BEADS
(for making holes in beads, see
Beads-Holes )
Gen.
Info.
Controlling bead size
Rolling
by hand (round, oval) + Keeping Smooth
Baking
+ Suspending + Finishing
....suspending
........applying
finish & drying (suspended)
....sanding/buffing +
brief high heat
"Finishing beads,"
end caps, etc.
Other info for all
beads
Covering a core
.....clay
cores (hidden cores)
.....flat
onlays
.....cane slices, bits
.........very thin flat onlays
(slice painting, etc.)
.....dimensional
onlay
........drum beads, beehive, bargello, dripped
.....foil cores, other cores (removable,meltable)
Types-Shapes of beads
Round,
square, etc, ...cabochon
.....Donut (hole in middle)
Spacer
& Heishi
Tubes ...various methods
Molded, stamped
....double-sided ...lumpies
Rolled, croissant
Mobius
Foldover
& other folds .....Folded log ring
Other
bead shapes & types (tiles,coils,cones,twisted,painted,etc)
Football
--shaved (mica, ButterflyWing)
Chevron (& peeled candle)
Symmetrical
pattern beads:
....Natasha beads (4 symmetries)
....flat
symmetrical beads (1 symmetry) & Elissahearts
Pillow
beads ...solid-clay, not hollow
Hollow
beads
...basic info
...lentils
(innie & outie molds/forms)
...spheres
...non-round
(hollow pillow, oval, & complex shapes, folded shapes)
Hole-y
surface (lost wax, cornstarch pellet)
Bezels
+ frames
Misc. uses for beads (bead
people, fan pulls, zipper pulls, clip-ems, wine charms, etc.)
Bead
rollers
...Bicones, using flat-surface
roller
........textured bicones
......."swirled
bicones"
..Trough-type rollers
(round, oval, bicone)
.......Measuring
clay amts for rollers
.......Making
your own trough bead rollers
Books & Videos ...+ Kits
Websites
Polymer clay beads can be made in almost any way imaginable...generally a "bead" will have some kind of hole or way of attaching to other things, but otherwise it can be just about anything at atll!
Our beads are created
in many shapes, with many methods, and with many patterns
or surface techniques.
...this page will have many exampes
of patterns & surface decoration, but it will mostly address the basic shapes
and methods for creating them
(use all the rest of GlassAttic
to find all the patterns and other decorations which could be applied to any of
the shapes, etc.)
Kellie's page showing a variety of
bead shapes and types:
http://www.kelliesklay.homestead.com/charmsforleigh.html
add more
If you want to make
beads of the same size, or beads of any particular size,
there are several ways to achieve the same volume of clay in each and make
the process easier than trial and error
....(this method is also helpful for
making body parts like two arms or ears of the same size, or two components
of anything the same size)
Of course, you'll have to figure out just which combination of thickness and cutter or mold, or diameter of log and width of slice, will result in the exact sizes you want.... (keeping notes might be a good idea!)
SHEETS:
..cutters ...roll
clay into a sheet (use the same thickness sheet for every set of
beads you want to be the same)
... then cut out identical pieces of
clay from that sheet with a cutter of some kind (any shape) ....roll each
into a ball, then shape or manipulate the ball as desired
...many things can
be used as cutters too if you don't have regular cookie or canape cutters...e.g.,
caps and lids, brass tubes, etc.
...in fact,nything which can make a visible
mark on the clay could also be used, then shape cut out with needletool or
Xacto, etc.
..molds ... completely fill a mold of some kind with clay
(even a measuring spoon could be "mold"), then cut off all excess
clay & remove
..graph paper, etc...cut squares of equal sizes
from a sheet of clay in two ways
....lay clay (that's smaller than the
graph paper) on top of graph paper, and use the graph lines which extend beyond
the clay to place your (long) blade and make cuts
...or lay graph paper
on top of clay, then use a pin to prick through the paper into the clay to mark
guides for cutting after paper is removed
LOGS:
comb,
Marxit, ruler... roll clay into a log which has the same diameter all along
its length (measure diameter exactly if want to repeat this size later)... it
can be helpful to roll the log under a sheet of glass or something flat to make
it as even as possible
....then mark the log at equal intervals using
an impression from a comb, a Marxit tool, or just a ruler on the log or beside
it... choose the intervals which will give the volume of clay you want for each
bead... then cut where you marked
STENCILS:
....draftsman
or engineer's plastic templates have round holes of gradually-increasing
diameter which can be used after a ball is made ...this method takes
more time and is more to check the size than create it, so just try fitting
diff. size clay balls inside one hole of the template-stencil, then remove or
add clay till the ball fits exactly
(for a few more tips that might be relevant, also see below in Trough Rollers > Measuring Clay Amounts )
ROLLING by HAND & Keeping Smooth
There
are an amazing number of shapes you can make with your hands alone.
...A great exercise (for beginners or anyone) is just to play for an hour
or two and just see how many shapes you can come up with (I save these
in a box for future reference and inspiration). This can be a great use for your
scrap clay mud. . . Try to use different portions of your hands and fingers,
different amounts of pressure, and different kinds of pinching or pressing, then
see what you come up with. Don't worry about trying to make partciular shapes
as much as seeing what what things happen when you use certain motions.
...Actually,
just about every shape in polymer clay begins with a smooth ball (or a
rolled out sheet). The reason for this is because it's the one way we can eliminate
all seams, cracks, lumps, etc. After you've rolled a smooth ball in your hands,
you can roll one end smaller (for a teardrop or a carrot shape), you can
roll it into a log, you can press it into a square/triangular/long rectangular/or
other shape. Other kinds of motions include pinching, pressing, twisting,
stretching/lengthening/etc. In addition to pressing or rolling with your hands,
you can use your work surface as a sort of third hand to create flat
surfaces (think of flattening the bottom of a teardrop shape to form a Hershey's
kiss shape) or as a flat surface to roll against.
(...for some ideas for shapes,
and how to make them, also see Miniatures
and also Sculpting Body & Tools)
...There
are also sculpting, miniature, and beads/jewelry books you can buy which
show many of these kinds of things in detail.
...After you've developed a
basic vocabulary of shapes, you'll have the tools for figuring out how
to many just about any shape! Diane B.
Roll
beads in the center of your palms:
--for round beads, roll in
the very center of your hands in small circles, applying
as much pressure as works best with the temp of your hands, etc
-- for oval-
or football-shaped beads, roll the bead in a larger circle in your
hands and/or put more pressure on the bead. DB
If you're having trouble making round beads, I can suggest that you dont'
do the reverse of what it takes to *make* those shapes . . . see if it helps:
--for round not football, try making a smaller circle in your palm when rolling
the bead
--for round not bicone, try not pressing down quite as firmly ...
I think one of the variables may be the shape and individual muscle strength of
one's palm/hand/arm, but assume that creating a different effect could be learned.
Diane B.
...I think the secret to a round bead is to roll it in your palm
moving only one hand circular...keeping one hand stationary. Cindy
I
think this is a very important thing to do, particulary if you're into bead making.
Not to downplay the manufactured tools for making beads, but there is a lot of
value in practicing with your most valuable set of tools - your hands -
especially for something fundamental as rolling a small piece of clay into a
ball.
The skills you develop by learning to control pressure and
performing precision repetitive movements positively translates into many other
manual craft activities. The most important being the confidence you gain to master
most any task that requires high dexterity.
Pardon the cliche, but practice
does make perfect. It can be very frustrating, at first, to try crafting
a simple little ball with your hands. It looks as if it should be easy. And even
now, there are days when I just can't do it and wind up inadvertently rolling
a football or something, I know I can "get the ball". I've learned to trust my
hands and 'go with the flow'. If I wind up with a football, so be it. I set that
one aside and try another piece of clay. But I keep at it. When I do make the
perfect little ball, it's because I've reached that mental and physical balance.
You see, making the ball is mostly about getting my head and muscles into the
right "zone".
Some basic tips to rolling a ball by hand are to:
-- relax
-- keep the piece of clay in your palm area; don't
let your fingers get involved . ..think of your palms as smooth shallow bowls.
-- start out using some pressure, but then lighten up... learn to keep
the pressure light but steady.
-- rotate one direction, then swtich,
then switch, then switch, etc.
--try to maintain a consistent temperature
throughout the whole piece of clay...There is an optimal firmness to roll a ball
of clay. This is determined by the brand and by temperature. Temp is controlled
by the environment and your hands. If the room temp is 75, then the clay is starts
out at that temp. After rolling about on your hot little hands, the clay can warm
up, first on the surface, and then eventually throughout. Inconsistent temp in
your clay can make it harder to control creating the shape you wish. - and practice,
practice, practice... Did I mention practice? Desiree
SMOOTHING
& shaping:
Since clays get warm (and
soft) from the friction of rolling and shaping beads,
fingerprints and other marks can show up on them easier
...so
its' good to let the clay cool off so it can firm up before giving a final
roll or doing additional shaping
...also a little water seems to make
smoothing easier (and to remove fingerprints) - so, after the beads are shaped,
for that final roll, I put some water in my palms, roll the beads
a bit, and those beads are smooooth!
..........then set them aside
till the water dries and they cool off and firm up enough to put
on rods, cook'em, and they come out great. Try it, you'll like it! Jan C
........at
Ravensdale Kathy (teacher) made us all keep a bowl of water on our desks to smooth
with. Works great. Cindy
....water works
great for Premo (& Sculpey?), but have found that Diluent-Softener
works better for the non-Polyform clays --Fimo (& Kato? & Cernit?).
Many clayers also like to use cornstarch or Bon Ami, etc., to smooth the clay before baking (in hands or with tools)
I always use gloves (latex, etc.) for making beads and other small things. I either buy them in a 5 pack and reuse them over and over again (cleaning in between) or get a box of small sized gloves (the small ones fit perfect on my hands-no bagginess at all), non powdered, non texured from a medical supply store. (The one-size fits all are good only in a pinch.) Valerie
Also
remember that rolling in one's palms will leave fewer fingerprints
than using fingers
.... and try to always hold the clay lightly,
especially when its warm.
(for more on
avoiding or getting rid of fingerprints, buying and using gloves,
and also smoothing clay before baking
... see
Sculpture > Fingerprints . .
. and also Sanding > Smoothing Before
Baking)
(for other ways to roll certain shapes of beads, and also avoid fingerprints, see below in "Bead Rollers, etc." below)
The three
methods (for learning to make bead, hapes) that I've used (so far) are:
Viewing numerous times the video tapes by Tory Hughes and Karen (Klew)
Lewis on bead shapes, practicing these shapes over and over as often as
possible, and then using the bead rollers when I need to do certain shapes
in a limited length of time (some artists the bead rollers just to roll the base
bead and then they add the decor over them.) I think, however, that practice and
watching the tapes has been the most help. Dotty
To roll out a bead with a metallic clay you have to be careful to fold the cut ends inside or else you'll have darker lines on the surface. Dotty in CA
For rolling even
logs of clay, keep your hands diagonal to the log rather than perpendicular
to it, so that your fingers don't leave depressions and raised areas on the log.
I think I learned this trick from Marie Segal. Elissa
..Or roll under
a sheet of glass or plexiglass. DB
Larger items can also be
built up with many component shapes like these logs, balls, etc.
...as
an example: http://store.cforiginals.net/index.html
(look all around, and clicking
a second time will make photos much larger!)
...or
shapes can be used as more traditional onlay (see Onlay)
BAKING
+ SUSPENDING + FINSIHING beads
(&
sanding-buffing, drying clear finishes)
baking
Beads
can be baked sitting directly on ordinary paper which has
been laid on a metal or glass baking pan (the paper barrier prevents a
shiny spot from developing when the clay is baked
on slick surfaces)
.......or baked on other matte surfaces like terracotta
tiles, etc.
....round beads will roll around
less if they've had holes already made in them (slightly flattened on each side)
......but if rolling is a problem, beads can also be baked on an accordion-folded
paper and/or a baking pan with a lip.
Beads (esp. dimensional
ones) can also be baked on:
.... polyester stuffing or batting....
nests of tissues or cotton fabric... (on, or in) piles
of powders like cornstarch, etc., to keep from darkening as well (see Baking
for lots more info and possibilities)
baking suspended
Or
beads can be suspended during baking, after threading onto thick
or thin rods of metal or wood, then placing the ends
of each rod on a raised surface of some kind to keep the beads from
touching any nother surfaces.
.....the raised surfaces could be as simple
as scrunched logs of aluminum foil, or a cardboard strip formed
into a rectangle
.....or they could be made, or assembled from, kitchen
& garage items
.....or they can be purchased as "bead
trays"
RODS,
etc.
advantages to using metal:
....won't soak
up particles of clay over time
....can cure, buff and glaze
the beads while they're still on the rod
....cleans up nicely
with a 3M scrubber if nec.
I
sometimes had a sticking problem with wood skewers, but beads will come right
off metal when slightly warm ) Elizabeth
lengths of wire (preferably stiff) can always be used
I use long
doll making needles to suspend my beads....come in a variety of sizes. You
can also use the very long ones and go the long length on a box. Jeanne.
http://www.heartofclay.com/eb/beadbox6.jpg
very
thin metal needles-rods (9"?) are often sold at bead supply stores
...Bead
Piercing Pins" (same thing? but through PolyTools, intended for use in
their bead racks)
........ http://tinyurl.com/4d49u
(Misc. category)
.........dia.
similar to 20 gauge wire ...sharp
...hardened
steel (must protect fr. moisture or can rust)
)
.........beads will stick to these pins
during baking, so if nec. hold pin with pliers then twist each bead off
...bought
a package of metal rods with flags on the end of them
at Home Depot...just pull the flags off . Janet
I
use very thin.knitting needles from
yarn shops (or online)
...... for example Polymer Clay Express
http://www.polymerclayexpress.com/tools.html
Elizabeth
I use thin or very thin.
brass or aluminum rods (or tubes) to cure beads ..come
in many diff. diameters (even the thickest is no fatter than a skewer).
.......available at Ace
Hardware ....or in railroad-type hobby stores. Elizabeth
I
use thin brass rods... across various disposable aluminum foil trays
.....I
just lay the rods across the tray , so the beads aren't touching anything.
........even
if the beads extend beyond the foil tray, it's no problem. Randi
with
the (aluminum) trays, I nest maybe 3-4 together for more support!
.........when
the niches wear out, I move that tray to the bottom, and put nitches in
the next one
...you can even get them to match the size of your oven
and it works great, even better
...you can have more than one, and have
one batch in the oven while you work on another!!!! Leigh
Any kind of box bottom or lid that's reasonably stiff can be used to suspend beads on rods while baking:
I made a quickie bead
box/tray that can be used for suspending beads, plus other beads can bake
in its bottom
(lesson) ...you need a small pasteboard
box (I used one that business cards come in)
...slice down
the 4 corners of the box so you can flatten the box
...cut around the
outside edges of all 4 flaps using pinking shears or decorative
edge scissors
...reconnect the corners back in place with paper
and white glue (do not use hot glue)
...line
the bottom with polyfill batting (if adhesive on one side, lay that side
down)
take an old metal pan and cut notches in it for the skewers. Trina... (with a Dremel?)
I took the baking pan from my toaster oven & ran some snakes of
clay down both sides.
...then I pressed indentations
into the clay with some bamboo skewers, then baked the clay on the pan
.... I insert skewers or rigid wire into the beads &
let the skewers/wire rest in the indentations of the clay
..When
I'm using wire
to bake beads on this unit,
sometimes it sags in the middle
..so I
also put 2 small bits of clay on the front & back edges (the
sides I hadn't used for the clay strips)
.... they cradle another wire
that runs from the pan's front to back & helps support the wire & beads. Barb
I
use the metal rack that is made for baking stones from Pampered
Chef (cost= $4 retail or 10 cents at thrift store)
... I just twist 22 guage
floral wire around one end of the "handle", string the beads on the wire,
and then secure the wire to the other end.
....When I apply glaze
to the baked beads, I stick a bamboo skewer through the hole of the bead
(still strung on the wire) so that I can keep the bead in one place or turn it
in a controlled manner.
....You can do several rows at a time on the same
rack. Kara
Professional
Bead Baking Rack "&
Cane Slicer".... & Pro Bead
Rack ...(2 versions)
......heavy
duty aluminum trough(s), with notches in sides to suspend bead(s) on metal
"piercing pins"
..........also
slots in the frame sides for 45° angle cuts
....small
rack
(end
view)..!__!
. ...9x3x1-1/4"...20
pins, 3-1/2"
--room to use 13)....$18-23,
sold by Amaco
.........http://jewelsbyjewls.com/P620002.JPG
...
http://tinyurl.com/cwkos
etc.... + JoAnn's, etc
....large
rack (Pro Bead Rack)... (end
view)...!__!__!__!
...3
U troughs in one unit
....... http://tinyurl.com/6cppo
....(30
pins, 3/1/2")... room to use 27....
$24 ,
sold
by PolyTools
...50
Bead Piercing Pins can be ordered separately http://tinyurl.com/4d49u
from PolyTools (Misc. category)
.......hardened steel (protect fr. moisture
or can rust), sharp... dia. similar to 20
gauge wire
......beads will stick to pin during baking, so if nec. hold
pin with pliers then twist each bead off
(for info on using
these as a cane slicer, see Cutters
> Stand Slicers)
Sherry Bailey had a great bead rack design in a back issue of Polyinformer. She made a box out of wire grid material. The skewers could poke through the holes (in the sides) and the box could go into the oven, no problem. Looked like it could hold a lot of beads in a very efficent amount of space. Jody
I use a rack that I made from a couple coat hanger sections, crossed and wired together, with bends at the end of the arms, with 26 gauge wire coils (a la Coiling Gizmo) over a second straight piece of 26 guage stretched out to make separators. I keep a bunch of eye looped copper wire around, and put one bead on each, making a little hanging hook. The coiled wires go around the outside edge of the arms, and cross over to make an X outlined by a square, for maximum hanging in minimum space. I hang the beads from this, and tie the whole frame to the ceiling fan on the patio (I live in the AZ desert, but any hook in the ceiling would probably work, if the rack has room to rotate gently. When I start spraying, the whole rack moves slowly around from the wind generated by the propellant. I do the first coat aiming up a little from the bottom, and another aiming down a little from the top, and that generally takes care of the beads. I get to look at them while I'm pulling the wire out, and catch any that didn't get completely covered, and they go back outside for another coat, applied more carefully to keep from getting a build-up on the bead. Kate
I
use the thin wooden skewers
for my bead holes, & for baking the beads. Most of the skewers have
been used many times in the oven. But sometimes it is almost impossible to get
the beads off, afterwards. Mavis
....Try coating the skewer with talc.
I like to use Armorall, a product made for cars as a release as well. Ellen
...I've seen comments here and there about not using bamboo
skewers, that they don't release the bead (or whatever is on them)....the trick
is sanding them before placing the clay on them, and then just slightly
wiggling the item. Not much, just so... it slides up and down easily (if not freely).
There should still be a little tension. The
sanding is VERY important, though -- not a whole lot is needed, just enough to
eliminate the little barbs and splinters. .
. Kelly
I've baked beads on just about everything without using a releasing agent: knitting needles, metal or copper rods, tooth picks, wooden skewers, wire .... Whenever I have one that won't come off easily I just pop it back into the oven for about 5 min. and take it off when it is warm. I have never had one that would not come off after reheating. Jeanette
I have been having a terrible
time with beads cracking lately and I've been
wondering if baking the beads on wooden skewers has been contributing to
this. Libby
. . . it's a very strong possibility that if the clay is
just the size of the wooden skewer that the wood itself is contracting
and expanding causing the beads to split.
This has been a problem with other objects made with wood and covered with PC.
I might suggest using a thick wire like a coat hanger or a knitting needle to
bake these pieces instead. Jeanette
......A
further trick is, an hour or so before using, wrap the
skewers in a damp towel (I suppose you could even microwave them after
doing so). The point of this is to allow the skewer to
expand the least little bit, so when you cure the clay, the skewer will
reshrink a tad and the bead will be simple to get off. . .I especially like the
@ 2mm hole - just right for leather cord! -- Kelly
...April
2005: I too have had problems lately with cracked beads. I"ve been
working with polymer for over 16 years. For a long time there were no cracks and
then all of a sudden the cracks appeared. It happend with Fimo Classic
and also Premo. I tried (all kinds of things, but) the beads still cracked.
It seemed like the larger ones cracked more ...the only thing that works
for me now it to cover the beads with an aluminum disposable baking pan...
I have 't had a cracked bead since. Jane S.
applying finish & drying (suspended)
While
applying clear finishes, or drizzling liquid clay, etc., onto non-flat
clay beads, it's helpful to suspend them in some way.
Tthis also helps keep
them from touching other things while finishes are drying.
One can simply stick one end of a toothpick into a bead with hole, then stick the other end into a piece of "Styrofoam" or a wad of raw clay, or some kind of "stand" created with holes for the toothpicks (e.g., a thick, baked slab of clay with pre-made holes)
Some
people use pins or T-pins (set into a base, points up) as
a rack to hold drying beads (feeling that the tiny marks cause by the pins won't
show
Beads can also
be suspended on lengths of wire or rods of various kinds as
just above, to apply finish and allow drying.
Applying
liquid
finishes
to beads without drips (lessons):
......I bake them ten at a time
on bamboo skewers. When cool, put the blunt end on the table or on your
chest, twirl the stick as you use a soft paint brush to go around each bead with
some varathane.
.......when each stick is done, lay them across the baking
pan again to dry. It looks and sounds very primitive, but is very fast and effective
once you get the hang of it. Dont use too thick a coating, and it won't pool or
drip. Sarajane
dipping:
I took a length of 2x6 piece of wood and drew a graph on it so that the
squares where 1/2" apart. I drilled holes in it. Then I took some toothpicks
and cocktail picks and placed my beads in them.
..... I put my Future in a
film canister and dipped the bead in it. Then I tap off any extra future that
may be on the bead. Then quickly place the other end of the toothpick in the hole
on the board. And I say quickly because otherwise when some of the future runs
down the bead and down the toothpick it will then run down your fingers and then
your arms and before you know it you got a mess!!! LOL
....... I then bake
them to set the future and then I do it again. Mia
...Dar's
lesson on dipping with wire http://modernclay.homestead.com/dipping.html
I've been painting
(Varathane?) on with a rush, and the bead *sticks*
to the skewer, and it hard to get off, and somewhat peels the sheen
off. Caroline
...I find that twirling the beads around on the stick
as soon as they come out of the oven, before I put on the Future resolves
that problem. I also make certain that they can move around on the skewer before
I bake them. If you just thread them straight onto the skewer the hole is
barely the size of the skewer and when the clay shrinks the tiny bit it does in
baking, the hole snugs up. If you loosen them prior to futuring, there isn't further
shrinkage when reheating with the future.
...I don't know if
this works with Future, but when this glue thing happens with Flecto
(Varathane), I put the beads on the stick BACK in the oven long enough
to get hot, and they slide/twist right off. Sarajane
...You
can drill the wood out later with a smalll hand drill to rescue old ones--it's
a pain, but does work. Jeannine
...You could also try coating the skewer with
vaseline before you apply any finish to the beads. that should help to
keep anything from sticking. Glenn
...or use cornstarch or talcum
powder if it's necessary...
( ....for much more on all kinds of liquid or wax finishes), see Finishes
sanding, buffing... & brief high heat
For
info on sanding beads in various ways, including "Smoothing
(raw clay) Before Sanding,"
see Sanding-Tumbling
> General
Info and Other
Methods for sanding
........ on that same page, also see Tumbling
(sanding in a tumbler), if you're interested in that technique
.....Or for
using an electric drill or a Dremel
to sand round beads with a doll or tapestry needle (plus wet-dry sandpaper,
steel wool, or sanding pads) see Tools-Dremels>Sanding>Sandpaper
buffing:
I
have a (tabletop) Foredom buffer in addition to my Dremel, but since most of the
time I buff little things like beads, I like using my Dremel.
....My Dremel is small and light and, "it comes to me",
instead of me having to "go to it", so to speak. In other words, I don't have
to specially mount it. I can sit at my project table and simply reach for it,
hold it in one hand and buff. Desiree
...Most buffing just requires a light
hand with the piece being constantly moving across the face of the
buffing surface. Patty B.
...If you have a lot of beads to buff, then
you might try laying your Dremel on its side with the shaft and wheel
sticking out well past the table/counter (use a Quick Clamp or C-clamp
to hold it in place)..... Turn it on. and then you'll be able to hold your
object with both hands and move it back and forth against the wheel.
....I like to put a number of beads on a metal rod (piano wire
works well) or a bamboo skewer ....then for buffing I hold them on the
rod, parallel to the floor (this allows the beads to rotate against the
wheel and the wire keeps them from flying away).
....usually I start at one
end and do 2 at a time ...as they are finished, I slide them off into a
container. Kind of an assembly line system. Patty B
.....here is a
different way (to polish round beads on a buffing wheel)
... into the bottom end of a short length of pipe, insert a dowel (which
is narrower); then drop a bead into the top of the pipe (which will rest
on the end of the dowel inside the pipe)... now push the dowel and
bead up past the open end of the pipe maybe a third of the way,
and let the bead spin freely against a buffing wheel… takes very
little time that is how they make spheres out of rock cubes… Faun
......for
buffing beads in a tumbler, and with other electrical devices,
see Buffing > ....and Tools
> Dremels
brief high heat
...
I had a wonderful accident the other day... I bumped up the temp to 350 degrees
just to raise the temp slightly but quickly. I hadn't realized that the top elements
would come on (as well as the bottom ones), and my pan with beads was on the
top shelf. ....the elements got red hot and I noticed smoke (not a lot
but enough to know what was happening). ....I immediately removed the
beads and they were perfectly shiny! ... and no burns or markings at all.
Just perfectly shiny....
Now I'm thinking there must be a way to do this, on purpose. To shine beads without
having to sand, polish, or glaze. Wouldn't that be great!? Especially for those
small 7mm beads that you would never do that to anyway. Cindy
P.
......the shine I got was actually a complete accident. I used FimoClassic
and I'm pretty sure I burned it, cause there was smoke coming out of the oven.
When I pulled my items out, they had that shine. (I've only used FimoSoft before
and that one bakes to a nice matte finish even when you burn it). honeysuckle
...caused
by extreme softening of clay which settles enough to become perfectly smooth?
"to FINISH Beads" ....end caps, etc.
Nancy Banks sometimes cuts off the tip ends of her beads (often odd-shaped ones) after baking (while still warm) rather than doing it while raw, so the cuts will be very straight and not deformed
Carly’s lessons on making your own
“end caps” for beads
...also making multi-strand bracelet, &
crackled center bead w/ foil & acrylic paint
http://www.geocities.com/lubellebeads/projects/gbproject.html
http://www.polymerclaycentral.com/chall_may03.html
(click on Details, under Lynne S)
Liz's
tube beads with 3 stacked, graduated-size, disks on each
end used as end caps
http://www.libzoid.com/files/goldscribbtubes503.jpg
Dayle's
wide end caps for tube beads
http://albums.photo.epson.com/j/ViewPhoto?u=1751472&a=32123747&p=73924291
Marcella's
(Balinese) filigree endcap for tassel http://www.polymerclaycentral.com/chall_aug04.html
......VR James's endcap for "tassel" under woven clay basket
pendant http://www.polymerclaycentral.com/chall_sep04.html
domed
(or other shape) bead caps can be made by using the same
techniques used for making lentil beads (see Hollow Lentils below)
.....Marcella's
lentil Bal. filigree "bead", made with two halves (same website
as Marcella's just above)
..special metal "beadcaps" to make
all kinds of animals & insects, teapots, tiny figures,
etc.... these are generally used on both ends of a bead to simulate a torso
... could make these faux metal though
http://www.pennymichelle.com/
"finishing"
beads ... some people like to create tiny faux beads
with clay to use as finishing beads or decorative covers over
holes made for cording in pendants ....or where something rodlike
is attached to a surface, etc. (e.g., where a handle or knob, etc. is attached
to a vessel)
....roll a tiny ball of clay in the size you want
.......then
either place it where you want it with your fingers, and poke a hole
through it and into the hole below it with a toothpick, or tapestry needle, etc.
......or
with one motion, pick up the clay ball on the end of your pointed
tool, place where you want and push through at the same time
...these
can look like seed beads (just dimpled where the hole is), or they can
be flattened a bit more to look like a donut spacer bead
...clay
balls applied this way are very firmly attached
http://www.kelliesklay.homestead.com/inro.html
(various sizes, shapes)
...many clayers like to use a tiny "o-ring"
made from black rubber in the same way
Desiree's o-ring
"beads" on necklace cording
http://www.desiredcreations.com/images/galleryTwoPics/hornNeckl.jpg
...(girdle was made by placing
a clay sheet around a small roll of paper or dowel, rolling it under a dowel a
few times to create grooves, leaving the ends flared and rope-like to "finish"
the ends, adding metallic powder?, then baking... (did she cut the girdle widthwise
so it would fit over a cinched bead instead if she didn't used removable paper?)
http://www.npcg.org/Activities/muse/images/winters/Original%20Files/winters1.jpg
ragged
edges on clay sheets (especially from drier clays, or when run
through the pasta machine)
...use a strip for framing (ragged edges
up)
... roll up a strip so that the irregular edge end forms
a spiraled cone
......sliced off, they could be end caps
for beads, or other onlaid embellishements??
if I feel like a patterned bead is not
turning out well ....instead of throwing it in the scrap pile, sometimes
I wrap it in a very thin layer of translucent clay ... that
mutes the pattern underneath (see Translucents
> Thin Layers)
... you can then add cane slices on top as well, letting
the underlayer show throw again. It's a nice save! Heather P.
http://www.humblebeads.com/tip3.html
for making a pitted surface on beads
by using raw clay rolled in salt
(then dissolved out), see
below in Tube Beads
http://www.nfobase.com/html/viking_beads.htm
(various pitted natural stone beads...also look down about
2/3 of the way for the large orange bead)
to
add weight ....if you only need to add a small bit of weight, you
could imbed a BB or two in the piece. Joanie
...or get the tiny
sinkers that fisherpersons use ... these come almost as small as BB shot,
and I got a box of them assorted for under $4.00. (a hundred.)
....since these
are lead, they cut easily if they're too big or the wrong shape,
and they weigh a lot for their size. This will make those light pieces hang right.
Janey
wired bead figures
lesson (a polymer clay doll, with a torso of pc and then beads and wire for
the rest of the body. )...They sell well at $20 and are a good way to use up odd
beads. I haven't used clay for the body, just ordinary beads, but clay would be
easier cause you could imbed a pin finding in the body. Ornamental Resources has
directions, but basically:
use 1 to 2 feet 22 GA brass wire or art wire,
start at head with double rolled hanging loop, string first section of beads for
hat, hair, head & neck. I've used colored telephone wire for hair, wrapped around
a knitting needle. Leave about 3mm bare wire below neck to establish shoulders.
Insert stick pin loop at neck if using stick pin.
Bend wire to right angle,
string beads for arm, make loop for hand, add a charm if desired, thread wire
back through arm beads. Turn wire twice around the 3mm wire area that you left
blank for shoulders.
Take wire out for other arm, do other arm same as first,
make other shoulder. Bend wire straight down and string torso beads. Put large
blanket pin in body beads now if you are using that for a pin.
Angle to left
for a leg, string leg and foot beads, ending with a small loop, string back up
through leg to base of body, wrap wire once around to stabilize, bend wire down
for other leg. string beads for other leg, ending in loop at bottom of foot.
The only warning is that these tend to get to be VERY BIG, so restrain yourself
from using a lot of beads. And you need beads with holes large enough for the
wire to pass through twice, or blessed PC beads that have holes that enlarge easily!
Then you can go on to make all kinds of animals and other figures. ..
(They
don't really take much time). . . you can wire one up in 10 mins - AFTER you have
picked out the beads!!! lol and expenses are next to nothing if you are using
leftover odd ones. I've seen them on a web site, they call them "moon babies"
for up to $65.
http://www.moonbabies.com
(then click on Shop Online) or go to http://www.ornabead.com,
send them an email and request the instructions for a wired beaded figure.
Jan Clausen
...the idea for the figure is from a "Beady Buddy" book
which we actually use an example of how easy it is to do in our store! klew
the
technique that works best for me (applies to anything sculpted or even beads
....and Premo, Cernit, Pro-Sculpt or Kato Clay)
...work a little while, and
then let it sit it on marble or glass so it hardens
a little and cools
...then go back later and work a
little more.... i is amazing what you can touch the next time, and how
much more control you have over the clay. Jeanne
for
building up a supply of non-polymer beads for using
with polymer beads (or not)
.... I go to those cheap jewelry boutiques
in malls, etc., and haunt their clearance racks... every month
or so they run a "10 for $5" clearance sale, when they need to clean out inventory.....
while most of their stuff is usually not my style, there are often beads that
are salvageable. I can get at least $20 worth of beads (based on the usual "bead
store" prices for similar items) for that $5, sometimes more. I got a lot of my
batiked bone beads, pendants, and other interesting bits
that way....phrena
........lots of times the clasps or other parts
are useful too!
(also
garage sales ... thrift stores, etc.)
Cheryl's necklaces featuring a single elongated bead (with rubber cording) (website gone)
I have many old beads . . .so I pulled out all the flat and somewhat flat beads, and I'm going to use them to make a random mosaic tabletop. obirtasil
Yesterday I found out about a group of mentally challenged adults that has a creativity meeting every Wednesday. They're always looking for supplies to make things with. So, my formerly unloved beads are going there. Kim K.
Sometimes beads (particularly larger ones)
will develop a crack or cracks
after baking. There is a lot of discussion about what might cause this, as well
as ways to prevent or fix cracks, on the Heads
page (sub-category "Cracking")
... (see also above for cracking
if using wooden skewers)
Just
Beads is my own favorite auction site: http://www.justbeads.com.
You won't find shoes, or magazines from the '50's, but you can find some
extraordinary beads! Just Beads is a site created BY bead lovers FOR bead lovers,
and its is a select and focused marketplace that is growing steadily...with some
extremely cool beads and beading supplies. Many glass and polymer bead artists
are finding it to be a receptive and appreciative market. Its easy to get set
up as a buyer or seller there, prices are great, and bead artists may also wish
to apply for a spot as Artist of the Month.
There is also a lot of
information to be had there --about beaders, bead societies, bead shows
and events, bead books, and more. Sarajane Helm
history
and info about beads in general at The Bead Bugle,
The Bead NFObase Magazine
http://www.nfobase.com/default.htm
(look in the lefthand column)
Cores and bases made from
clay or from other materials can be completely covered, or
partly covered, with slices, bits, or sheets of decorative clay
in order to create a decorative surface.
....the decorative clay may
be applied then be rolled into the surface of the base/core, or it may
be left dimensional.
wooden
balls and wood shapes can also be used as cores ... all details
in Covering > Wood)
scrunched
aluminum foil shapes can be used as cores ... all details below in Foil
Cores
hollow polymer
clay balls or other shapes can be used as cores ... all details
below in Hollow Beads > Round forms)
.......(for
cracking problems, esp. in larger beads, see Heads
> Cracking)
clay cores (cores hidden)
If want to completely
cover a base bead with round cane slices:
...overlap
the slices (though this will create a different look because some of the slices
will be partly covered up)
...or, make the base and/or cane squared first (details
on this just below in Flattened Onlays)
To
cover a rounded bead completely with a sheet of
clay, wrap it around the widest area first, then close it around the rest
(or the poles) by pressing gently, folding, squishing or whatever
... shave
off the excess, and pat it down flat
.... create a shape with it .... or cover
it with another clay element like a cane slice or a flat bead (or make sure it's
on the bottom or in a place not easily noticed).
Klew
(Karen Lewis) always wraps her patterned clay around a scrap
clay base bead to avoid waste ...she has a wonderful video tape on
making beads.
....she creates base beads by making a fat roll of waste
clay
....wraps it with a sheet of black or whatever color she
wants... and rolls it out into a long snake
...Then she just
cuts same size lengths... pinches the colored ends together...
rolls each into a ball... and then covers it with canes.
...Watching her roll the canes in smooth is worth the price of the video.
My beads were not too good until I began practicing them the way Klew does them.
Dotty
Mia's lesson
on covering a ball (or other shape?) by wrapping with a long strand
(rainbow -variagated) from a clay gun around the baked ball
http://www.pcpolyzine.com/february2001/rainbow.html
(bottom of page)
...would work for wood beads as well... just roll in hands
to smooth
HEART-shaped
cores:
Donna Kato's lesson
on covering a clay heart base shape with slices of mokume gane
http://www.hgtv.com/HGTV/project/0,1158,CRHO_project_20284,00.html
http://www.mindspring.com/~janruh/clay/bargello.htm
Candice's lesson
on making a "heart-shaping" tool, then using it to shape logs
into heart-shaped canes, or making individual heart shapes from pattern-covered
balls
http://polymerclaycentral.com/cyclopedia/heart_tool.html
Pewter heart swap http://www.polymerclayhaven.com/PCHSwaps/pewterlike.htm
(gone)
Byrd's hearts (website
gone) (look around for them)
......... (Elissa's) asymmetrical hearts
are done differently (from the Natasha type below) http://pcpolyzine.com/november2001/ezheart.html
(find
new site too?)
--lesson.--
For those, I roll a ball of scrap clay,
-- and to it I apply a thin
covering of a base color/pattern, then thin slices of various other canes.
-- I then shape it into a rough heart...keep in mind the natural flow of
things, like the way that a Hershey Kiss tapers to a point. A heart should taper
as gracefully as that.
-- Also it helps to accentuate the cleavage
by gently pressing and rocking a folded piece of cardstock into the cleft
...
-- then either press it into the mold to make it uniform or
-- form
by hand...and with your fingers, round out any flat areas. I (sometimes) want
a more abstract or asymmetrical shape..(.I may also begin with) a bicone
bead, carefully flatten the cones, preserving the spiraling pattern, and then
shape the rounded bead into a heart; the friction of the rolling so warms and
smooths the clay that making an even, shapely heart is easier.
-- Then it
is baked, sanded, buffed, and glazed, the same as the others.
(these pendants
are two sided... rounded on both sides, with balanced and
usually related designs on either side.
...These pieces, since there
is no (flat) back, have a screw eye inserted for hanging. Some pendants
are slightly puffy on the back, with an attached leaf-back bail or a screw
eye. Elissa Powell
(for
making sculpted hearts, see "More Bead Shapes" below)
one use for the white-Sculpey-in-the-box clay is to be used a lightweight armature base for beads (cheap and bakes up really hard... will be made stronger by covering it with a strong brand of clay
CANE
SLICES
...any base clay shape can have cane slices applied to them
......the
method may differ depending on the final form you want though
.......you can
partially cover or completely cover a base... then flatten
the slices into it by rolling, etc. (seams will disappear)
(......or you
can leave the onlaid cane slices dimensional --for that, see Dimensional
Onlay below)
To partly cover a clay bead
so there's background color showing all around each slice, simply apply
thin cane slices or other clay bits (any shape) to the clay
ball leaving spaces between them, then roll in your hands to smooth away
all the seams.... shape the bead further if you want an oval bead, etc.
...if
the color of the base bead is the same color as any background clay in
the slices, they will merge and the image in the slice will appear to be floating
freely
...one example would be silastones' partly-covering base clay
balls with tiny balls of clay and ribbons of stripes (cut from a
stack) in contrasting colors
http://polymerclaybeads.blogspot.com/2007/06/blog-post.html
(where
did I put all the others?)
If want to completely
cover a base bead and you're using round slices:
1....you
can overlap the slices (though images slices won't be whole because they're
partly covered up, or edges may show on any slices)
........Desiree's
lesson on covering a scrap ball with slices, overlapped
http://www.desiredcreations.com/howTo_CABullseyeLaceCane.htm
(middle of page)
......What
I do is use less slice per bead, so what you have left is gaps and not
overlaps .... then just take a darning needle and tuck the scrap
base bead inward ...and re-press the cane slices back together fitting
over the dent you made with your needle. Mia
2....or, you can make the
base and/or cane squared first:
2a....one way to avoid the overlap problem
is to form your base bead into a cube shape first, and also squeeze
your cane into a long rectangle (the sides of the base bead need
to be same size as a slice from the cane)
.........place 6
slices on the cube (one on each face).... pinch together any that aren't butted
completely
.........gently roll the bead back into a ball, or any
shape you want (you can gently press each corner of the whole
bead inward before doing that to help avoid distortion at the edges)
2b...another
way would be to add extra (background) clay to the outside of your
round cane, then trim excess to make it rectangular ... then apply to a
cube base bead (this avoids any distortion of the cane pattern, since you won't
be squeezing it alone into a square cane)
3....(...or you could partly
cover the bead, then add some tiny bit of color to the spaces, etc.)
I
get less distortion from adding slices on beads by letting the parts
cool off from the heat of my hands and even
out in temperature
...... I press the slices into the ball so there is good
contact, but I don't roll the slices into the base right away
.......I let
the slices sit on the base for about 10-20 min, and then I roll
them in my hands until the seams are MOSTLY gone
(and softer
clays can be more difficult to roll into even
shapes, so you may want to leach those clays, or at least cool them at various
stages)
For more tips
on rolling cane slices onto beads, see Canes-Instr
> Translucent Canes > Basic Info
small sheets of (butted or overlapped) cane slices can also be used to cover base beads --for example, tube beads.
A
neat trick from Ann M. for making equal-sided square beads:
....roll
out a slab of clay... cut it... stack it into layers of the desired
width (e.g., three slices at #1stacked together will create a 3/8" bead)
...cut off one of the rough ends.... then flip it , good side down, and you
have a perfect guide for cutting a 3/8" log.
...from
that log, cut off one of the two remaining ends, and use that to cut cubes.
for square beads, you can also square up your log between (equal-size)
acrylic rods, and slice. . .
http://home.istar.ca/~ladydian/boutique2/
(see Canes-general info
>Tips for Successful Canes/Square Logs, for more info on
using acrylic or other square tubes/rods)
flatter
beads especially, can be covered or partly covered with cane slices and other
dimensional or flat materials like metallic powders, leaf, etc.)
.......
then all slices & bits can be completely flattened into the surface
(or some left dimensional, or dimensional things added afterward)
...Christel's
female face cane slice plus added hair rope + background
leaf...onlaid, then flattened onto a long bead
http://home.online.no/~raje/Polymer/projects/womanpin/index.htm
(for
lesson details, see Onlay > Flattened
Onlays)
BITS
from shaved texture sheets
Jeanne R's lesson
on covering a base bead with shaved-off cubes of mica clay (which
had been first textured with a sheet of plastic canvas) see Mica>Ghost
Images
...or with shaved cubes from a 2 colors (first textured)
...she
applies the shavings to a base clay ball (....or she just rolls a bunch
together) for quick faux pique fabric
http://www.heartofclay.com/pc/fauxfabrics.htm
...could
use different shapes of shavings too from diff. texture sheets
very thin onlays (+ "slice painting")
very
thin cane slices can also applied
then rolled into the surface to "paint"
a picture or design on the bead ("slice painting")
...
create (multi-part) single items by
sequentially laying very thin (possibly very small), slices from
one cane onto a base (bead or sheet), to build up a finished picture
or design (like all the petals of one flower or all the scales on one fish/dragon)...
overlapping them or not, reducing the cane for some
parts or not
...create single items by laying very thin layers of one
or more different canes, in order to add details or elements,
onto individual cane slices or onto sheets
(translucent
canes and "invisible canes, e.g., are similar in their
thinness and being added later)
for
much more on this technique, see Canes-Instr
>Flowers > SlicePainting ... also Canes-Instr
>Later Manipulations >Slice Painting
very
thin translucent +opaque canes slices...canes which
have used translucent clay along with opaque clay in the same cane
...
you can apply very thin slices from a translucent cane over a base
of patterned or plain clay, and the opaque parts will appear to float
over the background.
... you can also use translucent clay as the
"background" clay around your motif in a cane (e.g. a flower),
so when it's applied, the background of the slice will disappear and
the flower shape will be the only clay that shows up on the base
...Jainnie's
unusual dotted beads, using (opaque) black wrapped with translucent
slices over various base colors (often metallic clays or clays with inclusions)
http://www.littlebearstudio.com/
(click on Beads 1)
. . If you're having trouble slicing translucent canes
thin enough, here's what I do...I try to get slices as thin as I can and
still be able to work with them. After I put them on the bead, I take my blade
(I use the NuBlade) and carefully slice off the excess clay. I think of
it as "shaving" them. Also works with opaque cane slice so I don't have
the obvious lines of where one slice stops and the next one starts.
Jules
...many flower and leaf translucent+opaque canes, overlapping,
etc., are often used for covering beads and pendants
(see Canes-Instr.
> Translucent Canes for much more on all these canes)
torn
pieces from very thin stacks, overlapped
....if a
paper-thin stack of colors is torn
rather than cut, the resulting pieces will have pleasingly irregular
edges, but also the colors of the under layer(s) will
show along all edges which were torn (Watercolor beads)
http://cgpcyOfPendants.jpg
and http://www.desiredcreations.com/images/galleryFivePics/WCB2.jpg
(for
much more on this technique, see Sheets
> Flattened Shreds & Bits)
Dimensional ONLAY (partial covering)
DRUM,
etc.beads (dimensional onlaid slices)
Klew's
drum beads: http://klewexpressions.com/drum_beads.htm
http://www.nfobase.com/html/karen_lewis_.htm
(gone) (Klew’s drum beads, bead shapes, mask,
etc.)
Klew's
video: "Appliqued Millefiore Beads (Drum Beads) with Karen Lewis (all drum)
http://www.klewexpressions.com/videos.htm
and http://www.abbadabbavideo.com
(also Karen Lewis' video "Bead Shapes and Design" videos shows techniques
she uses to create the beads pictured in the July/August issue of Beadwork magazine
--"drum" beads (appliques)
OTHER
dimensional onlaid slices
Klew’s
many beads with onlays
http://klewexpressions.com/gallery.htm
(click on Accent,
)
Donna
Kato's beads, some onlay parts
http://www.katopolyclay.com/gallery/jewelry_6.jpg
Kim
K's trees, etc., onlay scenes (tiny, on beads)
http://www.picturetrail.com/gallery/view?p=999&gid=440248&uid=144121
Cheryl's
onlaid sculpted flowers and leaves on focal beads
http://www.cherylsart.net/
LEAF
or POD beads (overlapping slices like an artichoke)
Klews pod beads,
made with leaf canes http://klewexpressions.com/leaf_pod.htm
...also
see Sculpting-Body > Dragon Skin
for more examples, but they're actually "overlapping scales"
http://www.nwpcg.org/dec99.shtml
(gone)
(Cynthia Toops’ leaf and "pod"? shaped beads)
http://www.jewelrycrafts.com/clayproj9.html
(syndee's lesson on onlaid leaf beads, lumpies,etc.)
(gone)
"filigree"
onlays (made from tiny clay gun extrusions) or molded-stamped-etc bits,
can also be placed on a bead, then coated with a metallic powder, etc.,
to create faux metal beads
Janet's large "ethnic" silver
beads with filigree onlays
http://www.janetfarris.com/images/2005_11pics/images/silveramber3.jpg
(STRIPS)
"Bargello
beads" were popularized by Laura Liska. Bargello is a quilting and needlepoint
technique which creates rows of offset rectangles, etc., resulting in a zigzag
patterns or a lot of apparent movement.
http://home.earthlink.net/~sbpcg/1198os.htm
(scrap bargello technique -SBPCG)
http://thepolyparrot.com/right.html
(Irene Y's bargello cylinder beads)
(website
gone) –Nora Jean’s bargello beads and
explantions
(see
Onlay > Bargello
and Canes >
Bargello for much more)
simple
b&w twisted ropes draped all around the outside white beads very effectively
by Carol
http://www.bpcg.org.uk/images/midsouthern/dec08/Carol.jpg
twisted squared strips
mica clays: (Mike
B's "Beehive" beads)
(Mike
Buesseler, Jewelry Crafts) . . . Mike used a mica clay (Premo’s gold,
silver, blue or green pearl, other colors mixed with lots of Pearl--etc?), rolled
through the pasta machine until the mica was lined up and created a sheet about
# 3?. He then cut long strips that were as wide as the thickness of the
clay, creating tiny square logs. He twisted these and used them
to cover a base bead, beginning at the top and spiraling down to
the bottom.
...These twisted
strips can also be used to cover any other kind of base –a vessel, pendant,
barrette, etc., or can be used to make patterns (as in Kato’s Balinese
Filigree), etc.
...Or they
can be used to outline or otherwise embellish.
Run any of the pearl/metallic Premo clays through the pasta machine over and over until you get a smooth, shiny face. I used a sheet of solid blue pearl, and one Skinner blend sheet, stacked.... (or you could use several different mica colors to stack) . . . you could do this with much thicker sheets, and several colors at once, I would think... (After cutting the strips) twist them... loose or tight, even or uneven, and apply them to a bead base. . . Roll them tightly down to perfectly smooth or leave them raised. Elizabeth
(see website above? ,twisted egg) . . . roll out three sheets of clay, one of each of the colors. . . the thickest setting gives nice effects, as do say, a #4 setting. (atlas settings)….once you have your three sheets, slice off the ends of the sheet so you get a squared edge...you'll see that the edge is not shiny like the top. slice thin strips …like? looooong rectangles) ..carefully take these three strips and twist them (all together) so you get kind of a rope look. I like to leave the hard edges, rather than rolling them into a snake. if done correctly, it will kind of look like the swirls on a candy cane. notice that you see both the shiny surfaces as well as the darker surface of the edge...this is good! don't twist too tight and cover up the darker areas! once you have your snakes (bumpy, not smooth, but I think smooth works too) put them on the same as you would the balinese filigree, but for the beehive look, coil all the way around the egg, not in spirals and the like, like a beehive. that could look nice just like that! use whatever method you like, but flatten the bumpy snakes now and get rid of any seams. i like to use the end of my needle tool to roll over and flatten it all until it's smooth. do whatever you do to minimize fingerprints before baking. ..bake, sand and buff. Lori
Same technique as your beads, only I used two Skinner Blends, back to back,
Copper to platinum, and Purple to platinum, the shading going in opposite directions.
I covered an egg this way, too. When you look at it from the side, it just looks
interesting and kind of nice, but when you look at the ends, each is totally different
from the other... I also smoothed my beehive down and buffed it like you did.
It's hard to tell how it was made once you do that. I keep telling people that
beehive thing has a lot of possibilities....try adding interference powder
to one side of your sheet, for instance....Mike Buesseler
....You
don't have to have the Premo metallics.. this would work with any clay, it's just
that the metallics add a lot of depth. Just make one side of the sheet
one color, and the other side a different color, and you'll get that "twisted
ribbon" look. Ziggybeth
....(for
Mike B's non-onlaid, twisted, single beads, see above in
Misc. Bead Shapes)
(see also Cold Enamels in Other Materials)
Sharon's shiny embossing powder beads http://www.geocities.com/ferryblue/polymer_6.html (gone)
"GLAZED"
& DRIPPED
...I had been making
some cool textured beads and was looking for some way to get them to look a bit
like the glazed ceramic beads...then I saw this article on using Liquid
Sculpey and Pearl Ex powders... Libby
http://www.sculpey.com/Projects/projects_FioratoPendant.htm
See
much more on glazed, stained-glass look, using metallic & embossing
powders, raku look, drizzling, and other effects in:
Liquid
Clay > Drizzling, Piping, Lampwork
(faux lampwork beads...
drizzling, making dots or other small shapes with tinted liquid clayon beads,
or other surfacess)
Finishes > Other
Liquid Finishes
Powders > Metallic
& Embossing
Other Materials
> Cold Enamels, etc.
Faux-many
> Raku
FOIL & lightweight cores & removable CORES
(Pier Voulkos, CZC, Bauchbaum?, et al?)
We
used the same foil from the kitchen and crumple it up to the shape you
want, and used a hammer to pound it so it's firm. Any little holes you
fill with bits clay so you don't have air pockets.
....
cover with a thin layer of clay, bake, then you can cover with whatever
design you want.... If you have the summer 1998 issue of Ornament magazine,
on page 71, you'll see an article on how Pier Voulkos does her foil beads Lucille
Pier's
foil armature beads (lesson) : (can see on the cover of Creating
with Polymer clay & inside pgs.)
--alum. foil that shows (through translucent
clay?) gives reflective quality to whole bead and also possibly between slices,
or along ridges of crumpled foil after hand rolling??)
--using kitchen (aluminum)
foil. The cheaper the better.
...crumple the foil... and straighten it
...
then begin to compress and shape it gradually
... keep compressing and getting
it as smooth (and firm) as you can....you just have to work the foil gradually
into shape...Pier says "work with the foil".
...You
won't get it 100% smooth, that's why you fill in the pits with clay
bits. You form it into whatever shape you want (she made football shapes,
tall and short spirals, crescents, worms, etc..DB), of course the foil sometimes
has to tell you some of the shape.
...cover the foil with a thin layer of
clay, smoothe, bake, sand and then do your cane slices over that. (if you are
working with opaque clays instead of translucents and don't need the foil
to show through as in the particular beads described next)
TO MAKE BEADS
with TRANSLUCENT CLAY (and/or foil shining up through):
...Make some translucent colors, (using) lots of translucent and tints of
color. Pier uses Fimo's Art Translucent.
...Make some spiral canes of the
colors and plain translucent, whites, (?? --or whatever you want).. you can put
a layer of a foil leaf in too.
...Make VERY thin slices of the canes and
apply them to your bead in a pleasing pattern.... some of the foil bead can show
through,
you should then roll it gently in your hands to smooth it down,
and bake!
...Pier does some sanding, but is not a big believer in it....(her
translucent ones have a kind of frosty look--DB)
HOLES: ...Pier makes
the holes in those beads after she bakes them... she says because the clay
is so thin and the foil hardly resists, she can usually just pokes them through!
With the foil armature, you can get very big and still very lightweight
beads. Pier makes some really huge beads! She even has a choker made of ping-pong
ball size beads. Anna
...(see Covering
>Plastics>Misc. Plastics for covering ping pong balls)
Aluminum
foil (or paperclay?) could be formed into exact balls using a mold
...or Katherine Dewey uses a nifty bowl-like depression to roll
her alum. foil ball around in to create a lightweight, ball-shaped armature
(which she forms a head around)
....she creates the depression in a
thick slab of raw clay by pressing into the slab a firm sphere of the same curvative
as the foil ball she wants to make, then bakes
polystyrenes
(Styrofoam and other) can be used as permanent armatures to create
lightweight and somewhat-hollow beads of various shapes
....polystyrenes will
shrink when heated at our baking temps, but will stay large long enough
to hold the shape of the clay
....however, if covering the foam completely
with clay, a small gas
release hole
must be left in the clay covering ...or aluminum foil must be used over
the polystyrene under the clay (to keep it from sticking to the inside
and cracking the clay)
http://www.garieinternational.com.sg/clay/pc_foam.htm
.......(for
more details on covering polystyrenes, plus discussion of shrinking or
melting rates and fumes, see Covering
> Plastics)
Other lightweight forms
for covering might be:
....small glass Christmas ornament balls, or
glass molds for making grapes with resin (still available?)
...some of the
silver clay sites sell hollow ceramic/porcelain beads for use with the
various silver clays. Might that work? Valerie
...ou could try searching the
net for round cork balls... I think they are sold for crafting and for
fishing bobbers. Sherry B.
You
could also make your own half shells from polymer clay using
the inside or outside of something like these steel hemispheres (which are hollow
on the concave side)... then you'd put two halves together as with a lentil
bead (for details, see below in Hollow Beads > Round)
For heavier forms, maybe wooden beads or even marbles, etc.
Other
cores ....meltable, removable
.. tiny glass Christmas ornament balls can be broken out after baking
...
papier mache balls might be dissolvable, or at least lighter weight
...many
food-based items can be soaked out (or left inside beads) after baking
...cornstarch-based
packing peanuts (biodegradable) can be used, then soaked out after baking
(for
all info on these, see below in "Hole-y Beads")
....also
packing peanuts made from cassava from Brazil might be usable....the biggest
were about the length of my thumb. They were all sorts of shapes. I don't know
if cutting would work. I think they have lots of holes throughout them. But they
are a lot harder (than cornstarch ones). I'll have to see if I can get some. Jody
B.
...round ice cubes ...spherical
ice-cube trays are usually available from novelty cheapo shops - or at least they
are over here in the UK. The units are in two halves of soft plastic (top and
bottom) with a small filler hole in the top of each division for the addition
of the water (or PVA in our case!) Alan
...modelling wax is often
sold by candle-making supply places - those are real treasure troves for moulds.
Alan
(see more on many of these
in Armatures-Temporary)
ROUND, Oval, Square & Cabochon beads
...see Desiree's excellent
discussion near top of this page for "Rolling by Hand"
...also
see more on keeping beads round in Bead Holes
...for
using "Bead
Rollers," see bottom
...also see "Covering" below
for very round beads. . . I took a bit of clay and rounded it as round as I could get it..them popped it into a round half-ball-type plastic tablespoon (measuring spoon). Hold the spoon in one hand..and use your finger or palm of the other and roll ball VERY GENTLY ! The sides of the spoon are perfect for smoothing and rounding the bead! You can use a teaspoon for smaller ones if you like..but the larger one seems to work fine for any size bead. Jan
The
number one suggestion I have for making round beads round is to make the bead,
let it rest on glass or marble and cool.
...when cool,
gently reroll.... you can then easily see where it is out of round.
...I
do several beads, and go back to the first ones and put holes in and let them
cool. Jeanne
There is a wonderful video tape
by Klew (Karen Lewis) on making round beads. ...she rolls out a long snake
....then
she just cuts same-size pieces...for each, she pinches the ends
together... then rolls into a ball
. . . My beads were not too good
until I began practicing them the way Klew does them. Much better. Dotty
For more on ways to make beads of a particular size, see above in Controlling the Size
(for making very round beads over forms, see Hollow Beads > round, below.... and also Foil and other cores above )
(for
cube or square beads, see acrylic rods Canes-General
> Square Logs for Cane Components
... and also see above in "Covering")
square
(not cube) beads can also be made with cutters, or by hand with less-square corners
...Linelle's
Perfect Pearls-covered, thick square beads, each with hole in center...strung
on dimensional necklace with spacer beads
http://www.sonic.net/linelle/FamilyPics/images/squares2.jpg
(for
oval beads, see Rolling Beads by Hand above)
....for
(pointed) oval shapes made in a bead roller, see "Bead Rollers" below
truncated
long oval beads (tapered and cut off at
each end)
http://humblebeads.com/lariat_art_beads.html
Claude's
lesson on making a oval-shaped bead (with a lengthwise seam
on one side) by rolling both sides of a millefiori cane
slice toward the middle of the slice, then rolling the result into
a smooth oval shape (and piercing a hole)
http://www.chez.com/creabijoux/interieur/ATELIER/cal5eme.htm
many
tube beads are oval also, but have thin walls (see Tube
Beads below for more on those)
cabochons (hemisphere, or half a rounded-oval) .....sometimes misspelled
as cabachon
(definition: non-faceted
& faceted, round and oval half-stones, flat on the back
so will fit in a ring or other jewelry setting)
Kellie's
cabochons surrounded by seed beads:
http://www.kelliesklay.homestead.com/cabs.html
Irish Red's cabochons (website gone)
....
2 push molds made by Amaco will allow you
to form
cabochons of different
sizes
http://www.polymerclayexpress.com/molds3.html
....You
can use measuring spoons as molds for cabochons. . . . Sharon
...
cut off 3-4 mm of the square of a plastic ice cube tray with the
cutoff wheel of a Dremel... the one I have has lovely slightly rounded
corners and edges. jclausen
...I don't know if you have
seen the little plastic protectors on the tops of solid deodorant
i.e. Mitchum, Secret. They make fabulous cabochons... most have a small handle
built in. Crafty Michele
....the
round plastic flip top lid of my vinegar bottle makes nice round
ones. jclausen
....at
Michaels I saw wooden bird eggs which are cut in half and immediately
thought a form for making my own mold!!!!... now I have a nice little mold
for making oval cabochons ....the packs of egg halves range in size from
an inch tall up, and I only paid .99 cents for the pack of 4!!
.......so
when I got home, I made a 1" square block of scrap clay, pushed the half
egg into it and made a mold! Sharon
...Danielle's lesson on creating
a cabochon in a bezel by forcing a ball of clay up through a
bezel (from the back side) then cutting off the excess on the back (she then
onlays flowers and stems onto the "cabochon")
http://tutorials.theclaystore.com/beads-buttons-and-jewelry/pink-flower-applique-pendant
(also
see Bezels below for Desiree's forcing-up method, but using a wire frame)
In
Lynne W's lesson on making hollow lentil beads, she says that just
one of the halves of the bead shape can be used after baking as a cabochon
(will be hollow in back, and lightweight)
. . . she suggests adding a "bezel"
by cutting a disk just a bit larger than the one used for the lentil half, then
pressing it's sides up around the edges of the cabochon.... this would give the
back a flat surface also
http://www.polymerclaycentral.com/cyclopedia/flyingsaucerbead.html
(from
a "cutter" --not true cabochon shape because flat in the center
even though rounded on edges
..Lisa Pavelka's lesson used an empty metal bezel to cut a small focal
"cabochon bead in a frame" for a necklace
from a small, patterned,
thick sheet of clay
http://www.hgtv.com/hgtv/crafting/article/0,,HGTV_3352_1812259,00.html
Cristina's
simple turtle made with cane slices bead (sort of round) plus
head/neck and feet (key chain)
http://www.geocities.com/pastasint/ita/bigiotte/pag1.html
BICONE
beads
(see
below in Bead rollers)
DONUT beads
Donut beads are usually large focal beads with a hole
in the middle
...they have usually been round like a donut, but could be any
shape and thickness as long as the hole is in the middle
... the hole
can be small or large relative to the rest of the piece
...the donut is usually
flattened somewhat from a dome shape, but could be thick or thinner or flatter
...often the donut is strung onto a heavy cord by passing a loop through the donut
(cord ends then passed through the loop), or something similar
...sometimes
it's also hung underneath another shape, or has beads of various sizes-shapes
strung below or above it, etc.
....it may be a faux stone of some kind like
jade or turquoise, or be stamped-textured, or use any other technique at all
Desiree's
domed faux turquoise donut dangled with doubled cord
http://desiredcreations.com/images/galleryTwoPics/Donut1m.jpg
's flatter faux jade donut bead, with various wire wraps used as
connector around donut (through hole)
http://www.pcpolyzine.com/2004may/debbie3.JPG
Tonja's several flat donut pendants with transfers ...one has
cording through hole to bottom side of donut too, with dangles
http://www.tonjastreasures.com/transfers/transfers.html
Linda G's donut bead (leaf canes, medium-size hole) (website
gone)
Roll a ball
of clay (patterned or not).
Press down with something to flatten it
as much as you want (or press between your palms with a light rotating motion).
Use a drinking straw to remove a plug of clay from the center, then
widen and/or smooth the hole until it's rounded.
...First make a ball, then
put it in the middle of your palm and push a little with your other palm. Then
roll the upper hand like clock hands move above the other hand. You get
sort of flat bicone. Now take a small round cutter or drinking straw or something
like that and pierce a hole into the middle. If the hole is small, take a pen
and wiggle it inside to get rounder sides for the donut center. Turn
and repeat. Widen the hole a bit and shape it a bit with your finger to get it
round. Put back between your palms and smooth with the rolling- clock-like
motion. Bake, sand and buff. Porro
...Depending on how fat you want the doughnut
and how large
....... I use 2 circle cutters and some (plastic)
wrap.... I start with a doubled sheet of clay (on my thickest setting)
Lay plastic wrap over it and cut the outer circle, and then cut the inner circle
with a much smaller cutter (I use a 2" cookie cutter and probably 3/4"
brass tube for the interior) .........(for thicker ones) then I cut another
set just like it and butt (stack) the two together, and smooth the
seams.... its SOO much easier than trying to hand shape them and they are more
uniform. Otterfire
...I roughly molded that particular donut by hand, baked
it, then shaved, carved and sanded it to complete the shape (this
turquoise donut was made a bit differently from most because it was critical
to retain the nugget quality and I couldn't twist and turn the clay).
How you construct the donut depends on the pattern you want showing when it's
all done. Desiree
I went crazy trying to achieve that sort of 'domed'
look that some of the donut beads have
....I rolled a small ball (I like
my donuts on the smaller side now, roughly 1 to 1.25" diameter; and from 1/8 to
1/4" thick). ...I put it down & 'smushed' it to the right size using a perfectly
flat jar top. ...Now, if you want that dome-type donut that I was talking
about, set the flattened circle on a curved surface, like
a light bulb. I use a wooden sphere about the size of a tennis ball
cuz I want a real 'gradual' curve that's hardly noticeable. Kind of smooth
the edges of the circle lightly against your sphere, and make your center hole;
lift carefully to maintain the slight curvature. . . .the less I fool with it,
the better it looks. All I might do is take my brayer and GENTLY, lightly roll
it around the edges a couple times to finish... then bake.Cathy in CA
I
have two things I use to make the middle hole, one is a cylindrical
pen cap with the end cut off and the other is a 'sample' size
lipstick cap. I carefully position this, trying to get it exactly in the center
of my circle. Then in one fearless motion, (!) I press it completely through the
flat circle, and give it a couple of gentle twists to make sure the hole
is completely cut through. Cathy in CA
...in leiu of canape cutters,
look around your house for anything round and in the size you'd like your
donuts to be... I've used the tops from prescription bottles to make circles,
with some success. Jodi
...prairiecraft's hole-within-a-hole cutter
(for donuts with large holes?)
http://prairiecraft.com/Merchant2/merchant.mvc?Screen=PROD&Product_Code=AT-14422&Category_Code=KCF
make
donuts from large clay "jump rings"
....roll a smooth clay rope
of the desired ring diameter... then wrap it around a bamboo skewer or
bead mandrel (as you would when making metal jump rings from a length of wire)
... slice through the entire length of the clay coil, down to
the skewer-mandrel
....gently loosen the clay from the skewer and separate
the cut coil into individual pieces
....bring the ends of each piece
together, and smooth with your fingers. Voila!
If you plan to make many donuts, you might want to buy a finished one and make a mold of it to use. Desiree
Libby
M's very flat donut shapes... with liquid clay squiggles on flat
side http://home.centurytel.net/tkaylen/group6.html
...(thin, flat, small donut beads could also be used as spacer
beads --see just below)
cyn
clay's donut beads... some even square and flat... with various
patterns, and sometimes frames
http://www.flickr.com/photos/cynsclay/2759123057
donut
variation: Ginny's lesson on making a "Saturn"
bead --a thick flat disk.... which rotates
on a pin inside a thick flat ring of clay
http://www.pcpolyzine.com/july2001/saturn.html
I love making them to resemble the faux 'stones' like:
rose
quartz, jade, turquoise, polished granite... there are stones of EVERY color and
combination to replicate..Cathy
As far as how to 'finish' your donuts, well, that depends on what you want.... (I wire-wrapped a few with wire) Cathy
As far as putting together in jewelry, I have tried it several
ways:
... I personally like the look of stringing it on 1.5-2 mm. cord...leather
or silk or whatever.
...Then I add a few beads going up each side of the pendant,
but also leaving a few inches of the cord alone, between bead segments. I think
this accents the donut bead best.
When I put the donut on the cord, I like
to center it, cinch the cord, and then choose a nice 'special' larger bead and
string both ends thru, letting it sit on top of the donut like an anchor or cap
of sorts. Then knot above that bead, and at this point you can go ahead and add
beads as wanted to each side of the necklace.
.... I have seen some with only
one large bead, knotted about halfway up each cord, and that looks nice too. Of
course, the thicker cording will limit you to the beads with big enough holes
to string. Cathy in CA
SPACER
(in-between or filler)
& HEISHI beads
Filler
or spacer beads can be any shape.... and are usually
smaller than special or focal bead(s)
....generally used between
larger beads, or in longer lengths between beads or at the (around-the-neck
end of necklaces), but can be used any way one wants
small
disk or tube filler beads may also be called "heishi"
(hee-shee) beads ... old Pueblo term meaning shell (originally they were
made made from shells, strung together to form flexible strands)
... turquoise,
coral, or other natural materials were also used (...nowadays even
metal beads may be called heishi if they are somewhat flat)
http://images.google.com/images?sourceid=navclient&ie=UTF-8&rls=GGLC,GGLC:1969-53,GGLC:en&q=heishi
Claude's
various shapes and types of polymer filler beads
http://www.chez.com/creabijoux/interieur/ATELIER/3_lecon.htm
(click on all 10
galleries)
various
shapes of real filler beads made from natural materials
(round)
http://www.trashcity.com/roundheishi.htm,
(tube) http://www.trashcity.c
m/heishi.htm
...(also shell)
http://www.trashcity.com/shellheishi.htm
a few ideas for shape, color, embellishment,etc.:
...make with solid colored clay , or marbled
clay
...make with faux stones
...texture ... then perhaps
antique or highlight
......texture and completely cover
with metallic powder to simulate purchased metallic spacer beads
...use similar colors, but do something geometric (stripes, kaleidoscoped,
Skinner blended, etc) ...be careful though to make the pattern small enough
or neutral enough that the beads won't take attention from your featured beads
(unless that's what you want)
...roll cane slices, or bits of cane
slices, into smooth ball, then shape (can twist first, etc.)
...roll
or twist cane slices, or colors from the focal beads, until completely
mixed (will create a more neutral but compatible color that should
go well with the focals)
(see more info on cutting these beads from "tubes" of clay, including using multi-blade cutters.... and also more ideas on possibly using them... below in Tubes)
tubes
tube-shaped filler beads can be long or short ...fat or
thin diameter.... plain or patterned/textured/etc.... edges
can be flat or rounded...
There
are several ways to make small tube beads (mostly similar to making the larger
ones --see below in Tube Beads)
... roll a snake of clay on a
long needle or wire... cut raw clay snake, while on the wire,
into the lengths you want for individual beads with a single-edge razor blade
or other blade as you roll the needle... bake clay on wire...
after baking, pop apart the beads
...or, partially or
completely bake snake of clay on needle...remove clay
tube from wire (may need to twist off) ....then cut clay while
still warm with a blade (may not want to use a blade you care about)
......sides of beads made this way may be dusty
looking but they that face generally won't show (..or can reheat to remove the
dusty effect)
Heather
R's lesson on making (tube-shaped) spacer beads with twisted-lines by
rolling scrap clays into a ball, then into a short cylinder... then
inserting a short rod and rolling till long... bake... cut while
warm after removing rod
http://www.sculpey.com/Projects/projects_tropfishjewelry.htm
(....bottom of page)
(slightly
diff. tech.) ...I've made "seed beads" (with straight
sides) from clay
(.... first I took a long, thin needle and rolled a tube
of clay on it to really thin)
.... then I took the blade and made
cuts in the clay maybe half way through
the clay
.... I baked for 15 minutes ... then cut through the clay
when it cooled down. Ginny
You can also give angled or rounded edges to tube beads by using a toothpick or other thin rod (or any shape) to indent lines in the raw clay first (where you want the beads to end) ...then make the actual cuts with a blade in the center of each indentation (before or after baking)
Claude's
faux amber, small spacer beads (cut from a baked log)
http://www.chez.com/creabijoux/interieur/GALLERIE/grandes%20photos/186.htm
....(...see info on making individual faux round
or donut seed beads from clay, above in Finish Beads)
Sarajane's
tube heishi beads for sale (cut while warm, from thin-walled tubes)
http://www.polyclay.com/beads3.htm
...using
all translucent clay for these looked cool ....the colored translucent
looked okay too. Ginny
...Kim's
accessory beads (shaped, textured, powdered --made from cane
bits) (website gone)
can also roll a cane slice around a needle or toothpick (...then roll to smooth, or leave dimensional) to create an interesting tiny tube bead
disks
...these
filler beads usually fairly thin (like a washer with a small
hole in the center)
...they can be smaller or larger diameter...
their edges can be flat or rounded
(for
"disk beads" where the hole is drilled through the edges,
from side to side, as with cane slices, see Jewelry
> Bracelets > flat and
half-round tiles
or possibly
Beads-Holes or Canes-General)
disk-shaped spacer
beads can be made in several ways:
...press balls of raw clay
as flat as you want .. make holes
...press slices from canes as flat
as you want.... make
holes, or take slices from a cane which already has a hole drilled though it's
center
...cut disks from a sheet of raw clay with
a circle cutter ...make holes
...use 2
paper punches
(one which makes tiny hole and one which makes a larger hole)
......take sheets of baked clay (#5 on the pasta machine)
(or baked liquid clay), and punch a row of little holes with
the tiny punch
........then go back and use the bigger punch around those holes
to make heishi beads
.......you can turn the bigger punch upside down and use
the gap the punchout falls through to center the little pre-punched
hole! --Cynthia Toops showed us this one
...make a one or two-piece mold
holes
can be made in raw clay disks with a tiny straw (twist in), a tiny cutter, or
a needle, etc.
...sometimes holes can be made before shaping or cutting each
bead
...holes can be made in baked clay with a drill (hand or electric),
and a clay or other jig could be created to hold each beach so the hole would
be placed in exatly the same place (see more in Beads-Holes)
Mathilde's
disk beads ...each with spiral cane slices showing on edge, and
a bit onto flat side of beads as well (...medium-thick, wide diameter, rounded
edges) ... proably made by
http://creaplastic.free.fr/32_07.htm
Ronna's marbled-clay disk beads, which have had their edges distorted
to slightly wavy
http://www.ronnaround.com/index.htm
may
want to look at the page on making buttons for more ideas re disk-type
beads (Buttons)
flat bicones & other shapes
spacer beads could also be made as small and/or thin
bicone beads (which have been flattened almost completely)
http://desiredcreations.com/howTo_CALentilSwirl.htm
.......for
much more on the technique, see below in Bead Rollers > "Swirled Bicones")
...see
also "Donut" beads above?
Sarajane's
many 3/4" tube beads
http://www.polyclay.com/beads2.htm
Elise Winters' many short metallic tube beads, separated occas.
with real-metal spacer beads (more at her website?)
http://www.npcg.org/Activities/muse/images/winters/Original%20Files/WINTERS5.JPG
Heather
P's elegant & neutral-colored tube beads, most with fancy
bullseye cane slices in diff. sizes
http://www.humblebeads.com/tip6.html
Christy
H's tube beads (made with cane slices)
http://www.povn.com/rock/gBead1.html
Margaret
R's many colorful strung tube beads
http://www.mregan.com/portfolios/portfolio2/photo1.htm
...& http://www.mregan.com/portfolios/portfolio2/photo2.htm
Dayle
Doroshow's large tube and rolled-up "tube"? beads... some
with transfers, end caps, etc.
http://albums.photo.epson.com/j/ViewPhoto?u=1751472&a=32123747&p=73924291
Tube
beads can be made as small, medium or large size tubes....in
any length... and walls can be any thickness
....(short or long
tube beads of small diameter can also be used as spacer
beads (see just above)
...they can be a solid color clay, or patterned
clay...they can be textured, antiqued, coated with metallics, onlaid, or just
about any polymer technique can be used, either before or after
baking
(pre-baked tubes can also be used as a hidden interior "hole" for a bead --see "lantern beads" below in Misc. Bead Shapes-- or as an exterior "hole" on the outside of rock vessels for example --see Vessels -Rock)
Most
of these methods involve rods of some kind... but cording and
other materials are possibilities too
... some rods might
be: metal (long needles, knitting needles--which also can come very thin,
brass rods, wire, etc.), wood (skewers, dowels), even glass (swizzle
sticks, glass "strings").... see cording and other materials below
When
rolling the clay on a rod, etc., for smooth tubes... you can just use your
fingers and/or palms, or use something flat (and if possibly transparent
like an acrylic sheet as when rolling a pen)... this could also be done just for
the last roll
... or roll with, or on top of, a texture sheet
of some kind
basic
technique ....before baking
....roll or wrap clay on a long needle, rod,
or wire till it creates the thickness of tube you want ...(more on ways to do
this below)
.....then make rolling cuts with a razor or other
blade in the raw clay where you want to beads to end
....then after
they're baked, you can twist the tube off the rod, and pop
the beads apart (if more than one) at the cuts
You can also give angled or rounded edges to tube beads by using
a toothpick or other thin rod (or any shape) to indent lines in the raw
clay first (where you want the beads to end) ...then make the actual
cuts with a blade in the center of each indentation (before or after baking)
...right out of the oven, I hold the needle with its baked clay and
cut cleanly in the troughs with a sharp blade ...then I wrap a pot holder around
the beads, rest the needle on the table, and push the beads down to the end of
the needle (they'll then be easy to pull off). Elizabeth
Or just mark the raw clay on the rod lightly with guidelines for cutting after baking --could use a Marxit, ruler with raised marks, a comb, etc., or multiple-blade tube-cutter (see below), etc.
basic
technique .....after baking
... bake clay on the rod first
...
twist the long tube off the rod while the clay is still warm
...slice the tubes to the length you want (while clay is warm)
with a blade (don't use a blade you care about keeping sharp) ...and remember
to remove the wire or needle before cutting
....the sides of
the beads made this way may be dusty looking
but the sides often don't show in use
.......or you can reheat them
to remove that dustiness (can also use a bit of Diluent-Softener on edges before
reheating)
I cut the beads after the
clay tube is only been partially baked, about 10 mins ...
the clay is then firm enough to cut nice and cleanly
.... then I return the
beads to the oven to finish baking
...Watch yourself as they are still
hot .... and also watch out for beads going 'ping' (and flying
away) as you cut. Shelley M. (though shouldn't happen if warm enough)
tip: ..if beads will need antiquing, or sanding & buffing, it's easier to do those things on a whole tube before cutting beads after baking (rather than on indvidual cut beads). Elizabeth
blades
your choice of blade, when slicing after baking, may depend on the
brand of clay you're using
....Sculpey3 is more brittle so
it does better with a tissue blade (it's thinner so it's easier to get
it to go through the clay without breaking bits of clay off ...but definitely
make extra tubes in case of breakage)
...Premo
& Fimo (& probably Kato) handle about the same. Barb
I
use a sturdy blade (the Kato blade) for my regular tube beads
because it makes straighter cuts, & the clay is strong enough to tolerate the
thicker blade.
......but if I make *really* thin-walled beads, I slice
with the tissue blade.
...also, if the bead tube cools
off too much, you may get more breakage ...so just reheat it a little before
continuing. Barb
multiple bead-cutter
unit ....this device will cut up to 10 or so beads at one time
from a tube ... just roll the unit over a raw polymer log on a rod
....can
also be purchased: http://www.polymerclayexpress.com
...
made by taking several linoleum blades, sliding them on a long
threaded screw, using spacers (like nylon, or metal?, washers) between
each blade. Depending on the spacing you can fit quite a few blades on
one threaded rod. ....I've made a whole bunch of them with varying widths
between the blades
.... see more on making your
own in Cutters-Blades > Multiple
blade cutters > Fixed blades (& tube-bead cutters)
hole problems
If the hole
widens and gets floppy while
you're rolling the clay onto the rod:
... twist the clay back
firmly ... then continue rolling (... may have to do this several times during
rolling)
To avoid the
widening problem:
...try to roll lightly rather than pressing
too hard, concentrating on moving the fingers outward
more than straight down. DB
...for
me, only Premo will work for tube beads... I need the Premo's extras
stickiness or I end up with floppy holes in the tube and it's all over. Jody
...when
the clay gets too soft, it's time to PUT IT DOWN for awhile and
let it rest.....now doing that was how I got monster holes. Kim2
...or
just use a different method to get the clay on the needle (like
jellyroll, spiral, or butted sheet) ... see below. DB
(if
you're using a rod or material for the hole that's removed before baking
to create a tube bead or bracelet), make sure the clay is stiff
enough so the hole won't close in on itself .
Randi (refrigerate, let rest, or leach?)
getting clay onto the rod
clay
ball or long ball....I make them the way Pier taught us,
by starting with a ball or short wad of clay at the center of a skewer
.......then
rolling it while stroking the clay out from the center
....the ends need
checking and trimming periodically during the process of rolling them out...
other than that, it's a matter of practice. Jody
hot
dog bun....Sarajane had us make a clay rod about 3" long and maybe a
1/2" in diameter.
......we sliced the rod lengthwise partway
through... then set our wire or knitting needle into the cut ....then
we sealed the cut up
......then we started rolling and pulling outward.
Dotty
graduated rods... you can begin with a small rod ... then use larger and larger rods until the hole is the size you want
flexible
"rod"
or cord ...
roll clay onto smooth cord of some kind (or maybe even string)
........could
"saw" cord back and forth inside the raw clay tube to loosen it if using
something like string, which is textured
or not even in diameter
...remove
cording before baking or after baking
........ (if after baking,
be sure to use something bakable but that won't bond to the clay
... could use Repel Gel or powder, as "release"?
...........
then pull out cording, or some cords can be stretched to thin and
loosen from clay, or try twisting cord out
... I put the clay
around a piece of Sketti
String (S'getti?), that stretchy plastic cord from the craft store.....after
baking the cord comes out with a tug. I suppose that any smooth cord
would work. (I made my curved beads this way). Jody B
...flexible clay
like SuperFlex extruded though clay gun might work too?... with Repel Gel or metallic
powder as release?
...might not be able to cut
these while raw though, since the blade might cut through the cording as
well
dissolvables?... could use something that would dissolve out, or be softened enough to remove with rinsing, or twisting through a metal rod, etc.? (see Armatures-Temporary for possibilities)
butted sheet ...(like covering a pen)... cut a sheet of clay the final thickness you want... trim one long edge straight, then wrap around the rod.... trim other long side and butt the ends ... then just roll a bit to get smooth the seam
butted
sheet on large wood dowel covered with aluminum foil
....Karen O's lesson on making a large,"hollow,"
thin walled, tube bead (bit like an inro) by baking textured clay on a foil-covered
dowel (1/4" - 1" in dia.)... baking and removing (then embellishing)
http://www.polymerclaycentral.com/hollowbead1.html
....these
need ends or end caps to put smaller holes in if they're
to be threaded on cord as beads, or they will won't be centered
on cording while hanging
.....could also use clay or other filler, or
even a bead, inside the tube to create a centered hole for it
jellyroll
"cane".....I needed no seams so I ran the (base?) clay
through the pasta machine till it was a very thin sheet, and laid the
sheet on the needle.
....then I carefully rolled it up around the
rod .... much quicker thank you!!! Petr
rope wrap... roll or extrude a long, thin rope of clay... spiral it around the needle or skewer (like for a pinch pot).. .then roll briefly, just enough to smooth the ropes flat. Diane B.
I wonder if you could extrude clay with one of the big, strong clay guns, and then put in the hole in , and cut into lengths? Just a thought. Carlos
patterns, texture, embellishment
tiny,
cane slice tube beads (for spacer beads, danglies, etc.)...
these are made individually
. . . I like to roll a single thin
slice of cane around a long thin needle for an individual bead; the overlapped
edge of the slice can look quite cool. Diane B. (see Spacer Beads above for more)
If you want cane slices covering the surface of a base bead, one way that Marie Segal showed me was to (make the clay sheet first) ...roll out your base clay on the number one setting of the pasta machine. Lay thin cane slices over the surface and then it run back through the pasta machine. Cut a piece of this sheet that is somewhat shorter than the rod you are using, and just wide enough to wrap tightly around it, pressing the join together firmly and smoothing it. Then begin rolling and elongating the clay until it reaches the end of the rod. This way, you are not rolling it long enough to cause the opening to enlarge. If it should open a little, just twist the clay to tighten it up (One end away from you and one end toward you, and roll until smooth again. Your cane patterns may twist a little also, but that is usually quite pretty. Dotty
I made a long tube base on a brass rod with waste clay, then covered it with pieces of Skinner blend-type sheets
Elise
Winters uses Skinner blends, pearl clays, and metallic paints on
her tube beads... she follows the skinner blend of colors so her necklaces blend
from one color and shade to another.
...she strings her necklaces with nothing
but the tube beads, separated here and there by a few metal spacers.... three
strands and very, very long. Dotty
Sculpey's
lesson on making simple tube beads first, which are then spiraled around
with a diff. colored clay rope) (they use skewer, and cut tube
when raw)
http://www.sculpey.com/Projects/projects_ghost_necklace.htm
You can also use rods and chisels to create a machined "lathed" look on the individual beads (like "turned wood legs, etc.).Eliz..
Karen
O's lesson on making large, thin walled, hollow "tube bead"
(pendant) by baking textured clay on a large wood dowel covered
with aluminum foil
....she also made end cap units with 3 stacked,
progressively smaller disks, which she then made a hole through and TLS'd
onto each end before baking again. She strung these like vertical pendants with
a tassel below.
http://www.polymerclaycentral.com/hollowbead1.html
baked
textured clay sheets can be rolled over with raw clay beads (if tube
beads, use large-diameter skewer)
http://www.mhpcg.org/clayDays/claydays04/july2004/jul023Lg.jpg
http://www.mhpcg.org/clayDays/claydays04/july2004/jul2004.html
(beads made this way)
...for rolling
stamp "beads," or cylindrical seals, see Stamping
> Rolling Stamps
and Texture > Rolling
joann.com's
simple coral tube beads textured with salt . . . clay on
needle is rolled in salt (and indented), then baked; afterwards the beads are
cut-broken apart and dropped into water to allow the salt to dissolve, leaving
behind a pitted surface
http://www.joann.com/content/projects/projectsDisplay.jhtml?articlePath=/content/projects/static/new/jewel_time.jhtml
Terry
Lee C's vertical tube bead pendants with tassel
inside and dangling below ... cap on top end only
http://www.pbase.com/tlccreates/image/25780615
Liz's tube beads with
3 stacked, graduated-size disks on each end used as end caps
(Skiiner Blend with liquid clay drizzles)
http://www.libzoid.com/files/goldscribbtubes503.jpg
Tania's
large long tube bead strung onto cording.. then large clay disk pendant
hangs from it via another cord wrapped multiple times around the center
of the tube bead and the dangled pendant
http://www.flickr.com/photos/1001artbeads/2080834785
I've been able to make
tube bracelets, with elastic running through the
middle.
......I make the raw tube on a brass rod... then take it
off and shape it into a circle or oval before baking .... I learned
the technique from Margaret Regan.
...I even made a bunch of tubular bracelet
'blanks' & cured them... later I apply clay slices over
the cured bracelets (this keeps the hole intact, although I've found that the
bracelet is frequently better-looking when I do all the embellishment before baking).
Randi
jointed
figures & animals on pipe cleaners could be made with various
tube beads substituting for the pasta pieces! Fun. DB
http://familyfun.go.com/arts-and-crafts/season/feature/famf97project/famf97project22.html
("macaroni
monsters")
curved tubes
Raw tubes can curved before baking (see flexible rod
or cording above)
... or baked tubes can be curved somewhat after
baking.
You can curve a
baked tube after removing it from its rod while clay is
still warm-hot ...but bend it gently and slowly! (....use
oven mitts, or protect your hands)
.......hold
in place till cool, or use something else to hold in shape ....If
your hole was small,
this may somewhat close up the hole
..........so
you can run string, yarn, flexible tubing, etc., through the baked
but hot tube with a needle before bending.... then pull out after
bending
......... or your hole will be larger if you make your
tube bead on a wooden skewer or knitting needle ,compared
to one made with a needle tool, and won't close up if you bend the bead somewhat.
...not too far, though. Dotty in CA
I
found that I could make curved tube beads by putting the clay around
a piece of Sketti String (S'getti?), that stretchy plastic cord
from the craft store.
....after baking the cord comes out with a tug.... I
suppose that any smooth cord would work
.... I guess that I would make
each bead on it's own little piece of cord and gently arange them to try out different
curves.. Jody B.
for my tube beads for necklaces... if I can match the color, I'll mix SculpeyFlex clay into my Premo. This makes really comfortable beads around the neck. syndee
curved tube necklaces....you can play with the amount of curvature when you bend it.... hold it up to your chest and see what you like (use a mirror, don't just look down) ...in general, the closer to the neck, the less curve you want . . .long necklaces can flow well with a much tighter bend. Sarajane H
(for more on making bracelets or rod necklaces from tubes, see Jewelry > Bracelets, esp.)
MOLDED or STAMPED or TEXTURED......& Double Sided...+ "Lumpies"
Amanda's lesson on
carving a pattern in baked clay to make a flat mold for flat
beads (following lines made by rubbing a previously drawn ballpoint ink image
on tracing paper onto raw clay, then baking...this will result in a
reversed image though unless you turn the paper over and re-draw the lines
on the back)
http://www.sculpey.com/Projects/projects_EgyptianChoker.htm
The lumpy beads were my attempt at getting impressions on both sides of a bead. The beads are a soft white Sculpey covered with a faux ivory slices and rolled into a ball to make smooth. Then I pressed some button molds into each side. The handling, squeezing and pressing made them lumpy. Then I cooked on skewers. When cool, I 'antiqued' them with a watered down coat of burnt umber acrylic paint to bring out the little pictures." Shane
Didn't Shane have some gold ones too, possibly antiqued as well?
see lessons on making impressions all the way around cylindrical beads (or clay on mini wood spools as beads) by rolling over a texture (a stamp or carved eraser), or on flat beads..... and also making impressions in beads with stamps the regular way in Stamps > Rolling, etc.
Julie's lesson
on impressing a pattern into the raw clay of a "bead" (which
is made by wrapping a strip of clay around a mini wooden spool) by rolling
it over a carved white eraser ..can then be highlighted, antiqued,
etc., if desired
http://people.delphiforums.com/dancinjules//spoolbead/spoolbead.html
Jenny's
"fragment" beads --double-sided but flatter (she antiqued them)
http://www.pcpolyzine.com/february2001/fragments.html
Sarajane's
various textured beads in diff. shapes ..most antiqued, some prob.
doubled-sided
http://polyclay.com/texture.htm
syndee's
lesson on onlaid leaf beads, lumpies,etc.
http://www.jewelrycrafts.com/clayproj9.html
Carly's lesson on making double-sided, heart-shaped,
beads using two filigree findings
http://www.geocities.com/lubellebeads/projects/valbproject.html
Kathy W's two-sided beads made with Miracle Mold
http://home.comcast.net/~puffinalia/commentspagepics/kweinberg.html
rolling
beads on a textured flat surface http://www.mhpcg.org/clayDays/claydays04/july2004/jul027Lg.jpg
sunni's highly textured beads from Grant Diffendaffer class
http://sunnisan.com/crafts/01/unsandedtxtrbds001b.jpg
....for lessons and
more on making molded, and double-sided beads, see Molds
...esp. "Two-Piece Molds")
...for much more on texturing beads,
etc., seeTexturing > Rollers and also >
Texture Sheets)
ROLLED UP , "Croissant, etc."
like an uncurved croissant... roll up a long skinny triangle (or blunt the pointed end) for one entire bead . . . .
....Heather's "roll up beads" at http://members.home.com/claythings/beads5.htm
(hold cursor over until photo appears)
.....Janet's rolled up beads, with mica
powders, crackled leaf, etc.
http://www.janetfarris.com/images/2005_11pics/images/twist1.jpg
....Cathy's example in necklace, (website gone)
Leigh's
lesson on using a long leaf cane slice to roll up... she adds a
cane slice of a flower over the end join
http://polymerclaycentral.com/poleigh/accent_leaf.html
Betty Abdu's rolled
up beads using mokume gane ( translucents & paint), using triangles
scallopped on edges
http://www.polymerclaycentral.com/guilds/shrinegallery1.html#abdu
heavily
embellished/textured rolled beads from Alison Ingham class
. . . (looks
like they were made by texturing long skinny triangles of clay or having
mottled appearance), indenting near the long edges of the triangles --and
some indented inside that "frame" before rolling up.... a glass or
stone bead surrounded by ropes, etc., onlaid over the join; the whole
thing antiqued --ancient looking)
http://www.sdpcg.org/classes2.html
...can
also make these with triangles of fabric embedded with solid or liquid
clay (or transferred patterns done the same way) (see Mixing
Media > Fabric)
...can also make these with triangles
of paper "decoupaged" with liquid clay (see Liquid
Clays > Strengthener or Decoupage)
diagrams for strip shapes (using paper) http://tappi.org/paperu/art_class/paperBeads.htm
(these beads were first created
by Mike Buessler... they're not the true mobius shape though; Mike named
them mobius beads because they have the the same inside-out quality...
Eliz)
Mike Buesseler's small Bleeding Hearts mobius beads on a stem
http://www.polymerclaycentral.com/mikeb/BldngHrts.html
Kellie's lesson on making mobius beads.... she has a method for making
one on a needle tool also
http://www.polymerclaycentral.com/cyclop...edia/moebiusbead.html
Monica's
lesson on making a mobius bead; she puts metallic powder on the edges
http://guide.supereva.it/hobby_femminili/interventi/2001/10/73761.shtml
(gone?)
Linda
Goff's various beautiful
mobius beads--one has Jones Tones (metallic foil) on either side
http://www.lindagoff.com/mobius1.html
Ellen's animal print, etc. mobius
beads... cane was wrapped with black
http://www.polymerclaycentral.com/guilds/shrinegallery1.html#berne
Elizabeth's log cabin quilt block pattern (dark/light)
mobius earrings (4x4 to create a darker square on point)
http://www.polymerclayexpress.com/images/pinsearrings.jpg
BASIC
LESSON:
...start with a square of clay (maybe a medium-thick
slice from a cane of any kind, or a square cutout from a pattern sheet or a faux
sheet, etc.).
...bring two of the opposite corners up together over the center
(allow clay to cool first if it's too soft, and gently urge the corners upward
allowing the clay to stretch a bit)
...from the "flat" side, then
bring the other two opposite corner together on the opposite side of the 'bead'
...allow
clay to rest, then pierce a hole through the two 'joinings' and the middle of
the original square. You might need to support the joined bits when you pierce
- depending on size you can use anything from a cocktail stick to a paintbrush-end
for that. The Crafty Owl
Using disks of clay (instead of squares) work well too.
One
of Marie Segal's millefiori videos shows how to make a bead that might
be called a pillow bead (I don't remember what she called it). The beads she made
were similar to mobius beads:
...she took a a slice of a square
cane and pulled each corner down (on the same side of the square)
so that they would meet in the middle. Laurie
For speed, pierce the center of the slice with
a skewer or rod (what ever you usually pierce your beads with, and perhaps cook
them on) then pull the points to meet OVER the rod - so they meet around it making
the hole.
...I find if I'm doing a lot, this is quicker than doing them and
then piercing them, and is especially good if you are doing tiny ones because
they don't squish when you try to pierce them! Crafty Owl.
(see
Kellie's lesson just above)
Christy's
foldover beads (like taco
shells)---spirals of extruded clay colors folded over a skewer,
baked, then removed
lesson http://www.skygrazer.com/polymerclay/reference/foldoverbeads.htm
(for hollow folded-over shapes, see below in Hollow > More Complex Shapes)
Brigitta's
lesson on "folded weave bead" ...folding short strips
of clay ( with crackled pearlescent inks) over a skewer
http://www.fantasyforevercreations.com/weavebeadles.html
Lynne
M. created a working pinwheel (for a pin) by cutting a square sheet
almost to the center from each corner, folding over to the center one tip of each
resulting triangle, then piercing the 4 tips loosely with a head pin (etc) to
hold them together... (may need to prop open with tissues etc. while baking or
hit with a heat gun briefly to hold the shape)
http://store1.yimg.com/I/manning-creations_1814_169695
see
Grant D's class for folding raw clay which first been turned on an electric
drill "lathe" for partially closed or hollowed out
spaces (to make into beads) in Carving >
Turning on a Lathe
FOLDED beads (log rings)
There are various ways
to make beads by folding:
..Foldover Beads just above, and Folded
Beads here, are both are a specific technique for folding small sheets
or logs of clay
...but there are also other ways to fold layered sheets
of clay (related to the way Folded Canes are made) which can also be used to create
beads (for all those folding techniques,
see Canes
> Folded)
lesson
for "Folded Beads"
- Form a striped log into
an "O"ring,
- push in on three sides to make an outline of an equilateral
triangle,
- rotate the sides so the strips look twisted,
-push in on the
triangle sides and pinch the corners until your shape looks like a
three-legged
star or a "Y",
- arc up the legs until they meet and roll to shape your piece
spherically.
Klew's folded
beads (3-4 colors + dark gray or black stripes).. plus 1-2 cane
slice onlays placed over each fold curve
...also
one thick "stripe" of translucent with inclusions of
widely separated gold leaf bits and tinted translucent, separated with
thin white
http://www.klewexpressions.com/beads/misc.htm#anchor153400
Kathy G's folded beads (monochrome... 2 blue logs twisted together & rolled
smooth)
http://gallery.gundo.com/gallery/album30/folded_beads
Described from looking
at a Jamey Allen picture in Nan's "The New Clay". Desiree
(in other
words:) Form a snake, preferably with some stripes running down the length of
the snake. Butt the ends together and join them forming a circle. Make sure you
line up the stripes when you join the ends. Form the circle into a triangle with
the butted ends in the middle on one of the triangle sides (i.e. don't have the
area you joined the snake be one of the triangle corners). Place the triangle
in your opposite hand with one corner pointing toward your wrist. Hold the right
corner between your thumb and little finger and the left corner between your index
and middle finger. Begin to twist the clay in the middle between the left and
right corners with your dominant hand. Either twist it inward or outward, but
whichever way you twist it, do it consistently for the entire bead. Also do the
same number of twists on each side. After you have twisted that side of the triangle
sufficiently to acheive a nice look, turn the triangle in your hand to a new side.
Repeat the above steps. Then twist the third side of the triangle. Take a point
of the triangle in your hand and push the sides of it together. Do this with all
three points of the triangle. Now look at both sides of your clay to decide which
side you want outward on the bead. The two sides will look different. After you
have decided which side you want on the outside, put that side down on your work
surface and fold the three points of the triangle upward and push them together
enough to adhere. You can either leave the bead that way or you can roll it in
your hand until the creases disappear. Both ways have a pleasant appearance.
Basically, you have to be *very* painstaking in the detail work on these beads, I've found. The initial snake must be of a uniform thickness, the stripes must also start out uniform, the three sides of the triangle must all be the same length, and when you're twisting, you must be careful that the twisting doesn't make the sides too thin (a bit of change in the diameter is OK, but needs to be uniform for all the sides, and if you thin and elongate the sides too much the bead shape is distorted). Then when you join the sides preparatory to folding the bead, you need to be very careful to match the mirror-image stripes exactly. The final rolling-the-bead-into-shape stage always caused mine to distort, so I ended up using a technique of pushing it gently into shape instead. Other things that may help: - More twisting. The more twists you can manage to do without losing control of the diameter, the better/more detailed the final bead looks. - Working smaller. I tend to overestimate how large I need to make the snake to get a bead of given size, myself. The smaller beads generally look better, at least I think so. Jeanne dV
Triche’s
cut & fold beads & lesson (twister, cascade, fleur-de-lis, & star)
http://www.btr.quik.com/catenae/polymer/techniques/
(gone?)
OTHER
kinds of folded beads:
...the most lovely bead...I had a bunch of
mokume gane pieces left over....smooshed" pieces together accidentally
I had my pasta machine on setting #7 (thinnest)....I just sort of crumpled
up ... folded (gently this time) a small piece and VOILA ... Ann P.
(.......see also folded "brain"
mokume gane technique in Mokume Gane >
Other Manipulations > Folded Brain)
some
of Klew’s bead shapes
http://www.nfobase.com/html/karen_lewis_.htm
various beads from Bethesda Retreat (website gone)
Jenny's various beads (website gone)
mini
teapot beads .. metal "end caps" & findings added to top
and bottom, etc., of round beads (or a marble, etc)...
...or
use clay but color it with silver powder or silver acrylic metallic paint
(before or after baking)
http://www.pennymichelle.com/teapots.html
Rebecca
N's bas relief teapot pendant beads
http://members.aol.com/nogyclay/page3/index.htm
Karen G's beads of various shapes onlaid with clay squiggles
and shapes
http://www.mhpcg.org/images/members/Kg/kgNeck.jpg
ring
beads (circular rods as beads)
...cyn clay's logs of patterned clay formed
into rings (also in various sizes, then strung vertically apart in rows)
http://www.flickr.com/photos/cynsclay/3014749683
tile
beads
for most info and examples re tile beads, see Jewelry > Bracelets
> flat and half-round tiles
...
also Transfers (bec. many transfers are make
into individual tiles by adding layer(s) of clay behind them)
various
tile bead shapes --with cane slices or micromosacis... (Toops & Adams)
http://www.lapidary,journal.com/feature/1099str.htm
Cynthia
Toop's many butterfly wing half tiles, strung on a necklace
so that opening 2 tiles apart creates one whole butterfly (both wings)
http://www.npcg.org/Activities/muse/images/toops/Original%20Files/TOOPS2.JPG
(gone)
charm
"beads" could be made in various ways... these are faux gold, molded
ones
http://gallery.gundo.com/gallery/album52/LindaEgyptcharms
you can inset a punched-out shape made from liquid clay into a raw bead (...for making punchouts, see Liquid Clay > Faux Enameling > On Glass). . . then carefully put the baked cut out shape on the bead, making certain no air bubbles trapped...and gently roll it around a bit, making sure it is stuck on the bead fairly securely.... bake the bead, let it cool and glaze it. Pamela
Elissa's
lesson on a solid heart shape... formed by cutting a
slightly-tapered-in-the-middle log diagonally, then rejoining
http://pcpolyzine.com/november2001/ezheart.html
(practice cutting same lengths!)
....(for
many kinds of hearts, see also Halloween,
etc/Valentines)
Lorraine's spiral-wrapped cone shaped beads (long strip of stripes spiraled around a cone shape, then removed) http://www.pcpolyzine.com/june2001/clayworks.html
*less*
twisted logs, used as individual twisted beads (roll a thick? sheet Skinner
blend, cut square strips, twist them, bake, cut into short beads, drill. Mike)
http://www.polymerclaycentral.com/mikeb/MultiNklc.html
video
... I
took a workshop from Mike B. and he said that he bakes the beads first,
and then he cuts them (into bead lengths). He drill the holes with a pin
vise. That is how he keeps the nice crisp edges. Lee C
...(I twisted
a long rectangle of clay then bake it, then cut it into 1" length beads, then)
drilled holes with a pin vise...carefully!! What I did was, I put the bead
on a vertical position , flat on a glass plate and held it securely with my left
hand, then position the pin vise vertically too, on top of the bead, approximately
at the center, then drill slowly until I can hold the bead with the drill tip
in it without my left hand holding the bead, then i proceed with holding the bead
horizontally while drilling it further. Halfway through, i take out the drill
(pinvise) and proceed with the opposite side of the bead. So far, I only cracked
two beads. But Boy, did my wrist and thumb got sore! Tanya
...(see
Mike's "beehive" beads -tiny, square ropes twisted and onlaid
onto a base bead, below in Covered beads, & also in
Mica > Mike Buesseler)
"barnacles"
(nesting, half-cone beads made from decorative clay sheets) (Toops &
Adams)
http://www.lapidaryjournal.com/feature/1099str.htm
(middle of page)
Pier Voulkos'
lantern beads...a small prebaked tube of clay functions as
a rigid interior "hole"
...she
placed same-shape-size pieces of clay --e.g., rectangular cane slices, or half-round
cane slices-- vertically on 4 sides of a clay tube...(with the slices thick enough
that the tube is completely hidden)
...or raw clay can be added around
or on either side of the baked tube, in any shape desirable
lesson
for coils or springs:
Extrude a bunch of clay with the second
smallest round die of your clay gun. Powder it well with cornstarch so
it can't stick to itself. Wrap it around a skewer the right diameter for
the cord and bake it. When it's cool, slide it off the skewer. You should have
a long flexible polymer clay spring! Jody B.
...I cut up the (springs/coils)
and use 'em as beads. . . .Try using acrylics to contrast the coils...looks
great. ...Made a bunch with a combo of clay to look like bone, then used
burnt umber to age....got wonderfully old looking bone beads.
.......use all
the different shaped disks that come with the clay gun for different effects.
...I cut wire hangers to wrap the clay around for baking. Great uniform
holes and a cheap source. And you don't have to powder the clay, it will
pull apart while still warm if you don't smash it to itself. Extruding and wrapping
is great FUN!! Valerie
...also see Donut beads above for cutting the coils
for single jump rings
I've been mixing chunks of these wild FimoSoft glitter metallics with chunks of the pearls and colorless translucents to make moire beads... This is so fun! Just start mixing other translucent based colors into them and see what happens! Elizabeth
I am making some BIG pc "silver" beads to go on a pc "turquoise" necklace....and they are every bit as convincing as the turquoise. Really rich looking! I just formed the bead, carved, use teeny rope overlays, teeny balls, etc from a darkish silver and hit the highlights with the Krylon silver leaf pen. Jan Clausen
Jean
Hornberger covered some of her round beads with real crochet (very
fine stitch & cording?)
http://www.polymerclaycentral.com/jeanhornberger2.html
(white)
http://www.polymerclaycentral.com/jeanhornberger4.html
Penny M's "bodies"
represented by one (or more ) colorful bead. . . with the head, limbs, or accessory
parts made from metal (could be done similarly all clay, with
the metal parts being faux metal, covered with metallic powder, etc.)... she has
a teapot also with the spout, lid and base made from metal (one round bead or
thick donut, oval bead, or a stack of beads, etc.)
http://www.pennymichelle.com/index.html
PöRRö's shiny flat areas on 2 surfaces of beads from baking between
two shiny tiles
http://members.surfeu.fi/porro/eninti.htm
see Elise Winters jewelry where "strips"
are raised to an art form!
http://www.elisewinters.com/work/work.html#
JAI's
flat beads made slightly dimensonal with tiny polymer paste "paintings"
of thinned clay ("impasto")
http://www.michelejanine.com/leoproducts.html
and http://www.michelejanine.com/leoprocess.html
...(first
outlines her design into raw clay clay) adds tiny bits of
clay for the base colors with a toothpick... then adds and
shapes more clay onto base clay... may add a bit of metallic powder
to parts... bakes ...acrylic gloss finish
for embedding... you can get a lovely effect of seed beads by rolling a thin snake of clay, chopping off tiny squares of it, giving each a quick roll with a finger, then using a blunt darning needle tool to pick them up one by one and poke them onto your soft clay surface. They stick better than glass beads and once coated with future you can get much the same (shiny) effect. Sounds like you're going for a huichol effect. Might do well to coat the clay with white glue or dip each bead in the glue as you imbed it. Helen F.
OK,
this is pretty old news to most of you who have tried etching (see Transfers/Etched,
but without the last step, of paint) with Gwen's method. But when I tried to develop
new ways to use that, I found a
way to make stamp-sheets
for imprinting my name on beads.
I made a photocopy page
full of my name. (No reverse printing this time, kids). I then made a polyclay
sheet from it by etching it the Gibson way. Then I baked it. Now all I
have to do is roll some of my beads on top of that tile, and voilá: my
name is on the beads.... As the letters are raised above ground level they
catch the light and show the writing. And if the light is not right, the writing
doesn't stand out too much. PoRRo?
This same technique can be used to make
small scale decorations on beads. I have made some tiles for veins, tiled-wall,
lace etc. Really easy way to make interesting beads! PoRRo?
Claude's
lesson on making a oval-shaped bead by rolling the sides
of a millefiori cane slice inward, then rolling the result into
a smooth oval shape
http://www.chez.com/creabijoux/interieur/ATELIER/cal5eme.htm
see also Mike B's cool "holographic"
beads in Mica >
Mike Buesseler
. .. also the
slices you cut off of the holographic beads are way to cool to throw
away…I roll them up, inside out, into even more beads. . .Mike B
simulated stone beads ... Susan F. has a lesson on making faux rhodochrosite or any stone with the "dragged lines" or combed paper method (see Sheets of Pattern > Dragged Lines)
"aquarium"
beads moved to
Misc. > Marbles (also
glass pebble cabochons, marbles)
....also see
similar beads created with epoxy resin in Other
Materials > Epoxy > Cells
clear,
round and flat glass marbles and pebbles can be "crackled"
to create some interesting effects, then used as onlays (info about doing that
is in Misc > Cracked Marbles)
(for decorative clay sheet sandwiched between 2 microscope slides, see Covering > Glass)
for indentions
made into the edges of swirled pattern bicone/lentil beads to create
flowers, scalloped shell shapes, etc., see
Beads > Rollers > Bicones > Forms/Shapes
...
see also Canes-Instr.> Indentions for other
ideas
African
trade beads (millefiori)
http://www.nfobase.com/html/beads_of_africa.htm
(see more in Canes-whatarethey)
..Debbie
J's (polymer clay?) African trade beads as curved tube beads, threaded
end to end
Kiffa beads, from Mauritania (actually colored glass
pastes painted onto a dried glass paste shape with a needle, then fired, but could
be duplicated with caning techniques)
http://www.nfobase.com/html/beads_of_africa.htm
(bottom third of page)
(for
cabochon shaped beads, see Molds/Existing
Molds)
(for cube
or squared beads, see above under Round Beads)
(for rolling stamp
beads --cylindrical seals-- see Stamping >
Rolling Stamps)
"FOOTBALL"
("sharp edged")
shaped beads, created by shaving
(for regular,
oval, football shapes, see above in "Round" beads;
for pointed
football shapes made in a bead roller, see "Bead Rollers" below)
In addition to the rounded football shapes which are rolled in the hands or in a roller, football-shaped beads can also be cut with four distinct sides (and corner edges). These were introduced by Mike Buesseler, and revealed a pattern when cut. (see also Mica/Mike Buesseler)
*Desiree's Butterfly Wing
beads (lessons; see how the cane and bead are made--many bullseye canes
rolled up on Skinner blend sheet)
http://desiredcreations.com/howTo_CAButterflyBead.htm
http://www.desiredcreations.com/gallery5beads.htm
http://www.desiredcreations.com/images/galleryFivePics/footballBeads1.jpg
(with mica clays)
~I printed
your directions and made a cane and then a bead. Mine doesn't look like yours.
Mine looks more like chevron stripes. If I slice the cane instead of
cutting a football shape, I get a leopard design. It also makes interesting
Natasha beads. Genevieve C.
... It's funny. I think that sometimes
the scraps turn out to make something better than the beads. ;-) . . .
(that black and white one) is lentil shaped, but it's solid, not hollow. It's
actually the scraps left over from cutting the the football beads. Desiree
http://desiredcreations.com/gallery2necklaces.htm
(Mike's football bead shape) ...It
helps tremendously if you cool that cane, making it as stiff as you
can and make sure your blade is fresh (very sharp). And yes,
lots of practice does help. It took me a while to get confident doing that
cut.
....Perhaps a little easier method to cut the football shapes,
though I've not tried it, would be to do flat angled cuts instead of curving
the blade.... Then if you want the curved shape, after baking put the curvature
in by using coarse grits of sandpaper to round off the edges. Desiree
lesson
on making this same football shape from a flat bicone shape
... roll a flat bicone (see below in Rollers > Swirled Bicones), then
roll back and forth over the point with a flat piece of glass or acrylic... this
will create different patterns than the cutting-away method above though
http://www.poly-tools.com/tutorials/lentil.htm
Desiree's
Sparkling Copper Moss Agate beads lesson
http://desiredcreations.com/howTo_CAMossAgateBead.htm
Linda Geer's football cut on Skinner Blend with mica clay
http://www.nwpcg.org/photopages/may2000.shtml
Dawn N's various canes (flower, checkerboard, Skinner, chrysanthemum,
etc.) cut into butterfly bead shapes
http://sites.netscape.net/dn537/butterflybeads.JPG
(gone?)
CHEVRON (& also peeled candle) beads
These are dimensional chevron patterns (all around a bead), not the flat chevron patterns covered in Canes-Instr. > Layered)
chevron
bead examples (these are made from canes of glass --opaque or clear-- but
polymer versions look the same)
http://en.wikipedia.org/wiki/Chevron_bead
http://www.heronglass.com/beads.htm
Chevron
beads are relatively easy, except for the fiddly bits.
(lesson) ...Start
with a star cane (a log of solid color, surrounded by many triangular logs
of the same color alternated with triangles of a background color
in
several colours
.... reduce it to the size you want, then chop it into
bead lengths.
...Now comes the fiddly bit. Get your cutting blade out, and
starting about one-quarter along the length of the bead, slice off triangular
pieces. The slices should be thin at the one-quarter mark, thick at the end,
and should lie over the points of the star. ...You will need to pare off
both ends of the bead.
...To
smooth off the cut edges, carefully roll the bead between your palms.... Then
put a hole in it.
.... I have had good results baking these
at this point (having pierced them) and then sharpening the ends of the beads
with a pencil sharpener - then sanding and polishing. This avoids distorting
the beads when soft. Sue
If you are truly a chevron bead fan, you
should visit the web site of the Picard African Trade Bead Museum (in Carmel
CA). They sell beads and books on beads, including one dedicated to Chevron Beads.
They're web site addy is: http://www.picardbeads.com/
Desiree
...http://www.picardbeads.com/e_archive/archive1.html
... there are four other books in the series of Beads from the West
African Trade. Ruth
(for faux chevron surface effects created by dragging across colored layers of clay, see Canes-Instr > Striped & Stacks)
...I
wonder if any has tried to make beads like some candles are made...I am thinking
about the candles that are cut, and release several layers of colours, and formed
like leaves?. . . I found this site which shows it and I'm trying it with Skinner
Blend canes: http://candleandsoap.miningco.com/bl4easy2.htm
Christel
..."peeled" candle beads or sculptures (cuts
made down into candles which are basically tall multi-wrapped "bullseye"
canes --first cuts are at the bottom of the candle and move upward; each cut
is peeled outward and possibly rolled inward or outward at the ends; a regular
blade can be used, or a bent or pointed one --see Cutters-Blades
> Bending--or another rounded cutter like a linoleum blade might
make differently-shaped cuts)
...someone did an article in Jewelry Crafts
a couple of years ago of this very thing. Not sure of which issue it was. Helen
Pope
...The problems I had were, firstly cutting neat and even incisions
but I have never been one for patience with that kind of thing. Also, when trying
to bend the cut pieces back they tended to crack (possibly stiff or old clay,
maybe would work better with Flexiclay - thinking aloud here)... Emma
...would
it be good to refrigerate the clay shape (tall triangle or whatever) before cutting...
but warm, or at least thin/warm the tip, with fingers before attempting to make
the rolls? DB
SYMMETRICAL-pattern "NATASHA" & FLAT beads
Beads with symmetrical patterning can be created in various ways
from scrap clay logs/blocks (in addition to the more usual symmetrical
patterns that can result from cutting canes into lengths and rejoining them side
by side, which can be placed on bead cores, etc..... these are made differently):
...1 symmetry, flat bead ....cut 2
thick slices from a rectangular or square log of discrete scraps
of various colors, then place them together in any of their 4 matching orientations,
to create flat beads with one symmetrical pattern (then press the seam together
well)
..........each set of 2 slices will yield a slightly different
symmetrical pattern as the scrap log is sliced farther and farther down, but they
will be in the same color family (unless separate logs or hunks of discrete scraps
were added to create the log in the first place)
...4 symmetries,
rectangular log bead ...cut in half (the long way)
a rectangular log or block of many colors, then cut each of those halves
in half before rejoining them to make a "Natasha bead"--
which has four instances of symmetry (one on each
side)
.........(could do this for a short length of cane too)
....could
also wrap a clay core with a sheet of symmetrical pattern created
in one of the two ways above
(ordinary
canes and cane slices can be considered
symmetrical sometimes too on beads, but the ones below are limited to a "slicing
apart" method to create the symmetry)
Also
the patterns created themselves can look very different... patterns
could be:
...simple, or more complex, or very complex
and "busy"
...any colors (usually a minimum of 3)
......and
the colors can be sharply contrasting or more similar, could be
bright colors or toned down, and may even include metallic
colors (or be all metallic colors) or translucent clays, etc.
..."ink
blots" (with areas that look like real things)
four-symmetry (Natasha beads)
(see my lesson
in next section)
Diana's lesson on making 4-sided a Natasha bead
...but, she cuts each of the first halves
separately
http://www.webhaven.com/crick/natasha1/index.htm
Nora
Jean's mini-lesson on first compressing her chopped colors (one
bead's worth) into a fat square to make it easier to cut... then creating
various basic bead shapes from the Natashas when finished, skewering , then
pulling to make some beads longer ....(using "chopped trims")
http://www.norajean.com/Biz-Archive/Chop/Natasha/Compress.htm
Nora Jean's lesson on chopping an orchid cane, pressing into a squared
log ... cutting log in half lengthwise then opening joining, cutting those
two in half lengthwise then opening & joining... then lays an eye pin
down the middle of one joined pair and tops with the second jointed pair...smoothes
all seams
http://www.norajean.com/New_Projects/2004-FlowersLeaves/Demo-04-10-04-OrchidCane-MiniBeads.htm
Leigh's
simple-Natasha lesson ... not the usual
technique
http://www.polymerclaycentral.com/poleigh/natasha.html
Natasha
beads made into tiny figures
http://www.polymerclaycentral.com/pcc/swapnatasha97.html
NoraJean's
many Natasha beads, using very finely chopped clay
colors (click on
all photos after
"Natasha Logs Introduction")
http://www.norajean.com/Biz-Archive/Chop/Natasha/Index.htm
Nora
Jean's using chopped canes to create Natasha beads
http://albums.photo.epson.com/j/AlbumIndex?u=1751108&a=30452389&sp=1&showall=true
(last 10 photos)
Nina's
various Natasha beads
http://www.picturetrail.com/gallery/view?p=999&gid=5377855&uid=132892
(--click on Clay Beads photo)
Nina's Natasha
beads with leaf cane slices, onlaid over top ends of beads
(same
link as just above, but click on Beads with
Leaves photo)
mokume gane stack (with Genesis and Lumiere paints and metallic
leaf), made into Natasha beads, then rolled (?)
http://www.polymerclayexpress.com/jan2001.html
(enlarge photo middle of the page... blue-green &
white beads)
ACK!
. . . most of the great 4-sided Natasha examples
were at Photopoint, and now gone!
(Kari's
dramatic dark to light patterns in dark beads --wraps or Skinner
blends in the scraps?)
(Kari's mostly translucent Natashas)
(Byrd's framed and end-capped Natashas)
(Cathy's "creature) ......(Lisa's
demons)
(Julie's dancing figure Natashas & more)
(Irish Red's tiny figures)
(Byrd's Natasha "face" heart)
(Flo's Natasha pendants)
(recognizing pictures
in Natasha results, like ink blots)
Natasha bead LESSON
--Pick
out at least 3 clay colors (or many more) of your choice
(the more contrast between colors, the stronger the patterning will show
up)... lay on cutting surface
--Chop
clay into many small pieces with the edge of a blade (I may also use misc. scraps
from the work surface for this too)
--Roll into a ball, then into
a fat log...
--Twist the log to create stripes (the
tighter the twist, the smaller and more intricate the pattern will be).
-----(if
one color begins to stick out more than others and overlaps other colors,
roll the log smooth, then twist again; repeat if necessary... this just means
that color is very soft)
--Using your fingers and/or a brayer, square
this log (to the height you want the bead to be, and at least as
long as you want the bead to be).
--Cut lengthwise through the
rectangular log (almost to the bottom**)
----Open this cut like a book ( you now have 1 symmetrical
pattern).
--Cut each of the "pages" of the book in half lengthwise
also (almost to the bottom).
--Fold each of these quarters
back, so that you now have a new rectangular log, but it's now inside-out
and shows 4 symmetrical patterns (one on each side).
----These last
two quarters are the hardest to realign, and some people like to put a small
rope of scrap clay in the middle of the "bead" before turning these last
two back to help.
--Smooth the seam by gently dragging your finger
along it from top to bottom, and bottom to top... cornstarch or talc on finger
may help
--Cut the ends off of the bead to even them up, or even
up the rounded ends the best you can.
(--you can put a "cap" on each
end of the bead to hide any imperfection, or to create an elegant finish)
(**some people cut all the way through on each step, and then reassemble, but that results in 4 seams that'll need to be smoothed... with this method, only the final seam needs to be smoothed.)
Another
thing I do is to put the 4 quarters together around a toothpick or skewer
...this
gives a firm surface underneath for when you're smoothing out the seams,
and also allows you to bake right on the skewer. Beth Curran
After
creating the patterned bead, you can change its shape by gently stretching,
compressing or shaping, but don't twist.
....To make a sphere from
the Natasha log, I pinching the ends together, then roll
the whole thing in my hands
...To make a sphere with tapered ends,
the best way I have found to do this without losing the mirror image
at each end is to pinch and stretch the 4 corners of each end of
the bead until the corners meet ...then I roll it in my hands without
touching the ends to round the bead leaving the ends tapered
other options for Natashas
stacks of color can also be used at the
beginning, rather than chopped bits
(see also Sheets
of Pattern > Damascus Ladder for similar technique)
you
can also just twist a number of colors together in a log shape,
then cut the log apart lengthwise
..... you'll get a kind of tight curved
repeating pattern which is quite cool
.... the two halves can be rejoined
lengthwise then used somewhere, or each half can get flattened on its own and
used
.....(I did this twisted log once with black, brown, and yellow clays
and ended up with a really fantastic leopardy looking pattern)
Amy W's stacked
beads use this technique but she rolls a stack of layers into a ball
then a log then a tapered log, then also coils one of final halves around
into like a snail (beginning with the tapered end) so that the pattern shows up
on the outside rim of the resulting fat disk (bead)
http://www.ovenfriedbeads.com/stackertutorial.htm
If
you just twist ropes of different colors of clay together, you'll get a
different pattern.
Try
folding or otherwise distorting the cane before making final cuts,
or don't twist it.
.... or use a "folded cane" (made
from a long thin strip of stacked colors), then maybe twist or distort it too
(Canes >Folded)
To
make a finer (smaller) design, (the chopped bits or
logs or rods or stack or) whatever you're using, can be flattened in the
pasta machine
...then stack those sheets, and either trim to square
and/or twist, then proceed as usual to do the Natasha thing
I've made variations by incising the side of the block and inserting slices of contrasting but complementary colors. Marcella
Emma's
indented Natasha beads ("feather")....look like lengthwise waveform
patterns or like spiked stripes
(she indents
a squared bullseye cane about one-third of the way through on one side, then indents
one of the unindented sides between the previous indentions... then cuts, rotates,
and reassembles like a regular Natasha bead
http://www.pcpolyzine.com/november2001/feather.html
Skinner
blend logs and plugs make good additions to these, either roughly
chopped, or left whole
...I
used a Skinner blend jelly roll as the core of my block (before
cutting it open).
If you are have
leftover bits of foil and translucent, you can use them in Natasha
beads -- the foil and translucent work well to give them depth and variety (or
just mush the bits up and make spacer beads)
.....Dawn’s
look-like-mokume gane natasha beads, done with tinted translucents
(gone)
Use
a wavy blade to cut Natasha beads for a different effect.
....Think
about Natasha beads --just cutting through in different directions
can have different, and VERY COOL results.
If you think you have made too big a bead, you can always stretch that bead, then cut it in two or more lengths to make smaller beads (though the design will not be as compact).
If
you're doing larger beads, it helps to stand the bead on end and slice
vertically instead of horizontally while lying down.
....If you do
slice horizontally, freezing the bead before cutting can give a sharper
cut. Beth
The symmetrical
patterns can also be cut off of any side of a raw Natasha bead (on
two or more sides) then used somewhere else.
... could also stretch
the pattern from this side slice in a pasta machine (one direction or both),
and/or back with another sheet of clay to make it thicker if nec.
Pinchy's
lesson on making a bug body with a Natasha "bead"
which is pressed around a blob of scrap clay to form a fat bug shape
...for
legs and feet, bits of clay are then added to the end of each of 4 wires
which are inserted into the body with liquid clay (could use short wire pieces
and superglue rather than LS), or telephone wire. . . (could use less-chopped
up clay for Natasha for a larger pattern too)
http://www.geocities.com/pinchyspolymerplace/natashabug.htm
see Pens for using a large Natasha block to cover a pen
I used Desiree's Butterfly Wing bead (see "Football" below) and made a cane and then a bead.... It makes interesting Natasha beads (if sliced). Genevieve C.
(just) one symmetry (flat
beads)
lesson
(this
is also one of my favorite relaxing things to do after a project):
....chop
all the leftover scraps, and mix them together.....roll smooth, then form
into a square log
....then I cut the whole log into same-thickness
slices, 2 at a time
....I put each two contiguous slices
together to audition their four possible combinations (only two of the
combos will result in square shapes though) ... then join them when I decide
on the best one.
...(then I do all the other pairs the same way)
While
none of the two two pairs is alike, in a way they're better because the color
schemes are all related and they can be used together in some way.
...If you cut the slices
thick enough, the joined slices can have a hole drilled all the way through
the middle and be strung as minor beads or just separated by spacers, etc....
or you can put two of them back to back--with the good sides facing out--with
an eye pin left down the middle. or removed to create a hole for stringing.)
...Sometimes
I also can pick out particular combos that look like something real
to me (a house in the woods, a wild face, etc.), and place them on another
piece of clay as part of a pendant, etc.
Mirror images are major fun!! Diane
B.
As listed above under
Natasha beads, other things can be used as components besides chopped
colors alone:
.....stacks of color or stacks of pattern sheets,
twisted ropes, folded canes, translucent or metallic
clays, metallic leaf, or translucent clays with inclusions, etc.
.....indenting the final log, inserting other colors into the
log, using a wavy blade to made the cuts, cutting from different directions,
etc.
Jenny
P's symmetrical patterns, each cut into a shape, then surrounded by clay
rope frame for earrings or pendants
http://www.ruralaccess.net/users/jpatter/gallery/natasha.htm
pattern
made with opaque turquoise
clay
plus probably gold clay + gold glitter clay
http://www.rubarbdesertdesigns.com/mirroredturq_gold.jpg
Kim's
symmetrical patterns (from leftover canes)
http://www.beadyeyedbrat.com/caneseasteregg.html
(bottom of page)
cforiginals
arty hearts with onlays and other embellishments ... impressions,
mixed media gone?
Kathy
W's monochromatic tile patterns where?
Elissa's
lesson on somewhat 3-D pendant hearts (+ many examples)
...she
forms the ball of chopped colors into a 3-D teardrop shape, then
flattens it somewhat
...then cuts the flattened teadrop shape in half,
and opens it like a book (...then rounds off the sharp edges)
http://www.pcpolyzine.com/february2001/eheart.html
(see much more just below in Elissahearts)
Jan
make a symmetrical heart a slightly different way
...
she cuts a twisted log of colors lengthwise on the diagonal
... rolls one half into a snail shape
... then stands that snail shape
up on its flattest part, and cuts it in half (from snail's back to tummy)
...
open like a book and these two pieces will form a heart shape
(gone)
Muriel's
simpler, flatter 3-D hearts
http://gallery.gundo.com/gallery/album59/Muriel_hearts_1
(or http://www.polymerclaycentral.com/masterindex.html
ClayPen photos)
Symmetrical slices could also be used to make leaves (which are symmetrical on both sides of a stem --see details in Canes-Inst > Leaves)
So
the face would have symmetry, the head was a flattened large
oval "Natasha bead"
.... I used jelly roll cane slices for eyes, and made "hair"
out of coiled telephone wire
I
just love it when I make a mistake and it turns into something else that really
works!
...I rolled a thick blue snake with a thin orange one,
and when I went to twist it , I ended up mostly covering the blue with
the orange. Rats!
..... so I cut that into quarters, pressed them together
(and made a natasha bead out of it
..... that made a double row of
teardrop shaped blue marks down the length of the bead. But it just didn't
have that zing.
...So I put it on a skewer and twisted it.
A ha! ...now looks like a twisted bead with a leaf pattern going around it.
Jody B.
Other uses for Natasha bits:
....use
as handles on boxes, or medallions on their sides... frame them,
or place onto a larger background which will act as a frame
To
get repeating rows of symmetical patterns in
a sheet, look for lessons in Sheets
of Pattern > Damascus Ladder and Damascus Ladder Reduced
(crushed helix)
one example http://www.angelfire.com/ct3/lujs/demo-helix.html
. . . The technique in the
plastic arts of using symmetry to achieve appealing or esthetically useful
effects is an old one; the ancient Egyptians and Romans used it (Roche N, The
New Clay, Rockville, Maryland, Flower Valley Press, 1991, p.5).
...With
polymer clay, I called a method of slicing a ball of mixed colors of clay in half
and using the cut edges to form a symmetrical design the "Rorshach Technique,"
after the psychological test [Edwards D, The Rorshach technique, Polyinformer
1992;2(3):7-8]. Jamey Allen (personal communication, 1992) carried
this further, forming canes that were sliced across their axes and reassembled
so that slices produced symmetric designs of considerable complexity; he called
these "geometric canes," if I recall.
......Recently Natasha Flechsig
described a Rorshach variation that exploits another orthogonal plane;
she called this "The Magic Bead" [Flechsig N, The magic bead, Polyinformer 1995;5(3):19],
although it is commonly discussed and described on the Internet as the "Natasha
bead." (Dave Edwards)
Elissahearts (somewhat 3-D heart-shapes with symmetrical patterning)
Elissa's
lesson making on making flat-backed, symmetrical hearts in ("Elissahearts")
Polyzine, cutting a somewhat flattened teardrop clay shape in half, then
finalizing with a mold
http://www.pcpolyzine.com/february2001/eheart.html
--lesson:
. . . . . Most polyclayers are familiar with the Natasha bead technique.
Well, my hearts are my variation of her process, in that mirror images
are produced in the clay by slicing patterned clay open, and then pressing
the two halves together, side by side.
--I start by making many canes
of patterned clay in the usual way (or she uses scraps --see Scraps).
--I then cut small chunks (not slices) from several of these, and
placing them strategically (light patterns next to dark, for example,)
--I then roll the pieces together into a small
ball..... I then shape this ball into a half-heart (a teardrop
shape will do almost as well.)
--Then I lay the shape on its flat edge and
carefully slice the clay evenly down the middle.
--Open
along the cut, and press the pieces together (with a talc-ed finger), side by
side, making sure the two halves are aligned.
The effect can be either stunning
or disappointing.
No problem if you are not happy with it...just close
the ball, roll it again, reshape it, and cut it again.
The pattern variations in one little ball of clay are endless! Twisting or
distorting the ball before shaping and cutting can give you different effects,
as well.
--I have several homemade shallow heart pushmolds.
I apply a thin coating of baby powder to a clean mold, then press the heart-shaped
piece of clay FACE-DOWN into the mold, and applying even pressure, gently coax
the clay into a uniform shape. While the clay is in the mold, I apply some powder
to my finger, and smooth the back of the heart. I have found a simple way to remove
the heart from the mold without distorting it -lung power! A quick puff directed
right at where the clay meets the edge of the mold usually will cause the clay
to release (assuming I have used enough powder.)
-- After curing the hearts
in the usual way - 25 minutes in a 265- degree oven - the real work begins- the
sanding, buffing, and glazing. I have tried many finishes, and have discovered
the absolute best finish for my projects to be Varathane Diamond Wood Finish...
(she finishes the backs by sanding smooth and glasssy, with a leaf-back bail)
...My small hearts are usually about 1 1/4 wide. Average is 1 1/2 inches. A large
one is about 1 3/4 inches. A very large heart is about 2 inches wide.
Pins: The larger pins
are smooth and slightly concave on the back, to lighten the weight, and
hold the pin closer to the fabric. I sometimes make an impression of the
pin back in the clay before curing. That way, when I glue it, there is a snug
holding groove, and the pin back is less likely to fall off. I don't bother with
applying a thin slab of solid-color clay to the back, like some do.
Pendants,
the shorter the cord or chain, then the smaller the pendant should be. One of
my average size pendants looks right on a 24-inch cord, and a large one looks
best on a 30-inch cord. Elissa
(see more below-above? in "Covering....Other Shapes...Elissa)
(non-hollow)
PILLOW beads --square
.......see.
hollow .square pillow beads just below......
Mia's
lesson on making pillow beads using a scrap ball of
clay as a core
...she
sandwiches
the ball (she uses a fairly large ball) between
two thick cane slices, then gently presses the sides of the
top slice to the sides of the bottom slice around the ball, and drills a hole
through the bead...she
suggests rolling a knitting needle over the joins very gently to close them
....(using
this large a ball creates corners that are more projecting than if using
a smaller ball)
http://clayfulminglesgallery.homestead.com/pillowbeadlesson.html
...Barbara's similar lesson on making
flatter and more rounded squarish pillow beads over a core of
scrap clay that's been pillow shaped (she doesn't have the extending corners
like Mia)... she also trims along each joined edge of pressed together
cane slices to make cleaner sides
http://www.rubarbdesertdesigns.com/pillowbeadtute.html
I
made some pillow beads a long time ago and it was by accident... they look like
small puffy square pillows.
...I was rolling the cube bead on
one side, gently --like when you roll a ball of clay into a log.
...As
the edges are a bit smooth, i turned the bead to it's other side (quarter
turn?) and started rolling it gently.
...I repeated
this process over and over, turning it every quarter until i created a
puffy looking square bead with four points or corners, and smooth
edges. Do try this experiment. Tanya
Instead of cane slices, squares of any type of patterned clay sheets can be used (see Sheets of Pattern), which are cut out into small squares (or other shapes) with cutters, etc
The
edges can be formed and smoothed so that the edges of the slice won't
show
...or a rope frame can be used to hide the join as with
some lentil beads and hollow pillow beads
...to create cutouts
which already have beveled edges so they'll fit together better when the
sides are joined, place a sheet of plastic wrap over the clay sheet before
pressing down with the cutter (the plastic wrap won't be cut by the cookie cutter)
....this
will bevel the edges and create a puffy version of whatever cutter
shape you used)... you can then use two of these cutouts to cover a scrap
core
....the heavier the plastic, the smoother and rounder the edges. Sally
Sagit Levi's very
colorful pillow beads, often with cane slices on background-patternerned
clay
http://www.flickr.com/photos/sigaliot/sets/72157600034592784
Mia's flower-covered pillow beads
http://www.clayfulmingles.com/beads3.html
(...click on other pages too)
pcbysusan's
various pillow beads, with single cane slice
http://www.flickr.com/photos/pcbysusan/237130010/in/set-72157594504558718
(look around for more)
tooaquarius' pillow
beads with translucent + opaque cane slices
http://flickr.com/photos/tooaquarius/2586100818
Heather R's pillow beads with twisted-ropes frames, and also squashed
balls for bead "caps"
http://www.polymerclay.co.nz/galleries/heather_richmond.html
(see also hollow pillow beads, below, for more
pattern possibilities)
HOLLOW
beads -- square Pillow + Lentil + Round + Non-Round
(
for larger hollow forms, see
Vessels )
Basic Info for all shapes
Some
reasons for making beads hollow besides just the cool shapes
that result from these methods:
...they
are also lightweight to wear
...rice
or other things can be added inside to make them rattle
Last week, I was making puff beads (lentils?) (ala Dotty McMillan) and the edges didn't fit together evenly (do they ever?) ....a touch with the Dremel evened out the edges. Kim K.
To create pre-beveled edges for
the halves, cut through the pattern sheet with your cutter over a sheet of plastic
wrap ....when you remove the wrap from the clay, the shape has been cut
with smoother, more rounded & beveled edges
--The next step is
to bake the shape over a rounded (form). You can make a (form)
from scrap clay (if you dust it with powder, the clay won't stick)
--Finally, glue the two halves of the bead together to make your lentil
bead. Kay
any cane slices or pattern sheets could be used (to cover clay armatures underneath) for making these beads, of course
These techniques for making the baked halves (round or any shape) could also be used as bead "caps" which would fit over a bead or other clay.
Earrings in the fancy galleries these days seem to have
ear wires that are integral to the earring (rather than a
loop and hook effect)... one way to do that would be to use oversize
kidney wire ear findings... straighten out the safety hook part (kinda twist
it to the side and straighten it, and bend it around til you are happy)
...then
put the ear wire between the two halves of a lentil bead before you put
it together (may have to put some clay inside and bake the wire into that)...
Emma
(see above in Mobius, for Marie's pillow-shaped mobius beads)
(for "swirled lentils" --which are non-hollow lentil beads, each with a spiral of patterned clay-- see below in Swirled Bicones)
Desiree's beatiful lentil bead pendants
(click on each photo to see side-views, and more pendants)
http://www.desiredcreations.com/gallery2necklaces.htm
Gwen Gibson's silk screened lentil beads
http://www.npcg.org/Activities/muse/images/gibson/Original%20Files/GIBSON4.JPG
Terry's
lesson on rattle pendants from lentil beads
http://www.polymerclayexpress.com/octo2001.html
Tonja's
rattle lentil beads, and rounded triangular lentil beads, with onlays,
gecko, etc.
http://www.tonjastreasures.com/gallery.html
(gone)
(for a way to create non-hollow lentil shape beads, see below in "Bead Rollers > Swirled Bicones ....although Valerie creates create hollow lentils by flattening some of her swirled bicones (then puts through the pasta machine), then uses the resulting swirl pattern sheet to )
There are various ways to create the structure of these hollow lentil-shaped beads:
baked dome-type shapes, joined
*Lynne Wardrop's lesson
on making lentil beads using a 25-watt lightbulb; she stresses
that the edges of the discs should not be smoothed
to a slope so they can be sanded
flat later and fit exactly...also creating the thinnest finished
edge;
...she also give's Dan Cormier's tip about warming
the clay (& removing fingerprints) before applying to bulb
by placing waxed paper over and rubbing on it with a finger (to prevent later
cracking)
...she bakes, sands edges flat with 400 grit sandpaper,
sands and buffs domes, then joins with a superglue (feels
that using liquid clay slips too much or caused the
bead to explode)
http://www.polymerclaycentral.com/cyclopedia/flyingsaucerbead.html
... she also says a cabochon shape results if only one half
is baked
Emi Fukushima's lesson on making a drapery tie-back
with a stamped lentil formed on a light bulb and antiqued
http://www.hgtv.com/hgtv/cr_clay/article/0,,HGTV_3236_2810521,00.html
...Denise in Austin's photos of mokume gane lentil discs formed on
small light bulb, and photos of the inside and outsides of
the formed halves
http://hobbystage.net/art/denise_in_austin/
(near middle)
...Cassy's texture-impressed mokume & ghost image
lentils
http://www.sdpcg.org/Sandy%20Camp%208/sc8jc34.jpg
...http://www.sdpcg.org/sc8album20.html
To sand the bottom parts of her lentil halves,
Kerstin "holds onto" each half with a piece of masking? tape
which is folded in half partway to form a handle, leaving the ends free
to attach to the top of the lentil half... then she rubs the lentil on
sandpaper which is sittting on a flat surface
http://www.kerstinsfimoseite.de/fimo/Anleitungen.html
(a problem I had) was that I was not super careful about making sure that the edges of the circle of clay I put over the christmas ornament or palette tray were even.... When they were done baking I had some buckles at the edge that sanding just couldn't eliminate. Libby
clay rope
inside join...
Nancy Banks demoed a large hollow bead (lentil-type) at the
South Bay Polymer Clay Guild where she created two (baked) hemispheres
of polymer from circle cutouts (she domed the disks a
bit by pressing with one set of fingers against stationary fingers
of the other hand --several trips around), then baking over a large wooden
bead.
...She laid an unbaked rope on top and inside
of one of the baked hemispheres as a gasket, then smushed
the other hemisphere tightly over it. The excess was scraped off,
or another rope was left around the outside.
...rattles made
with this method: tlc's lesson on making lentil-bead rattles ; similar
to Nancy's above, she lays a rope inside to seal, but adds beads or tiny chimes,
then surrounds with a rope of black over the join, looping along the way in two
places to create connectors for cording
http://www.polymerclayexpress.com/octo2001.html
clay rope around outside edges...
...I use an engineer's circle template
sheet (it's plastic, the holes go from tiny to fairly large), place it on
my sheet of clay, cut out desired size with a needle tool or exacto, place clay
disk on round christmas ornament and bake.
After baking, I
sometimes, but not always, trim the edge a bit with the exacto to
make it flat (not sure if that makes sense but don't know how else to describe
it), put a bit of TLS around the edge of two circles, roll a clay snake,
put it on the edge, place beads inside to rattle (or not), place the circles
together, roll it to smooth it a bit, trim the extra snake clay off, bake again....It's
not really as difficult as it sounds. Cathy
some tips (from
Gwen's workshop):
... use 5 minute epoxy for gluing
the baked halves together....apply carefully with a toothpick (not
too much or it drizzles out the sides!)...this gives a longer time
to get the halves to fit together well.
...we also discovered wet sandpaper
and metal dry wall sanding sheets worked well
....consider buffing
the edges.
....(Gwen makes a base bead first?)...If the base
bead is black, the edge adds a nice detail. ..or add some Rub 'n Buff
along the edge to hide the base clay color....if you've used metallic paints before,
it ties in well.
....Seal the edges w/ Future.
....Drill the
holes at 10 and 2 o'clock so that the bead doesn't twist as it's worn.
I started drilling with a very narrow drill bit & worked on up to
the thickest needed.
... Using buna cord for stringing works well
but getting it threaded through the bead can be a
problem. I trimmed one end of the cord very thin (tapered), & managed to thread
it through a long, sturdy needle. After getting it through the bead I simply trimmed
the end & finished as usual.
If you have an opportunity to take a workshop
from Gwen, be sure to do it! She is an inspiring artist and excellent teacher.
Karen S. in Colorado
(will work with hollow lentils too?) ..Desiree's
lesson on drilling a lentil-shaped bead with a jig and drill
press
http://desiredcreations.com/Misc_PCLentilDrillJig.htm
rounded armatures-form, cutters, & tips
for hollow lentils (or spheres)
To shape the halves of a lentil (or round) bead, some armature forms will use the outside (convex) of a rounded object (like a lightbulb), some will use the inside (concave) of a rounded form (like a polymer mold), and some can use either the inside or the outside (....btw, using the inside can result in a shiny finish if the form is metal or glass)
for LENTIL beads .. . . One consideration with lentil beads is their thickness or height compared to their diameter. . . .through trial and error you'll discover the optimal diameter versus height ratio. . . . let's say you have a 3" diameter circle, domed over a standard light bulb. When you put the two halves together, you could end up with a lentil that's around 2+ inches thick! If you shape that same diameter over a large glass bowl, you'd have a lentil with a much shallower, gentle curvature. . . .however, structurally a wide low-domed lentil is more prone to collapsing unless the sheet that you cut the round is much thicker or you employ another way to reinforce a gentle curvature after putting the halves together. Desiree
I used light bulbs for the form. I haven't tried it with transfers
, yet, but I did try it with several kinds of mokume gane, and I love the
results. I used different sizes of seed beads inside, but I want to find some
bells or chimes to put in these, too. Elizabeth
...the
larger round lightbulbs used in bathroom vanity light fixtures work
well, though originally I used any bulb I could steal from a household
lamp! Karen S.
...When I used light bulbs... I made a clay base
to hold the lightbulbs so they would stand during baking. Over a period of
time I collected quite a few bulbs, so I could bake several "halves" at one time.
:)
aluminium (beer or soda ) can . . . .the (bottom)
makes a wonderful mould for lentil beads... Tania
..(warning:) . . .
I didn't think about the product number that is stamped
on the bottom curve of the can!! Hehe there is now a long serial number looking
thing on top of my beautiful halves. I got to tell you it was a great transfer
too. Couldnt sand it off at all! Heather
...(before baking) the product number
comes off quite easily with some alcohol... Jenn
... Actually I like
the idea of using the other side of the bottom better! Then if there
was something strange going on in the cooking it would be on the inside of the
bead. Heather
paint mixing trays (aluminum, 10-well )...Jewelry
Crafts article shows how to use (the insides of the wells of) as
lentil bead forms.Tonja
...paint trays being used to make lentils at Sandy
Camp 8
http://sdpcg.org/Sandy%20Camp%208/sc8ap200.jpg
...I use both sides of the pallet (tray) depending on the look I want.
...I use the inside, the indent-concave, when I want a shiny surface
and the design on the clay is already well established. . . I'll
use the back, outdent-convex, when I need to work on the surface
design of the bead. Valerie
....Since I couldn't find the metal trays
around here, I took a chance and put a plastic rectangle 6-well tray in
the oven at 275 degrees for 15 minutes and it survived with only
a very tiny bit of warping.
--(mini lesson) I guess I should mention
that if you use a 1 - 1 1/4" round cutter, the piece will fit just right
into the wells of the tray.
--After 10 minutes I took the pieces out
of the tray and finished baking them on a tile.
--When cool you will
need to trim them to get the pieces to fit flat together.
--I plan
on just putting a thin band of clay to cover the gap between the 2 pieces
after I glue them together.
(...on the first try, I used cornstarch
as a release... as a second experiment I used an embossing pen on the bead,
sprinkled clear emb.powder with sparkles and melted it. Worked fantastic
!!!! Might have to try writing a word next time.) Tonja
I use a set of metal rounded measuring spoons for the shape. It works pretty well. Emily N.
Could use a plastic (or metal?) engineer's template (stencil)
of circles or ovals, etc., could also be used to make halves in a variety
of shapes
... lay small sheet of clay on one side of template over hole
of your choice, then push the clay up through the hole a bit from the underside
until it's domed the way you want... remove... then cut out shape on impressed
outline... (then make a second one just the same)
silicone
sheet molds ~(these can be baked with clay in
them, and are non-stick --orange-colored) ...each sheet is 7x12"
http://www.jbprince.com/subcatmfgprod.asp?0=276&1=279&2=-1&6=3
(look at all pages)
.... sheets have round and other
shapes like ovals, candy mold shapes, etc. . . ..... for
example, the sheets of round molds produce items from 1-1/2" dia. x 1/2"
deep, to 2-3/4" x 1-1/4"
.....The silicone can withstand temps up
to 500 degrees. One technique that I particularly like:
--I *lightly* brushed
the inside of (two of the round mold indentations) with Armorall
--applied a thin coat of Kato Liquid polyclay and baked. Let
cool.
--I applied a second coat, cooked, cool . . .
--and
then a third coat (don't bake this one yet). . . to this I apply
very thin transluscent cane slices to the unbaked liquid clay
--Gently
press the slices into the mold and bake again.
(--You can continue
adding liquid clay and/or slices as desired.)
-- Once you're satisfied
with the design, simply pop the two halves out of the mold and join the
two halves using more slices and liquid clay.. . . For this
final bake, you can actually bake the ball in the mold so it doesn't roll
around and to hold it steady while baking. Jan R.
I've used the little "cups" that my soft contact lenses are packaged in to mold clay --half lentils. lukabara
I searched the house and found something else that might
work, a bag of marbles ...they work perfectly for small lentils.
lesson: http://hobbystage.net/art/media.cgi?site=hava&folder=*&group=1&page=*&id=1058680638-004623
http://hobbystage.net/art/media.cgi?site=hava&folder=*&group=1&page=*&id=1058682133-004624
....as
long as you cut the circles the same size, no matter where on the marble you stick
'em, they'll always match up. And if you wear gloves while pressing the circles
on the marble, there's almost no surface sanding needed.. . . I usually smoosh
a pea-sized bit of scrap clay to the bottom of the marbles to keep them from
rolling around.... After they're baked and sanded, I place a few seed beads
in one half, place a few drops of superglue on the flat edge, and set the other
half on top.... After everything sets, I drill little holes with my pin vise
and jeweller's bits, and everything's done. Hava
...To keep them from rolling
around you could put them on polyfill while you bake them. Pamela
I've
used the Lazertran Silk (to transfer) on my "Teeny Beanie Beads" and it
does work just great. And aren't the texture sheets great for these? I've
used the 5-minute epoxy, but also the slower type of cyanoacrylate glue
and both work really well. . .
...I use Buna-N cord and since my lentil
beads are small, about 1 1/2" in diameter, I've not had any problem threading
it through both holes... the larger ones, like I have in my book
(Creative Ways with Polymer Clay), don't work well that way and do need a long
needle to get the cord through. Dotty in CA
......or use Nancy's tip
re threading with cording... use a small plastic straw
to run through the holes first (in the baked hollow bead)... then
run the your cording through the straw (the thread will now know
where to come out)
make your own polymer mold (and
use the inside), or make your own form (use the outside)... use a release
like ArmorAll while baking
...several years ago I started making them using
a mold, which works okay, (as outlined in my polymer clay book) but later
I also did them the other way (over forms), and I believe it is really less work
since you don't have to first make the mold. Either way will get you there. .
. . for shapes that are not round, like hearts, the molds
seem to work... Dotty
created
as two-parts:
Or you
could also make your own half sphere using the inside or
outside of something like these steel hemispheres (which are hollow on
the concave side)
......then you'd join two halves together as
with lentil beads above: http://www.jbprince.com/product.asp?0=276&1=280&3=1117
.....or
use non-steel spheres like marbles or large wooden beads
.....or you could
make or use something from a silicone mold like these: http://www.jbprince.com/subcatmfgprod.asp?0=276&1=279&2=-1&6=3
"hemisphere
molds" (stainless steel "molds-forms"). . . non-solid
...can use the inside or outside for shaping
http://www.jbprince.com/product.asp?0=276&1=280&3=1117
--smallest
to largest sizes, with more in-between
3 cm = 1-1/4" diam., 5/8" high,
(3/4 oz)
.............3-1/4" diam., 1-5/8" high ("single-serving")
10
cm = 4" diam., 2" high
20 cm = 8" diam., 4" high (70 oz) (good
for making bowls too)
....I've tried various items for making hollow beads
etc (paint trays, light bulbs, glass balls etc but these work best for me and
there's no doubt that your two halves are the exact same size). You can
apply clay either to the inside or outside of the molds so you're getting 2 sizes
for the price of one (because the walls of the hemispheres have some thickness)...I
bought 2 of each size I wanted so I could bake them at the same time. Jan
R.
one-part ("covering")
:
..You could create a hollow ball as one piece by just by covering
a ping pong ball with decorative clay --it will shrink while baking,
but will stay round long enough for the clay to harden (see this technique in
Covering
> Plastics > Other Plastic Items)
..or you could use something
which could be removed later (broken out or dissolved/melted, e.g.)
after baking
...... like wax, cornstarch, papier mache, or glass balls,
etc.... I've seen papier mache balls, and some Xmas glass balls are almost completely
round
... Ultralight polymer clay might be lightweight enough to leave
inside too
....but for lightweight but not nec. hollow
spheres, aluminum foil or paperclay could be formed into exact
spheres by using a mold ...or Katherine Dewey uses a nifty bowl-like
depression (which she makes from a thick slab of clay) to roll her alum. foil
ball around in, to create a lightweight ball-shaped armature (then she forms a
head around it).
pillow (hollow)
We
made square (and other shaped?) pillow beads at Arrowmont...(these
are hollow though, not solid as the "pillow beads above)
....... roll
the clay out really thin"
...... cut out two pieces
the same shape and start sticking them together right along
the edges leaving a small area open on one end or one corner
just as if you were stuffing a pillow. You will really have to play with it to
see what works for you.
.......then blow some air in the
pillow bead... seal the hole, and bake.
...One year at Shrinemont
we were also making them and used one of those little cocktail straws to
inflate it.
...It is a little tricky to get the
air in there and seal it off before the air leaked out. We just about collapsed
with laughter because we had all kinds of mishaps with them. Blow too hard and
you blow out one of the seams. Don't get the seams sealed well and the bead collapses
after you have sealed it. etc, etc. . Kat
...Barbara made one out of translucent
clay and overtamped it a bit, and it looked every bit like one of
those Chinese wontons. Kat
...I folded the fortune cookies and
baked them ...I wrote a fortune on ribbon (actually stamped it) and pushed it
in there and left a tab hanging out. I made a clear take-out box for them to go
in and stamped it with Chinese symbols. It looked neat and was a big hit... Darla
oval
smooth, river rocks work well too..but you have to use the same rock (top and bottom, two tops won't work?) for both halves to make sure the curve of the bead is the same. (unless you want it to be different) Jan R.
I saw wooden bird eggs which are cut in half at Michaels and immediately thought -mold!!!! Now I have a nice little mold for making oval cabochons!! The packs range in size from 1/2' to 1 1/2 inch tall, and I only paid .99 cents for the pack of 4!! Sharon
the disposable protective
caps on wide deodorant sticks (under the lid when you first buy) make great
domed ovals! caneguru
. . and they even have little handles on the back
(to use for cuttter?). Dawn
more complex shapes + misc.
Lisa
P's lesson for hollow, heart- and flower-shaped
pillow beads, but flat-backed, and with clay "frames"
http://www.amaco.com/project-pillow-bead-19.html
...press a clay pattern sheet onto a small cutter (face down, to create
beveled edges), then press center area of the clay gently to create a concave
shape, and remove excess clay while pressing cutter onto work surface
...
bake clay in cutter, and remove by depressing plunger once clay is thoroughly
cooled
....to create backing and holes, cut the same shape from raw
clay and lay two parallel pins (or just one) across it
..... then press the
baked dome shape on and into the raw clay shape, and press the extending raw "frame"
a bit more against domed shape... bake again
while squares or rectangles create ordinary box shapes when putting two together, using equilateral or isosceles triangles, or even pentagons/hexagons, can create hollow shapes
Johnny's large hollow bead... like
long "flat-sided" bicone or 2 long pyramidal shapes, joined at
bottoms (actually .. an octahedron or two joined tetrahedrons), with interesting
dotted surface... could be made by using two pyramid (4-sided) or 3-sided halves
joined as with lentils, or from scratch (baked or unbaked sides)
http://www.pcpolyzine.com/0306june/johnny09.jpg
see also single metal molds of different shapes (just above) for creating octahedrons, double cones (bicones), or timbales, etc.
folded-over
hollow shapes
...half-moon shaped, hollow bead, from one
large cutout disk of clay, created by folding over, crimping
edges, then blowing inside (these could also be made using two
separate shapes which are joined rather than folding one over)
http://www.pcpolyzine.com/may2001/pillow.html
...Carissa got her idea from Carl Hornsberger's
"Fortune Cookies" but made hers a bit differently .
....she feels that FimoClassic clay is best because it doesn't get soft
or sticky
lesson:
.....she uses 3-4" cutters,
and refrigerates the (FimoClassic) clay after cutting, or later if the
clay becomes warm
.... she puts a bit of cornstarch in the center
(only) of the disk to keep it from sticking;
.....folds over
loosely, tamps the edges together, then blows into the shape (not
too much) with either chapsticked lips or a coffee stirrer straw;
.....supports
shape while baking in pile of flour or cornstarch (or polyfill), etc; (no
sudden temp changes... bake starting from a cold oven 25 min 260F.; let cool in
oven)
...She
suggests practicing with circles first
....... then using long ovals
and long rectangles and diamonds to fold over for different shapes.
(Pier
Voulkos made some similar shapes, but hers were much larger
http://www.nfobase.com/html/five_artists.html
... see Vessels > Hollow)
slightly
puffed figures & shapes... vbffl had an idea which could be adapted
to polymer clay
......she had
made very thin figures with two sheets of paper bag which were sewn together near
the edge, they had wadded paper inside to puff them a bit (embellished)
...for
clay, these could instead be made with two sheets of brownish
clay (or white for a snowman, etc.), embellished, and then sandwiched with some
clay or even a bit of tissue or cornstarch peanut inside, etc.
.....the
edges could then be crimped or faux "stitched" with tracing wheel indentations
......or
the figures could be made puffy by blowing into them
...these could
be made small for pins or made larger for xmas ornaments... could
use cookie cutters or free-draw the shapes
various
shapes and sizes of small single, metal molds
make making hollow items a breeze!
...fairly inexpensive and the possibilties
are endless! Jan R.
http://www.jbprince.com/subcatmfgprod.asp?0=276&1=286&2=-1&6=3
(look around) ....(see also Molds
> Suppliers for many links to single candy molds)
....they
have pyramid 4-15cm, tartlette 50-100cm.....these are the
ones you can buy in cooking supply and Indian stores too, petit four molds,
timbale molds (like flower pot without lip)...1-1/8" high and larger.
Jan R.
Margaret R. made a pendant where the interior clay
armature (covered with crackled silver leaf) was incompletely
covered by two decorative clay sheets (so that a bit of the silver leaf sheet
showed under the crack)
http://www.mregan.com/portfolios/portfolio1/photo4.htm
Ai
Ping came up with a very clever construction technique for making her lightweight
(mostly hollow) boxlike pins (or pendants)... many of hers have wavy tops
(think ocean waves), flat bottoms, curving sides... and often windows in the top
in which pearls or other beads or wire coils wave around on wire stalks or roll
around on the surface when tilted... she also attaches or embeds pearls or other
beads to them with
....(see full lesson on these in Vessels
> Closed Construction Boxes)
http://www.glassattic.com/imagesOBJ_SEAS_MISC/vessels/Ai-Ping_boxes.htm
(photos)
http://www.pbase.com/stargazer/ai_ping_demo
(..........Ai-Ping also wires all her pearls and beads
into and onto her pieces ...some are also stable)
.....this
technique can also be used to create non-flat surfaces of all
the sides of a hollow form (no obvious bottoms) to create a bead or
abstract shape to use as an ornament, a handle on a vessel,
or just about anything...etc.
...Jeffrey Dever's "miniature
forms" ...long hollow forms with 4 wavy sides ...could
be beads or longer ones could be handles
(Ravensdale 2003 class)
http://www.nwpcg.org/ravensdale/catalog/dever.shtml
(gone)
http://www.functionart.com/AM/Artists/DeverJ/DeverJinventory.html
http://www.alphavillebooks.com/ppcg.htm
smaller
& larger forms in Dever class
http://www.nwpcg.org/ravensdale/images/images03/dever.jpg
http://www.nwpcg.org/ravensdale/images/images03/deverwork.jpg
http://www.nwpcg.org/ravensdale/images/images03/andreaindeverclasscropped.jpg
....Celie
uses hollow rectangular box forms as tiles in a segmented bracelet
(walls are set in slightly from the edges of the top and bottom)
http://www.celiefago.com/gallery_2003.htm#
see more info on Grant D's class for making partially closed or hollowed out spaces (to create beads) from folded over raw clay which has first been turned on an electric drill "lathe") in Carving > Turning on a Lathe
(for "swirled lentils"
--each with spiral of patterned clay-- see below in Swirled Bicones)
HOLE-Y-surface
beads & shapes
(using cornstarch pellets etc, or "lost
wax" method)
there's
much more on using cornstarch-based and other materials
things to make holey
or double-layered beads in Armatures-Temporary
cornstarch-based packing peanuts
Jody
B's "Archaic Filigree" beads (holey) ......I started with a baked
tube bead
....I wrapped the tube with a cornstarch peanut so I
could work over that --I'll save the rest for my article, but I bet you could
figure it out anyway! : ) Jody website gone)
Kellies
oblong "cage" bead (hollow) http://www.kelliesklay.homestead.com/beads.html
for
an bead or item inside your "hollow" bead
...
you could push a glass bead(s), crystals, natural stone, polymer
clay bead, or a tiny bell, etc. into the center of a biodegradable
(cornstarch) peanut
.......to make a larger bead, slightly moisten
your finger and rub it on one of the peanuts and it will then stick to the other
peanut (so you can surround the first peanut)
... you can cut up the peanuts
into slices or chunks to design the basic shape of your bead (which
could even be a pendant when you are through).
... once the enclosed bead is
covered with the peanuts, add your clay ...(since this is to be hollow,
I suggest a strong clay such as Premo, Fimo or Kato)
......this can
be in single strands, small cut outs of clay stuck to each other
all over the surface, or with a continuous sheet of clay.
....... be
sure to have 2 openings if it is to be a bead so it
can be strung they don't have to be directly opposite if you want the bead to
hang differently... for a pendant, you might consider having your extra hole some
place where it isn't noticeable)
....bake your clay at the recommended
time and temperature
...let cool ... then soak the baked bead
in a bowl of water a few minutes and then begin to shake out the remaining "goo"....inish
up with a bit of running water. ...dry your bead... and finish as desired.
..One
hint for hanging a hollow bead or pendant is to insert either
sterling or craft wire into the bead before adding the clay so that once you are
finished, the wire is in place to either attach to other beads with a loop or
to turn the wire into a bail for a pendant.
..Remember a bead doesn't have
to be round to be a bead. Think about other shapes like ovals, tubes, cubes,
hearts, stars, moons or any other shape you might want to create (Santa's face,
or a snowman, anyone?). Patty B.
Many
more possibilities
for materials which are removable, or dissolvable,
or melt-able, etc are discussed in
Armatures-Temporary
...see
also Eggs >
"Vinegar Eggs" for similar ideas and methods
holey
beads (made with lost wax) lesson http://www.desiredcreations.com/howTo_BeadInBead.htm
--Desiree's lesson on 3 beads-within-beads more solid than filigree,
with shapes cut out in solid cover clay
There's
the outermost bead, easily seen, then just inside is a pinkish bead and inside
that is a patterned bead. You won't seen any seams because there aren't any! And
each bead is free to roll around independently inside it's home.
A quick
explanation: 1. Dip the smallest bead in enough melted wax to build up a #1-2
thickness coat, Let cool. Smooth with fingers while the wax is still malleable.
2. Wrap the waxed bead with a #2 sheet of polymer clay. Cut out desired shaped
holes or openings. I used a leather circle punch. 3. Bake, making sure the bead
is suspended so the wax can melt and drip out. Let cool. Now you've got one bead
rolling about inside another bead. 4. OK, now you gotta dip the whole thing in
melted wax, making sure you end up with a #1-2 thickness coat. Repeat step #2
and #3. Then you'll have one bead inside of another inside of another. That was
my first lost wax project. I gotta try a few more of these so I will get better
at making obvious how many objects are trapped inside of other objects. ...Desiree
Well, I did leave out the part about the waxy mess.
You've got manage the wax bits, piecesand drips that tend to end up everywhere.
If you've ever made candles or done batik, then keep those wax handling lessons
in mind. If not, make sure you cover all surfaces with paper or something disposable
or something that wax will easily peel from. It's best to have a separate heat
source to warm the wax, instead of using your kitchen stove or microwave, especially
if you're going to work with children.
... As far as covering the bead
with clay, I used the quick and dirty egg covering technique. That's where you
cover the entire object with a big sheet of polymer clay, folding the sheet over,
kinda sealing the object inside. Then trim away the excess and smooth over the
seams. I found one site that shows a similar technique. http://www.yeoldouthouse.com/clayhints.html
(gone)
...If I didn't mention it, another tip is to make sure you suspend
the bead when baking. There's two reasons for this. One, to allow the
wax to melt away. Second, if you've punched away alot of the bead surface, it
won't be terribly strong while baking and could flatten an bit.
... Finally,
whatever you use to cut away openings with, cut with patience. As I mentioned,
I used one of those little circular leather punches. Do as much of the cutting
before baking, would be my suggestion. While you could use an X-acto post baking,
it's far easier and safer to cut when the clay is highly malleable. I would suggest
starting out with something small like a small plastic straw if you don't have
a punch tool. You can always get more complicated later on. Desiree
I
used the kind of wax you make candles with - the plain white granulated
kind. Melted it in my toaster oven (keeping an eye on it of course), then let
it cool enough to start to harden. ....Putting it on top of the oven kept it warm
enough to ball up the skin forming
...and dip into the still soft parts to
smooth and keep the cooling bits together. Put onto a skewer before it was totally
hard. The ends where the bead meets the skewer need to be fairly strong, since
the not-quite-baked-yet bead needs to be able to hold it's own weight plus the
weight of the melting wax, which droops off the skewer into the bottom of the
bead quite soon after going in the oven. Thus you need a closed spiral around
the ends of the bead, around the skewer.
...The clay filigree
can then be put from end to end, wiggling about and crossing over itself, and
passing over the spirals at the ends.
....Press it down gently where it
meets other pieces, so they bake together and make it strong.
....For peircing,
make a thin sheet of clay, put over the wax shape, smooth and remove excess, then
pierce with cutters. Let it all rest a bit to stiffen
... then bake as
normal, watching the whole time. The wax starts to melt
quite quickly, and drips out at the bottom.
....... use a tray
to catch the drips while it melts out of the beads, held above it on a rod.
...If the weight is too much for your filigree, it will tear or break at the
ends. Larger beads with more wax thus need thicker or closer filigree.
...After
the usual baking time, get the beads out, allow to cool, then run under
almost boiling water to remove the last of the wax which may be clinging
to the bead.
. . I did try modeling wax, which is softer so
you don't heat it to melt it first, but it didn't run out
of the beads properly, it sort of oozed rather than becoming liquid. ...There
may be other waxes available, but not easily found over here in England....I used
regular unscented, uncolored candle wax.
I melted it in a shallow tray in
the oven,Crafty Owl
I just got an idea
about that lost wax method ...First of all I would not bake the thing, but boil
it until the wax melted. Too much afraid of the fire. But that was not the idea.
....I thought about making "wiggle eyes" with it. First make the flat
black disc. Dip it (in)to wax. Cover with white to make round eye. Then just poke
one hole to the front of it. If the black is small enough compared to the white,
the result should be at least interesting. PöRRö
.....see also Boris'
interesting experiments using beeswax (reusable) to make hollow figurines
and shapes in Armatures-Temporary
> Wax.
.....see also: Canes-General
> Using Wax to Make Holes)
The names bezel and a cabochon setting are often
confused and used interchangeably. I think of a bezel as having a "frame"
element though.
"Bezel" are different than "cabochon
settings." A bezel is like a little tin can with a bottom and a cabochon
setting is the ring that goes around the edge (no bottom). obirtasil
...Fire
Mountain Gems http://www.firemountaingems.com/
_-search for bezel or cabochon setting
...Check out Rio Grande
http://www.riogrande.com for bezels. Rio
Grande has only sterling bezels, but I think they have base metal cabochon
settings. They have just about everything else in base metal. They don't have
an online catalog, but you can order a catalog and place orders on line. obirtasil
......bezels
are available in most jewelry supply stores. Brenda
cinch
mount cabochon setting
... an example is on this page: http://wire-sculpture.com/gfilledfind.htm
...I thought I saw some once that were adjustable but I can't find the link. Charli
...these
are metal frames, with attached top bails, which are not fully closed
at the top so that a stone can be cinched tightly into the frame
...Carol
Zilliacus used what appear to be cinch mounts for her Faux Cloisonne Pendant
in Dotty McMillan's book "Creative Ways With Polymer Clay" though she didn't
close the tiny open area in the ring. . . . she first made a beautiful and
interesting clay sheet from her version of a tight, multiple Skinner blend
which she textured in various ways (often using color changes as guides),
then cut out some shapes with tiny cutters and replaced with
contrasting-color (and textured) cut-outs from other areas of the sheet; she then
pressed the cinch mount onto the sheet and cut away the remaining sheet ...she
popped them out after baking and reinserted with several drops of superglue
...(some
of her pendant cutouts were not textured, but sanded and buffed)
metal-strip
frames (no back)
...Bead "Charms"..
(tall, empty) metal bezels from Elite Better Beads are a
metal frame-bezel but have no backs
....they have hole drilled
all the way through, from side to side so they can be strung as beads
....come
in both gold and silver color, and the package says Bead "Charms"
(Elite Better Beads)
....package has frame shapes of circles,
triangles, hearts, and another shape like a cloud. Claudia
...
I bought them months ago at either Michael's or JoAnn's in the bead
department.... they were with all the jewlery findings like spacers,
head pins, etc. Martha ...the manufacturer said they are only available in Michael's
and Hancock's stores in various parts of the country. Lisa
...they
weren't intended as bezels or rings for cabochons, but as beads
to be strung along with other components. Patty B.
....I
think you get 6 of them for 2.99 . . .lishstu442
Marty
Woosley's lesson on making "surround" beads with these metal
frames
...she used a doubled thickness of her crackled acrylic paint
clay sheet (so the bead would be reversible).
...She
then used the empty bezel like tiny cutter to both
cut and fill the frame.
...She drilled through the side
holes of the frame to make a hole through the clay as well before baking (she
says the larger heart shapes couldn't be drilled
this way)
http://www.pcpolyzine.com/november2001/gands.html
....Lisa
Pavelka also had a similar lesson on Carol Duvall where she used these
to make a small center "cabochon bead" for a necklace. She
used the empty frame "bezel" like tiny cutter on a small, thick,
patterned sheet of clay
http://www.hgtv.com/hgtv/crafting/article/0,,HGTV_3352_1812259,00.html
...Lisa's use is one I did a year ago to make
dangles for hair sticks. . Patty B
..make your own
"empty metal frames-bezels" from clay
... cut a strip
of raw clay... fold it over lengthwise (will be narrower --that creates
a rounded top for the frame you make... otherwise leave the top edge blunt
cut)
... cover the raw clay strip with metallic powder (use a real-metal
powder for the most convincing metal look)
...stand the strip up on its unfolded
side
........curve it into the shape you want freehand, then
heal the seam
........or shape it around a form of some kind (a small
metal cutter, or dowel for round bezel, or around something else you find or make
that's the right size and shape
....bake the clay with the form if you can....
remove after baking (and put clay inside)
(see more
on small frames like this and others in Frames-Mirrors
> Very Small Frames)
For making faux (flat) cabochons in a wire frame
by forcing the clay upward through a wire frame, see Desiree's lesson in
Pendants-Cording > Loops + Frame on
using a 4"length of brass wire to make a wrapping frame
(any shape ..e.g, teardrop, rectangular, octangonal,
etc.) around a clay pendant, which also has 1 loop at bottom (for
dangling other things, or just design), and 2 loops at top (soldered or
wire-wrapped together to hold wire frame closed) ... sort of like a bezel
(see also Beads > Bezels)
...first
she creates the bottom loop at midpoint of wire length by holding there with round
nose pliers while crossing each end to opposite side ... flattens both ends of
the wire slightly... wraps the wire around a hard form of some kind to create
frame's shape ...forms loop at each end of wire --flat side out (then solders
or wire-wraps the necks together)
...lays wire frame on her clay (2 layers
of #1 top color, and one layer of #3 middle color), and presses deeply into clay
almost to bottom of stack with 2 pliers... then cuts away excess clay around frame
and pokes out clay from loops
...places this on another sheet of clay (back
color, #1), and repeats removal of excess clay
...embellishes the top by pressing
indentions and adding another wire shape, etc.... bakes.... antiques... sands/buffs
http://www.desiredcreations.com/howTo_PJBrassFramePendant.htm
........could
do upside-down if wanted the single loop at top
…Linda
(Goff) made pendants in different shapes, then surrounded them with wrapped
wire and beads
(see more in Pendants >
Framed Pendants)
Suzanne I's clay bezel
frames (some are Buna) with interesting embellishments
http://www.picturetrail.com/gallery/view?p=999&gid=279317&uid=149408
Marie's
clay ropes acting as bezel-type frames and multi-wraps around
faux stones for pendants
http://www.marieidraghi.itciondoli.htm (where
now?)
(see more on clay ropes in Clay
Guns)
...for making faux (domed) cabachons by forcing clay up through a wire frame or bezel, see above under Round-Square-Cabochon
I
made a medallion for my little Dracula to wear one Halloween . .
. a sort-of star shape about 3" wide, with a large, faceted, red plastic
gem in the center which was surrounded by somewhat flattened, tiny
clay balls around it acting as a framing bezel (actually I glued in
the gem after baking since it would have melted in the heat); powdered the clay
areas gold. Diane B.
...there are Renaissance and ancient looking
jewelry items on the Jewelry page
Since the prints of your fabric are small, (covering the fabric with liquid
clay) would work also as an inset in a piece of jewelry as a medallion
so you could co-ordinate with specific clothing!!!!!! Think of the possibilities....
Lucille
(see Mixing Media and
Sculpting Body&Tools for more on using fabric)
MISC.
uses
(bead people, fan pulls, clip-ems, wine charms...
leftover beads, etc.)
When I'm finished with a big cane making spree, I like to sort my scraps into color ''families" ( all the different blues together, the reds and oranges). They will have little flecks of other colors stuck to them. I roll some beads from the unblended mixture, or I run it through the pasta roller until it blends into a beautiful, muted tone. They're some of the prettiest color beads I have. Lisa
jointed
wire and/or dangle type people, made from beads (body
parts are connected components) ---often for pins
...Cheryl's many danglies ...women with various components and dangles http://members.shaw.ca/gera/new_page_1.htm
...Funky
Figures bead people...http://www.art-e-zine.co.uk/funfigs.html
...Sue
S's beoples pins http://www.beoples.com/
........simple
lesson on making bead-type people (top to bottom) http://www.springfield.k12.il.us/schools/Iles/demosp/Mari.html
.........lesson on making bead people
(bottom to top) http://www.beadstudio.com/info.php?a=141
...
see more bead people, etc., in Sculpting-Body
> Jointed > Various More Jointed-Dangle
Sarajane’s head &
body girl beads (not jointed.. sl. flattened ovals, balls), and more
http://www.polyclay.com/beads.htm
fan pulls (..or
light pulls...or zipper pulls, etc)
...a large bead, or
maybe small rounded sculpt attached to end of ball chain or string,
etc., for overhead fan-- or also an overhead closet light or shed
light
Irene uses small beads and wire spiral underneath
http://www.good-night-irene.com/FanPullsLatest.html#21
Klew's
zipper pulls... long bead with seed bead danglies
http://klewexpressions.com/largeimages/zip500.jpg
http://www.emeraldearth.com/servlet/Categories?category=Ceiling+Fan+Pulls
...In
my experience, cracking often occurs when you have
clay that is at "different" levels of conditioning of softness/gushiness.If
I make a fan pull w/ older scrap clay, and cover it w/ gushier, fresh scraps,
I often see cracking.... I've learned to put soft scraps in the freezer
before using them w/ harder scraps. Laurel (for more on avoiding cracking in larger,
solid clay items, see Heads > Cracking)
... ball chain suppliers...stainless silver-colored (and perhaps brass)
ball chain can be purchased by the yard from hardware stores
......colored
ball chain is available from http://ballchain.com
... and Metalliferous --metalliferous.com
..... and PolymerClayExpress...
http://polymerclayexpress.com/findings.html
....if
there is already ball chain hanging from a fan, etc., in order to make
the bead separately, a short length of ball chain could be embedded in the
bead with the clasp thingie extending out of the clay, for baking... afterward
the clasp could be used to attach the bead to the hanging ball chain)
(fan
pulls are generally just large beads, so really any kind could be used
...photos of a variety
of wine charms: http://tinyurl.com/yus9q4
...the charms themselves could be anything at all that's small,
and made as as dangle (and any size, shape, colors, or look)
.....usually though,
wire rings of some kind are strung with small-medium beads (see
Beads)
......a dangle bead may be is strung on, with or without
other beads
.... or molded items (made from molds of anything or from
other charms (see Molds)... could be faux
metal (see Powders & Leaf)
around-the-stem
part:
...for wire rings, some people use the smallest diameter
of Memory Wire... and some use the small wire hoops
for making earrings
...other
removable materials could be used, or created, as well...
e.g., hair elastics or short chains with hook and clasps or magnetic
fastenings or ribbons/cords, etc.
(lesson) http://www.craftbits.com/viewProject.do?projectID=349
http://www.beverlys.com/projects/wine_charms.html
.....
or beads could be strung between hangers and shower, or other, curtains
http://www.beadbabe.com/index.asp?where=store&ItemID=19725
Bead
ROLLERS
(for round, oval & bicone shapes)
There
are several things that can be used to help create round, oval or bicone bead
shapes.
...A simple flat rigid surface (preferably clear) can be used
to create bicones.
...Or you can
purchase or make a roller from two long troughs between which
you roll your clay
(think of a PVC tube cut in half lengthwise)...... these kinds of
channel rollers will create very smooth and symmetrical shapes as well as repeatably
same-size/shape beads, but come only in certain set sizes if purchased... (90
degree troughs can be used to create bicones this way as well)
Bicones
can:
....be made as a single color of clay ... or be textured...
or have metallic leaf or powders applied, etc.
....have inclusions
in the clay, or translucent or mica clays, etc.
....be made to
have patterns:
......random patterns
.....controlled
patterns
.........there are at least two ways of rolling patterned clay
bicones... both methods will result in a pattern if the clay is not just
a single color, but the patterns will be different (...hard to do these in
one's hands, but possible?):
..........the first way is to create patterned
bicones with a flat "roller" (often a sheet or block of acrylic
or glass).... if the clay has more than one color, if the method is done right,
and if the clay is rolled in one circular direction (clockwise or counterclockwise)
under the sheet roler, the markings in the clay will "swirl" from the center
of the pointed "tip" outward in a spiral pattern like curved arms on a
windmill
........the second way is to create them with a "bead roller"
which has two separate parts shaped like troughs ... if the clay has stripes
or markings, and if the beads are rolled between the troughs in one straight
direction, repeatedly (not back and forth), the markings will begin to
bend around the bead, mostly at the widest part of the bicone
bicones made with a FLAT surface "roller"
short and tall bicones (basic technique)
lesson:
Use a square or round piece or block of glass or acrylic
... can be small (4" or so) or a larger sheet of glass or acrylic
like from a picture frame....the glass is heavier though and may
help in some ways?...in a pinch use a metal jar lid but you won't be able to see
what's happening as your roll (to check evenness, etc.)
....place a ball of
clay on your work surface and the glass centered over it
....begin moving
the entire piece of glass in an even, circular motio, and the bead will assume
a bicone shape
.......the wider your circles, the more elongated the bicone
will become... and the harder you press, the wider the bicone.
Cautions:
....it's difficult to get exactly symmetrical
beads with this method since the top half will often be slightly different
from the bottom half...with practice, they'll be fine enpough though! . . . (the
longer the bead, the harder this will be... flatter bicones are easier)... try
refrigerating clay first if you need it stiffer (bicone shapes can also be
made using a trough-type bicone roller --ee below)
....making holes
in raw bicones ... tricky to keep the shape while handling, and to get
holes exactly in end points; the longer the bead, the more difficult ...try
entering from both ends rather than making one pass through...refrigerate first,
or drill into baked bicones
(... this is a technique which originated with Tory Hughes in 1996 or so... Nancy Banks then demoed it at the 1998 Ravensdale Conference & an early Shrinemont Retreat, etc. --with a solid or clear flat "roller"?)
Desiree's
lesson on making bicones with a flat surface this way... she also
flattens the points of her bicones somewhat to create more of a lentil-bead
shape
http://desiredcreations.com/howTo_CALentilSwirl.htm
textured bicones
The bicone can actually be rolled on
top of a texture sheet which is taped to the work surface for creating
a bicone with texture on one side... if a similar or diff. texture sheet
is held or taped under the flat surface top "roller" as
well, both sides will be textured (powder or antique afterwards
if you want).
...these could make interesting buttons, toggles,
or handles for boxes or bowls, etc.
Duplications
of the exact pattern of a texture sheet (or large stamp?) can be made by
rolling the bicone just once over the texture ... I found
it helpful to make a plain bicone of the finished size and shape first,
then transfer to a texture sheet on the work surface to do the single rotation
with the glass/acrylic plate (pattern will become overlapped with more than
one rotation, at least for me)... doing this with the texture sheet on top
doesn't seem to give as even an effect
...the very center of the textured
bead surface may not have quite as deep or as much pattern as the
rest of the surface, but this can be sculpted a bit, or the area can have
a small onlay/inlay pressed placed there, etc.
These
can also be pressed on the sides with fingers, etc., to create interesting
rectangular or other shaped thicker-in-the-middle beads with texture,
etc
...might make good torsos for little people with protruding tummies
as well as beads
could also try a Skinner Blend or another color pattern rather than a plain bead to show under the texture
It's not totally impossible to roll a bead which has been completely covered with leaf (on one side) on a texture, but it's pretty slippery... seemed to work best when the texture was on the bottom (gives a pretty cool effect with the stretching and crackling)... it might work to use something just a tad sticky on the part which contacts the leaf to help grab it for the rotations
swirled bicones, swirled lentils
.....short, wide bicone, with a swirl of pattern(s) radiating from its center....swirley
Note:
these bicone shapes may sometimes be referred to as "lentils",
especially if the maker flattens their points; but because of the way polymer
lentils have traditionally been created, they are hollow inside...
"bicone lentils" are solid clay however.
.....(see
most lentils discussed above, in "Hollow" beads)
(this
technique is adding patterning to Tory Hughes'/Nancy Banks' one-color
swirled bicone shapes--see above)
EXAMPLES:
Laura
T's swirled bicones ...(she calls hers
"tsunami beads" ...not
to be confused with Elissa's tsunami canes)
http://www.lauratimmins.com
(...click on "Images"
...then click on everything to see more)
......Laura Timmins was the first person I saw doing bicone swirls using a plexiglas
square. She attended our guild retreat several years ago and brought the most
amazing swirled beads with her. We'd never seen anything like them. She was gracious
in demoing her amazing technique to the group of assembled members, and someone
ran to the hardware store for plexiglas squares and we rolled them up all weekend.
They're quite addictive! Julia Sober
Desiree's lesson
on making
many patterns of swirled bicone beads
http://desiredcreations.com/howTo_CALentilSwirl.htm
Lee
R's swirled, very flat swirled bicones, and also a bit taller
http://www.rmpcg.org/lee.html
Barbara's
various swirled bicones... lots of translucent effects (including trans+opaque
slices, glittery inclusions, etc).
...
some with onlays (some shape onlays made with beigey-colored clay
--or other colors-- then those parts antiqued with brown acrylic
paint)
http://www.rubarbdesertdesigns.com/beadgallery2.html
http://www.rubarbdesertdesigns.com/beadgallery.html
...
lesson for making swirled bicones http://www.rubarbdesertdesigns.com/swirltute.html
kids making swirly bicones http://www.kerstinsfimoseite.de/fimo/lentilbeadsandkids.html
Alan's landscape (or waves, etc.) swirled bicones
http://groups.msn.com/ALANpolymer/polyclayjewellery.msnw?action=ShowPhoto&PhotoID=76
Kimba’s
bicones (ornaments) —marbled, inclusions, etc. (website
gone)
You'll
need to use a clear, flat, square or disk of glass or acrylic to roll with
(mine is around 3")
....... a larger sheet of glass
or acrylic, etc., can also be used and the extra weight might help too
.....
in that case, hold it on both sides exactly the same
...
it can be helpful to barely touch the worksurface as a guide to keeping
both hands at the same height, or to use spacers underneath the acrylic
sheet or on the work surface made from something which will slide around easily,
or use felt dots, etc.)
a basic lesson:
...decide
where you want the swirl in your patterned ball to originate (the midpoint)
...then
lay the ball on a not too small, non-slip work surface (with the midpoint
you want centered and pointing straight up)
......OR Barbara
McGuire puts the parts she likes best facing down, rather than facing up
....now my swirly beads look much, MUCH better (the clay starts going IN on itself...
that's why my 'pretty side' always disappeared). Mary
...place the acrylic
block over the ball flat or at a slight angle (I placed the closest side
almost on the work surface...the further side stuck up from the work surface an
inch or more) . . .
...then barely touch the acrylic to the ball .. you should
be able to see a tiny spot of reflected light (or just lightness) wherever
the acrylic touches the clay (this is very helpful!)
...very slowly
begin to move the acrylic in a circle, keeping your eye on the reflected
spot (since I always went clockwise, this meant that I began moving the acrylic
first to the right, then down, which causes the acrylic to press
on the clay left, then up or 6:00 to 8:00, 10:00, and so on)... this part can
be confusing because sometimes the direction seems counterintuitive ...it becomes
second nature though
...........(see Desiree's animation of this motion
on her lesson page above... under "Process," click on "See
a Little Video")
...after you've moved the acrylic in enough
circles that you've defined the area you want to be the midpoint
(it should be becoming a bit pointed in that spot by now), begin to move in somewhat
larger circles and press down a bit harder (if the midpoint moves, recenter it
as you did in the beginning)
... this is when the swirling really begins
...
jilla says it should take 30-50 revolutions to see a swirl
TROUBLE-SHOOTING
+ more on exact technique
...you
must roll in one direction only, of
course ...if you were to reverse the rolling direction at any time, the swirl
would un-twist. Mona K.
....I found it helpful to keep both my beginning positions and my rolling
directions the same every time to avoid confusion!
..sometimes
it helps to move your whole body in a circular motion rather
thanjust using your arms, to keep the shape round
..sometimes it was
helpful to use both hands on the acrylic block, sometimes it didn't
seem to matter... see also just above using hands or other items as spacers between
acrylic and work surface to keep acrylic parallel
...remember that at
any point you should be able to roll the bead back into a
ball for further swirling (define the mid-point again as above), or partially
back
..the bead may tend to walk (especially
if using one hand)...(in my case, from s.e.
to n.w
.....if so, pick it up, move, begin again ...or use the marked point
mentioned (as a diagnostic below)
....."extreme
traveling" is likely a result of applying uneven pressure
as you move in circles. Not a bad thing, just frustrating. jilla
...If
it's not starting to swirl, perhaps your bicone is
too pointed and needs to be rounded down a bit so more of the surface comes
in contact with your swirling surface... It's that friction which grabs the clay
and makes it swirl. jilla
...the bicone may become somewhat narrower
in one dimension creating an "oval bicone"
(so stop, and gently press the sides back into an even circle, then continue if
you don't yet have enough swirling for what you want)
...... this "oval
bicone" can be an interesting shape though!
...the bicone may
become much longer-taller as well, and eventually
difficult to roll... try to stop before it gets so big that it kind of bumps
rather than rolling (which will distort your shape, and probably leave a gash
on your bicone)
...to make a flatter bicone, roll around over
the bead, with the acrylic block parallel, pressing fairly hard ...at first
in smaller circles (this will usually flatten
the sharp midpoint too
...
in fact if your circles are too small, the bead will
flatten too much and you may lose the ability for further
manipulations)
..In the early stage, while the colors
are moving around, you want a more defined cone, so use very light
pressure while you are swirling and also larger circles
(if the clay seems too soft, let it cool down a bit
and you'll have much better control over the swirling process and the bead won't
flatten until you are ready.
....later, when you are ready to
flatten it, use smaller circles and then add pressure gradually
until the bead starts to flatten. jilla
...also, if sanding and
buffing this type of swirled bicone, the surface design will be fairly thin
on the edges especially so don't sand
and/or buff those areas too much or you'll sand right through them
diagnostics:
JILLA's
various suggestions:
...jilla's
diagnostic dots... I discovered a little trick you can use to figure out
what's wrong (when trying to swirl re the evenness of circular motion
and the amount of pressure you're using)
......start with a bicone of
solid color clay....put flat dots (slices) of contrasting color about 1/8"
thick around the outside of the the bicone (on the top OR the edge OR on both
top & bottom)
......place
the bicone on the work surface with the points as straight up and down and as
centered as possible (sometimes you have to press it a bit to make a little flat
spot on the bottom point so the bicone will stay vertical)
......once
you get it standing up straight, start the swirling motion and watch
those dots ...within
2 rotations you will be able to see where the dots are or are not moving... if
they aren't all climbing up towards the point evenly, that means
one part of your rotatation is incomplete... the dots will tell you exactly
where that's occuring.
.... for further study, try putting different
colors, like red at 12:00, blue at 3:00, yellow and 6:00 and green at 9:00...when
swirled, .this will show you exactly how far the piece rotates
with each circle of your acrylic block.
(Between the two, these should help
you diagnose any problem you might be having with the circular motion and the
amount of pressure used.) jilla
... you will understand how the
clay moves during the process (so you can plan the outcome better) once you
know how the clay that starts "here" ends up "there"... try these
ideas:
.... 1. Make a thin snake of a color of your choice. Wrap it
in another color, much lighter or darker, to make a bulls-eye cane. If desired,
add a third layer. Compress it all so you've got a snake that's about 1/4 inch
across. Start a swirlie using just plain, solid color clay that will go with the
colors you have used so far. Once you've got a swirlie formed, put thin slices
of your bulls-eye cane around the outside edges, top and bottom. Swirl again and
watch how the slices start to "feather" up and in towards the center.
........a...
way to vary it is to use thicker or thinner layers of clay when you are making
the bulls eye cane. Thin layers will produce extremely fine lines when you swirl.
Thicker layers will produce bolder elements on the swirlie.
....2.
Or arrange your cane slices differently. Maybe put them just around the edge on
one side only, leaving the other side plain. Or put some right on the edge and
some up a bit higher towards the top.
....3. After you've made your
bulls-eye cane but before you roll it down to be real skinny, cut off a one-inch
slice. Pinch the cut ends a bit to start to define the "points" of your swirlie
and have at it. You will end up with a very different kind of swirlie but if you
always start with the same size slice off the cane, they will all come out similar
to each other. jilla
...more
swirls than 30-50 and the good parts travel back into the center
of the bead.
.....this is not always a bad thing though --if that happens,
slice that puppy open because you've got some cool stuff inside.
jilla
OTHER
...I've
been experimenting
with swirled bicones (at first
unsuccessfully), and this is finally what's happening for me ...thanks for Kim
K. for mentioning that she began her rolling with the acrylic slightly off
to one side... that got rid of the log jam for me!).
...
you can also use a marked point (even a dirty spot near the center of the
roller) to keep your bead centered and swirling evenly...just concentrate on keeping
the point of the bead exactly under the marked point on the roller
...Desiree
says to use thicker slices if you're using slices,
so that the pattern will be sure to remain during swirling
GEN
INFO.
(....interesting patterns will form with
any amount of swirl ....even just a little)
(...any
pattern on a ball can be treated these ways to create a swirled oval or bicone
shape)
...constrasts in color and/or
pattern between the parts can be effective
...little contrast yields
a subtle effect (or can stay within one color family, etc.)
...partial blending
(can occur between colors, especially if a translucent clay is used or if the
bead is swirled with more top pressure)
.......the
very center of the bead swirls more than the rest
of the bead surface and the swirling is more concentrated in that area, so the
longer a bead is swirled the more likely that the colors in that area may lose
their crispness and begin to blend into each other (or be so close together
they appear to blend)...
if the colors in the center are complementary or contain black/gray/brown,
this can make a muddier, duller color
.......my
first swirl is (centered?) on a def. edge between the color and
the white (slow large swirl 15 to 20 times)...back into a ball... then
pick a second area to use as a swirl (center).... the blending of
the colors are just exquisite and everyone loves these beads! Deborah
SPECIAL
clays, OTHER materials, etc.
....if
using translucents in the mix of colors, the effect can be kind
of ethereal, subtle, or misty) because it tends to
mix with its neighbor more easily
.............will
Skinner blends happen if translucents are used betweeen two colors?
............I used slices from cane Skinner plug cane in a stack (alternated
dark to light, light to dark)....using lots of translucent...and I left the rest
of the area blank. Aurora (very nice!)
.............I've
been swirling with my mokume ganes and seeing what effects I can get. Aurora
....using only translucents & Pearl &
tinted Pearl or other light mica clays creates a gorgeous effect (see
Desiree's website above)
...........I've
tried strips of bleached translucent loaded with accent beads(?).
Alan
...........Ilene's
translucent logs wrapped with diff. colors, placed together for
canes
http://www.polymerclaycentral.com/claypen_transcanes.html
........... I use some canework for a nice mixture of colors, and
then add a translcuent with a bit of pearl white to add a bit of
glitter like effect... i make a snake of of the mixed cane colors, and
an equal snake of the trans +pearl ...fold on each other... snake
again ...then roll into a ball.
....press
or paint lines of metallic powder onto the bicone before rolling
(it will also swirl)
....love the effects of Pearl-ex
in swirls :). I roll a couple of balls of different colors, then cut into wedges
and put the different wedges together, roll again to stick 'em together then swirl
and see what happens. Celia
.......my
bead looks like ink squirted form an octopus or squid in swirly blue waters...it's
bleached trans with lots of duo green/blue pearl ex and bits of black, done in
the swirly lentil style... lots of layering, chop into chunks, roll into a ball,
and swirl away! Robin
... Judi's swirled bicones with gold clay and
translucent clay with cayenne spice as inclusion
http://gallery.gundo.com/gallery/album63/Judichile_pepper_inclusion
....metallic
paints
(Matthew's lesson with Dicrofex paints) .... run translucent clay on the
thinnest setting... smear Dicrofex Paints onto clay.... dry (15-20 min) .....
place a piece of translucent sheet onto ball of black clay (paints
facing down),
or ball up a portion of the translucent
sheet, twist, and roll that into a ball) ....
then swirl the ball. Matthew
....metallic leaf will also swirl, & also crackle (a
little or a lot, depending on how long and hard it's rolled)
..........but
when using leaf or metallic powders,
the bicone will be
too smooth to roll
well if it's completely
covered on either side!
................you
may find it helps if you roll the bead in your hands a bit first
- this seems to stop the foiled areas from being overly slippery by transferring
some of the clay's stickiness onto the surface of the leaf. Alan
.........roll
bicones on a surface scattered with tiny bits/flakes
of metallic leaf ....or tiny dots of colored clay, etc.
.........what I did was to cut up the (leaf) into narrow
strips and apply them in parallel lines
onto a sheet of black clay,
with gaps between them (I wrapped the sheet around a ball of scrap
--any gaps can be filled with small offcuts of foil).....before rolling, choose
a good 'centre' which will show the swirl well - and off you go...nice crackle
effects. Alan
.....(also see "textured bicones" above)
CANES
& patterns
Cane slices can be used in any way on a base bead ...overlapping,
butted, random, from diff. canes, etc ... or as thick slices alone
....Laura
Timmins lays 6 different, thick triangular slices next to each other
pizza-style (no base bead?), then swirls
http://www.lauratimmins.com/Process.html
...
jilla's " flower" --I started as 5 slices off of a triangular
extrusion.... the slices are placed with points towards the outer edge of
the cone.... with inner corners touching, the 5 slices leave an open pentagon
shape in the center of the cone....about 10
swirls cause
the triangles to spread into "petals" ("rewind" the swirl in
the opposite direction if the petals start to look too fanned out)
. jilla
..on base beads:
.....3
sections... if a cube-shaped base bead
is completely covered with 6 thick cane slices, there
will be several places where 3 slices meet ...making
that area the center of the swirl square bead will yield an
even effect ... or use 8
sections with half-triangles
.......Desiree suggests putting each of 3 thick
cane slices on the base cube
twice (on opposite sides)... this should result
in the back of the bead looking more or less like the front (see Desiree's lesson
above for photos)
...radial/symmetrical kaleidoscope patterns
....Skinnered canes/etc, or ikat fabric
...I used a tiger cane
and a checkerboard cane combined ...then I sliced, and put onto a small scrap
ball and swirled away. Kat
...try all kinds of single or multiple
patterns/colors, cane slices
...I've
used strips of fluorescent clays over dark clays. Alan
....Desiree
has come up with some great patterns:
..........a 2-color sphere
(each color one hemisphere...cut ball of each in half and join)
.........
football bead cane scraps
..........since only the middle portion of the bead
top may end up swirled (esp. using a glass sheet), using just a lace
cane (or other single pattern) all over will result in the lace cane
swirling in the middle, but not on the edges creating a dual pattern
.......placing 7 or so small cane slices (round with star, or triangular
ones, e.g.) in an open circle (leaving the middle and edges empty) looks
really cool
.......add 2nd cane slices on top of first ones...
or add larger bits of solid color here and there over slices
....
..slice the ball in half, insert a sheet of contrasing color clay, then
swirl over middle of insertion
.......roll
bicones on a surface scattered with tiny
dots of colored clay, etc.
Alan
V.
...(see also the "pastel flames"
technique, using diff. colored Skinner blend slices around the outside, below
in Forms/Shapes)
OTHER
USES
buttons, earrings, knobs... eyes (or eyes for masks),
center slice or use as other backgrounds or frames, , mica clays (scraps, textured...),
cutter bits.... collage bits
or scraps, Christmas colors + candies?, other holidays/hearts,
inclusions, leaf/crackled leaf or powders?, mokume gane underlayers, dragged lines
or Damascus Ladder or simple Natashas or twisted logs...
...
fan pulls or light pulls (attached to end of ball chain or string, etc., for overhead
fan, or overhead closet or shed light
http://www.good-night-irene.com/FanPullsLatest.html#21
FORMS,
SHAPES, MISC.
...squeeze the sides and turn into an interesting
square or rectangular "bicone"... squeezing the edges
in various ways also creates some interesting bead shapes (even if the bicone
has become oval while rolling)
...press the resulting bead into a mold
instead of just flattening the point
.......when you press it down, do it
in a paint palette (concave depressions) ...gives it that perfect curve,
then flip over and do the other side. Lara
...cut in half, or cut
most of the back off ... could then be used as b**bs <g>, on glass
bulb ornaments, or as other embellishments/onlay
...what happens
if slice off top... or sand or carve in other ways
...flatten
completely with your acrylic square or even in the pasta machine for a swirl
surface pattern to use in other ways
.... I flatten the resulting bead and
run it thru my pasta machine.... then I make hollow lentils from
the sheet. Valerie
.... I made some swirly beads and buttons in a totally
different manner, but they are lentils and bicones also. I ended up using them
(as torsos) for some little bead people that I make. Jeanne R.
http://www.heartofclay.com/eb/swirlbeads.jpg
and http://www.heartofclay.com/eb/beopin18.jpg
....make large slices from larger balls, or pasta-machined swirls, or using
a stand slicer, (to create a draped bowl, or use in other ways)
... the guild's
co-pres. at my guild (Columbus OH?) did a demo of her techniques... she made a
large black bicone (about 1-1.25" diameter), and attached various
colors of Skinner blend cane slices around the edge, making
these gorgeous sort of pastel "flames" into the spiral (sometimes she leaves
a gap so there's a section that's entirely black)
........ then she shapes
the lentil prior to baking, indenting between the colored sections to form
flowers, sort of scalloped shells, etc., or flattening the sides to
make it more of a lozenge shape ...then she turns them into pendants...
Lisa
...Barbara's used twisted log of scrap clay, dragged- lines
with a toothpick, then swirling
....... then made it into a heart shape
by indenting with credit card and pinching other end of finished siwrl bead
at top
http://www.polymerclaycentral.com/swirls.html
...Nix Creations removes or indents the round shape to create
a "stalk" at top of round pendant (also easy to hang
cord through)
http://createapendant.com/claypendants.htm
(gone)
... Barbara's lesson adds some cane
slice or other shaped onlays around the
bead holes (some as "bead caps") to her swirled bicones
http://www.rubarbdesertdesigns.com/swirltute.html
...Suzanne
flattened her swirl, then placed it on a (shaped) pendant
surrounded by flattened tiny flower canes
http://www.picturetrail.com/gallery/view?p=999&gid=279317&uid=149408
(Swirled Flower Brooches)
...Desiree cut some long bicones in half (around the waist) and
added wire, etc.
http://www.desiredcreations.com/images/galleryFivePics/bicones.jpg
... I just made quarter-sized ones and teeny bitty ones and they look great!
Susan
.... swirl white and peppermint candy pink together and you have
the most fabulous looking beads... everyone thinks they're candy.... I actually
'over swirl' 'em...they shouldn't look too static.Cara
(...see
how to make swirled bicones in Beads
> Bead Rollers > Bicones)
...lesson on making a football
shape (with sharp edges though) from a flat bicone ... roll a flat
bicone (see below in Rollers > Swirled Bicones), then roll back and
forth over the point with a flat piece of glass or acrylic... this will create
different patterns than the cutting-away method above in Football Beads
though
http://www.poly-tools.com/tutorials/lentil.htm
HOLES
& ATTACHERS
Kathy G. has some swirled bicones with clay "bails"
folded over the for stringing the cording, and head pins or head pins
embedded in disks and ball of clay atop bead
http://albums.photo.epson.com/j/AlbumIndex?u=4153008&a=30892220&f=
...there
are so many different option for hole placement in bicones.....
for wearing in series on a necklace, if they're holed from edge to edge,
I think it's best the hole be off-center so the larger portion weights
it down to keep the bead from spinning.....as a focal bead, they could
be center holed from top edge to bottom edge and embellished
with a small bead at the top and bottom.... if they're small enough for earrings,
then they could be center holed from edge to edge OR holded from
back to front through their little bellies and suspended. Aaaarrrggghhh!
:D Desiree
(....see Desiree's diagram of various directions to put
holes in larger bicone lentils on her lesson page)
...Desiree's
lesson on making a jig to hold a lentil bicone (under a drill press)
so that a hole can be drilled it in from side to side: she pokes a needle
just smaller than her drill bit into a flat block of wood, then glues
down two short segments of a solid plastic quarter-round molding
strip so that their flat sides are on the bottom and to the outside and
their curved sides facing each other forming a narrowing "trough" in
between them to hold the bicone (they're placed tight to both sides of the needle)...
the Dremel and it's bit are mounted in the press so that it's exactly in line
with the upright needle, and when in the bottommost position won't
quite reach the needle... she notches the first spot, puts
the notch on the needle, then drills (halfway through)... turns bead
over, threads the first hole onto the needle ... and drills
from other side
http://desiredcreations.com/Misc_PCLentilDrillJig.htm
....To
steady a bead in a drill press (or a a makeshift one) (especially difficult
bicone or lentil beads): … use just a blob (of modeling clay) on the platform
(like a donut shape)… drill the bead 1/2 way or most way through (do this stage
in bunches?} … (remove it and) insert a short nail or tack in center about
1/4 the length of the first drilling …it will hold your bead so the drill will
go in at the same angle as the drill …I can feel it hit air (lack of push
needed} and then pull up before you feel the ping of hitting the nail.
Faun
(...for more info on making holes in general, see Beads-Holes)
(...
see below for swirled bicones and
swirled oval beads made with trough-type rollers)
Carl
Hornberger was the originator of the trough type bead roller (his rolled ovals)
.
. . .
http://www.polymerclaycentral.com/roller.html
The newer versions (clear ones?) of the trough rollers have tiny channel lip just outside the top edge of each bottom trough to hold a guide rail from top trough so the top can't slip side to side.
PolymerClayExpress
sells bead rollers: 3-8 mm round, various oval, "pointed
football", bicone (most are transparent)
http://www.polymerclayexpress.com/tools4.html
(also click on sev. photos here to see how they're used)
Sue
Lee (PolyTools) sells various sizes of round, oval, bicone bead
rollers
http://www.poly-tools.com/claytools.html
....plus the older,
non-clear rollers for round and bicone shapes...and the story
behind Sue Lee's rollers
http://www.geocities.com/polyzine/december2000/beadrollers.html
Tri-bead roller
(made by Amaco, licensed by Poly-Tools) http://www.amaco.com/jsps/amacohome.jsp
.....sold at Michaels, or online, etc ...$8? .....two-part
(acrylic) unit with several channels side by side for diff. shapes
.....makes
3 bead shapes (each in one size): 7/16" round - 5/16 x 5/8" oval
- 1/2" bicone
..I bought one ...one tray had a slot for an acrylic
piece to slide into, the other tray had a groove this piece was supposed to ride
in to keep everything lined up....but the tab would not come anywhere near fitting
the groove (my son ground on it a while and
it was somewhat improved but still too hard to push... I'd think they would be
making them better than that). Pat C.
...buy your rollers from Poly-Tools
and you will be happier. Trina
PCE Beadmaker (for oval
beads)... comes with 1 bottom unit + 3 top "paddle" units
of diff. widths (for making 3 sizes-widths of oval beads)
http://www.polymerclayexpress.com/apr2001.html
I have found some nifty gadgets for forming beads without spending a lot of money or hassle. Look in the cake decorating section of your craft store. Wilton's Flower Former set (used for making flower petals) makes a fantastic bead roller for oval shaped beads for only about 6 dollars. leallen
"Boilie Roller" (at fishing tackle shops), used to roll fish food into round balls (I think mainly for carp fishing). They come a variety of sizes although I am not sure of the exact range, the one I have is a 12 mm. you can roll lots of beads at once with these; you can achieve nice round beads with them, it just takes a bit of practice to get the amount of clay you use right. It looks like a tray with lots of gulleys in and a top piece that is similar that your roll over the top. You roll a log of clay and lay it onto the bottom part, push the top part on top and start sliding it along the base. It may be something that can be refined or whatever. what I find the boilie roller good for is making a lot of base beads quickly of the same size for covering in cane slices or whatever.Emma
all trough rollers
Roll the clay (see "Measuring"
below) in-between the troughs by moving the top trough back and forth
over the clay resting in the bottom trough
...if the upper trough won't
move in the lower channel or the lower trough or doesn't move
freely), you could sand it down until it slides. jilla
(however, if you're making an oval or bicone bead and the surface of the clay in the roller is not a solid color, avoid lifting the top trough before finishing the bead to help keep any lines or pattens from distorting)
(or, they can be used as molds to create long pieces of consistently shaped clay for bracelets, or for anything... see below in "Ropes of Clay")
If
I am applying cane slices to a bead and don't want the cane slices to
distort, I make the background clay color into a base bead, then apply
the cane slices, and then roll only forward to carefully incorporate
the cane slices. Kat
...I
cover a lot of beads with cane slices so I think the rollers will come
in most helpful for making the (bead) cores...I like
baking the bases and then putting on the canes... the seams
between the cane slices seem to disappear more quickly as I roll them if I have
baked the bases first. . . .
You
can also use these kinds of rollers to roll MULTIPLE beads simultaneously
...I
can really speed up my bead making with the round rollers by placing up
to 4 oval-ish clay pieces at a time, evenly spaced, on the bead
base. Then, I just place the roller top over them -- slide, slide, slide, slide....voila!
4 round beads. Dianne C.
But
the best advantage that I've found is that there are no fingerprints to
sand or buff off.... Sanding beads this small is difficult, anyway. When you've
made a perfectly smooth bead, it just takes a little touch of the buffer to make
them shine. Zig
...I haven't figured out how to cover a bead with slices and
still use the rollers to get rid of the fingerprints, but at least the lopsidedness
is taken care of. Ziggybeth
I believe Poly Tools has put drilling guides for bead holes into the next generation of bead rollers. Possibly we may be able to drill holes in the current model (top and bottom) that would work. Bob
I love the idea of making eyes for my clay figures that are the same size (3-8mm) and very round!!! Dianne C
oval (ovoid)
PolymerClayExpress'
lesson on making an oval (pointed football) shape...(and some types)
...plain
(or core) beads can be made, then baked
......these can later be covered with
other patterns, or left plain though even plain clay may develop a subtle moire
pattern
....(also shows various symmetrically swirled examples... see below)
http://www.polymerclayexpress.com/apr2001.html
symmetrically "swirled"
effect on oval beads, made with oval
bead roller
...you can also make oval shaped beads with stripes that swirl
in a paticular way when rolling these (forward motion only,
not back and forth) in this trough ...his will actually drag and wrap the
pattern around the bead
.....Jean
Horberger's examples (wife of Carl, originator of rollers)
http://www.polymerclaycentral.com/jeanhornberger4.html
http://www.polymerclaycentral.com/roller.html
......roll
clay bead in the trough once, then pick up bead and put it back
to the beginning of the trough.
......repeat this step a few times and
you get this beautiful waving pattern on a football shaped bead!! Georgana
(Kim's
lesson) .....I make a ball of clay about the height of a
finished oval bead (or a little more, the picture shown makes a bead on the small
side).. . . Add stripes of clay in the order you want, don't let them
go all the way to the end. Then the way you orient the bead on
the roller determines which way they swirl... I used the roller going from
left to right. Then pick up the bead, careful not to flip it around, put it back,
and repeat until you're happy with the swirls. . Kim
.....I
have a bead roller and I use black clay as to make a solid black bead.....then
I extrude premo gold (from clay gun?) and just kinda snake it around
the round black bead...then I roll it in my hands to adhere the
gold just enough and when finaly I roll it in the roller,
the swirls just kinda happen.... Sara
....any
patterned ball can be treated these ways to create a swirled oval or
bicone shape
...swirled
oval beads can also be flattened (by pressing down on one pointed end)
to create a flat, thick disk showing a fine spiral on top
(could be a button) ("it takes very few passes to get the perfect shape for
the bead, but it could take a dozen passes to get lots of pattern ...stripes).
... other shapes can be also pressed from a swirled oval
bead
http://polymerclayexpress.com/apr2001.html
(bottom)
...(for
"swirled bicones," see below and above)
You
can also use a round bead roller to
get an oval shaped bead ... just use a round roller bottom
trough, with with a slightly smaller top trough. Trina
bicones
(made
in trough roller)
Bicone rollers are two v-shaped channels (the angle usually sold is 90 degrees ...see "making your own" for diff. angles)
bicone roller by PolyTools... has one bottom
channel, but 2 tops which can made 5 bicone sizes: 7/8", 5/8", 1/2", 3/8",
and 1/4"
(one of the tops is a multi-side top trough for 4 sizes)
http://www.poly-tools.com/Merchant2/merchant.mvc?Screen=PROD&Store_Code=PI&Product_Code=BIC&Category_Code=ROLL
http://www.polymerclayexpress.com/tools4.html
Sue's
lesson on making a bicone bead ...
...and also a swirled
bicone...Sue's
lesson using 4 tiny logs placed pole to pole on a bicone
shape before rolling in the 2-part bicone roller
http://www.poly-tools.com/tutorials/bicone%20bead.shtml
.........also
see swirled bicone method above using a flat surface rather than
a roller
....any
patterned ball can be treated these ways to create a swirled oval or bicone
shape
Lib's swirled and squooshed
bicone bead (similar to polymerclayexpress' lesson above on flattening a oval
bead?)
http://hobbystage.net/art/media.cgi?site=libsclay&folder=*&group=2&page=*&id=1043606006-003061
(???) I just got my new oval roller from Polymer Clay Express which will also make a bicone shape by baking the oval shapes, then slicing off the very ends, ...and drilling them after they're baked (reminiscent of some moire patterns). Ziggybeth
rope shapes
for LONGER pieces
of clay (not beads... or could be beads too?):
...Sue Lee also
sells a longer 12" version of the oval bead roller (Gibson
Channel Tools) for creating a rounded clay rope long enough to go around
the entire wrist (for making the rounded cuff bracelets in Gwen
Gison's video "Cuff Bracelets made from Polymer Clay") ... like a mold ...she
uses one lengthwise half, or both?
http://www.poly-tools.com/Merchant2/merchant.mvc?Screen=PROD&Store_Code=PI&Product_Code=GCT&Category_Code=MISC
PVC pipes cut in half lengthwise, or half-tubes
made from other materials can be used to create shapers for
long clay pieces
...I had wanted to form a long strip of clay with a
rounded top surface (with a design) and flat bottom surface....I
experimented with PVC pipe and found that 3/4" PVC split lengthwise
(min was about 8" long) works really well to form a long strip of clay
(for a bracelet). Patty B.
...fill
your trough with clay, trim, and carefullly remove.
...or if you
have a decorative layer you want to use (cane slice sheet or transfer,
e.g.), do as Patty did and lay that #1 sheet in first, face down, and an
acrylic rod or cornstarched dowel to press it in well; then trim
overhang; lay in a narrower strips of clay until full, pressing down;
remove carefully and use ...?
...(see
details on making a hidden-channels, cuff or tile bracelet (with
a transfer) using this technique in Jewelry
> Bracelets)
any shapes of bead roller could work for long shapes as well, and may even be a supplement to the clay gun for even, though larger, "extrusions"
even with
shorter rollers, one long rope could still be made by molding each length
that will fit, then overlapping a bit for the next length... may need a bit of
finger smoothing to remove any small indentations
NEWER
ROLLERS:.....the new Tri Bead Roller (Michaels,
or online) has 3 roller trough in one acrylic unit (round, oval & bicone)....
this one comes with a measuring "ring" to cut the
right amount of clay. Charli
... the Amaco bead roller comes with
a round thing w/ a hole in the center about the size of a pencil eraser.
The directions say (to get an appropriate sized piece of clay for the rollers,
fill the hole, then poke out the clay using a pencil eraser.
Laurel
...I suggest you stuff the hole in that disk from the wider side, then slice the excess off needed to make bead in trough roller with a blade of some kind. Push the wad of clay through from the wide side with a pencil's eraser end.. . . That gives you one correct amount for one bead which could be done in any of the three shapes the roller has (smaller or larger amounts of clay will not work). Christine H.
I agree that filling
up that little plastic doohicky every time
for the correct amount of clay is a pain....
....so what I do is roll a snake
of clay that will fit through the clay sizer thingy... mark
the clay on both sides with my blade... slide out the clay snake... place
it on a ruler (with the marks aligned with the marks on the ruler)...then I just
make more marks with my needle tool on the clay at all of those (same length)
ruler measurements.
...I write the size of snake and
ruler measurement on the side of the bead roller with a permanent marker
and you are set to go
...Since I have all of Sue Lee's bead rollers
from the very first ones, this is basically the method I've always used.
Patty B.
The latest way to measure clay for rollers,
and probably the simplest, is shown on the Poly-Tools site
(similar to Patty B's method above):
...fill the bottom trough with
a rope of clay, then use long blade to slice off any clay extending above
the edges
...mark the side of remaining clay (in trough) with their
ruler which has upraised measuring lines (of at least 1/16" or smaller
increments)
...remove clay... cut clay into lengths specified
in their instructions for the size bead (or roller) you're using
http://www.poly-tools.com/tutorials/bicone%20bead.shtml
(see
example of sizes recommended http://www.polymerclayexpress.com/images/polytools04.jpg
.....OR
if you've made your own roller troughs, you can use this idea of 1/16"
increment lengths to see which size works best for each roller/bead)
Sue Lee's (Poly-Tools) new round bead roller set... . I have found that I can save time if I roll my clay out into a snake just slightly smaller than the diameter of the roller base that I am going to use. ...then I squish the bottom of the snake; check the snake for size by placing the measuring tool for that roller on top of the snake. If it fits, I then I just slice my clay, sliding the measuring tool along the snake as I slice. This gives me uniform pieces to roll into round beads. Dianne C.
OLDER
ROLLERS
OVAL........using scrap clay, make a ball and use the oval
roller, rolling back and forth. Then remove a little slice at each
of the pointed ends and roll again. . . . .Repeat this until no
little threads of clay emerge from the rollers. The top and bottom
of the rollers should meet and glide freely against each other.
...To measure
the amount needed for more ovals, take your perfect oval bead and form it back
into a ball... then flatten it to the same thickness as the thickest
setting on your pasta machine.... now see which one of your round
circle cutters most closely approximates the shape and use that ...
...If
you don't have circle cutters, you could just use the ball you created
from the bead as a measuring guide. Verna
ROUND
...for Sue Lee's smaller round bead rollers, I suggest
you try my method of measuring so you can make beads fast and very round!
(you'll need the Kemper set of 5 square cutters (3/8" - 3/4"),
and Kemper's 3/16" circle cutter; these are the small plunger-style
cutters)
--lesson: ...first roll your clay in the pasta machine
on a #1 (....then for each size bead wanted, do the following:)
3mm
= cut a 3/16" circle, and cut in 1/2
4mm= cut a 3/16" circle
5mm = cut
1 of the smallest square, and divide it in 1/2
6mm = cut 1 of the smallest
square
7mm = 1 of the 2nd smallest square
8mm = 1 of the 3rd smallest
square (it is the square that is 3rd in line from small to large)....Dianne Cook
(I've made several "eye ball rollers" based on the bead roller concept.) To measure the clay, I roll it into rods the same diameter as the bead roller ....and then cut the rods into slices 2/3rds the diameter of the rod. That way they're always the right size. Katherine Dewey
You
can measure the exact amount of clay needed for a particular diameter
of round clay ball by using a rod of clay:
.........first,
on paper: draw a circle which has the same diameter as the desired
round bead (easiest if you use one of the precut sizes of a circles template)
.........mark
the center point (to find the midpoint if not using a compass, cut out
a same size circle and fold in half twice... poke hole at center and transfer)
.........now
draw a second (same-size) circle overlapping the first one, so that one outer
edge of the second circle falls on the center point of the first circle
........draw
a vertical line which passes through both places where the circumferences of the
two circles cross
........measure the exact distance from the outer edge of
either circle to the vertical line (this is your 3/4 measurement of the
diameter)
...Now make a rod of clay the same height (diameter)
as the desired bead diameter
...for each bead, cut a fat slice of the rod the
same length as your 3/4 measurement
(..round slightly in your hands, then
roll in roller)
(thanks for Katherine Dewey for this idea, and to the DH
for pointing out that it should be 3/4 the diameter rather than the 2/3 Katherine
remembered... and then showing me how to do it <g>)
for the round beads there is a measuring tool, but it doesn't have to fit the bead roller, if you make beads in a different size of the rollers, you just have to roll them with your finger (the index one) over the base of the round bead roller. Gaby
ANY SHAPE:...Make one bead the size you want and then see what you have
that cuts or shapes that amount of clay. Trina
.....(flatten to # 1
on pasta machine first, or squish a bit and make a mold of that volume??)
....i use little bitty clay cutters (from Friendly Clay?) (with a specific
clay sheet thickness?) to portion the clay into the 'correct amount' for a bead...
i just pick a cutter, and when i've found one that measures the proper
amount of clay for the bead size and shape i'm making with the rollers, i cut
the clay into 'cookies' and make beads... Jean
I
roll out a piece of junk clay to the ideal size and measure it's circumference
with a Pickett Small Circles Inking Template (you know those green
plastic templates that artists and engineers use). The template I have has dozens
of circles, each one just a couple of mm larger than the next so I can tell easily
when a particular ball of clay is a little too large or small.
Since my beads
are frequently a ball of background clay plus an overlay of cane slices,
this lets me know approximately the size I am working toward. Kat
I did discover that it didn't matter how much clay I put in my homemaderoller-- if it was too much, the extra just squirted out the sides in a little wormlike tail that I pulled off, gave the bead another roll, and it was fine and they came out the same size. Louisa
ADDING SLICES.....To get the same size of beads, I always cut the clay that will (be the core of the) beads with a cutter.... I make a sheet of clay, and I cut the filling beads with a tiny cutter, then I make them round, I apply the cane slices that I try to cut in the same size, I rolled them on the bead roller and thats all. You don't need a measure tool if you make the beads that way if you use an oval or a round bead roller. the tiny oval bead is made with an small atachment that the round bead roller has, and you can measure it the same way. Gaby
I have had some luck with rolling a bead with the middle size roller, then adding thin slices off my cane, then putting it in the larger size roller and rolling very gently. Also I've 'measured' clay for whatever size bead I want to roll, reduced it by about the amount I think I'll be adding, (via cane slices), hand rolling it, adding the cane slices then roll it in the bead roller. The amount of clay in the roller will have a lot of bearing on the amount of distortion. Sue Lee
(look above in "measuring clay" for suggestion on using the correct amount of clay in trough rollers)
Roller
troughs can be made by:
...(non-clay)...cutting one (or more) tubes
of some kind in half and using those;
...(clay) ...pressing a cylindical
form into a slab of clay to create a trough (creates a base too)
.....for
this one at Mile High, the bead is rolled in the trough while on a metal skewer
and the skewer rests on the sides of the trough
http://www.mhpcg.org/clayDays/claydays04/july2004/jul012aLg.jpg
......or
a clay sheet can be wrapped around a cylindrical form, then cut
into two sections(or 3)... baked and removed
Rollers
for round beads will have two troughs which are exactly the
same
...rollers for oval beads will have the top
trough narrower than the bottom one, and will fit down inside it
...rollers
for bicone beads (the trough type) will have two troughs
exactly the same, but they will be 90-degree angles rather than arcs.
MORE
BASICS:
Round bead rollers consist of two channel halves
exactly the same, each forming an 180 degree arc ...think of cutting a
hollow PVC pipe lengthwise, yielding two pieces when rejoined. Rollers for round
balls must have two channels of the same shape and size.
..a
tube of some kind can be cut in half lengthwise, or the halves can be made-molded
separately over a form.
Oval bead rollers still consist
of two channel halves, but they should not be the same
exact size and shape.
In fact the top trough will be narrower
than the bottom one, so it will actually rest inside the bottom trough
somewhat (which also creates a guide for it)
...If you look head-on
into the front of an oval bead roller, the upper and lower halves together
form arcs that are each less than 180 degrees,
thus they create an oval shape. (If, on the other hand, the two halves each formed
full 180 degree arcs, when put together they would shape a sphere
and make round beads instead of ovals). Desiree
...The
large PVC pipe works well for oval beads if you roll the pipe halfs like
(two parentheses, but one has slipped halfway down inside the other, so
that each side has a tail hanging free) --this creates an
oval shape in-between them. Mia
It
can be a good idea to create a guide track on the
bottom trough of a round bead roller, so top half will slide in
place without veering:
. . .one way would be to mount the bottom
half of the split pipe in a clay base but allow the clay to extend
up just a little higher than the pipe does... Sunni
(....the
edges of the upper trough will still ride directly on the bottom trough edges...
but there will be a short restraining wall of clay just outside
the top trough to keep the top trough moving only where it's supposed to)
. . . some of the ideas below for making oval rollers could also work for round ones, if the troughs are the same size and shape ...
WAYS to MAKE ROLLERS:
....CLAY ROLLERS:
cylindrical
rods impressed into clay slabs to make troughs with
"bases":
...I tried making a (large)
oval bead roller out of scrap clay with two separate forms
for the top and bottom troughs .... my prototype definitely ain't pretty,
but it works.... I used a tall-narrow, straight sided glass vase as
the form for the top trough of a large oval bead roller, and a smaller metal tube
for the bottom trough ...( I also added a knob on top of the upper trough
to hold it while rolling). Desiree....
http://www.desiredcreations.com/Misc_PCExtrudNRoller.htm
...I
made a round bead roller myself out of clay - using a 1/4"
dowel as the form for a mold - it turned out o.k. for a first shot
- I can make small uniform beads in it. Louisa
... can use knitting or
crochet needles..... aluminum or brass tubing as the rods for
mini bead rollers
lesson: Roll out a clay rectangle at
least twice as thick as the diameter of the rod (=eyeball or bead
size) and 6 times as long. ...place the clay sheet on a bakable surface
(ceramic tile).. dust rod with talcum powder or use water or Armorall as a release,
and press the rod halfway into the flat sheet.... carefully remove
the rod (leaving a half round trough) and bake... cool... replace
the rod using a release. ......then use another clay sheet affixed
to a ceramic tile to create an impression of both the rod and
the original molded clay sheet... carefully lift the tile with the
clay sheet still affixed, but now molded... trim the ends perpendicular
to the trough and bake. (It's a bit like making a two piece mold
...
the second mold half may fit (spread out) over the sides of
the bottom trough... that's fine because this top trough will (act as a restraining
wall guide to keep the two troughs properly aligned, and then the
roller is easier to use). Katherine Dewey
(...these will
take a lot of clay for any larger bead troughs
--could use larger dowels, markers, etc.)
(these
last ways will make a round bead roller... but could be modified to make
an oval one?)
cylindrical
forms & clay sheets (makes just the trough arcs... no thicker
"bases", but can add rope stabilizers, etc. under
bottom trough)
...I made
my own oval roller (or could be round) with
scrap clay over a cylindrical form. ....iIt took some experimentation and
time to get just the right shape and size so you might want to just go
ahead and buy one if you don't like to fiddle with
things.
.......I took an old prescription bottle ..
wrapped it with waxed paper (so that the clay wouldn't stick, or use a release)...
then wrapped sheet of clay around it (I think I used second largest setting
on pasta machine)
......Here comes the confusing part unless you have seen
one of Carl's rollers (his bead rollers are a great invention):
.........I
just sliced through the raw clay on the bottle down its length in
three places, so that I ended up with a series of 3 "crescents"still
on the bottle (one large crescent a little more than one third of
the circle, and two smaller ones of different sizes to use as
two diff. rolling parts... so you use only two of the three parts at
any one time)
........to stabilize (what would be) the bottom trough
and make it stand on its own, I stuck 2 snakes lengthwise under the middle
of the largest crescent
....... then I placed little knobs in the middle
of the two upper crescents to act as handles (carefully so the clay
wouldn't come up)
....... I baked them all ... then slid them
off of the bottle... and snapped the 3 pieces apart. Ginny B.
SO...
different bottle sizes and different widths of troughs cut
from it will both influend the size and shape of the bead rolled:
If,
for example, you're using the same bottom trough with various
smaller top troughs to create oval beads:
...the narrower the width
of the top trough, the skinnier the oval will be (and it will be a smaller
bead... less volume of clay)
...and vice versa: the wider the width
of the top trough, the fatter the oval will be (and it will be larger
bead... more volume of clay)
NON-CLAY
ROLLERS . . . splitting a tube of some kind lengthwise to use as
a trough:
PVC pipe:
....I split a 3/4" PVC pipe
lengthwise (8" long for a bracelet form). ... with a skill
saw after I set up a jig on each side of the pipe to keep it
straight and centered as I pushed it through the moving blade. Patty
B.
. . some lumber yards and hardware stores carry short lengths of
PVC pipe so you don't have to buy a 10 ft. length. Patty B.
.......more
on cutting PVC pipe:
....crosswise,
use an inexpensive PVC pipe cutter (a ratcheting scissor type tool) or
a saw (sand to smooth if using a saw)
...lengthwise, use a hand saw
with fine teeth (see below, or use an
electric saw with the pipe held in a vise or jig
....PVC pipe (can be?) cut with a hacksaw, bandsaw
or scroll saw. Sunny
...I
first sawed off the threaded ends of the PVC pipe, measured off the length
I needed, and sliced them down the middle with a saw.
...for
smaller beads, I placed the split (PVC?) pipe in a 250 degree
oven for about 3-4 minutes....took the piece out with oven
mitts and formed (curved it lengthwise with
my hands) until I was satisfied with the width. Crafty Michele
Other
"tubes" & cylindrical forms:
...I made
mine from an old 35 mm plastic film canister...and my
Dremel. Take the canister and a cutting blade, and cut off the bottom, and
the top ridge. Then slice the tube you're left with in half. ...sand down the
roughness on the edges of the pieces if you like (they don't get in my way, so
I didn't bother)
... (for an oval roller) then trim away about
one quarter of one side, and about half of the other side (these
measurements come after an hour or so of trial and error, trying to get the two
pieces to fit together for a pleasing shape - you may want to adjust them slightly).
The object, of course, is to get the top piece to fit inside the lip
of the bottom one.
........to use this oval roller, drop
a small ball of clay on the bottom piece, lay the top piece over it, and gently
slide it back and forth...after a few of these, you can use one hand, but start
with both hands, to keep the pressure even. Be careful on the first few, till
you get used to the distance you can travel, and then you can churn them out in
just a few seconds. I did over 100 in a half an hour, and they're the most symmetrical
beads I've done in the *whole* 4 months I've been making beads
You can make your own rollers for any size by cutting a metal or plastic tubing lengthwise.. use a fine sawblade to avoid distorting the shape. Kasey
He cut (a bead roller) for
me out of a bic pen (for tiny beads?) )...
Mia
.... 3/16" is really small, but you may be able to
make a roller from a sturdy straw or the barrel of a round ink pen . .
. use a fine sawblade to avoid distorting the
shape when cutting. Kasey
My
husband made me a bead roller out of wood, believe it or not (by
cutting a channel into a board with a round router bit?)
...... we countered
the drag of the wood grain when rolling by spraying
it with that "teflon in a can" thing...works like a charm (but use the
spray out of doors...some got on the parquetry tiling in our lounge room and the
dog kept skidding and ending arse up over end on the rug. *G*)
you can make your own bead roller longer to accomodate multiple balls. Sunni
bicones
Make
or find two V-shaped troughs to roll a clay ball between for creating bicones
.
. . the wider the angle of the V, the shorter and wider the bicone will
be.
flytee suggested lengthwise gouges in
boards . . . and Armorall to give a smooth surface (might act as a
resist for finishes though?
... or "teflon
spray"as above (spray out of doors) (does teflon also create a resist problem
for later finishes or powders?)..
There
are some kinds of wooden molding pieces which are long, v-shaped, 90
degree channels... wouldn't two lengths of that work?
...I've also seen
some plastic 90 degree channels, but can't remember what they were sold
for (shelving?)
Claudine's elongated
and bicone beads made with a roller (made by her dad?) -Fr.
http://www.picturetrail.com/gallery/view?p=999&gid=249620&uid=137974
make your own from polymer clay
other ideas for design & use of homemade bead rollers
If the roller is made out of clay, that can be just the beginning of you
making and rolling all kinds of interesting shapes and patterns
into (the surface of) a bead.
..For example, you could form the two
basic bead roller halves and bake them. THEN make a thin textured sheet
of clay and line the inside surfaces of the bead roller halves with
the textured sheets, bake and you'd have a textured bead roller. The possibilities
are endless. Refinements will probably be forthcoming. Desiree
...sample of
textured baked clay trough (half of the usual roller) ...(raw bead
placed on skewer to roll over texture)
http://www.mhpcg.org/clayDays/claydays04/july2004/jul025Lg.jpg
...If
you put tiny ridges in one half, straight, for the full length,
then wouldn't you get a bead with a perfectly straight, even pattern of circles
from one end to the other? Then, when baked, you could dry brush or use powders
or oil chalks amd rub off the smooth areas and have the patterned rings colored
in? I'm talking very minute ridges, not deep cuts.
...And what about putting
one straight ridge diagonally from top corner to opposite bottom corner-would
this give a spiral design on the bead rolled through? Now I am having visions
of things like tiny roses, stars, leaves, anything you could make tiny and detailed
and slice off about one mm and place at almost the end of the base
and have an intricate-appearing inlaid design on the finished bead? It could be
attached with TLS and rebaked to preserve the design perfectly. CC
....different
diameters of PVC pipe will work too ...You can glue a texture
inside. Sunny
BOOKS & VIDEOS... + Kits
many polymer books
have one or more projects on beads, but most aren't totally beads. Almost all
polymer techniques can be used to make beads, however.
There are a number
of books just on jewelry though --many of those are the shorter Hot Off
the Press type books. (see Books & Videos
to browse those)
Making Polymer Beads, by Carol Blackburn
...huge range of bead-making techniques. There is a tiny bit of overlap with
my other clay bead book, but not much. The pictures are great, instructions are
clear.
There's a good and complete breakdown on the types of clay, tools,
assembly basics.
There is a nifty set of pointers for making color-gradated
beads and color mixing pointers. Good tutorial on Skinner Blends.
She also
shows variations on the different techniques and provides some ideas on how to
incorporate each type of bead into finished pieces.
Here's a list of the
techniques: molding, extruding, working with foils & powders, applique, texturing,
inlay, plain canes and kaleidoscope canes, ribbon weave, vera beads, faceted beads,
Rorschach (symmetrical patterns, Natasha probably), transfers, stamping,
mokume gane with and without translucent clay, mica shift. AND 16 faux material
techniques.
Fifty Fabulous Beads by Barbara Finwall and Nancy Javier,
with designs and techniques taught by Marie Segal (Leisure Arts)
...a "slick"
publication of 60 pages and very nicely set up ...projects are basically
fairly simple, but there are some really neat beads among them...for beginners
and intermediate clay artists.... even the advanced artist can benefit. Dotty
Picard African Trade Bead Museum (in
Carmel CA) sells beads and books on beads, including one dedicated to Chevron
Beads. They're web site addy is: http://www.picardbeads.com/
Desiree
... there are also four other books in the series of Beads from
the West African Trade. Ruth
Just Beads is my own favorite auction site created BY bead lovers FOR bead lovers, There is a lot of information to be had there about beaders, bead societies, bead shows and events, bead books, and more. Sarajane Helm e: http://www.justbeads.com.
http://www.gameplanvideo.com/videos.htm, Tory Hughes’ video on bead shapes
(for the Bead
Making Tool Set put out by Amaco .. still available?... price? (for the
little you get)
......7 tools for making various
beads which they're given their own "names" to... includes a long blade
and some sandpaper... plus a sponge, 2 metal rods, a ball-tipped embossing tool,
and a stencil for cutting long triangles of clay to make rolled-up beads ...see
Tools > Tools Kits for details)
Desiree's
miscellaneous beads (and lesson links)
http://www.desiredcreations.com/gallery5beads.htm
Felicia's caned, onlaid, and Natasha beads
http://polymerisland.com/beads.html
http://www.drizzle.com/~caneguru/black&goldswap.htm
http://www.geocities.com/Area51/Shadowlands/2708/mille98.html—"trumpet"
beads
http://www.polymerclaycentral.com/mikeb/BldngHrts.html
(Mike Buesseler’s mobius beads)
http://www.google.com/search?q=cache:gladstone.uoregon.edu/~ewebrigh/polyclay/+ewebrigh
if the page is still "unauthorized"
Xtine's cane slice beads,
each branching off (with twisted wire) from a central twisted wire
http://creaplastic.free.fr/14_08.htm
Sue Heaser's diagram of rolling to enlarge a bead (or for pen, vessel,
etc.)
http://www.polymerclaycentral.com/orntrees1.html
Jeanne's
macrame necklace (neck piece) using some large polymer beads (multicolored),
along with smaller glass and metal beads
....I used cord that I ordered from
Whiteswan http://tinyurl.com/6ckvq... the
knots used in the piece are just the basic knots (square knot, diagonal double
half hitch, and half knot twist spiral)
http://pg.photos.yahoo.com/ph/grannyx2002/detail?.dir=7f58&.dnm=9a38.jpg
Cindy's lesson on placing leaf
between cut layers of a (Skinner blend) cane (both horizontally and vertically)
before slicing, so that only a thin line is visible in the slices for the bead
http://www.cindysartandsoul.com/silver.html
(Cindy's new website?)
Sunni's strung Tibetan
prayer beads, and bracelet
http://www.btr.quik.com/catenae/polymer/techniques/
(Triche’s cut & fold beads&instruc’s-gone?)
(website
gone) (scroll beads)
http://gladstone.uoregon.edu/~ewebrigh/polyclay/
(Erika’s "crackleware"
beads—lesson--gone?)
http://sunnisan.com/crafts/malas.html
arismiller’s
flattened twisted-beehive finish on egg
(website gone)
Tory Hughes’ video
on Bead Shapes, Gameplan/Artranch (--Tory Hughes + others videos),gameplan@earthlink.net,
ph.# (510) 549-0993; http://www.gameplanvideo.com
(and Klew's videos,
above)
Poly-tools & Treasures' ready-made grab bag of beads (and hemp) kits
http://www.poly-tools.com/beadsthings.html
Polymer Clay Jewelry message board http://forums.delphiforums.com/PCJewelry/start
...at delphiforums.com
("..meeting place for polymer clay artists and
crafters who make polymer clay jewelry, and experienced jewelry makers interested
in expanding their art to include polymer clay.... focus is specifically on jewelry
making, and all aspects of its construction, including polymer clay components,
findings, wirework, and mixed media...")
(see also: Beads--Holes, Canes, Mica, Vessels for hollow forms, Heads for cracking in beads, Sculpture for cornstarch pellets, Transfers, )
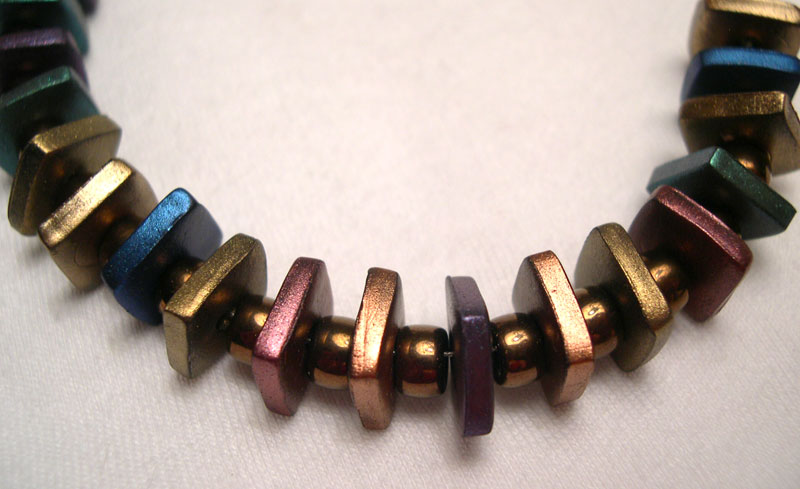
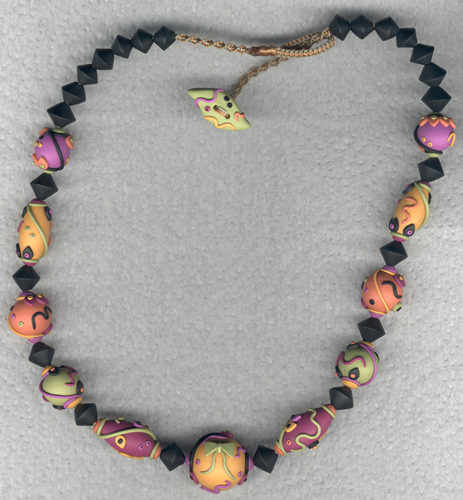