Basic
Info for all cutout shapes
SHAPE
CUTTERS
Examples of cutout shapes &
Uses
....beveling edges
Tips
for cutting out
.....releasing
clay from cutters
.....misc. tips
Small
& medium size cutters
....types
....buy,
or find around the house
....punches
...can openers
Sources for many purchased cutters
Making your own cutters
...clay
...metal
...bending & shaping
Cutting small
tiles
Freehand cutting + Templates, etc.
Cutting
out freehand (without
cutters)
Stencils
& templates, Shapelets (+ make your own)
....Masking
BLADES
...Summary
...Types
.......short & medium blades
.......long
blades ....suppliers
...Safety
& storing
Sharpness
Bending
& cutting
Wavy blades (ripple)
...various tech's
Multiple blade cutters
.... fixed blades (& tube-bead cutters)
.... rotary blades
Other
blades
...scissors & wavy rotary cutters
....guided round/oval,
guided height
...misc. blades/cutters
Stand
slicers (for canes, etc.)
Kids using blades
CUTTERS
&
BLADES
(&
stencils, templates)
Basic Info --all cutout shapes
Shapes
can be cut out from sheets of:
......solid color
clay
......patterned clay (e.g., cane-slice sheets)... blends...
mokume gane... fauxs ... marbled clay
......metallic
leaf or powder covered surfaces... textured surfaces.... etc., etc.
Then
the cutouts can be used in various ways.
...Cutters
are used with polymer clay for everything from embellishing and onlaying
clay with shapes, to creating boxes and lids, to making
canes or sheets of pattern, and much more.
Cutters
There
are various kinds of shape "cutters" one can use with clay)...
most of them are similar to "cookie cutters" in that they can cut a
shape with one press.
...(size) Some cutters used for polymer clay are
tiny, some medium-sized, some large.
...Some have plungers
to push the clay out (especially the smaller ones), and some don’t.
...Other
kinds of cutters can be appropriated as clay cutters too, such as aspic/canape
cutters, cookie cutters, vegetable or garnish cutters from
Japanese markets, fondant cutters, alphabet cutters, paper punches
(see below), or just whatever-you-can-find!
...they
can also be made (see below)
Examples of SHAPES + USES for cutouts
Claudine's
fish and starfish cut out from marbled or misc. sheets
of pattern, for necklace
http://www.essi.fr/~claudine/Fimo/Gallerie/maritime/poiissons.htm
http://www.essi.fr/~claudine/Fimo/Gallerie/maritime/etoiles.htm
(somewhat dimensional)
Lynne Manning's hands & elephant,
etc., made from cutout marbled, caned or scrap sheets
http://pcpolyzine.com/january2002/craft.html
Bianca's star shape cutouts, made from "ghost image" mica
shift sheets
http://www.polymerclay.com.au/images/Mica%20Shift%20Beach%20Beads.jpg
JSS added a (cane
slice) dog face to her dog body cut out from sheet of pattern (hard to
see!)
http://albums.photo.epson.com/j/View?u=4153008&a=31266991&p=68352251&Sequence=0&res=high
Margaret
R's coyotes, etc., cut out from Skinner blend sheets and added to a votive
http://www.mregan.com/portfolios/portfolio3/photo4.htm
unusual cutouts... some wrapped in different directions with metallic
thread?
http://www.mhpcg.org/clayDays/claydays02/jan2002/janClyDy02/pages/inspir
e08_jpg.htm
Mike High's crackled
leaf cutouts on pendants
http://www.mhpcg.org/clayDays/claydays04/june2004/tinaG1Lg.jpg
cutouts (of snowflakes) textured before
cutting out, then highlighted with Pearl Ex (ornaments by playsclay2)
http://pic14.picturetrail.com/VOL526/531344/4530485/75544602.jpg
my
flat ghost cutouts strung on fishing line as pendants to give to
kids for trick-or-treating
........ghost silhouette first cutout
with small ghost cutter... eyes & mouth cut with tiny cutters in shapes
like ovals, circles, triangles, leaves, stars, etc (for some I used straws)...made
with glow-in-the-dark clay
http://i96.photobucket.com/albums/l163/DianeBB/Halloween/ghost_treats1_31k.jpg
Darlene's
cutout cat (using animal-type pattern sheet), with a few
embellished details (website
gone);
Hazel's
cut outs from striped sheet butted against solid, with onlaid star
(website gone);
Dotty's kimono's with onlays (website
gone);
Jan
G's cutout shapes from millefiori sheet http://www.tinapple.com/cynthia/98retreat/index.html
(gone?)
Kat's calico cat cutouts made from mokume gane or other randomly
patterned sheets
http://hobbystage.net/art/media.cgi?site=kgedrich&folder=*&group=9&page=*&id=1058949992-004675
(hobbystage site inaccessible)
Kris
Richards' lesson on making "Polydollys"(or any
cut-out shape). .http://www.sculpey.com/Projects/projects_PolyDollys.htm:
--creates jellyrolls and stacks of clay (for stripes)
--cuts
out a shape of solid color clay with a cookie cutter, or paper pattern
& xacto blade
--onlays variously-shaped slices of the
jellyroll and stripe canes onto the solid body-shaped base sheet (somewhat
puzzle style, but some bits are 3 layers thick rather than 2)
--adds pressed-down
balls of flesh clay for head and hands, and 2 seed beads for eyes
--her different-pattern puzzle pieces are:
.......shoes, pant legs,
upper pants, belt, shirt, (vest), collar/buttons, arms, & hats or hair...also
cuffs at ankles, wrists, on hats
(--she makes pins or frig magnets from them,
but could be used for anything)
(--good lesson on making jellyroll/spiral
and striped canes there too)
....cane slices could also be added
to the cutouts (....left in relief like onlay, or very thin slices flattened
in)
shirts ....(cutouts
from patten sheets, using a paper pattern)
... many also embellished with little summer items like flip flops,
sunglasses, cameras, etc. ...onlaid/attached to them or dangling
below
http://www.dragonsglass.com/tshirt.txt
(red X's)
Heather
P's lesson on making small mitten shapes with clay, then embellishing
them with cane slices for cuffs, and also here and there
....(her
mittenshapes are cut around a cardboard template or freehand with
a Xacto though, rather than a
cutter)... ornament
http://www.humblebeads.com/mittens.html
Lynne
M's lesson on making a simple figure from flat chopped clay..
(if you don't make you own cutter, use a regular body cutter but remove head from
the chopped clay cutout and substitute) add a spiral cane slice for
head... bit of wire on back to strengthen for pin
http://www.hgtv.com/hgtv/cr_clay_jewelry/article/0,1789,HGTV_3238_3335450,00.html
Judy's lesson on making a toy polymer acrobat
figure from baked component cutouts joined with
wire --torso, arms,legs,etc (each a diff. pattern)
http://www.hgtv.com/hgtv/cr_clay_figures/article/0,1789,HGTV_3237_2831708,00.htm
for adding
faces (transfers or molds or actual photos) to
freestanding cutouts of bodies (or anything), with bases, see Kids
> Other Items
http://www.coolphotostuff.com/photo-sculptures.htm
Margi L's magnet-backed
figures or simple pictures... done coloring
book style with each Skinner blend sheet component surrounded
by black
http://www.studiocrafts.com/Products/Lm/pcmagnets.html
Linda
Goff’s fabulous wire-outlined shapes (Linda generally used a
copper or brass 20 ga wire, wrapped
with a 28 g wire but interspersed with small beads, then set into a groove around
the perimeter created with a gouge, and held with superglue ... more info in
Wire > Some Ideas)
http://www.lindagoff.com
(click on all 4 pages!)
Karen G's cut outs (from
sheets of pattern) wrapped with
wire outline shapes (with occasional beads)
...hers also onlaid with clay bits
http://www.mhpcg.org/images/members/Kg/Kgpins3.jpg
Dawn N's various shaped cutouts (forming a ring shape)
from a clay disk (placed behind a cross pendant as a background)
http://home.centurytel.net/tkaylen/group4.html
FLAT individual shapes can be used as components...then
layered in various ways to create a
final 3-D clay piece
..... sheets of clay (or even liquid
clay) are cut or made as these individual shapes
.....after baking
(or drying if not using clay), the component shapes are stacked on each other
in various places to create 3-D figures (animals, snowmen,
etc., or an object or even scene)
...Linda
Calef's samples using a cutter shape to create a base component
piece, which then has other component pieces stacked and overlapped on
it in layers to create whimsical critters, snowmen, etc.... she uses
colored gluesticks in a hot glue gun, to create each
shape for the critter on a see-thru hot glue pad (or sheet of glass)...(see
examples of Gloobies from pages of her book Wearable
Whimsies http://tinyurl.com/f8nhn
at amazon.com)
...hacrafter
uses just a few wood cutouts (which could be clay)
as component pieces of xmas ornaments
.......a
large
(painted) decorated mitten shape
has a snowman head cutout (in this case embellished with a fabric scarf)
attached partially behind one area of the mitten so it appears to be behind
it, but the snowman's arm (cutout) is another component attached to the
front fo the mitten....(mitten's
decorations could be polymer too --slices or onlays)
....more
patterns (from woodworking) for making many animals with hot glue guns
http://thewinfieldcollection.com/catalog.aspx?catid=113
......http://members.aol.com/_ht_a/craft2decor8/index_frame.html
(click on Christmas Crafts, middle of pg)
...more
very cool figures made from flat component pieces, which are onlaid
with each other to create a whole (painted, embellished wood,
but could be clay) http://www.pekin.net/pekin10/wash/artwood_ud/index.html
(Wash, Intermed.School, Illinois) (gone?)
ONLAYS...polymer
shapes made with cutters could also be placed onto other things or other
backgrounds
....snowflake wreath
embellished with many large "snowflakes" which are embellished
in all kinds of ways (San Antonio Guild members)... (some flakes have faces
in the center, chrysanthemum cane center. . . I can also see a regular
green wreath with lots of different snowflakes... maybe with tubes on the
backs of the cutouts so they could be wired on?)... foam wreath
has snowflake shape cut into center also, using a hot foam cutter
http://www.pcpolyzine.com/2004january/wreath.html
Marie R's lesson
on making a log cabin bas relief (on a xmas ball
ornament or a votive, or anywhere) with snow
....she
uses a base clay cut with a house shaped cookie cutter to
put her logs onto to create the log cabin... could use for gingerbread
house too.
http://www.sculpey.com/Projects/projects_BasReliefOrnament.htm
Kris
Richards' lesson on making a snowflake with a large 6-pt. snowflake
cutter and small "arrow" cutter
....after cutting the large snowflake
shape, then cuts out little arrow shapes from the "arms" of the
6 rays (inner area of the snowflake) leaving enough clay connected to a
central area... then places some of the shapes back on the snowflake
to act as a bridge between the central area and the arms... sometimes in
diff. areas as well....could use other small cutters or snowflake large
cutters
....then she brushes ultrafine glitter (clear, white, or prismatic)
on both sides and pokes a hole for hanging before baking
......(could instead
be textured white clay, highlighted or antiqued ..even with a metallic
or off-white, etc.).. or coated with metallic Pearl Ex
http://www.sculpey.com/Projects/projects_Snowflakes.htm
Nora
Jean's lesson on creating shaded petals (for sculpted flowers)
by cutting them out of Skinner Blend sheets with leaf-shaped cutters
http://www.norajean.com/Biz-Archive/Flowers/WaterLily/Index.htm
(see
also "Roses" websites on Sculpting-gen
page, under Sculpted Flowers sub-category for many more examples)
lesson on using wire with clay (could be cutouts)
to create cute bugs, suns, etc, (fairly flat) ...by bending
wires into shapes, then sandwiching parts of the wires
with clay shapes for bodies, e.g., leaving arms/legs/etc.sticking out .....(fom
Design Originals short book "Down to the Wire")
http://www.michaels.com/art/online/projectsheet?pid=k00028
(unfilled) HOLES:
James L's 2-layer
sheets... he uses a holey top layer of clay (holes made with tiny cutters),
laid over a solid under layer... in this case a variegated metallic holey
layer and a solid color underlayer . . . lots of variations possible
http://www.akrobiz.com/pc/i_72.html
Cutters
(or blades or drills) can be used to cut shapes out of he top of two layers
of polymer clay which are diff. colors... this will allow the lower
layer to show through to the top in whatever shape the cuts were made
...Black
& Decker drill bits makes a very clean cut hole in baked
clay (Ai-Ping uses them for drilling decorative holes in baked clay
...see Vessels
> Hollow Boxes)
..lots of variations possible ...
.....would be
fun to use a cutter for cutting a shape from the holey layer placed on
top of a solid or blend under layer (plastic wrap trick would hide
the edges of bottom layer)
....Cut
out shapes with small cutters (or carve out), then back-fill with
clay; bake; sand.
...........Oscelyn’s cut-outs, back-filled with gold clay
(website gone);
INLAYS:
Bob's lesson in Polyzine on using a cutter to make a thin inlay of a larger
shape to place into a background (inlay same size/shape as hole into which it's
placed)
http://www.pcpolyzine.com/september2001/cutters.html
...If
you want to prebake a bunch of Kemper cutter shapes to use as inlays,
etc., just press a raw sheet of clay firmly onto a smooth tile or other
surface, and cut quickly while rocking the cutter... or use cornstarch
over the whole sheet (see below in Cutting Tiles)
........if you put the sheet
onto a smooth tile, you can then peel the excess clay off,
and bake the whole tile with the shapes on it. Works great. Bean
(see
more on raw "inlays" in Sheets of Pattern
> Pieced)
REPLACEMENT
inlays:
......Jackie's small cutters (hearts, etc.) used to remove
shapes from one sheet of clay, and replace those with the same shapes
cutout of another pattern sheet
http://gallery.gundo.com/gallery/album55/JackieTexturedClay
...Tina's cutouts from
crackled sheet of metallic leaf on clay (frog, etc), replaced into hole
cutout of same size/shape
http://www.mhpcg.org/clayDays/claydays04/june2004/tinaG1Lg.jpg
......
to insert shapes of filigree (or non-filigree) into a prepared sheet
or spiral of Balinese Filigree, use a cookie or canape cutter
to remove some a portion from some portion of a BF spiral, sheet, row of
ropes,etc., then fill in with the cutout from another color using the same cutter.
(Placing plastic wrap over the sheet before cutting should leave the edges rounded
rather than evenly cut, if that's what you want.) Diane B.
BOXES & LIDS (see Vessels
for making little boxes and lids with cookie cutters... can also
be used for box-type pendants)
FRAMING-BACKGROUNDS...
2 or more graduated sizes of the same, or different, cutout clay
shapes can be stacked on each other to create framing backgrounds
for pendants, etc
....or stacked and used as end caps for beads... or
other effects
CANES: making canes
using cheater cutter method ( from stack of same-color)
....Arlene's
valentine heart cane http://polymerclaycentral.com/pcc/hearts.html
(see Canes--Info
> Types of Canes
for more details on this method)
....Cutters can also be used to make clean
cuts into logs or canes ....to create component pieces for
regular or landscape canes, e.g. (see Canes >
Landscape)
.......(see Kris's Polydolly lesson above for one small
example)
STAMPS: you could also use baked
polymer cut-out shapes (perhaps embedded at the end of a chopstick)
to stamp with (for example, stamping metallic powders or acrylic
paint onto raw clay, or even fabric paint onto t-shirts, etc.)
http://www.twisteez.com/products.html
(like these "chopsticks")
(see
also Clay Guns
> Disks for another way to make tiny shapes by using a slice of extruded clay)
.....there
are way cool small butterfly cutters (8 different wing types) plus
3 flowers in the set at http://www.cookiecutter.com...
I will be showing how-to- (do some really neat ones made with stamped and
metallic-powdered) wings in my new book (Celebrations with Polymer
Clay)... Sarajane Helm
COVERING:
Barbara McGuire's lesson on covering a votive (her clay is actually covered
with metallic leaf), then using a cookie cutter to cut through
the covering clay to create outlines which the light can shine through
http://hgtv.com/HGTV/project/0,1158,CRHO_project_18078,00.html
...or
just impressing a plain clay covering with cutters will allow the
light to shine through those impressed outlines more strongly
than the surrounding smooth clay
MOKUME GANE: Helen Hughes's
article & lesson on making mokume gane using a small cutter (pressed
into a stack) to create an outline, then using tools to draw/impress details
inside the outline (and outside for framing interest) before making her cuts across
the slab. She used two stacks for her variation on this method, cutting
a shape from one stack, then placing it into a matching hole-shape cut from a
different stack, before adding details. This can create more of a different color
scheme for the cutter shape (e.g., a butterfly) from its background, etc.. http://www.pcpolyzine.com/september2001/inlay.html
It would also be fun to combine this technique with some of the other mokume
techniques like leafing/powders/paints or with mica or other inclusion clays,
marbled clays, standing-on-edge folded stripes as for folded canes, etc.. DB
If you're doing a stand-alone cutout, for a pin e.g, using a double thickness of clay, or backing with a black or neutral color sheet makes for most strength.
cutters (or stencils) could be used to apply shapes of powder with a smooth outline... place over the clay and apply powder with a brush (around cutter??).
The edges of the cutters themselves
(curves, tips, indentions) can be used as cutters to remove small shapes
from edges
....Marlene's use of star cutter to make 3-pointed jester
hat (website gone)
Cynthia Tinapple's unusual chain
made with Kemper cutters ... for the links, she cuts round and
squares disks of metallic Premo with Kemper cutters, then makes lozenge-shaped
holes with a somewhat flattened aluminum tube, bakes, then cuts diagonally
across the bottom of each link to be able to slip another link through, and
closes with superglue
...also her pattern sheet made by applying
Kemper cut-outs of different colored clay to (both sides of a) base sheet before
flattening in the pasta machine
http://www.tinapple.com/oldsite/cynthia/1098neck.html
A sheet of plastic
wrap can be used to create a rounded bevel on the edges of cutout
shapes ...if small, these could be puffy-looking shapes
lesson:
....place a sheet of plastic wrap on top of the sheet of
clay before cutting it with a cutter (or blade?)
.........I
heard you could also use an old dryer sheet between the cutter and the
clay. Karen NC
....for
best results, it may help to cut on top of a very hard surface --or a somewhat
soft surface like foam??
...
press cutter through clay through plastic wrap (this won't cut the plastic
wrap)... can wiggle cutter a little against work surface when reach it
....remove
cutter, then remove plastic wrap
........using a thicker/heavier piece
of plastic will give the edges a gentler and longer slope/bevel
than using thinner plastic
........you may
have to turn under the outer part of the edges to make the edges
of the shape completely smooth when using a cutter this way, but it's quick
because those areas are very thin (or cut off thin excess with blade)
OR
....after cutting out a shape without plastic wrap, you
can round-bevel the edges later as well:
... by rubbing over
them with a finger (perhaps with a bit of cornstarch or Bon Ami or Vaseline,
etc.)
... by rolling a rod over each side of the shape
(parallel to edge)
........ Mike Buesseler used to create a textured
bevel on the sides of his pendants by rolling the long side of a cross-hatch
textured ("knurled") metal tool handle (like wrench or leather
punch) up onto each edge-side of the clay (which also straightened up the
sides a bit)
puffy cutouts
......could be used as freestanding
tiles to create create quilt patterns (if placed next to each other)
..............I
used this method when cutting "squares" for a quilt, since the
beveled edges make it look "quilted" Becky
......or use
them for mandala type patterns (if spread out...see more on mandala
patterns in Onlay > Uses)
.......especially
nice for making a tiny puffy heart
..........pillow
beads can also be made this way (as well
as the regular way)
Using plastic wrap is also a good way to avoid the dimple created on one side by plunger type cutters
When
2 stacked layers of different colors
(of raw clay) are cut out as one layer, the upper layer color should
be dragged down over the bottom layer color and hide it
(esp. for pendants,etc.)
You can
"cover" cutout shapes of wood or other materials
(which has straight sides or slightly curved sides --like Woodles, or pieces of
masonite or balsa wood) neatly with a sheet of clay, place wood cutout
on work surface, cover with sheet of clay then with plastic wrap... make cuts
with long blade outside each edge
.........to make more angled or
strongly curved cuts around the outside, the end of the blade, or the
shaped edges of various other cookie or smaller cutters could
be used to take bites out
... if you began
with a layer(s) of clay as thick as you want the fattest height of the tiles to
be, you could impress the rows of "stitching" or other embellishment
in a grid all over the sheet) with a straight edge ... then cut the
shapes out (with a piece of plastic wrap over the sheet if you want the puffy
look...you'd have to measure the spacing for the stitching lines very accurately
first though). Diane B.
....see clear plastic cutters (sold by Amaco) which will cut out certain sizes of automatically-beveled shapes, as well as do other things, below under Small and Medium Cutters > "Bevel Edge Cutters"
TIPS
for cutting out with cutters
releasing
As
a release, I'd recommend dipping the cutter in water to create
a water barrier when you cut shapes. Faun
...I use a lot of itty bitty
cutters with clay, so I press my cutters onto a watered-soaked
round cosmetic sponge sitting in in a baby jar lid.
OR possibly
press cutters in puddle of ArmorAll (silicone) or veg oil (or Vaseline)
........or Diluent-Softener or liquid clay or RepelGel
(ca debonder)?
....or wipe cutter edges with sponge or tissue soaked
with one of those
(if using ArmorAll, don't
use too much
or it will resist any powders or liquid finishes you might want to use later)
OR
dip cutters in cornstarch (or talc) before using ...or could use
a ponce ball with cornstarch or talc, perhaps loosely filled
It
can also help to kind of rock the cutter slightly as you
cut (esp. when clay is stuck down), so that one cutter side will release a bit
while the other is pressed down
...I press the cutter only a little into
the clay... then I slightly wiggle it and press further down...
and wiggle again. It seems to help release the cutter. Bean
...I
find that quickly doing a whole sheet is very important when
doing a lot of cutouts. Tamila
I
found that freezing the cutters helps too. Nancy (...prob. because
heat will be generated from the friction of using
the cutter, and warmer clay is
stickier)
...cooling the clay sheet can
be good too (...refrigerating, freezing, or just letting sit a while)
to
keep the clay from getting
stuck in the cutters
..press
clay sheet securely down onto a smooth surface (so its's stuck
down to the surface)
..........(perhaps dust the whole
sheet with cornstarch)
......... then use cutters (...can
rinse cornstarch off later with cool water if necessary, but usually not nec.)
....or
after pressing the clay down on a smooth surface, make as many cuts with the cutter
as you but leave all the clay in place... when done, peel up
the excess clay leaving all the cutouts on the surface, then scrape
the shapes up with a palette knife, etc, to use
.......if you press the clay
onto a sheet of plastic (ziptop bag, etc.), you can later flex the plastic
to make removing the cutouts easier
.......or if you use a bakable smooth
surface like metal, glass or ceramic tile, you can bake them in place
if you want stiffened shapes
Putting plastic
wrap over the clay sheet before cutting with a cutter can work... will create
rounded edges on the clay shape
one
solution (for any cutters or for complex-shapes) would be to bake the clay
in the cutter (if metal) for only 5 min to firm it up a
bit
... then push it out (without messing up the no-longer-raw
clay).... bake again for a further 20-30 min. Sarajane H
Getting
more complicated shapes out of cutters:
.....small
alphabet cookie cutters ... I've tried freezing the clay and this helps
some.... Choco
....my little dragon-shaped cookie cutter (actually,
a Japanese vegetable cutter) has such intricate details and narrow parts
of the design that I can't
get the cut piece of clay out in one piece
... also you can't "blow" the clay out of the cutter because there are holes in
this design
.... I tried oil, cornstarch, oil +cornstarch, freezing, and putting
plastic wrap over the surface of the clay before cutting (this last didn't work
because I have to use a fairly thick sheet of clay) Beth
making
a custom pusher for an individual cutter:
...I
make my own custom pushers for each of my med & large (metal)
cutters
..... I bake a very thin piece of
clay in the cutter
......then I push
it upwards in the cutter, and use that piece to push out
other cut pieces (so there's no need to poke at the soft clay)
.....
(if there are braces across a particular cutter, you can't push it all
the way to the back but it goes back far enough and you can use the end of a tool
to push the baked bit down to get the new cut bit out) Crafty Owl
...make
a custom pusher for your cutter …first use the cutter (dusted with cornstarch
or coated with ArmorAll) to cut a shape in a thick layer of clay, but do
not remove the cutter)… insert a stick (the biggest you can
allow up to 2/3 of the cutter size) into the clay.... then bake
.........while
still warm, push out the clay and let cool .... now you have a custom pusher
to get the others out of the cutter. Lysle
...see-through
back with pusher ...Christopher
Hentz placed his shaped cutter on a sheet of cellophane
as a release ....he then mixed a slow setting clear epoxy and carefully
poured it into the center of the cutter (...I believe he lifted
the cutter for a second, allowing it to spread out a bit, then set the
cutter back down into the epoxy). ...after the epoxy had set and the cellophane
was peeled off, the resin held the cutter's shape and was transparent
.......to
make a pusher for it, he drilled a
hole in the epoxy and used a bolt and a spring and something like
a big rubber washer to push against the clay
...(see
also Small & Med Cutters > Around the House below for making pushers
from plastic lids)
for other ways of getting clay out of plunger-type cutters like the Kempers, see just below in Small Cutters
baking
clay on a metal cutter when used as a temporary armature
....I
use cookie cutters (as forms for cuff) bracelets
... I coat
the cutter with cornstarch or talc ...(put the clay around the outside
of the cutter?) then bake them for the full length of time
... I do not remove
the clay from the cutters until they are just medium warm since the
clay isn't too stable when it's still hot
... I use a small dental tool
that is rather wide, flat and pointed to ease the clay off of the cutter... sort
of like using a thin knife to go around a cake in a metal pan to help remove it.
(...If the clay is completely cured, it has slight elasticity
to it and this helps in removing it ...if it's not completely
cured, it can break
on the edges). Dotty
work surfaces
with grid lines are a good thing to work on for any cuts
which are straight, or parallel, or measured
in some way
...these are also good for cutting
strips or squares & rectangles from
clay sheets (for making boxes,
covering things, etc)
...see Tools
> Work Surfaces > Thinnest to Thickest for the gridded Omnigrid
ruler... plus more info on other gridded surfaces)
after using a plastic cutter especially, be sure to wipe it off (with alcohol) because some plastic cutters will react with clay (and begin to eat into it) --I found this out when I left a cutter sitting on a slab of clay and they became one. Kim2
finding
silhouette images that simulate cutter shapes
--for making your own cutters or templates & stencils
...Dover books which feature silhouettes are one resource
for these shapes
http://store.doverpublications.com/0486995127.html
.....or
look in Google's "Image Search" (then enter the word silhouettes
in the Search Box for the item or figure you want... click on "More Results"
to see them all)
...see also the" Stencils & Templates"
category below, for getting shapes in other ways
Small & medium cutters can be purchased... or found around the house ...or made.
They can be geometric shapes (round, square, etc.) or they can be shapes of objects (animals, fruits/veg's, houses, hearts, snowflakes, etc.)
BUY online
Kemper Tools makes 2 kinds
of cutters used for polymer clay
... 1" tall small plunger-type
cutters in various shapes (round, teardrop, flower (5 rounded lobes), heart, star
(5 pointed lobes), triangle, lilac (4 rounded
lobes)...diameters are tiny to small (for round cutter, 3/16" - 7/8"
diameters)
1/2" tall medium
plunger-type cutters in vairous shapes
http://www.kempertools.com/index.php?link=eCatalog&page=24
... http://www.kempertools.com/index.php?link=eCatalog&page=25
two shapes of the larger Kemper cutters
(aluminum)
http://www.kempertools.com/index.php?link=eCatalog&page=31
Clay Factory's small & medium Kemper cutters... can buy small
ones individually as well
http://www.clayfactory.net/kempertools/pages/patcut.htm
http://www.clayfactory.net/kempertools/pages/K50.htm
... http://www.clayfactory.net/kempertools/pages/K46.htm
Kemper & other...PolymerClayExpress's
many small/med/large cutter sets, in various shapes (geometric &
objects)
http://polymerclayexpress.com/cutters.html
Prairiecraft's many medium geometric cutters (can also be used as forms--many
esp. good for making inros)
...single 2" tall cutters (round--1
1/4", double-circle/donut--2 1/2" outer dia., square--1", rectangular--1.5"
x 3/4", diamond, oval, ellipse)
...set of 2" tall cutters
(6 triangular--3/4" - 3 1/2")
...sets of 1" tall cutters
(12 round--7/8" - 4 7/16 , 6 square--1 3/8" to2 5/8")
http://prairiecraft.com/page/DONNAKATOPOLYCLAY/CTGY/KCF
(UK) ... PolymerClayPit --mostly Kemper
plungers + Makins cutters
http://www.polymerclaypit.co.uk/acatalog/Cutters.html
Amaco Friendly Cutter Sets --ovals, leaf & 5 flower sizes,
& 8 geometric shapes including long rectangle, equilateral triangles,
and teardrops, other leaflike or lobed shapes, figure-8, long
pointed oval, yin yang, etc.
(UK) http://www.heaser.demon.co.uk/products/Tools/tools.htm
...http://www.herrschners.co.uk/search.aspx?q=cutters&catID=&tab=
(....
see many more below in Suppliers --mostly for med.& lg. non-geometric
cutters)
BUY
local
craft stores ...often sell plunger (Kemper) cutters, as
well as non-plunger types... can also find more cutters in cake decorating
aisle, or for paperclays
cooking or baking stores...
often have graduated sizes of same-shape cutters (nested)
restaurant
supply stores.....I was just over at the Smart & Final, and in their baking
"tools" section, they have round cutters (quite a large set - 11
pieces) for only $11.20 (they also have a fluted version for $1 more). Karen H.
Kemper
makes 2 types of small and medium cutters
....
both are called "Pattern Cutters" and both have "plungers"
to release the clay (but generally it's the the tube type that's referred
to as a "plunger-type Kemper")
1) small, tall tube-type brass plunger cutters
2) shorter
and wider aluminum
round "Rose Petal" Pattern cutters,
and "Leaf" Pattern Cutters, circles,
etc.
The plungers on the smaller tube cutters
leaves more of a mark on the clay
...At retail
stores, these both come in sets (either same pattern but diff. size, or
assortment of same-size but diff. pattern)
... or online they can sometimes
be bought individually
http://www.clayfactory.net/kempertools/pages/patcut.htm
....
http://www.clayfactory.net/kempertools/index.htm
http://store.yahoo.com/fimo/tools--blades-and-accessories-pattern-cutters.html
(at Accent Arts)
To prevent having a
little impressed dot on one
side of the clay cutout after cutting with a Kemper tube plunger cutter (
made by the little rod plunger as it
pushes out the clay), Nancy Banks removes the plunger ... she drills
out the dimples in the cutters ...without the plunger, you can also see
just what you’re cutting, if that’s important
......( then you will have
to use the wrong end of a paint brush or such to push the clay out
...and you may end up with sore finger tips if cutting alot because the tube is
thin)
......(this is a great idea if you have two sets of cutters, I might
not suggest it for your only set). Nancy
OTHER WAYS TO PREVENT
.....it should
be possible to make a flat pusher for the plunger cutters which
is larger than the small rod plunger.... cut out the shape with the plunger
cutter from a thin sheet of clay , make sure the edges are smooth (and
maybe press it a tad smaller?), and bake it... then place the baked
cutout in the plunger cutter before cutting out the shape in raw clay each
time (or could possibly superglue it to the plunger instead?)
...or
place plastic wrap over the clay before cutting it (will have to clean
up the edges a bit though)
...Kris Richards spends 2 pages of her book
on Kemper tools, and 3/4 of that on these tools and customizing
them ( "New Ways With Polymer Clay....The Next Generation of Projects and
Techniques" ). Jeri
regular brass tubes as cutters
(not Kemper... no plungers)
...round and square brass
tubes of various diameters can be purchased at hobby stores
(or Ace Hardware) near their display of metal strips, and used for punching
out small shapes of clay
.......if necessary, use a long pusher to push
the clay out of the tube ...could be the back end of a paintbrush, a dowel
or solid metal rod just small enough to fit into the
brass tube being used
...I sharpened
the edges of a section of brass tubing on a belt sander and made
a tiny 3/4" square (or round or rectangular) cutter . Jody Bishel (only
outer or inner side needs sanding)
..........do
not use an electric grinder
to do metal sharpening... power sharpeners can overheat the metal and destroy
the temper (& you will need to sharpen it a lot). Lysle
.....Sarah
Lajoie has a lesson on sharpening the outside edges of a square
brass tube with a fine file held at 45 degree angle (for
cutting small tiles)
http://pcpolyzine.com/october2001/frame.html
even rolled paper tubes are surprisingly strong if they have a lot of layers
....see also Punches below for other hollow things which could be used as small punches
Bevel Edge Cutters, by Amaco (orig.
by Poly-Tools, I think)
These are various shapes of double-ended
plastic cutters--same shape on each end, but one shape is larger than
the other
(the instructions are confusing, I agree, and the cutters are
not quite what we'd assumed from the name)
... so, I think they're not
necessarily just cutters for making beveled
edges, but cutters which are themselves beveled
to allow one to more easily make freestanding bezels-frames,
or possibly to simply make the impression of a "frame" of the same outline shape
inside a larger cutout.
(I think the main beveled edge of the cutter
unit is there only so that the second smaller cutter on the other end can
be a continuous part of the larger cutter...and that the smaller bevel which creates
the rim of the smaller cutter is beveled so that it can make that edge sharper
and cut more easily)
...USES?... I'd guess these ways:
1. create
a freestanding bezel-frame (which would itself end up beveled a
bit perhaps depending on the thickness of the clay sheet being cut) .....press
the larger cutter's end down through the clay to create a cut-out (or just cut
around it like a template if it's not really sharp) .....then center the smaller
cutter's end on the cutout, and press down through the clay .....remove the center
cutout, leaving a frame-bezel
2. create a freestanding bezel-frame by making
only impressions with one or both cutter shapes (in the same positions
as above), but then actually cutting them out with something else like
a blade --or stiff pin, etc.
3. create a frame line inside the larger
cutout simply by making an impression of the smaller cutter line inside it (IOW,
do as above but don't actually cut out the center part; simply press the smaller
cutter onto the large cut out shape enough to make an impression --which would
register visually as a "frame")
.... I thought at first that Amaco might intend
one to use a long blade to make cuts using the beveled sides of the cutter as
a guide for 45 degrees --actually would be much less than 45 degree angle... but
that would only allow one to bevel the outside of the larger shape --IOW, not
using the larger cutter as a cutter; but instead placing the cutter large side
down on a clay sheet, then laying a long blade up against one of the beveled sides
of the cutter and sliding it down into the clay sheet till the cut is complete.
Diane B.
...for making beveled edges yourself, on
the sides of cutouts/etc, see above under Shape Cutters > Beveling Edges
avoiding
distortion
when using cutters
..SHEETS
with holes
.. . . to
cut shapes, (especially with Kemper tube-type cutters) from a sheet where you
don't want the sheet
itself to distort, lightly press
sheet onto a slick surface that's bakable (like a ceramic tile)... then
punch out your shape(s) without any of the little tricks for easily removing
them... this will allow you to push them out afterwards and leave your sheet
intact (see Kids >Games>TicTacToe,
e.g.) Diane B
... USING the
HOLES themselves .. . . If you want to cut shapes
which won't be distorted, but you
don't care about disturbing the base sheet ... use a smooth tile, etc.,
and also then use one of the release movements (like pressing then twisting,
or Saran Wrap over, etc.) so that your cutter will come out clean every
time
.....then remove the sheet, leaving shapes in tact on
tile, and bake them that way... can pop off after baking. Diane B.
I
made slab "holder-bases" for my Kemper cutters
(could also use for small containers of metallic powder, or whatever) ...
...(lesson) I start with scrap pc put thru at #1, arrange how I want the
cutters to be, put them on top of the pc. Have the cutters cut their own little
space; I use a release agent .. Make another layer of #1. Take first layer and
put it on top of an (uncut) second layer. Have the little cutters do their little
cutting again.. Do this process until you have 4 cut layers. Make a fifth
slab at #1; this is going to be the very bottom (so also make it big enough to
go up over the sides if you want). Leaving the cutters in the form, bake the whole
thing in the oven for about 45-60 min.. As the form cools I wiggle the cutters
around just so they have a "little wiggle room"....Another little tip I'm taking
from Helen is to use your tiniest cutter, cut a little extra piece and put on
top of your creation. That little piece becomes its " title". Dar
http://www.afamilyjournal.com/pctools2.jpg
and http://www.afamilyjournal.com/pctools4.jpg
...Could you do this with only a few layers in or on a box lid?
..to
save clay: ...could you use only one base layer, then add a stack
of 3-5 clay disks (or other shapes) of clay for each cutter (cutting after
refrigeration to firm the stack), on top of the base layer?
...or could you
make one (or two) layer with holes, bake, and add to 4 sides (and
a bottom, or to a box lid?), leaving the interior somewhat hollow?
around
the house
(modified-objects & temporary cutters)
To make a
small round hole shape in a sheet of clay, drinking straws
(various sizes) or coffee stirrer straws can be used
...press
& rotate the straw where you want the hole... remove from clay ...then either
blow out the clay in the straw, or cut that bit off and use straw again.
........McDonalds
and some of the smoothie places have really large stiff straws too
...caps
from old lipstick tubes make great round cutters (and some also have texture
on the outside!) ..H20 baby
...Tony B. uses the caps from eye makeup...
(liner pencils, mascara, etc.)
...I use the cylinder from an ink pen.
Steph
(these small ones are useful more for making
holes in a sheet, than for making the cutouts themselves)
Use
the cap from a deodorant bottle, or a plastic container or lid,
or other object you find as a cutter
......some will not be sharp enough
to cut through cleanly, but you can trim after cutting, or you can simply
make an impression first then cut out with a blade
.....maybe
wet-dry sandpaper could be used to sharpen the edge of some things
(only one edge needs to be sanded)
...also, some objects of this type can be
squeezed into other shapes and held that way while cutting (e.g., an
oval cutter from a round object) Diane B.
Have you ever heard of using a
prescription pill bottle, with the lid removed to trim the end so
they are 'slimmer', so it will make a fine cut and not a messy one.... they come
in a few different sizes....can be done with a Dremel type hand drill/polisher.
...it's good if you also can cut the bottom off... then you can see
exactly what you're cutting..... especially if you are trying to cut out a
particular design. Mary Clare
....removing the bottom is a good idea too because
I found it hard to hold the "cutter" exactly
symmetrical while cutting an oval shape with a film canister,
for example (close but not precise enough). Diane B.
I collect tops from
numerous items that I purchase and put them to use with PC. It cuts the cost
substantially..I use the plastic top from my Loreal moisturizer which is
a nice oval. Crafty Michele
I found
the bottom of a Mabelline "shine free" pressed powder compact was
a rounded square of aluminum (under the powder). Pried it out
and it makes a nice cutter. 10more
...That star-on-square shape seems
to be made with a contact-lens disinfectant cup piece, pushed into the
clay (cutter or stamp?).... I really like the patterns the contact lens cup plastic
pieces create and use them a lot. Those indentations mostly have embossing
powder in them which is then baked. Karen (find URL)
A perfectly round cutter can be made from the top of any metal can if you open it with the one type of safety-type can opener which leaves the rim sharp... have to look carefully though, because some safety types leave the top thick and unsharp (those cut through the actual lip of the can rather than cutting below the lip onto the can itself)
Making
a push-outer for one of these:
.... I drilled a hole in the top
(of my deodorant cap).... I cut a plastic margarine lid to fit inside
and also a piece of plastic canvas because that won't bend
....I put
the plastic lid piece, then the plastic canvas, on the clay that I'm going to
cut... then I top it off with the deodorant cap.
....after pressing the cap
into the clay, I insert a chopstick or similar item into the hole in the
cap, and push. Eltrut
(see also Tips for Cutting Out above for making
pushers from clay)
BAKED
clay ...bake very thin clay sheets... punch or cut shapes out
when warm (stars,
hearts,etc).. many want to bake the clay a longer
time for strength
....can
also stand on some punches to get them to cut through (esp. if clay is
thicker?)
...Polyzine's lesson on
gluing punched out clay shapes, or shapes cut with pattern scissors, with
white glue to the front of folded cards (cards made by covering
the front of the cardstock card with a sheet of same-color or complementary-color
clay http://pcpolyzine.com/january2002/tycard.html
.... I used the Sizzix die cut system to cut shapes
in baked sheets of polymer clay with fairly good results, especially with very
thin sheets of flexible clay. Irwin
....baked
shapes can be inlaid into raw clay (see Inlay
& Mosaics)... or be used alone
or in other ways
...one
way to make flat "heishi" (spacer) beads is using 2
paper punches (one which makes tiny hole and one which makes a larger
hole)
........take
sheets of baked clay (#5 on the pasta machine) and punch a row of little holes
with the tiny punch
........then go back and use the bigger punch around those
holes and make heishi beads!!
....... you can turn the bigger punch upside
down, and use the gap the punchout falls through to center the little
pre-punched hole! --Cynthia Toops showed us this one
RAW
clay: ...place clay in between 2 pieces of paper,
waxed paper, or thin tracing paper ....or on one piece of cardstock
.........or
powder it heavily?... or leach ...or refrigerate or rest
clay first.... or use flexible-type clay?
....I
had more luck using punches on raw clay than on previously cured... the clay would
stick to the punch, but when I put a 3 x 5 index card behind it, the card
kept the clay from sticking ... I used a curved dental tool to lift the clay off
the paper
......I could make the clay relatively thin --all the way
down to about a #5 or #6-- and still work with it as long as I immediately
removed the
clay from the index card
......(if you don't remove it right
away, the corners will dry enough that you will
have problems lifting it later.) Peggy
....I bought a 1/4" paper punch
to make clay stars, and I had a sheet rolled #4 of Premo Pearl & white
mixed which had been sitting from the day or 2 before, so it was cool
and firm... the punch worked fine
....I didn't need to bake a sheet
to use the punch, it worked fine raw as long as the clay isn't too warm
and sticky.
....every
once in a while I added some release powder and semi-punched it on the
nylon hose that holds my cornstarch. Jan C.
....I
had a punch in the scrapbook supply box that made maple leaves approx 1"
across, so I rolled the raw green clay *real* thin, then punched out
the leaves. ....They draped over the pumpkins beautifully for my son's pumpkin
patch complete with Snoopy and Linus! ......it was one of the really heavy
cast punches, and new, so it was very sharp.... I tried the same thing
with a tiny bat punch, but I think it was too small,
and didn't work as well.). Denise
BAKED
liquid clay ...cut shapes from films (decals) of baked liquid clay sheets
(could be colored, or have inclusions, etc.)
.........may be able to punch
directly, or use on of the methods of raw clay just below
...spread
some liquid clay REALLY thin on a baking tile (I used the colored kind, but soon
I shall mix pearl-ex powders into it) ...after it bakes and cools, carefully peel
it off.... then just go crazy with your paper punches
...to inset
the baked liquid clay shape on a round raw bead, I carefully put the cutout
KoKopelli shape on it, making certain no air bubbles were trapped, and gently
rolled it around a bit, making sure it was stuck on the bead fairly securely....then
I baked the bead, let it cool and glazed it. Pamela
helpful tool ... Strong Arm ...facilitates repetitive punching of polymer as well as paper, and beats using a hammer or standing on the punch! ....the manufacturer is McGill, costs around $20 ...found among the paper punches in local craft stores. Carol http://www.mcgillinc.com
Jan
S's lesson on using a large shape punch (frog or leaf, e.g.)
to create a a mold or molded piece
....(from a baked clay sheet with a shape punched out,
which has been backed (glued to) another sheet of plain baked clay--
or could back with raw sheet attached with liquid clay) ......or do this with
multiple shapes punched out?
http://pcpolyzine.com/december2001/punch.html
leather
punches ("belt punches", also grommet punches?, etc.) make small
holes ....can make holes in clay and other materials
.....(these create
holes differently than a pointed needle-type tool or awl because
they are hollow and actually remove a disk of the
material (rather than spreading it apart)
...individual
drive punches or saddler's punches or center punches . . . .these are struck at
the back end with a hammer, etc, to force the punch through the leather
http://www.rantektools.com/handtool/hlp.htm
(many sizes)
....can be purchased singly for each size hole, or in a
set with two handles and 8 or so interchangeable screw-on? punch
bits http://www.widgetsupply.com/page/WS/PROD/BBK40-S
...rotary wheel
(or revolving) set of leather punches...these offer 5-6 hole size punches
on one tool (on a revolveable wheel)... squeeze to force punch through... holes
cannot be punched far from an edge however with this
type
http://www.emocs.com/leatherpunch.htm
...bunches
of different punches http://www.csosborne.com/l-punches_1.htm
Japanese screw punch (or
"Japanese book drill") ...has various interchangeable
hollow bits (various brands?)
....when pressed down, the handle
causes the shaft to turn the drill bit (which is actually a hollow punch),
creating a smooth hole (the tool itself stays stationary
...(these have the
same action as a push-pull drills, which use regular drill bits
rather than hollow bits --for those, see Beads-Holes
>Push drills)
...creates holes anywhere, in stacks
of paper, cardstock for making books, or in baked clay, leather, matt
board,etc
.......its smallest bits are good for putting through waxed
threads ...larger bits good for book posts, leather cord, etc.
http://www.pcpolyzine.com/2004february/bookdrill.html
(Lauren's article on using a book drill for making polymer books)
...set
with 7 hollow-point bits: 1mm,1.5mm, 2mm, 2.5mm, 3mm, 3.5mm, 4mm = $69
plus shipping
..... or just the bits $37.50 (in case your
screw punch came with only one bit)
http://www.coilconnection.com/bookdrill.htm
http://www.dickblick.com/zz128/66/products.asp?ig_id=6142
Japanese
screw punches have some advantages over spring-loaded
punches (below)
...use them with one hand only... smooth drilling
motion (no sudden punch)
Some eyelet-setting helpers also have bits for
creating holes... they require 2 hands,
and have a spring-loaded, single hammer action to make hole:
....Click
It! (by Karen Foster) ...can punch with it (or also set eyelets, or impress
letters/numbers,etc. with separate kit)
http://www.mousememories.com/storefront/Multi_Themed/clikit.asp
...comes
with 10 interchangeable tips: 6 (round?) hole punching tips (
2- 5 mm dia) and lacing tip (makes 2 rectangular holes)... plus
eyelet splitter tip,.eyelet rounder tip
..supposed to be quiet, but many
say it's not (but makes only one sound, rather repeated hammer blows)... attachments
maybe hard to remove from the tool ..not for fabric
...resistance of the punch
is able to be adjusted, which is good
....Better Setter (only for setting
eyelets??) ..."Noxon spring action tool, 2-bit snapper, 1/8" eyelet
setter"
.....shaped like a pen .....(some complained it was difficult
to pull the spring to release it)
http://www.blockheadstamps.com/silentsetter.html
...Silent Setter (by Provo Craft) ..... sold primarily for setting
eyelets though
...silent ...has 3 interchangeable magnetized bits for
holes
...push down on the handle and turn it clockwise
(must use quite a bit of pressure?)
http://www.blockheadstamps.com/tools-eyelet.html
....(for mini hand drills which use bits
which are not hollow to make small holes in
baked clay, see Bead-Holes > Mini Hand
Drills)
Craft
stores like Michael's carry very small cutters in their polymer clay
sections; they are right up there with the push molds, or in other areas as for
paper clay, scrapbooking, etc..
The cheapest source for these things is Cost
Plus. I have seen the same $15 or $18 set of leaf or alphabet shape cutters
for $5 that I saw in a cooking store.
Also cake decorating stores.
Another good source is canape or aspic cutters. They come in every shape in the world. Lots of flower shaped ones can be found at large Japanese markets or any good cooking supply store.
fondant cutters are smaller than cookie cutters, and cheaper than clay cutters. bubbles
I was walking down the main drag of San Francisco's Chinatown yesterday
when my eye caught a glimpse of what looked like miniature cookie cutters in the
window of a cookware/hardware store. ...As the shopkeeper politely led me to a
glass case and pulled out a large box filled with a great variety of intricately
shaped pieces of metal, and as I picked them up to look at them, my jaw dropped
to my knees,...Turns out they were indeed cutters, individually handcrafted and
imported from China. According to the shopkeeper, they're called garnish
cutters and are usually used to cut turnips and other rootstock
into shapes to adorn foods at banquets. They come in a wonderful variety of shapes,
including:
a large dragon (2-1/2 inches wide,) smaller version of dragon (1-1/2"
wide), large phoenix, smaller version of phoenix, elephant, dog, squirrel, butterfly,
large fish (carp,) small carp, pig, panther, rooster, lionfish, lobster, crab,
written character for "good fortune", written character for "happiness," and possibly
others I can't remember or didn't see. .
The delicate intricacy of the art
in some of these shapes just blew me away. . . .the shapes also have that kind
of whimsy or joy in them that imbues the best of folk art. ...such perfection
comes with a price. The large and most intricate cutters (like the large dragon,
the large phoenix) were about US$29.95 apiece. The smallest and simpler animals
were $9.95 apiece...I hope the fact that I added embellishments of beads to their
eyes, and added a little texture and acrylic to the rooster, will make up for
the lameness of my dragon! Ann P.
alphabet
cutters ...2-inch plastic alphabet cookie cutters. . . been looking
at them but haven't quite figured out what I'd do with them. . . I always figured
that if I ever got around to using mine, I'd make kids' names on a little stand
or to hang on their door, like you see the painted wood ones. Could also go
on a lamp, a school binder, etc. The 1" ones would be even more useful,
I think . . . again for kids, the initial/s could be decorated and used as a pendant
or pin. . .
....I have a set of alphabet cutters about this size (1-inch
tall), all caps. My sis got them from the Wilton/cake area of Walmart,
I think. They are marked "Jigglers" as in Jell-O....Patti
... Cost
Plus. I have seen the same set of alphabet shape cutters for $5 that
I saw in a cooking store for $15 or $18
...I found canape cutters in
a kitchen specialty store called "Different Drummer" in Albany NY. They
are less than 1 inch tall. I have a selection of several different
sets. Each set came in a little tin to keep them together. Tr y searching for
canape cutters or mini canape cutters. Sally
...*Sweet Celebrations*
http://www.sweetc.com
(must look through their huge catalog!
--click on 7x),... 2-inch plastic alphabet cookie cutters. Item
# 94722, $9.49 for the set. (They also have 1- inch ones alphabet in metal)....
1-800-328-6722. Email- sweetcel@maidofscandinavia.com
...Makin's sells
one set of small alphabet cutters (can't tell exact size) http://www.Makin'sclay.com/products/cutterset.asp
..may be available at Michaels?
not-exactly-a source,
but 218 (other) ways to use cutters,
by CakeWorks
http://www.cakeworkscentral.com/Cookie-Cutters/cookiecutterideas.htm
Mail order & online
To find specific
types of cutters, go to a search engine like http://google.com,
then enter: cookie cutters
......or (for smaller cutters) enter
one of these phrases: canape cutters, mini canape cutters, aspic cutters,
gumpaste cutters, or vegetables cutters.
MAIL ORDER
.......(websites for small and
medium cutters in geometric shapes, are above
in Small & Med. Cutters)
Gooseberry
Patch ....a fantastic place that sells all kinds of mini cutters. ...1-800-854-6673.
http://www.delnet.net/~gbpatch/
*Sweet Celebrations* (must look through their huge catalog! --click on 7x), but they have a huge number of medium to tiny cutters of all kinds). . . has 2-inch plastic alphabet cookie cutters. Item # 94722, $9.49 for the set. (They also have 1- inch ones alphabet in metal). Just received a set of 6 nice leaf cutters from them that includes holly, maple, oak and are 1 1/2 to 2 inches. The catalog is a nice source for tiny cutters. they also have lots molds, pressers, etc., etc.!! The number is 1-800-328-6722. Email- sweetcel@maidofscandinavia.com or internet – http://www.sweetc.com
Off
the Beaten Path -- http://www.cookiecutter.com
(alphabet, plus much more)
Sugar Craft cookie
(and other?) cutters, and cutter/molds http://www.sugarcraft.com/
(look under Cookies > Cutters at least)
Happy
Cookers...many cutters in diff.sizes (tin & copper)..... many
sets... nesting gingerbread figures 2-4"
http://www.happycookers.com/wc.dll/products/listincat/537.html
Wacky
Wagon: http://wackywagon.com/cookiecut.html
(can't see actual pictures?... text listing only?...but
some interesting shapes)
JB Prince kitchen supplies: (very thin, often
expensive garnish cutters... nested cutters of rounds,ovals,hearts)
http://www.jbprince.com/index.asp?PageAction=VIEWCATS&Category=242
(click on "Garnishing" or on "Pastry")
Foose
Cookie Cutters
Halloween, autumn & harvest
and shapes
http://www.foosecookiecutters.com/store/fall_halloween_thanksgiving_minis.html
(mini cutters)
http://www.foosecookiecutters.com/store/halloween.html
(regular size cutters, Hallow.)
http://www.foosecookiecutters.com/store/fall_harvest.html
(regular size, Fall/Harvest)
Christmas and winter (mooses...head
and body--under NorthWooods)
http://www.foosecookiecutters.com/store/christmas_and_holidays.html
(reg. size)
http://www.foosecookiecutters.com/store/christmas_holiday_minis.html
(minis)
they also have more categories of cutters:
....(regular
size) Animals Gifts Sports Baking
Supplies Cats & Dogs Large Cookie Cutters States Musical St. Patrick Cookie Cutter
Sets Odds & Ends Transportation Dinosaurs Patriotic Valentine Easter Religious
Water & Nautical Southwest Wedding & Baby Miniature Cookie Cutters
(minis...1"
up to 1.5", depth 1/2") Animals & Such Odds & Ends Baking Supplies Gifts Southwest
Northwoods Valentines, St. Patrick's & Spring Easter Wedding and Baby
...(the
joins on these are better than on the cutters I've bought at craft stores...they
cut smoothly--no raggy edges (even w/o saran wrap over the clay.) Laurel
....I'm
thinking local guilds should get together and order. .... up to 100 cutters
for $5.25 flat rate shipping! And a 20% discount for orders over
100 cutters! Everyone could get a real good deal that way
Fairy
Gardens ...8 nice butterflies/moths and 3 flowers --small
http://www.fairygardens.com/catalog/cutters/mh32075.html
Bed, Bath and Beyond: 100 plastic cutters (I presume
alphabet & numbers plus others --the cutters with plastic bits in the middle
of the outline shape will make impressions inside the shape as well, e.g. the
football, bike, and ice cream cone)
http://www.bedbathandbeyond.com/Product.asp?SKU=11731422
one
thing I have found with the plastic cutters (and I have lots) is that they
don't make a clean edge. If you are willing to put in the extra time to
trim or blend your clay edges its no big deal. Trina
........or could use sandpaper
etc. to sharpen one edge?
....try using a piece of plastic wrap
on top of the clay before you cut it with a cookie cutter. This will at least
round the edge. Jeanette
There are various ways to go about making your own cutters (...see also "modified-object & temporary cutters" above, under "Small & Med.Cutters")
from CLAY
...cut an even strip of clay (not too wide)
... then curve and shape it on a glass sheet over a drawn pattern
(or shape it freehand)
...join ends as smoothly as possible (cut each
at steep angle, or butt)
...fill the interior well with tissues
or something similar to hold the shape fairly firmly while baking... be
sure to let cool in the oven
to avoid distortion... ...afterward, sand down the outside of
the edge all around the bottom to "sharpen"
that edge
....to use the cutter, you can leave it as is (especially
if small shape), or use a glass or plastic sheet to press it on your clay
sheet
.....or back the non-cutting side with a clay sheet or something
else (the back could be covered only partially, around the perimeter, e.g.,
or have a strip or two across the opening as seen with some purchased plastic
cutters, to stabilize it). Diane B.
...cut out and remove a
shape from a thick, flat slab of scrap clay (with an exacto knife)
...use the remaining sheet ...placing it on a baking dish
...spread cornstarch around the inside border
of the clay "stencil"
...now, take a separate long flat strip
of clay (not too thin, maybe just a little less than 1/8" thick)
and line the cornstarched border the whole way around
...... (to make
sure it holds the right shape, you can sort of press the edge of the long
clay piece down to your baking surface)
....now pull
the cornstarched (stencil) piece away ...and bake the shaped strip
...after it's out of the oven and cooled, you can take a razor and cut
an angle around the edge that was touching the dish (for
sharper cutting), with the sharp part of the angle on the inward side
of the cutter. Julia
see "BENDING & SHAPING" below, for more ways to use clay to help shape cutters
from METAL
KITS:
...Polymerclayexpress
is carrying a kit for making cookie-type cutters. With this product
you can fashion any design in any size. Our guild had a chance to test
this product and people really liked it. I've expanded my library of cutters considerably.
Ellen .... 72" of 1" (alum) metal stock, 48" of
1/2" metal stock, five shaping tools, dry adhesive, instruc's
.......they
also carry a taller version: 2" metal stock
for making box forms, bracelet formers, etc.)
http://www.polymerclayexpress.com/cutters.html
...Clay
Alley is carrying a kit for making cutters... 72"
of 1" (alum.) metal, 48" of 1/2" metal... plus
18" of dry film adhesive, 5 Multi-purpose bending or Forming
Tools, $12.50... refills also
http://www.clayalley.com/cookkit.htm
...cookiecutter.com
sells a kit with 72" of solid copper strip, 3-M roll of VH- adhesive,
working base and forming tools, instructions, starter patterns, craft ideas, recipes
..refills
http://www.cookiecutter.com/tabstyle/makeyourown.htm
...I found this kit for making cutters ...it has the rolled strips,
a decent way to glue the ends, plus items to make turns and corners easier.Lori
http://www.cookiecraftingplus.com/cocrkit.html
ADHESIVES
(glues & tapes)
Be certain that areas to be joined are free
of oils and dirt.......so
clean the
surfaces with alcohol before gluing
!
Glues will take awhile to dry,
where tapes give an immediate hold.
....To hold the shape
closed, apply a drop of super glue and clamp with a clothes pin..
........superglue works very well indeed, and will work with drink
can metal (aluminium alloy normally) where standard
solder won't.
.....Chris recommended not
to use the 5 minute epoxy
glues (because they deteriorate with time), but to use one of
the longer acting epoxies like Devcon 2 ton epoxy....just avoid
the really quick-acting ones.
........I
used J B Weld, to bond my 3/4 inch wide brass strips from
the craft store or the hobby shop, which I first shaped and cut with metal
snips (2-part glue... it comes in 2 metal tubes, you
squirt out a smidgeon of each tube, mix with a tooth pick and apply to the brass)...
I then clamp with alligator clips, , a few hours later
and they are all set.
.......my cutters are
simply glued together with a thin film of (2-pt.) epoxy glue.... K. Dewey
.......I found E6000 also works well to glue
the cutter edges closed.
...dry film adhesive..
...double
sided tapes of very high adhesion (same as dry adhesive?) ...rolls
...like 3M™ Double Coated Polyester Film Tape?... or check for 3M tapes at automotive
supply stores? (brown kraft paper backing with green lettering?)
... solder
...my friend Irene taught me how to form my own cutters and solder them closed
with a torch and a solder and flux combination paste. It's
much easier than I thought it would be. You can use a variety of objects for forming
curves, bends and folds. Eliz.
...Creative Versa-Tool..the way I ended
up adhering my ends was with a "Creative Versa-Tool" ...it's like a woodburning
tool only it has a variety of attachments that you screw on the end so
you can do a bunch of different stuff, including soldering
...... it
comes with a little roll of soldering whatever you call it
(you can also do embossing, stencil cutting , pattern transfering, stamping, leathercrafting
, woooburning, paper crafting) .... I used a closepin to hold the cutter togher,
though I believe hemostats would have worked good too. Lisa
BRASS
.shim
stock... in sheets or strips
.....I took Chris Hentz's
class at Arrowmont and he thaught us to make cutters using brass shim stock
and epoxy glue (sheets or strips?).
....brass
shim stock can be found at some hardware stores... or hobby stores
that cater to model builders... and also automobile supply stores
(brass shim used by automotive engineers works a treat too! )
...... ("old-timey"
hardward stores often carry a larger variety of shim stock and brass rods than
the newer stores)
....... It comes in a
variety of thicknesses from .001 to so thick you have to cut it with a
jewlers saw. ...it looks like .01 is about right but you may be
able to use .005 also. I
You
need to cut off a strip of the brass shim stock (sheet?) that is
long enough to make the cutter you want (plus a little extra for overlap) and
as deep as you want it.... metal shears should work as long as the brass
isn't too thick..
... I cut my strips fairly thin - about 1/2"
wide. Irene
I needed to find a means of making repeatable shapes,
particularly identical wings for polyclay butterfly brooches...the gauge of metal
I used was .005" sheet. The sheets are 4ins x 10ins.
......I
first marked the sheet into 1cm strips (yielding 1 cm by
10" strips).... then I used an old pair of kitchen scissors to
actually cut the sheet into strips (please take care -it's very
sharp).
......the strips can then be bent into any shape and the ends
overlapped, clamped, and spot-soldered together (or superglue
will also work very well)..... Any fine details can then be added using
fine pliers or the shanks of scissors - whatever you have available.
For
my butterfly cutters, I only needed to make one side of the insect. I cut
two of the shapes, flipped one of them over and later joined the sides (of the
wings) under a pre-shaped (separate ) sculpted butterfly body with brass armature
and wire antennae. Of course, any shape is possible (half or whole)--Christmas
decorations covered in Pearl-ex, the possibilities are endless. Alan http://communities.msn.co.uk/ALANMARY/butterfliesinpolyclay.msnw
(cutters & butterflies)
http://www.pcpolyzine.com/2004may/gadgets.html
I just found some of those wonderful brass strips at the local Ace Hardware store...couldn't believe how cheap it was. The brass strips are very soft and thin and could easily be made into any shape that you wanted. Betty
I bought a bag of "brass trash" at a local hobby store that caters to model train builders. I've had my bag for a year and have only made one clay cutter so far. Kay S
(stronger) metal
cans
.... some safety-type can
openers leave the rim of the remaining can sharp after opening
(there is second type of safety opener, however, which leaves a thickened rim,
like the Oxo, which is good for making lids)
... a strip of metal can
be cut from the sharp rim and used to make a cutter
...so look for a opener which opens the can on the side (safety) rather than on
the top, but don't get one which has its untoothed disk taller and farther
away from the toothed disk ...the correct one one looks more like a regular opener
in that area).
..... i used one of those (safety) can openers on a can
of tuna, but i couldn't get the lid off so then i also used a regular
can opener... shazam! . . .
the trick is to *not* remove the top
after you use the safety can opener...
(doing this separates the very outer part of the lid from the flat part of the
lid) ...leaving a 1/8" tall ring of metal, with a rolled top and a sharp
bottom (...for thicker clay, it'll just make a nice outline and you need
to use a needle tool or whatever to cut the rest). ..
i can shape it using my fingers needle-nose pliers..... i figure you can make
all sorts of shapes, using different size cans. mellybean
I make my own cutters out of (aluminum and brass) strips of Metals Works' Specialty Metal Sheets (from Lefranc & Bourgeois). It's a lightweight 36 gauge 'metal' sheet that can be cut with scissors - but it's soft so you have to be gentle with the shapes or they be easily distorted - it comes in different gauges, - but remember, a thicker tin will be harder to shape (a 32 gauge may be sturdier). Janice
ALUMINUM:
beer/soda cans work great for cutting.
You can actually cut a good straight
edge with a pair of kitchen scissors, then, for example, wrap them
around different sized "things which are round" to cut a decent circle
of the same size. I even used it wrapped around wooden dowel of different
diameters until my mini circle cutters arrived...
... the sheeting from
the cans wrapped around any shape makes a wonderful instant "cutter".
Tania
............(leave only a small amount of sheeting extending
past the form for the stiffest, strongest cutting egde?)
...However,
with the aluminium, if you try to bend
a straight edge into it then
straighten it out to make like a square
shape....it will snap, the stress of the bend
is too great for the aluminium.
....It had never occurred to me to use a pointed
X-acto knife to cut the ends off aluminum cans. ... On
the second can, I found that a utility knife (the kind with a retractable
blade) left smoother edges. . . . After further experimentation, I found that
after cutting off the ends with a utility knife, I could trim the edges
smooth with ordinary scissors. (I had a grand old time after that,
cutting up cans and shaping them into a variety of D's and O's!)
Sharyn
I make cutters using the aluminum piece from a 3 1/4" floppy
disk (it's a strong & thin sheet, though small).
It pops right off and can be cut with scissors, just don't use your best
ones!!! After you shaped your cutter, put a dab of superglue on the edges
you bring together. . .(will make small diameter cutters though)
...these
metal pieces are also great for using with polymer clay especially in miniatures.
I have made great little rakes, knifes, etc. Kellie B.
I
once made cutters for kindergarteners by cutting the thicker aluminum
"flashing" (hardware stores) into strips, using a
(quilting) rotary cutter and a metal-edge (or thick acrylic) ruler --with
the acrylic rulers be especially careful that the ruler
doesn't slip!! or you can really cut yourself with the pressure you'll
have to be exerting on the flashing to cut it --put a strip or two of masking
tape or something sticky or rubbery underneath it). I found that the rotary cutter
made smoother cuts than the other things I'd tried, but it took several passes.
I just overlapped the ends and held these together with masking tape because they
were only going to be used for Play Doh (the idea was to let each kid bend their
own cutter, which was now in a circle, into whatever shapes they wanted. Diane
B.
Use mini-blind slats! When I shaped the cutter, their curve dissappears, they are nice & straight. The cutting edge is nice & sharp, in fact, I glued some felt to the top edge to save my hand from wear & tear.
I sharpened the edges of a section of brass tubing on a belt sander and made a tiny 3/4" square (or round or rectangular) cutter . .. They work great and the leftover grid of clay from between the squares is pretty cool too. Jody Bishel
A tube cutter, available at hobby shops that cater to the miniature modelers (trains, planes) is a device made for cutting small (round) metal tubes and works just like a pipe cutter. At Arrowmont, Christopher Hentz introduced a tube cutting method that required no special device, simply a strong, sharp blade. Katherine Dewey
(more
on making ) BACKS for small & medium
cutters
...I
cover the sharp edge with a strip of polymer clay
. . . K. Dewey
...or you can add
a whole sheet of clay across the top side, or a couple of strips
across the back for structural support.
...If you
put anything on the back side of the cutter though,
you can't then flip it over and cut a reverse image.
...I
press down on my cutters with a petri dish -- clear so I can see
where I'm cutting, and flat so the cutter cuts the clay straight down, not angled
..
I prefer to push the cutter through the clay using a piece of plexiglass
that is *not* permanently attached to it -- that way, I can flip the cutter over
and cut a mirror image.
...Another tip
for pressing down on double-sided cutters is to go to the kitchen counter
department in a home center store and pick up a few of the formica samples.
I use these to press down on my cutters. It saves my fingers from becoming irritated
and sore. (I also use these to store unbaked little holly leaves and other small,
flat things.
...see-through
backs ...Christopher Hentz demonstrated
a technique for making clear backs
on cutters which also covered the sharp edges at Arrowmont
...
...lesson:... first he used thin sheet metal, bent
to shape ...then placed the shaped cutter on a sheet of cellophane as
a release. ....he then mixed clear epoxy ...and carefully poured it into
the center of the cutter (...I believe he lifted the cutter
for a second, allowing it to spread out a bit, then set the cutter back
down into the epoxy). ...after the epoxy had set and the cellophane
was peeled off, the resin held the cutter's shape and was transparent
...........he
stressed using the slower setting epoxies to avoid hazardous
fumes, and the need to mix thoroughly.
....you
can then even make a pusher by drilling a hole in the epoxy... and
using a bolt and a spring and something like a big rubber washer
to push against the clay and not mar it too much.
bending & shaping cutters
Various shapes and sizes
of stiff items may be needed to help create the bends in your cutter (depending
on pattern and size of cutter you want to make)... in general, you'll need rods
or tubes (large, med, small), items which are gently or sharply
angled (angle brackets, books, etc.), and/or pliers of various kinds,
etc.
... bend around pens or
cylindrical candles to get nicely rounded parts
....use flat-nosed
pliers to make sharp angles ... round-nosed pliers
to make softer angles (pliers come in larger and smaller
noses too).
....If you make a "jig" or
have one of the Wig Jigs used for bending wire (see Wire
for details), you can set up a pattern with the pegs and use that to bend
your metal strips, too. Judi
...use other cutters (or parts of them)
to bend the strips around. Diane B.
...I do the
bending from each side so I can flip them over and use the other
side.. Irene
It is easier if you start and end
your cutter on a straight area, or on outside curve,
or at a point....inside curves are
very difficult to glue and clamp.
...when your cutter is shaped to your liking,
clean the brass with alcohol, then glue and clamp. Jo
Make
your own stiff (baked) clay "form"
or armature to wrap your metal strip around
...cut the shape you want from a clay sheet freehand or around a template
......guidelines for cutting
could be created by pricking holes through a drawn
pattern into the clay, if necessary
......if one sheet
of clay isn't thick or tall enough to shape
the metal strip easily, then use several sheets stacked
together to make it thicker ...or place 3 or more balls of clay between
the 2 sheets to hold them apart & make a taller version
Or
draw or prick a pattern directly on clay ... then drag
a pin or needle tool down the line to create a groove that
will be shape that's wanted
....try to keep from leaning left or right so
groove will be vertical, and turn clay while grooving ... bake
...
then press a metal strip into the groove to form the cutter shape
......the metal shape could just be removed and glued together, or it could
be baked in the clay to keep the shape exact (with or without a partial
or complete clay backing). Diane B.
You could also use wood as a form
... my one idea is to
carve my desired shape into a block of wood (with an exacto
knife), then fit a strip of tin or flashing into the groove
made by the exacto knife. Lori Mac (...could use balsa?)
...or you could
use one of those wood cutouts as a shape around which to wrap
the metal strip (just use one, or stack 2, or apply clay on top of one then trim
& bake)
Rather than the whole
shape, just particular parts of the shape, or a set of general curves
or angles, could be made from clay to use as formers as well ... bake...
wrap the strip around the shape
... or just create parts of the cutter ...
especially if you want to make multiple cutters, etc. Diane B.
The
best way I know to make the cutter is to draw it full size on paper
first. ....then I take a string or thread and lay it onto the design
....when the string is straighten out, it will give me the length
I need the strip of metal to be.
....do NOT forget to add 3/16"
or so for the lap joint.
....try to place the lap joint in a corner
....I normally use a strip of metal about 3/4" wide... the
thickness of the metal is dependent on the size and complexity of the cutter design.
Lysle
For my butterflies, the method which worked best was to make a series of (half) cookie cutters from brass strip, so each cutter was just one wing. Alan http://www.pcpolyzine.com/2004may/gadgets.html
making
new shapes from purchased cutters
....many
bought cutter shapes can be re-bent into new shapes, or shortened for
smaller shapes
various long blades can also
be bent and cut to use as cutters
...for
info on bending long blades like tissue blades, see Bending and Cutting
below in the Blades half of the page
..to
make tiny cutters, I cut some doubled-sided razor blades
in half lengthwise (I use Wilkenson brand)
.......I
heat one of the half blades in a candle flame till it's glowing hot
......and
then bend it carefully around a knitting needle ...or use
pliers to shape it
.......let cool, and then wash the soot off ...
I use them as little cutters (GREAT for making tiny leaf cutters,
etc)
CUTTING
small TILES
(but see Frames,Mirrors,
Tiles for larger, decorative
tiles)
You can buy a set of small square cutters (at least) from the Clay Factory of Escondido. I'm pretty sure that's where I got mine, or maybe it was the triangle cutters?
Sarah
Lajoie shows a sharpened square brass tube for cutting individual
tiles, but cutting a sheet of clay pressed to a smooth tile.. she carefully removes
the excess clay and bakes the little clay squares on the tile
http://pcpolyzine.com/october2001/frame.html
(lesson)
I just had a thought about those old (grid-type) French Fry cutters (stiff metal strips?).. . . you push your potato through them. If you could get one of those apart maybe that would work (for making tiles, or grids)
At Taco Bell we used something that had wires stretched across a frame, making grid squares, to cut tomatoes. I don't know if something like that could be made for poly-clay, (my photo)
What
about those tiny-ice-cube trays, or maybe just use them to mark on clay
for various uses? Diane B.
...I use a plastic ice cube tray - the type for
tiny cubes - to make 'tiles.' Roll the clay out, put the piece on top of the tray,
and roll over the clay with a piece of PVC pipe that is the same length as the
tray is wide. One roll and I've got a slug of cut tiles! Nancy
You
can make square cuts in several other ways though. You can make your own cutters
(see info from my cutters-file below for examples), or you can use some sort of
guide.
The simplest guide type would be finding something the size
you want, placing it lightly on the clay, then cutting around it with
either the tip or the whole length of the long blade. (Donna Kato likes to use
a cheapie dental tool to cut around with that looks like the end 1-1 1/2 inches
of a medium-sized safety pin, which has been bent into about a 120 degree angle
and stuck into a long plastic handle. It's thin and rounded enough to make a very
smooth cut --see below
in Freehand Cutting)
However,
you can also simply cut out a paper square of the desired size,
then pierce the clay just outside of each of the four corners, and use those dots
as your guide for cutting with the long edge of your blade (this nifty trick is
via Sue Heaser, who pokes holes in the intersections of graph paper to give her
a guide for cutting dollhouse tiles!). DB
(Sue) . . . .You might find my method
for making dolls house "ceramic" tiles works for this: Roll out the clay
on a real ceramic tile to the correct thickness - roll the clay out between two
strips of wood of the thickness you want the tiles, using a smooth rolling pin.
Lay on a sheet of graph paper and prick with a pin into the corners
of each square the size you want. Remove graph paper and, using a knife with
a long, straight blade, cut straight down along the lines of pricks. Do not move
the tiles - just remove the scrap clay around the edges. Rolling the clay onto
the tile like this keeps it sticking thereuntil after baking. ****For a gloss
surface, press a second tile over the first so it contacts the clay completely,
for a matt surface lay down a piece of baking parchment first. Weight with
a few more tiles or a casserole dish. Bake for 30 - 40 minutes (longer
than usual to get the heat to penetrate the tiles). The top tile keeps the clay
from bubbling or distorting. When cool, you may need to cut down the lines to
separate the tiles, and slice under them to ping them off the ceramic tile.
*Lisa
Pavelka's lesson on cutting small square tiles
while clay sheet is snugly lying on a ceramic tile, then baking
and snapping them apart...can
later be trimmed to other shapes if necessary
http://www.hgtv.com/hgtv/cr_clay_other/article/0,,HGTV_3239_1396715,00.html
nowwhatzine
's lesson on cutting small tiles by impressing first with a wood
block for guidelines before cutting with a long blade... then a
letter is impressed into each...then all tiles arranged onto a background
and framed
http://www.dotcalmvillage.net/nowwhatzine/hiddenmessages.html
(several pgs)
sanding: If you bake your tiny tiles on a ceramic tile or something else that they stick to, and don't pop them off after baking, you'll be able to sand them while they're still stuck to the baking tile. Irene
I used 4 cutting wheels (the type used for rotary Olfa cutters in
sewing/quilting) which were threaded onto a long bolt with nuts
as spacers when I needed to cut uniform strips wider than the
noodle cutting blades on the pasta machine.
...I was able to cut uniform
squares for parquet work by running the wheels in one direction,
then by running them at 90 degrees to the original cut. I used a straight edge
as a guide.
Naturally, I got carried away and cut diamond shapes
as well, but all of those uniform shapes made my parquet covered box a sweet little
piece.
...Running the cutting wheels over a paper towel sprayed
with Armorall kept the wheels from sticking
to the clay. Katherine Dewey
(see
below in "Multiple Blade" Cutters for more on this
way to make your own, rotary or not, strip cutter, or by setting Xacto
or longer blades into raw clay and baking to make a strip cutter)
Violette Laporte has
a *tile cutting lesson for (Tumbling Blocks or other) geometric
quilt and other patterns
http://www.webhaven.com/crick/tb1/index.html
...used to be
http://home.istar.ca/~ladydian/tb1/index.html. . . She cuts her tiles
into diamond shapes in raw clay by indenting parallel
lines, then indenting crossing lines (at 60º), these are then baked
and "gently" separated...(pick the closest in size to use);
she then uses two layers of raw base clay (#2 Premo on bottom, #5-6 Sculpey III
on top for tooth and squish) before lightly adding the cut baked shapes, trimming
if nec. with a blade, pressing lightly to the Sculpey (she cuts around her design
for this pin), then bakes for 10 min at reg. temp. She grouts with softened Sculpey
III, scrapes, most off, and bakes again for 30 min. at 265 (sands & buffs).
Many different quilt or other geometric patterns could be created with this "mosaic"
technique!!
http://creaplastic.free.fr/10gal_vio.htm
multiple process of cutting tiles which have impressions or onlays, etc., you want to be placed in the same position on all tiles (e.g. faux stitching around the edge, or a centered cane slice)... if you began with a layer(s) of clay as thick as you want the fattest height of the tiles to be, you could impress the rows of "stitching" or other embellishment in a grid all over the sheet) with a straight edge ... then cut the shapes out (with a piece of plastic wrap over the sheet if you want the puffy look...you'd have to measure the spacing for the stitching lines very accurately first though).
Jean Sheppard suggests using
" spring dividers " (tools used for measuring, which look like
a drawing compass with two pointed ends), or using inside-type calipers,
to mark two parallel lines on a sheet of clay, or to cut
even strips
http://diytools.com/store/search.asp?ProductTypeID=540
....I like using those old fashioned wooden rulers with the metal
edge to cut and/or mark pieces of clay that are longer than the tissue
blades. I lay the ruler out and adjust to get my straight line and then simply
push lightly up so it's on its side (metal edge down into the clay of course),
and then quickly press down with the top of my hand. Works like a charm
every time. Lyrael
Beth's barrette made of
same-size, but two alternating colors, of tile...laid next to each
(with one image stamped across them all)
http://www.polymerclaycentral.com/pcc/swappics/barrerdelac.jpg
Shrinkage
(noticeable in larger fit-together pieces only?)
~I learned not
to assume perfect fit a couple of years ago when I did a piece which was supposed
to have exactly 6" square tiles. 54 of them. After the first 18 didn't
fit quite perfect in their places, I got wise!! Anyway: All brands of clay can
shrink. The ratio can be from 1% to 5%. I found it depends on the softness/stickiness
of the clay--how much solvent and plasticizer is present. thus leached
clay will shrink less than fresh clay. the thickness of the sheet seems to
have an inverse relationship to shrinkage: a thinner #4 or 5 sheet will shrink
more than a # 1 sheet... I suppose this is some factor of resistance and "stretch";
ie. the thicker piece has more body to resist the force of inward shrinkage. If
what you are doing needs to be precise, I would suggest you either do a test piece
and calculate your final cuts based on the shrinkage you find. Or cut your piece
slightly larger than what is needed and trim or sand down to fit after baking.
Patti Kimle
. . . someone also said their tiles didn't shrink when
sandwiched between two bathroom tiles (while baking?)...
bubbles
in clay sheets can be prevented if they are occurring by making sure no moisture
or oil or air is introduced into the raw clay (especially when conditioning),
and if layered on something sheets are rolled down from the middle
outwards and brayered outwards to prevent trapped air which will swell with heating|
... if you do get bubbling, try weighting during baking and/or cooling with a
tile (and piece of paper, to avoid shiny areas)
small
tiles which will simulate certain
geometric patterns or "visual textures" can
also be created in various ways (... for quilt patterns, mosaics, temari balls,
or anything)
...these
can also be cut into specific shapes to puzzle-piece together
....clay gun strands... fold a strand
back and forth on a backing sheet of clay... then cut
out whatever shapes you need from the sheet (the folded
ends wouldn't be included). ...repeat for any the other colors... then put all
the pieces together puzzle style like
we do mosaic tiles (some Balinese Filigree methods could
work here too).
....or create
the puzzle pieces from a cane that's finely layered
to look like strands (see Canes-Instr.>
Stripes, and also Folded Canes on that page)
....or create a clay sheet for each color by texturing
a sheet of clay with an object with fine lines on it, then cutting out your pieces.
Diane B.
(...for
temari balls, see Clay Guns
> Weaving --Jap.
tech.... thin strands of diff. colors are wrapped around a base ball shape, resulting
in geometric patterns)
(for tiles to use in mosaics, see Mosaics)
(for
other ways to use thicker "tiles" as beads, etc.,
see Jewelry > Bracelets
)
( for stamping letters into & onto individual tiles,
see
Letters&Inks)
FREEHAND-CUTTING or TEMPLATES... without cutters
If you don't have a
particular cutter shape (and need to cut out
only a few of that one shape), then try this:
......draw or copy
the shape onto paper...and place the paper shape onto a sheet of clay
.....
then cut around the paper shape using a flexible-type needle in
a handle
To cut freehand
shapes, or to cut around a template or inside a stencil:
...place
the clay sheet onto a very-smooth, smallish, maybe-temporary work surface
(glass, acrylic, shiny metal, gloss ceramic tile, etc.) ...roll or press the clay
down so that a vacuum is created between the clay sheet and that
work surface (this will keep the clay from moving around on that surface at all
while you're cutting)
...... you can also put this temporary work surface
on top of a sheet of paper or something else which will allow the temporary
surface and/or paper to be rotated on top of the larger work surface below
it (a table, or your regular work surface, e.g.)
...lay your template on the
clay sheet, and press or roll over it to adhere it to the clay
...cut
around the template using a small, very-thin, pointed metal "rod" that's slightly
flexible
(.......the very best thing I've found is a disposable dental
probe tool, but haven't been able to find another one where the metal part
is exactly the same shape/length/flexibility... the one I'm referring to is on
the far right in this photo:
http://i96.photobucket.com/albums/l163/DianeBB/tools/e549.jpg
......
That little tool you saw on the (Carol Duvall
show?) tape came from, of all places, my local Dollar Store! I got it years
ago when I had my bead store. The information on the package is hardly helpful
either. It says: Answer Disposable Dental Tools and was made in Taiwan.
For some reason, it's the best sheet cutter I've found, it's even better
than surgical). . Donna Kato
....I use a
disposable dental pick I found at my local Ace Hardware. It's one
of my favorite finishing tools! You can get the same results with a Kemper needle
tool though. I just find the bend in the dental pick easier to manipulate. WiseCraft
....( DB: This is the same as Donna Kato’s
cutting too? –no, hers is sharper and a bit longer; she uses to cut out a shape
from a flat sheet of clay)
similar
tools can also work though:
...a sewing/quilting pin,
a thin needle, or a safety pin, (perhaps) firmly taped
to a paintbrush handle or put into a long clay handle so that it's longer
(...the angle and length of the bend at the end of that "really-good" dental tool
above works best, but a pin/etc. should work even if it's straight --though you
may want to stand over the work to get a better angle for cutting)
.....
I use a straight pin held in a pin vise as my cutter (to
cut barrette shapes from a sheet of patterned polymer clay)... or with a clay
slab 1" thick. Shirley
.....Katherine Dewey's lesson for making
a good "needle" tool (for dragging through raw clay)
.......
hold a sewing needle with pliers while heating it over a stove flame until
bright orange
....... remove from heat and bend to 45° angle
with 2nd pair of pliers
....... when cool, scrub the black off
of the needle with a fine scrubbing pad
....... insert needle into a metal
tube packed with polymer clay, and bake
.......(you may need to use
a little super glue to secure the needle after baking)
......The
45° angle allows you drag the shaft of the needle through the clay,
and doesn't raise burrs
...... If you like, cover
the tubing with polymer clay and make it really fancy.
...a
regular metal "needle tool" can work too, though it's thicker and
more rigid than optimal
...the tip of a pointed
Xacto blade can also be used, but it will tend to leave a sharp
bevel around the edge of the cut which may be uneven in angle here and there...
you could always rub over that area to round it off though with a finger, perhaps
coated a bit with cornstarch or Diluent, etc.
The advantage of
the pin type things is that they're much smaller and pointier at the end
and also have a little flexibility so they can be "drawn" with easier,
and will leave a better cut surface behind
...Both straight lines and
curves can be cut more flowingly, evenly, and easily, especially when you
get the right amount of pressure and angle on the tool (just practice a bit to
find those things)
...If you also rotate the temporary work surface
or the paper under it while cutting, you may not even have to lift the tool from
the clay till the cutout is done, or if between cuts still doesn't disturb the
clay sheet
...If necessary, before peeling off the cut shape, cool
it for awhile in the freezer on its surface or just let it rest so it will be
stiffer and won't distort when being
removed
(This method also works with stencils, and really well
for freehand cutting of shapes from sheets of clay without a template/stencil).
If I'm having trouble with my tools dragging, I dip them in a cup of water.Then they glide right along.
lesson on tracing around a hand with a toothpick,
then cutting out with Xacto knife blade (smooth edges)
...
a clay "pocket" is added, and then clay flowers on pocket to embellish...
silk flowers placed in pocket...(at joann.com, Clay Ornament)
http://tinyurl.com/5875s
A
friend of mine thinks she could use a scroll saw to cut shapes from (thick?)
baked PC. Does this sound do-able?
....Sure. I use a jewelers
hand saw sometimes. Jody
(see
Canes-Instr
> Quilt > Collage Sheets,
or Quilt for clay sheets made into collage patterns, crazy patch,
etc., by creating shapes from different sheets of colored/patterned clays, then
tearing or cutting them [with a blade, cutters, etc] and either fitting them together
puzzle-piece wise, or laying atop each other, or inserting shapes
and flattening, etc.
(...see
more in Canes--Instr.
> Cutting Sheets ... and maybe in Tools)
STENCILS + TEMPLATES + MASKING
(solid-material)
Stencils and Templates
(Sculpey's Shapelets, stencils, drafting stencils,
etc..)
I don't know if this is technically accurate,
but for purposes of clarity I'll mostly refer to templates
as shapes (made from solid materials) which can be cut around (such as a leaf
shape), and to stencils
as the sheets-with-holes they've been cut from (leaf hole).
Masking
materials are other materials which can be used to prevent certain areas from
absorbing paints, metallic powders, etc.
"Shapelets":
(basic abstract shapes) Polyform offers pkgs. of (clear) stencils and their
matching templates in the following styles/shapes: Asian, Classic, Leaf,
Heart, designed by Barbara McGuire
....each pkg. has both the stencil
type piece with 4 opening shapes (which they call "template frames")
as well as the templates (cutouts) that they came from... either the positive
or the negative can be used ...around $3.50
http://www.sculpey.com/Products/products_premo_shapelets.htm
http://polymerclayexpress.com/stamplets.html
...their
Stamplets sets also come with one Shapelet included (just one shape
though)
These "stencil frames" were intended to
be placed over sheets of decorative clay (transfers, stampings,
etc.) so that the openings can be placed on a selected
section of the sheet for cutting only that section out.
...the cutouts
or the frames could also be created from sheets of patterned clay such
as mosaics, mokume gane, stamped or textured clay, etc
....see
also Sheets of Pattern for other decorative
sheet possibilities)
....see also above in "Cutting Small Tiles"
for simulating patterns or texture in
clay tile shapes by caning, texturing, or using clay gun strands
It may be necessary to first mark the
cutting line of a stencil (or template) with a needletool or pin
(individual pokes or light scoring), rather than cutting directly
...then remove the stencil, and cut the clay freehand... esp. if the stencil
material is flimsy
When you're
ready to cut the clay for any of the following methods, place it on a small, movable
surface (so it can be turned while cutting)
...you can then
cut the clay with a pointed Xacto blade, or a needle tool
or pin in a polymer handle
.... or a disposable dental
explorer tool works well... it has a thin, bent metal "pin" in the
end that's slightly flexible (see it and similar tools above, in Cutting Out
Freehand)
After cutting a stencil, the cutout portion
can also be used in many ways:
...It could be used alone, as a pendant
or barrette shape, e.g.
...It can be placed on top of a different
sheet of clay... then a flexible blade can be used to (freehand)
cut the bottom sheet into a pleasing "frame" around
the cutout (or the frame cut can be made with the tip of another blade or the
pin tool mentioned above)
...The piece can be stacked on top of
another cutout shape (from a plain or textured/decorated sheet of clay) which
is larger than it is. Several layers could be stacked together.
...It can
be placed inside the hole of an exact same size/pattern which was
cut in another sheet of clay (a positive going into a negative --they would be
flush).
sculpey.com's lesson on using a
Shapelet to cut out a shape from a "ghost image" mica
sheet (textured,shaved, mica...see Mica >
Ghost Image for technique)
http://sculpey.com/Projects/projects_GhostImageStamping.htm
Tonja's
journal covers show many of these techniques http://www.tonjastreasures.com/journals/tn5.htm
....her gold powdered frames
using Shapelets, or a handmade stencil or template...
(lesson)
...for example, using an template (say, an oval or lozenge shape) you've
made from cardstock or something stiff:
...prepare a clay
sheet (A) to use for the frame (perhaps stamp and powder it, or
use a patterned clay sheet)...it's best to do this on the paper or tile
you intend to bake on so nothing moves around too much
...place the cardstock
template on the clay sheet ...cut
around the outside of it, and remove the resulting
inside shape
...place a clay sheet (B) you want to use for the
framed image or pattern onto a
piece of paper
...place template on
top of this sheet, cut around the template, and this time remove the resulting
outside area
... gently remove this shape .. and then insert
it into same-size opening of the frame sheet; press together gently
...to complete
the frame, cut off outside edge of frame (following the lines of the inside
frame edge, or create a new shape)
http://www.tonjastreasures.com/journals/tn4.htm
...a
clay rope or other embellishments could be added over the joined
area, if desired
Barbara McGuire's lesson
on using the Shapelet stencil to make a brooch, adding a slightly larger
background layer shape under it for framing
http://www.hgtv.com/hgtv/cr_clay_jewelry/article/0,,HGTV_3238_1386303,00.html
Nanetta's
lesson on using Shapelet stencil to cut open frame area in sheet
of mokume gane for a transfer
http://www.sculpey.com/Projects/projects_AsianTassel.htm
Susan
B's lesson on using a Shapelet on textured & powdered
clay to make a simple amulet-type body (adding a molded head,
coiled wire arms)
http://www.sculpey.com/Projects/projects_InsetPeoplePins.htm
nenuphar's triple-layer of
shapes.... top one is stamped and powdered (see Powders
> crevices for details)
http://isisesc.supelec.fr/gallery-nenuphar/album01/aah
(gone)
acrylic embossing paste (opaque white or translucent) which is the consistency of buttercream icing....narrow metal spatula is used to apply to the paste to the stencil (which has been taped down)....few swipes to remove the excess embossing paste, the brass stencil is carefully removed to reveal the image which is now raised.... takes 40 minutes to 1 hour to dry.... art stores and rubberstamping stores carry it.... Valerie in Chicago
see also Paints > Stencils
make
your own solid stencils
or buy "regular" ones (stencils
& templates)
Thicker plastic shape stencils
can also be found in office supply stores or the drafting area
of art supply stores.
...These draftsman stencils are often graduated
sizes of circles, rectangles, etc., but also have other shapes --but
these don't have the corresponding inset pieces.
....They tend to be smaller
openings than the stencils are available for doing scrapbooking (Michaels,
etc.) or wall stencilling, but those can work well too.
little
Dover books (the ones for 99 cents) have many larger stencils (one
per page on cardstock) which can be used in lieu of cookie cutters, etc.,
or just part of one of the stencils could be used
Nanetta's
lesson on cutting a stencil with stars and curved S shapes from
designs drawn or copied onto cardstock for applying metallic
powders in various patterns (she cuts with a pointed Xacto knife on
a self-healing mat)
http://www.sculpey.com/Projects/projects_MicaStencilPendant.htm
Nanetta
also suggests punching out designs in index cards with decorative
hole punches and paper edgers to use as stencils
While
Fiskars Shape Templates do not include the cutouts, they have some
very nice shapes. I bought one of the basic packs from Wal -Mart. It contained
three approx. 8 x 11 sheets. One had various size circles,
one had ovals and one had rectangles. . . . also thhe outer edges
of the plastic sheets have a border patterns like waves, scallops,
etc. (in the pack, there is also a brochure that shows additional templates
that I didn't see on their website.) They also have the star, diamond, square
and heart in graduated sizes per sheet. All shapes go from approximately
1" up to 4" sizes on each sheet. Peggy
http://www.fiskarscrafts.com/tools/c_shape-cutting.aspx?p=7
Purchased stencils and templates can be various materials (plastic, metal--usually brass, cardstock, etc.)
make
your own template (or stencil). . . a few ways I can think
of:
.......draw the shape you want (one way is to fold a piece
of paper in half or in quarters to keep the shape symmetrical, then sketch
the shape you want on just that portion)... make a smooth cut on your drawn line,
then open the paper
.......place the paper template on your raw clay
and cut out
.......OR cut out two or more of your shapes from in cardstock
or manilla folder using the paper template ... then either glue them together
to form a sturdy template . . . or place a sheet of clay in between two
cardstock templates and trim, then bake (this should result in a
thicker template.... haven't tried it but it should work)
.....draw
shape on warm sheet of clay with your paper template, then cut with
scissors for a template
......5
min.clip from Gwen Gibson's Ancient Images video, showing the cutting of an oval
stencil (need to have, or install there, MacromediaFlash to view)
http://www.mindstorm-inc.com/pages/vid/pc05.html
Or
you can make them yourself from many materials (cardboard,
paper, brass shim stock from the hobby store, old x-rays,
acrylic from the plastics store?)
....can also "burn"
a stencil with the design of your choice with "stencil
plastic" (usually pretty thin though) and a stencil burner (usually
over a sheet of glass)
....from clay (templates or stencils)...
can be made by freehand cutting a shape from a sheet of clay, or
by using a cutter instead ... then baking either the positive
or the negative
.....stencils can also be made by pressing brass stencils
(or other small stiff stencils) onto clay so that clay in that
shape rises up through the hole of the stencil ... bake (or add some texturing,
flatten, etc, first)
........if you start with a ball of clay, this "stamp"
can be pressed into raw clay... or that impresssion can be baked to use as mold
...Jan
S's lesson on making a flat mold the same shape
as a punch shape... she first punches out the shape from a sheet
of baked clay, then places the clay "stencil" on top of a
plain sheet of clay ...bakes ... then she has a shallow mold of the original
punch shape into which to push new raw clay
http://pcpolyzine.com/december2001/punch.html
......can also use brass stencils (or other stencils) to just
make raised shapes as above (domed) for decorative purposes ...
could also paint raised shape with metallic powder while stencil still in place
as a mask, or texture the shape, etc.
....PhotoEZ photosensitive "silkscreen"
material can also be used to create a stencil (....for much more,
see Transfers > PhotoEZ)
...many
materials can be printed with the resulting stencil such as printing inks,
acrylic paints, to emboss or apply
gold leaf using thick water-soluble glues such as Elmer’s® Gel Glue
Don't
forget all cutters (including cookie cutters) can be used
for their shapes ...as templates, or for making stencils
....(--other
around-the-house items can be used also: tin cans, plates, bottles, etc.)
Cre8it's interesting mostly-silhouette stamps...
though in component pieces (bodies, heads, tails, arms, etc.),
which can be combined and arranged in any way desired (people & pets...
semi-abstract or ethnic) ... can be used as templates if stamped on paper...enlarged,
etc.
http://www.dotcalmvillage.net/newstamppages/designtimesets.html
Masking
materials can be made from a solid material with areas cut out to allow
other media to be applied, or they can be liquids/pastes which will act
the same way
...a solid stencil can also have a liquid applied in its cutout
areas to create an opposite mask when dry and stencil is removed.
...various
resists can be used for masking added colors (clear or colored ones powders,
inks, washable glues, etc.)... they can be left in place or removed later
batik
effects ... try patterns of any non-permanent substance on a white clay
background (or any color desired)
... then add a permanent coloring to the
whole area
... after drying and/or baking, rinse or scrub off the pattern areas
with water (or perhaps added soap?)
Tonja's lesson
on using vellum shapes as masks (for chalk ink pads and permanent inks)...
she lightly brayers vellum cutouts onto raw clay, then presses 3 colors of chalk
ink pad over clay... removes with tip of Xacto, then lightly uses stamps with
2 more colors of chalk inkpad... stamps (text) onto surface with permanent black
or dye ink, then adds a backing sheet for thickness with liquid clay
http://www.polkadotcreations.com/books/article.php?id=pdctl02
embossing
... emboss pattern areas a resist for Pinata
alcohol inks and
some dye inks
....first stamp main image (& background
designs) with clear or pigment ink
... pour on clear embossing
powder, knock off excess, and melt
... then wash and/or coat
surface with inks (embossed lines will resist inks and remain their original
color, but the rest of the background or unembossed areas will absorb the inks)
Elizabeth's
lesson http://polymerclayexpress.com/octo2002.html
(more in Powders
> Embossing > Resists, Masking ....and
Letters & Inks > Other
Uses)
One of my latest tests was with Masquepen....this
masking fluid can be applied to raw clay
....either left to dry
and then removed before baking
....or applied and left on while baking.
Either way, it can be removed (after applying paints, etc ) to reveal
the untreated spaces.
....I'm now writing a book which will show different
looks with the technique.... with the many inks,paints, etc I've collected.
Ellen Marshall
Repel Gel and "ca debonders"
(cyanoacrylate glue remover, etc.) may be able to act this way as masking for
powders or paints/inks or just about anything, etc. (but
can't be used on liquid clay)
...Judy
Belcher makes mudcloth beads by applying lines of RepelGel with a small brush
to a baked white bead, dabbing on brown then black alcohol
inks and letting dry... then scrubbing off the ink on top of the Repel
Get with water and a stiff brush
(for more on, see Glues
> CA Debonders)
"washable"
white glue (Elmer's School Glue) should work this way
as well, as wellas
....gouache?
.....gum
arabic (mix with water to heavy cream consistency)
.... crayons or
wax (melted or paraffin)?
(info on create silkscreen masks with PhotoEz or with regular screens is in Transfers)
stencils (or masks)
....stencils don't
have to be brass, though they work well, are thin, and their images tend
to be smaller than other stencils.
...stencils made of paper, waxed paper,
cardstock, and even strips of masking tape or cut shapes
of self-adhesive paper l(ike Contact paper), etc. are other possibilities.
...natural
maerials can be used also, like Mike Buesseler's leaves used as masks (around
which he applied metallic powders --see Powders)
a
toner based copy transfercould be used as a permanent mask?,
if a paint, etc., were used in the raw clay spaces not covered by the foil pattern
after application
...Xtine uses her toner transfer to create a foiled pattern
on raw clay ("faux photo etching")--(see Leaf
> Jones Tones for more on this technique)
(see also Canes-Gen Info > Cutting Canes for info on slicing canes, sticking blades, etc.)
SUMMARY
There
are lots of different blades that are great for polymer clay, but many of them
do one or more tasks better than other tasks so most clayers end up with a few
different blades for different uses.
Some of the differences/characteristic
between "blades" are whether they are:
...cheaper
or more expensive ...easily available at retail or not
...long (4-7" usually),
medium, or short (see more just below)
...thin or thick ...flexible
or rigid ...stainless steel or not stainless
...chiseled (angled) on one side
only, or angled on both sides (most blades)
...straight or shaped (e.g., wavy/ripple
blades, blades bent at home with heat, outside areas of a shape cutter, etc.)...
or round disks ...some are suitable for making multiple-blade cutters, or for
cutting sheets of clay with their tips ...some are mounted at the end of a rod
--Xactos, scalpels, etc.... those are often used most for their tips, but not
always
...some are more suitable for larger canes or for getting thinner slices,
etc.
(many blades canbe used for multiple tasks though even if they don't
work quite as well at all tasks)
Very
Short blades:
..These would include the pointed or rounded, short blades
(which come with handles or are embedded in clay handles)
...for example, Xacto
blades, surgical scalpels, or sections from breakaway blades... aluminum sheets
cut into shapes (double-edge razor blades, floppy disk shutters, etc)... thin
needle-type "blades" (flexible dental "explorer" tools, pins,
needles)
...generally used for cutting freehand shapes from sheets of clay,
making marks, cutting fine details, etc..
...(for "linoleum" blade
cutters used for carving and backfilling, etc., see Carving)
Mediuim
Short blades:
...1 1/2" (single-edge razor blades)
Long blades:
..These blades range in length from 3" to about 7"
..Their long
edges can be used in one downward motion for long smooth cuts in sheets of clay,
or for cutting slabs from blocks of clay to be fed into a pasta machine, or of
course for cutting slices from clay canes, etc. (don't using a back & forth
motion, and always try to cut down toward your working surface for most safety).
...Most
long blades are flexible too, which allows arcs of varying degrees to be
cut too (esp. good for "framing" e.g.)
..The tips of the
long or Medium Short blades can also be used as you would a pointed blade
for cutting details in sheets, etc.
...there is also wavy blade (now in two
sizes --regular, and 4" mini for smaller patterns) which is also long, and
also a long chisel blade (beveled on one side)
Misc. blades & cutters:
...for
raw and baked clay: Y-peelers for super thin sliced sheets of raw clay, band saw
for cutting baked beads, etc.
...calipers for cutting even strips of clay from
a sheet
..."guided cutters" for making oval or round cuts in sheets
of clay
...rotary cutters (wheel blades)
...scissors & wavy rotary blades
...for
baked clay or wire: toenail clippers, shears
To avoid
blade drag while cutting, many people clean their blades
periodically or before each slice; alcohol, baby wipes (with or
without alcohol), or possibly mineral oil are some possibilities. Trina
.....I
sometimes use a bit of talcum powder or cornstarch on my blade too...Diane
B.
...I find that blades still "wet" w/ alcohol really glide through
MG. I use those tiny alcohol wipes (like they clean an injection site with).
I wipe the blade, but do not dry it off, and take my slice. There is no drag whatsoever
on the blade, and you really can get paper thin slices with a "wet" blade. My
blade is NOT dripping, however. Baby wipes do not
work as well for this. Again, I think I'm actually dissolving a minute layer of
clay, which is why the blade moves so well. I usually take 2-3 slices before swiping
my blade again. Laurel
... I know that the best release for some of the clay
brands is water (Sculpeys & Premo), whereas for others (Fimo and Cernit
--which possess a filler, possibly kaolinite, which absorbs water), it's talc
or cornstarch (thank you, Katherine Dewey!), so different substances may work
for different clays. Diane B.
....James Lehman creates a feather pattern by watching the clay stick to the razor blade. Instead of scraping it off, he carried one color through another and then another, a subtle blend emerging in the process....if you let the character of the clay guide your efforts, James said, you end up with a more naturally achievable form."
TYPES
Very-Short blades (pencil-type with handles)
surgical
scalpels . . . .short pointed blades... sharper and thinner
than Xacto blades; easier for cutting fine details or sheets probably too
("disposable" with plastic handles, $2.00)... lightweight
http://www.polymerclayexpress.com/tools.html
http://www.puffinalia.com/tools.html
...What
I love them for is I can hold something in my hand and trim off any extra clay.
It works so much better than a blade or razor blade because you have a better
grip of the tool. They are truly wonderful! Mia
...awesome, sharp and tiny
points and they take a long time to dull up! They even have tops
that you can write on so you know which is new you can mark it with
your perm marker!!! These little scalpels will lift, push, slice, drag, smooth
and even cut!!!! ....will allow me to cut tiny teeny canes ...both
pieces remain perfect!!! Leigh
Xacto
knives, blades and tools
Xacto knives are small pencil-type barrels which
have interchangeable cutting blades; some are pointed, some rounded,
some flat, etc. (there are also small saw blades, etc.). Xacto
knives are available in many places, but unless you go to a hobby-crafts-art or
other specialty store you probably will only find one blade available --the one
sold in the knife.
...Computer stores have become a great source for me. (Fry's
is a) great source for diff size Exacto blades as well-cheap! Lynda
Celie breaks her tissue blade into quarters... then embeds one of the short pieces into a polymer handle (see below in Bending and Cutting for how-to's)
Garie Sim's lesson on using
the small flat piece of aluminum from a 3 1/4" floppy disk shuttter
to make small-knife cutters like Xacto blades (which he embeds in
long clay handles) ...he cuts into various sizes and shapes and even bends some...
can be used by kids
http://www.garieinternational.com.sg/clay/shop/handmade_recycle2.htm
...these
aluminum pieces pop right off the disk, and can be cut with scissors (just
don't use your best ones!!!) Kellie B.
...(for rounded or V-shaped "linoleum" blade cutters, see Carving)
Medium Short blades
single-edge
razor blades (length =1 1/2") (for safety razors & utility knives
& maybe blades for some wallpaper scrapers, carpet knives,)
...these are very sharp and thin
...great for cutting thin
slices from smaller canes (hold
with both hands when slicing) --they don't work as well for larger canes
though because the lip on the top can interfere with the slice
...can also
use the entire edge for making straight cuts for framing, etc.
...or
use the tip as a freehand cutting tool
...useful for lots of misc.
cutting and chopping chores too
--especially for kids, clay handles can be added around the lipped edge for a larger holding area, and also to identify which is the sharp edge (safety); brand new ones can also be dulled somewhat by scraping over sandpaper
for
cutting the thinner doubled-edge razor blades in half lengthwise,
to make tiny cutters, see below in Bending and Cutting
Garie
Sim uses the small flat piece of aluminum from a 3 1/4" floppy disk
shuttter as a medium blade which is somewhat sharp... he adds a rope of
clay along one long side to act as a handle for using it as a "blade"
http://www.garieinternational.com.sg/clay/shop/handmade_recycle2.htm
(tool B )
various forms of short-med blades, some for window or wallpaper scrapers http://personna.co.uk/images/Gpic4.jpg
The long blades available can
be made specifically for clay or blades from the hardware store used for other
things.
... Each diff. blade has diff. characteristics, which
can be important for doing some polymer cutting techniques
....... for example,
some are thinner and/or more flexible( vs.
thicker and/or stiffer , some are shorter or longer,
and some are stainless steel vs. non-stainless.
the
long blades which are flexible are especially useful for
making arc cuts in clay! (concave or convex)
...this
kind of blade is often used to create a non-even and/or non-rectangular exterior
shape for a pendant, etc
....or used in the same way for cutting shapes for
"frames" and framing
...as well as taking "bites" out of
sheets, canes, stacks, etc, for various reasons
http://www.katopolyclay.com/nuflex.html
Long
blades are held with both hands (one at each end) for making most cuts...
and most cuts are make in clay which is stationary and sitting on
a work surface, not in the air... all cuts are made in these straight down
toward work surface (the tip of a long blade can also be used for drawing-type
cuts through clay sheets)
...Garie's photos
of using and holding a flexible long blade in various
ways
http://www.garieinternational.com.sg/clay/shop/slicer.htm
...Mike B.
showing the proper holding technique for tissue blades (he's cutting down
a tall column, but notice how he's holding his blade). (website
gone)
...Sculpey's page on holding a long blade
(they suggest thumb + forefinger
on each hand, but I prefer thumb + first two fingers for stability) ....and
also making cuts (straight down, "sawing, " "rocking,"
and arcing the blade to make a curved cut)
http://sculpey.com/Products/products_access_superslicer.htm
(see
more on techniques for slicing canes in Canes-Info
> Cutting
...and info re slicing mokume gane + ghost image
stacks in Mokume Gane and Mica
> Ghost Image)
"tissue
blades" (blades for microtome machines, which cut human body parts into very
thin slices for laboratory work)
... 4 1/2"+ in length
.009" thick, 3/4" high...
these are the only long blades we clayers had for a long while
....they are
thin, sharp, and flexible ....can be used to make curved
cuts in clay pendants, e.g., as well as cutting thin slices from canes
...they
are great for slicing canes and taking paper-thin slices
from mokume gane pads and stuff, but I didn't miss them when I ran out. Eliz.
... it's been theorized that the dark
spots that the regular tissue blades get over time may have more
to do with an individual's skin chemistry than exposure to moisture, etc..
(I'm not sure they're really rust either, though that seems to be the
way most people describe them.)... If you think that the spots are helping dull
your blade, you might want to try wearing gloves or at least cleaning
your blade or hands frequently while doing a long session of mokume
gane, for example. Diane B.
... and keep them stored in a baggie with
a cracker in it (to keep them as dry as possible). Dusty
...I store tissue blades
in a bag with a rag soaked in WD40 to keep from rusting (after I've heated
and bent them). Alan
I have one older blade I keep around just for making indentations or lines in the clay. Barbe (a duller blade, or using the non-sharp edge?)
stainless
steel long blades
(slower to dull
than traditional steel ones, and don't get dark spots over
time)
created for polymer clay
Kemper
Slicing Blades (short 4" long , 2 per package)...
flexible (about same thickness as tissue blade?)
....my
very favorite "all-around" blade is the Kemper stainless blade...
the sharpness lasts (I'd say) five or six times longer..... I wipe them with alcohol
before I put them away, and they seem to stay sharp for a very long time.
... I actually like the Kemper blades better (than the microtome
ones) now... the Kemper ones bend just fine and I seldom cut a curve larger than
what they will cut. Dotty
...I hate the Kemper blade... to me, it drags
on every thing I try to cut... luckily as a non-caner, the drag
thing is not a huge issue... more of an annoyance when I am trying to
cut a big chunk of clay. Tommie
Sculpey
Super Slicer (6" long, 2 per package) ...very thin
.......Sculpey's Super Slicer doesn't seem to drag as much (when cutting large
chunks?) as the Kemper, and is my favorite. Tommie
...they also have a 3-pack
with a Super Slicer... 1 rigid, 1 flexible and the new 4" mini-ripple
blade which is corrugated (wavy)
Kato blades now
come in 4 versions...
Kato NuBlade (6"
stainless steel blade; stiffer and thicker than most blades)
.....its rigidity makes it good though for things like cutting slices from larger
canes or stacks, cutting off chunks of clay (before conditioning, etc.), making
long cuts, cutting long strips from sheets
Kato NuFlex
(6" very flexible & very thin blade) makes
curved cuts; micro thin cuts (thinner than Nu-Blade, and even than tissue blades);
super flexibility for fluid curves and arcs... will
actually bend into an S shape...longer than
a tissue blade so good for making curved cuts
into canes or long logs of color. .
Kato T-Blade (short 4") flexible but remains rigid when cutting larger diameter canes (because of length?)..."tissue style blade for polymer and silver clay"
Kato Ripple Blade (for all info on the wavy or ripple or waffle or corrugated blades, see below in "Wavy")
Studio
by Sculpey Super Slicers
....4 blades (only as a kit?): a
stiff shorter blade, a long flexible tissue blade, a scallop
(wavy) blade, and a crinkle (smaller waves) blade.
...also seels 2
handles that can used with any blade
review from crafttestdummies:
http://www.crafttestdummies.com/2008/01/29/craft-product-review-studio-by-sculpey-super-slicer-blades
....instructions on how to attach the blades were
unclear- no diagram or photo ...have to take off the “saddle” - the green part-
put the 2 halves together through the holes, then snap the saddle back on (except
to snap the saddle down and into place, you have to put your fingers somewhere
for leverage… and your first instinct is to put your fingers under the saddle
to brace them, right where the most dangerous, pointy part of the blade is! I
nicked myself 3 times before I got the handles on
..re
slicing Mokume Gane cane...the handles made the tissue
blade so long, I couldn’t control it (length of handles plus blade = almost
10")… I removed the handles and put them on the shorter crinkle blade, this
time laying the whole thing on it’s side so I could see the blade laying flat.
(SBS recommends putting the blade in a chunk of clay, and working from the top.)...seeing
the blade on it’s side worked better for me, and I got through the process unscathed....
I’m going to use the handles on one set, and leave them on.
...re the merit
of the blades themselves, I loved them... nice and sharp...big thumbs up
for the scallop blade
(good for holding the wavy blades though
when cutting)
There are also chisel blades
which are beveled a bit on one side of
the cutting edge
... one type comes in a 6" slightly-rigid
version http://www.puffinalia.com/tools.html
...cutting with the beveled edge away from you? makes
it easier to do straight cuts, and the other assists in beveled cuts. caneguru
... the chisel blade that came with the JASI
stand slicer was extremely rigid and thick-ish, with wood handles on each end
and also a few inches tall (don't know if that's sold separately or any longer)
other long blades
In a pinch, certain other
kinds of blades sold for various construction or craft knives, holders, etc.,
could work too... however
... they may not be flexible
at all... most are thicker than blades we usually use ... some may have
holes in their sides which could interfere with some kinds of cane slicing
(these might be fine for cutting sheets though --with the whole edge or just with
the tip-- or for regular chopping and cutting)
--wallpaper scraper
blades
--8" "floor stripper" blade
(carbon steel ... not stainless?)
--a length of unseparated
snap-off blades http://mrboxonline.com/COS091494INFO.HTML
--carpet knife blades maybe
http://www.cornerhardware.com/hardware/Hand_Tools/Knives/Utility_Knife_Blades-396.html
shows some of the kinds possible
--my blade of choice is "Big
Job" window scraper blade which I suppose is for scraping paint
from windows. I've seen them in paint stores. There's five in a pack, they're
3" long and double sided, so handle with care, and I pay
about $2 for the pack. Irene SD (flexibility?)
.....Any of these blades will probably be used alone, but some come with a handle they can be extended from and might be usable that way if the clay to be cut is near the edge of the table (or a raised area), and your hand is off the table, giving it more room (or the end of blade or still connected snap-off blades could be embedded in a polymer handle.
ALSO:
Garie
Sim makes 2 tools which could function as long or medium-long blades
...he
uses the rectangular aluminum shutter piece on (the outside of)
a floppy disk (3 1/4") as a medium-length blade... he adds a clay
rope handled along the top of one long side to use as a handle
......the metal
piece pops right off and can be cut with scissors (just don't use your
best ones!!!) Kellie B.
......this is a fairly high grade of aluminum
(maybe tempered?) which is pretty stiff even when it's as thin as this
--1 1/4" x almost 2" for each side-- though each has a rectangular
hole inside)
...he also makes a larger tool from an aluminum sheet?
(like a small dough scraper) which could also function like a long
blade ...he curls one end of the aluminum over to act as a handle
http://www.garieinternational.com.sg/clay/shop/handmade_recycle.htm
(the first, and perhaps the second, could also be used to cut cane slices
as long as the canes aren't too old and hard or too soft)
In
the kitchen store, they have this dough scraper .... It is a sheet
of stainless steel with one edge rolled over to make a handle.
....I slo-owly
sharpened the scraping edge to razor sharp so now I have a blade
that will cut a cane slice that's up
to 8 x 6" ! (if I have the strength to get it through <grin>)
.....To
do this, I bevel only one side
of the blade (I used the side with the handle curl) ...the beveling-sharpening
is done by hand and
with water.
.......do not use an electric grinder
to do the sharpening... power sharpeners can overheat the metal and destroy
the temper (that means you will need to sharpen it a lot). Lysle
potter's metal "rib" ... preferably a sharpened one (see just above under dough scraper) or will smear slices too much ...fine for chopping or other cutting though
see "Stand Slicers near bottom for a stand version of a large cutter, with a stiff (but thicker) blade
other techniques with long blades
long blades (and also shorter single-edge blades and cutters) can be used with
the cutting-through-plastic-wrap trick as well, which creates an automatically
beveled edge (see beveling above, in Cutters, Uses)
... this might
be useful in various ways in addition to beveling an edge(s)
......e.g.,
when backing a clay sheet with a base layer when you don't want the
base layer to show on the edges, cutting over plastic should drag the
top layer down over the bottom one and hide it (?) . . .
.....straight
or slightly curved cuts could be made over wood (like Woodles) or masonite
or balsa pieces
.......to make more angled or strongly curved cuts
around the outside, the end of the blade, or the edges of
various other cookie or smaller cutters could be used to take bites
out of the edges
Sliding a thin blade between the clay and the surface (like a thin palette knife or maybe a table knife with no serrations) before lifting doesn't distort a flat piece if you're careful. Use a slight sawing motion, holding the blade flat against the work surface until the clay is free. Don't try to lift it until the whole piece is free or it will stretch and distort. You can even use your tissue blade lying on it's side, but be careful not to cut into the clay. LyndaSch (or use the dull side of the tissue blade)
-Thomas Scientific (tissue blades)... Thomas Scientific USA is alive and
well http://www.thomassci.com/ordering.htm
.
You can order the tissue (microtome) blades from them
directly, but the smallest quantity is a box of 25. The price
is $36.35 for the box, plus shipping and a handling charge of $7.50 (I think that's
on orders under $100). That's about $1.88 a blade. Their number is 800-345-2100
(you can't order from their website, but it lists their tel. and FAX numbers,
as well as e-mail ordering address). ...maybe those who belong to local guilds
could get together and buy a box. Laura D.
...I've always order a box or two
of blades (at a time). It never made any sense to me to get 1-2 single blades.
.Desiree
-The Clay Station
http://www.theclaystation.com/Tools_Home.htm
(plus photos of blades)
- Polymer
Clay Express's many blades, plus disposable (pointed) surgical scalpels:
http://www.polymerclayexpress.com/tools.html
- Donna
Kato's webstore carries all her blades...she
also offers various combo blade packs)
http://12.181.170.55/Merchant2/merchant.mvc?Screen=CTGY&Category_Code=KT1
(Kato blades...
http://www.sculpey.com/Products/products_access_superslicer.htm
(Sculpey's blades)
- Accent Imports
(Fimo Zone) carries the Kato blades and Kemper blade & Personna waffle
blades ( 5" longrather than 4 3/8"..also available in an 8-pack)
http://store.yahoo.com/fimo/tools--blades-and-accessories-cutting-tools-and-blades.html
- Clay Alley
has (and Sculpey Super Slicers) & ripple blades of various types
http://clayalley.com/
(click on Tools)
- Clay Factory has SuperSlicer and wavy blade
http://www.clayfactory.net/Shopping/S-Misc2.htm
8" "floor stripper" blade (carbon steel
... not stainless?)
http://www.polymerclayexpress.com/tools.html
variety
of ....blades, scalpels, zigzag saws, etc., etc., hole punches,
etc., in varying sizes (for
earth clay, but useful for polymer too) by Kemper mostly?
http://www.baileypottery.com/tools/kempertools.htm
http://www.bigceramicstore.com/Supplies/Kempertools/kemper_tools.htm
"Dove Cutter" (a holder/stabilizer for long blades)
Linda's sturdy, Y-type holder for long
blades (has handle); the blade is held between the upraised arms of the Y (similar
to a wire cheese cutter, but it's used upside down very rigidly)....http://doveceramics.com/Dovecutter.htm
...any (longish) blade (over 4 1/2") will fit it in,
but the wavy blade will not.
...the holder stabilizes
the portion of the blade between the grippers which has the effect of making a
long blade stiffer for cutting slices (which is the best
way to make slices from larger canes... to do that now I have to pull on
both sides of the blade *while* simultaneously pushing it down to cut; the stiffer
blades can be used by hand, but they tend to be thicker and therefore don't make
as thin a cut). . .
...can cut large hunks or slabs
of clay more easily (plus being easier on the fingers and hands) . . .
and would be sharper and quicker than using something like a metal potter's "blade"
as well
...would also be useful for making long cuts in sheets of clay
easier and quicker --e.g., when cutting strips for twisted ropes
of mica clay, cutting tiles (see above) for or color chips or anything
else, and for cutting straight framed sides.
... it's also good for
cutting regular slices . . .
... and for cutting long wedges from
logs of clay (cutting lengthwise down the log) for many cane patterns ..will
need to cut canes 4" or shorter though to fit inside the grippers unless
they're really small diameter canes. Diane B.
... I know what you mean though
about sometimes wanting to have your hands close to the clay... I hold it two
ways --by the handle, and on both sides of the part that holds the blade.
. . . My hubby said it's called pot metal (so it's strong). Linda
...the
cutting clearance is now 1 1/2", but will probably be
increased to 2" or more to accommodate the height of large bricks
of clay and really large canes.
...You could also make a version without the
top handle. I would use them both differently. Gail ..
...to insert a blade
in the cutter, you'll need to put it in a larger piece of clay, sharp end
down; then take the handle and place it on the blade (push sort of hard the first
few times you do it... it will loosen up just a little later). . . To remove
a blade, hold a wash cloth or pot holder on the blade to pull it out. Linda
...to purchase: $15.00 + $2.00 s&h ... they can also be shipped overseas
--e.g., for Austrailia, around $5.00 shipping.
Safety + Containers for storage
If
you are worried that you will cut your fingers on
the longer blades, you can try one of these things on top of each
end of the dull edge (rather than along the
whole length of the dull edge
which might interfere with cutting):
--paint with red fingernail
polish (enamel is best)
--put a bit of masking tape on it
--put
a small bit of clay or a clay handle on one side, or on both sides
(glue on)
.... if you place only on one end, the tip of the other
end will still be free to use easily as a pointed cutter
....putting
a larger bit of clay, or a long bead of clay, on each end
might be best for those with hand problems
.........I
put a cane slice on the corner that covers the notch in
the blade, if it has one. In other words about half way down the side of
the blade. I press this clay on very tightly and then bake it. After baking, I
remove the clay, put a couple of drops of super glue on each side of the blade
and replace the clay. ...when I put my blade down and then pick it up again, I
always look for the clay corner first....this clay raises one end of the
blade up about 1/8" above the work surface so it is easy to grab safely....
If it is placed on a magnetic surface, it still would be able to be picked up
easily. Patty B.
For kids especially, "safer" long blades can be made from the aluminum piece on a floppy disk or a potters rib or even a dough scraper (poss. sharpened) ...(see above under Long Blades for details on those)
I'm pretty sure
I remember that someone (was it CZC?) was reported to keep their long blade stuck
in a blob of clay, but can't find any reference to that
now. ...I think the idea was that it doesn't dull the blade, and maybe
the oil in the clay even keeps it away from air and moisture preventing "rust"??...as
well as keeping the blade easily accessible?? Diane B.
....I keep my
tissue blades in a bag with a rag soaked
in WD40 to keep them from rusting. Alan
storage
block or holster.... cut a 1/2" deep saw cut the length of a 6" long block
of wood, and you will have a storage place for the tissue blade. It also
will insure that the back edge is upwards and that it is easy to grasp.
Lysle
......or use balsa wood board the length of the blade and two
small upright pieces glued to the middle area (so it would be free from the handles
on each end if you had any)
Jean S. created a multi-blade,
multi-tool holder from a large half-ball or half-oval of clay...
she created grooves for the blades to rest in (sharp edge down),
and holes to stand various other tools in
http://i96.photobucket.com/albums/l163/DianeBB/tools/9dbc.jpg
Dar's
several hinged (book-type) blade holders, long and slender
...she uses "silk" adhesive tape (as an outer spine, overlapping front
and back) to connect and hinge the parts (which she paints and applies Future
to)
http://www.afamilyjournal.com/pctools3.jpg
... Violette's laced-hinge blade holder (with
magnet strip on inside) (website
gone)
I
was wondering about covering a glasses case for a blade holder. Only problem
besides removing the leather is that they aren't long enough for Kato blades.
Anyone done this? Trina
The dh has this old old case and the leather is pealing
off. I picked it up and thought, hmmmmm this might work! But your right, not long
enough for those (Kato) blades. I made a blade holder a few yrs back at
our retreat. I don't use it much cuz it's kind of big. Anyhooo, I learned about
using Durapore bandaging tape as a binding/hinge, from Jean Comport. And
I've seen others use this tape too with their little clay books. The tape is great
cuz you can paint it with acrylic paints and it's very durable. The tape gets
baked ibtw 2 layers of clay to hold it in place. I just cut and glued magnetic
sheets onto both sides of the inside covers. Next time I make one, I'll make
my clay sheets thinner or... I like the idea too that Michelle had, of imbedding
the magnet into the clay--Geo in MI.
I've always worried about using
magnets to hold blades because it seems too easy
to brush a hand against them (while rolling, or just
moving things around), or to grab one just a bit the wrong way or angle. Since
the magnet holds the blade so securely and stiffly, that
can mean a worse cut than if the blade is free and can move away some if either
of those things happen.
....It
seems that there should be ways of using magnets or magnetic paint safely,
but I'd love to hear some that would work while taking those things into consideration,
or even when working with kids.....really quick for a hand to move the wrong way.
(if a blade is held to a magnet which is *inside* a closed container, like some
of them are, it helps a lot but those aren't easy to use when the blade is being
used frequently).
...maybe it's good to use a weak magnet (magnet strips
aren't very strong), or even magnetic paint, so that the blade wouldn't
be held so stiffly and could move if bumped?? Diane B.
...How
about if you keep the blade (on?) in the plastic case? ....a magnet should still
work thru the plastic. mwezi
...I keep my blades on a very strong
magnet which is glued to the side of a cabinet sitting on the back portion of
my work area table. The magnet is 6" long and 1" wide. It is mounted
vertically. The blades are then put on horizontally (perpendicular
to the magnet strip), which makes the end easy to grasp. I have never had
a problem and I have them there for 3 years. Irene
In
a cookware store I found something called Knife-Guard, a white folded piece
of plastic meant to, obviously, for knife blades, but the thing is ideal for tissue
blades. The one I got is about six inches long, & there were different sizes there.
Marla
...long piece of cork that had a magnet running down the
middle....used for storing knives I think I've seen these at WalMart, KMart, Target??...
Carolyn
...would be blade be held perpendicular to the magnet strip
so that only the middle of it would be attached?
Tamila's covered toothbrush holder as blade holder (I have used some different types of the toothbrush holders, but the ones made by Caboodles are my favorite ones. I would suggest to anyone that is going to do this, to make a "draft" first. Buy a couple of the holders you find. Cover one with scrap clay and bake it to MAKE sure that it will withstand the heat. I've not had any yet that wouldn't, but always Test First! Tamila) (website gone);
It's been theorized that the dark spots that
the regular tissue blades eventually get may have more to do with an individual's
skin chemistry than exposure to moisture, etc.. If you think that the spots are
helping to dull your blade, you might want to . . . . keep them stored in a baggie
with a cracker in it (to keep them as dry as possible) .. LOL. Dusty
. ..
. . . or with one of those little silica packets . . . or in kitty
litter?
for Dove Cutter (grabs and holds long blades taut) for slicing of all kinds, see Long Blades above)
Actually,
the sharpness of the edge of the blade isn't
as important as you might think.... but the smoothness
of the sides of the cutting edge is very important. James
....There's
a difference, technically, between sharpening a blade (which actually
removes some of the metal) and honing, or straightening,
it down to a very fine, almost microscopic level
...straightening should
be done much more often than actual "sharpening," and will keep
blades very thin and sharp for best slicing
...a well-straightened edge is
so fine that every time it hits a worksurface, it will bend
the edge (or a part of it) a tiny bit to one side...
eventually there will be enough tiny bends that the edge will be noticeably dull
...and that's when it'll need to be honed (not "sharpened")
...holding
the blade at the correct angle (20
degrees) against the abrasive you're using is the
most important thing when straightening an edge,
and to make sure it stays at that angle the entire time ... more
important even than the way the blade is stroked (straight or circular)
...various
tools can be used to hone-straighten a blade.... whetstones (manual
& electric, stone to diamond), sandpaper, "steels"
(long rods) that chefs used to stroke their blades straight (though hard to hold
the correct angle for a blade),
etc.
If
you already have a whetstone, you can purchase an angle guide separately
(“Edge Guide" from Razor Edge Systems, or “Roledge” from Benchmark-- Cabela’s#
HF61260-900).
...OR you
can use your thumb (short blades), thumb and finger (long blades)
as a guide to a consistent angle
****OR you can use a
1/4” spring paper clip attached to the back side of the blade also
works ...cool idea!
http://gpvec.unl.edu/filesdatabase/files/feedlot/sharp1.htm
(lots of info
on sharpening, plus diagram of spring paper clip, etc.)
...
those thin stainless steel (a.k.a. disposable) blades are not designed
to be resharpened to the level they were when
they were 'fresh' out of the packet. Desiree
...also Cynthia Toops NEVER
uses a sharp tissue blade..ack.. She uses the same one for years and
gets those marvelous small, straight cuts. Valerie
To
make your blade sharper:
.... use 2000 grit wet-dry sandpaper
to polish the sides of your blade by placing the sand paper on a piece of
flat glass and rubbing the blade on the sand paper on both
sides ... you can work it up to a good shine. James
....
run a piece of high grit sandpaper (600 - 1000) along the edges to sharpen
them a tiny bit.... I did that with some really old tissue blades that had actually
begun to corrode a bit. A little elbow grease and some 600 grit and they looked
nearly new...however, they still didn't have that hair-splitting edge
of a fresh tissue blade... over time, you'll learn which tasks require the freshest
blades and which tasks can be tackled just fine with duller blades. Desiree
...If you run the sandpaper on both
sides at the same time, the edge will not get as sharp as running
the sandpaper on only one side ... because sandpaper method is not
precise enough. PöRRö
I spotted a small
whetstone for $2 in a rock shop. I keep it at my workspace and get
a lot of extra mileage out of my blades.
...don't need to use oil...
clean after each use with water to avoid build-up and shiny spots
on abrasive stone
manual sharpening "systems"
(system
= abrasive/hone + angle guide) ... DMT, LS Lansky, Gatco Edgemate, Blademaster
...cost will vary from $25 (stone) to $65 (diamond) and are available at most
sporting good stores. ...DMT system sells for about $40 and comes with a medium
and fine abrasive.
...I use the Lansky system http://www.lansky.com/systems_frame.html
...sharpens everything from shovels to scissors to knives. I adapt it to blades
when I need a really sharp edge, though I never get the same edge as when the
blade was new. I have the Lansky Professional Kit. Actually 3...and have had them
for a decade. This sharpening system is safe enough for children to use (with
supervision, of course)! And no- I'm not a rep of the company, just a VERY satisfied
customer! Sunni
...“Meyer Sharpen-It” ($27) ...2 pr tungsten wheels
for actual reshaping + 2 pr ceramic wheels to hone the new edge
(4.5" long)
electric sharpening units:
...I
bought a sharpener/honer unit from QVC, and now I never throw blades
away. Alan
....it may also be possible to use an electric kitchen
knife sharpener like the Chef Choice (#110)-- mine cost around $80 (has three
wheels, diamond) (use soft touch).
...$40
whet stone sharpeners available from hardware stores (wet-stone turns just
over 1,000 rpm ... variable angle guide which allows work on all
three angles of the edge)
Also for slicing, I couldn't find a tissue blade so I got a kidney shaped ceramic tool, (a metal potter's rib) the kind you use to round the inside of a pot being thrown on the wheel. I took fine sandpaper and sharpened up the straight edge and it cuts real nice. Nora-Jean
Now if you are both handy and cheap, you buy a dough scraper, the kind
with the back edge curled to become the handle..then sharpen it yourself.
. . . CAUTION: bevel only one side
of the blade. I used the side with the curl. I have sharpened mine razor sharp.
This is done by hand and with water.
Do NOT try using an electric sharpener or
grinder, any other means that heats up the metal, it removes
the temper of the metal. . . .
...That is also why you find the best sharpening
is done under water (razor blades are sharpened in a steady stream of fluid).
Lysle
To
keep your blade sharp on the edge, consider your
worksurface too
...you may want to use a self healing mat as a worksurface
(the blades do stay sharp longer if you do).
....or an inexpensive plastic
cutting mat
...I must admit that I always cut my canes on
strips of Plastizote http://www.acor.com/plastazote.htm...
it is a high density polyethylene (polythene) foam . It's non-allergenic,
not affected by clays and greatly reduces the notching of blades which is caused
by cutting on hard surfaces, extending their life.... I bought mine from
a company called Trylon which supplies plastics to schools for crafts etc....
I've found that a range of widths of strips is useful. I select one which is the
same or slightly less than the cane's width (cylindrical canes
can roll, but if one is careful, they stay in place). Alan
To keep blade clean so it slices well:
...use
a scrap piece of clay to run the blade through to remove
any old plasticizer residue (to make is smoother). .. and to remove
small (we're talkin we can't see it even with our Drugstore glasses) pieces
of clay. Syndee
...keep blades clean with
artificial (?) steel wool (very fine grade). . .syndee?
(...see
more on blade cleaning to make good slices in Canes-General
Info > Cutting Canes)
(see info on sharpening dental scraper tools in Carving)
Mike Buesseler showed us how to bend tissue blades in order to make
cutters with angles
.......the blade ended up with either a
V-shape or a rounded bend
...he placed the
mid-section of the tissue blade in a flame till red, then
bent it to the desired angle (while hot) with 2 sets of
pliers sort of slowly
(...getting a sharp
bend is harder than a rounder bend
--the blades often break during
the process , but it can be done).
...."When
you're using the pliers to squeeze the curve in the heated blade tighter, how
do you keep it from breaking?"
.........Well, when I do it, I bend
it a little at a time... when glowing hot, I bend a little...
heat again to glowing and bend a little more...
...........to
"case harden" it after you get the blade to shape, heat it to
near white hot, then drop it into motor oil (that way it will become rigid
again and it will also hold its edge longe --you might have to case
harden it a couple times (case hardening is the infusion of carbon,
from the burnt oil, into the metal ...at one time blood was used to case harden
blades, and the best blood according to lore is human blood. <G>) Mike B.
OR
......Alan suggests 1 different step :
......heat
the blade to a dull red... then allow it to cool
(naturally)
.........(this will cause the metal to be soft enough
to bend or to cut without special tools)
......the original
temper of the blade will be lost, but the hardness can be at least partially improved
after bending (or cutting) by red-heating it again... and this time plunging
it into water or oil
...if bending, it's best to sharpen
the blade beforehand
...even sawtooth-shaped
blades can be made from de-tempered blades (!)
.....before
cutting, measure and mark the intervals you want (preferably with scratches)
.....2 very narrow pairs of pliers are recommended for making the bends!
..NOTE:.the heating of blades will make them far
more prone to
rusting
(so I store mine in a bag with a rag soaked in WD40 oil). Alan V.
The
heating process makes the sides of the blade a bit
rough, so a short polish
with fine emery would markedly reduce the drag if using to cut through
a clay block. Alan
Mike
made his bends in the middle of the blade, so he wrapped
both ends of the bent blade together with a piece of masking tape
(to hold them together and also serve as a handle)
.....I made my bends at
the ends of my blades (to save blades)
but they would've been far more stable if I'd made all the bends in the centre
(as
they passed through the clay, they distorted quite badly --the tempering reduced
this a bit though)
...... also, properly closing the gap
left at the end of the bent area would have meant a great improvement in
their performance. Alan
Mike
uses his bent blades for making landscape canes (dr-o-o-o-l !!... see in
Canes--Instr. > Landscapes)
......he
removes clay from the outer edges of his (rectangular) cane,
then inserts same shape, but diff. color clay, as mountains, etc.
Alan bent a rounded triangle shape and
a diamond shape into the ends of two of his blades
http://photobucket.com/albums/y191/Alanjamesv/Tools
these
blades can be used in other ways too like making cutouts
...... or
for inlay where one shape is cut out then replaced by the same shape
in a diff. color (could be even Balinese Filigree)
.......of many components
for canes (subtractive like Mike's, or just to create freestanding
shapes to use in canes)
...I used my diamond-shaped
bent blade in an attempt at an easy way to make tumbling block canes. Alan
.Jean
S. cut a tissue (?) blade into a shorter length
by repeatedly bending it at one place (the metal fatigued at
that spot & eventually broke)
Celie
also mentions breaking a tissue blade into quarters ...then
embedding one of the pieces in a polymer handle (to use like a scalpel)
To
make tiny shape cutters, I cut some doubled-sided razor
blades in half lengthwise (I use Wilkenson brand)
....I
heat one of the half blades in a candle flame till it's glowing hot
...then
I bend it carefully around a knitting needle ......or I use
pliers or something to shape it like I want
...let it cool...
wash the soot off ... I use these as little cutters (GREAT for making tiny
leaf cutters, etc).
Which
of those things could be done to other blades??
...So far, I've only tried
this with my old carbon steel blades but it should be possible to heat and bend
the more flexible stainless steel blades.
.....however, if you do try
with other blades - PLEASE be very careful - eye protection
and heavy gloves are sensible in case the blade
still retains some temper and it shatters
as it's being worked on. Alan
floppy
disk (3 1/4") shutters
...The 2-sided flat sheet of aluminum
piece on (the outside of) a these pops right off and can be cut with
scissors (just don't use your best ones!!!) Kellie B.
......this is a fairly
high grade of aluminum (maybe tempered?) which is pretty stiff
even when it's as thin as this --1 1/4" x almost 2" for each
side-- though each has a rectangular hole inside)
......these small metal
sheets are fairly thin, so could be used to make a bent blade as above,
or to make small pattern cutters, too?, as well as various kinds of knives
and tweezers)
...Garie Sim shows these and making several cutters from them
on these pages:
http://www.garieinternational.com.sg/clay/shop/handmade_recycle2.htm
http://www.garieinternational.com.sg/clay/shop/handmade_recycle.htm
some food garnishing tools might be
sharp enough to make these outer cuts rather than single stroke cuts from a blade,
or bending a blade
--Oriental Garnish Making Set http://www.polymerclayexpress.com/equip.html
some portion of the outer edge of many small or large cutters of all types (aspic, Kemper, cookie cutters, etc.) can be used for this purpose too
WAVY
blades
(aka ripple or waffle blades)
DB —move many of wavy blade things to relevant folders AS WELL?
Wavy (or ripple) blades can be used in various fun
ways with clay:
...create wavy edging on clay sheets
...make interesting
rows of pattern by cutting through canes of various types (lengthwise), or cutting
through stacks (including mokume gane stacks)
...make ghost-image patterns
in mica clay
...inserting .... + more
Because of the curves, sometimes wavy blades can be a little harder to cut with (esp. cutting tall stacks) do, so if your clay is soft, let it sit awhile or refrigerate to stiffen it first.
Wavy blades now come in two sizes (regular, and mini--with
more & smaller waves):
SUPPLIERS
original
size (13-14 ridges, 4 1/8" long)
Donna Kato calls
hers a "Ripple Blade" -- KT-1R
http://prairiecraft.com/Merchant2/merchant.mvc?Screen=CTGY&Category_Code=KT1
(or prairiecraft.com > Kato
Tools)
http://www.polymerclayyourway.com/tools2.html
mini
size (about 35 ridges?, 4" long ...shorter, closer-together corrugations
....make tinier patterns, with more repeats)
... sold only
in package with Sculpey's two straight cutters?
http://www.sculpey.com/Products/products_access_superslicer.htm
both
sizes available
http://polymerclayexpress.com/tools.html
http://www.clayfactory.net/Shopping/mariestool.htm
http://www.clayfactory.net/Shopping/S-Misc2.htm
MAYBE-SUBSTITUTES
---Clay Alley has a tall, strong, wavy-type
blade with handle (could be used to cut slabs for pasta
machine conditioning or other chopping though?) http://clayalley.com/
(then click on Tools)
......this blade measures 3-1/8"
long. Compared to the regular wavy blade, it has more of a V cut than a
U cut. There are 9 "V" on one side and 10 "V" on the other side. The blade is
not that sharp. ...I can run my fingers over it with pressure and not get
cut. With the handle, it is not flexible at all. Defintely for straight
down cuts ....I may begin carrying more wavy blades though...Karen
---some
mandoline cutters may have removable blades for slicing wavy veggies
---there are also very short, rather thick but sharp, corrugated strips
of metal which are intended to be hammered through two wood framing components
to hold them together (can buy at artist supply stores or
hardware stores?)
wavy edgings can be cut
with a wavy blade on any clay sheet
......these which can be left as
is, or nested with another wavy-cut sheet
...I like to cut
nice edges for lacy petticoats on old fashioned ladies or little girl figures.
Dianne
side by side cuts on a Skinner
Blend sheet (or SB slice) makes a wavy Skinner Blend line.
.....there must be a jillion ways of using this blade! Donna
wavy
bargello. . . I thought I'd go blind doing the wavy one, but it's a blast
to work on.
...just do a regular bargello sheet..and cut with a wavy
blade.
....can position it all sorts of ways to get various effects. Jan
R. http://people.delphi.com/Janruh/bar3.jp
(gone)
Hazel's
cutout from a wavy layer sheet (website
gone)
insertion
...Pinchy's
lesson on a leaf cane with veins inserted into a Skinner
blend log cut with a wavy blade
http://www.geocities.com/pinchyspolymerplace/rippleleafcane.htm
...Barbara
McGuire's lesson on using a wavy blade to cut a 2x2" aligned stack
of silver mica clay or could be any stack) 5 times... then inserting a
thin sandwich sheet of black-white-black between each wavy slice
......she
then pinches one end of the cane to create a wavy fan effect to use
as one piece, but could also leave as a cane before pinching then slice
http://www.hgtv.com/hgtv/crafting/article/0,1789,HGTV_3352_1399717,00.html
(step 14...figs G,H,I )
mica clay (ghost image and mokume gane)
mica
clay ...examples of using ripple blade with just one color
of mica clay
http://www.polymerclaycentral.com/cyclopedia/rippleblade3.html
http://sculpey.com/sculpey102.htm
(bottom of page) --making stripes and grids
......
lightly slice across the top
of a double thickness of metallic or Pearl
Premo, leaving it looking slightly corrugated
......
then use the edge of your blade to make random marks across the ridges.
......run
this through your pasta machine and the disrupted mica makes it look like
holographic bamboo.
..Put some
Premo metallic clay through the pasta machine at #1 over and over until
it is the same color front and back.
......cut
and stack, keeping the direction of the layers the same, until you have a "block"
...let it rest for a while
......stand
the "block" so the bright gold side is facing you
......cut
a slice with the wavy blade as you would a cane slice...cut few more slices a
little thicker than a #5 setting
......now
run the slices through the P.M. on #5 (with the ridges running up and down)....
SURPRISE!!! I hope:) Marg Laurin
simpler + misc. info
....I just globbed together
many assorted scraps ... then rolled into a large ball and squished
into an obloid sphere ...the wavy-blade slices were all different and each
was a surprise but a delight. Jeannine
....Try
using wavy blade to cut Natasha beads (see Beads
> Symmetrical) for a different effect.
To
make many of the patterns larger and more spread out, as well as
to flatten out ridges created by a wavy blade, they are often put through
a pasta machine, or rolled over with a roller
...I usually put it through
so the tall "ridges" are crosswise to the rollers the
first time.... then on the next pass, I turn it so they are parallel.
......the
idea is to even out the stretching so the pattern isn't lost. ...After
the second pass, I go by how it looks (a sheet will always stretch more lengthwise
as it goes through the pasta machine).
...Another option would be to flatten
the bumps a bit with your fingers first, and then use the pasta machine
or a brayer if you want even more control. Jody
...(can also add a backing
sheet at some point if the pattern sheet gets too thin)
canes
I cut slices (lengthwise or crosswise?) from a cane made up only of a 9-log grid of colors with a wavy blade (website gone)
Kim K's lesson
using a wavy blade on old cane lengthwise
http://www.polymerclaycentral.com/cyclopedia/ripplebladered.html
Tzunun's
whole bull's-eye cane which trimmed with a wavy blade on all 4 long sides
looks rainbow butterfly wings
...she did same thing with a spiral
cane, using Linda H's " technique"
http://www.polymercafe.com/images/polymer_cafe_14.jpg
(upper left) but with
a Skinner blend+thin black+Pearl
Marie's
cutting a sun cane lengthwise
http://www.polymerclaycentral.com/cyclopedia/rippleblade1.html
red and yellow geometric cane cut with wavy blade
http://www.polymerclaycentral.com/cyclopedia/rippleblade2.html
(first row )
Marie's
lesson on cutting round and square canes lengthwise with
the little (mini) ripple blade
......(red
& blue canes at top + blue spiral canes
at bottom)
+ Marie's lesson on cutting 2 lengths of
spiral cane pressed together vertically (with mini blade), by
cutting several slices from top of vertical canes (purple
& turquoise)
http://sculpey.com/sculpey102.htm
stacks & mokume
Marie's
lesson on cutting a mulit-stack of two colors (..she stacks
the colors (1 1/2 x 3"), flattens in pasta machine (#3) to make a long strip,
then cuts and recombines (#3 then #5) till she has about 8-10 layers before cutting
http://sculpey.com/sculpey102.htm
(silver & turquoise, bottom of pg... pattern
hard to see)
more samples of cut stacks (some canes too)
http://sculpey.com/sculpey102b.htm
example from Sandy Camp http://www.sdpcg.org/Sandy%20Camp%208/sc8oa23.jpg
Tess'
lesson on using 8 small clay rectangles of diff. colors, on which she puts
various Lumiere paints and Pinata inks (allowing them to
sit no longer than 30 min), adding leaf here and there
....then stacking,
cutting and restacking sev. times (she presses down pretty hard in between
the re-stacks to create waviness)
... then cuts her stack with a wavy blade
http://pages.ivillage.com/tesselenetdkg/garnetpomegranate/id15.html
..now here somewhere? http://gallery.gundo.com/gallery/Tess_Gallery
If
you take thin slices from a mokume gane loaf, first parallel
to the face... then behind that, perpendicular to the loaf ... then run
that piece through the pasta machine, you can get the most amazing "magic
eye" kind of designs (actually, I guess, a sort of mokume gane)
...Jody's
"waterlillies" effect with mokume gane (website
gone)
...Denise's wavy
blade mokume gane (based on Jody's technique --see below in Jody's Ripple Mokume)
http://www.pbase.com/denise/image/4154571
I've
been doing cutting the "dead face" of the mokume block with the wavy blade like
Marie Segal. WOW...what a different kind of mokume gane it give me. All kind of
'wavy' and ripply like wood grain . Carolyn
...Pamela's "mokume
gane" stack cut with wavy blade... then cut into large thick leaf shapes
for necklace http://polymerclaycentral.com/chall_nov03.html
Marie
Segal makes a stack of layered translucents, with Jones Tones
foils between each layer
.... take slices from the stack with the wavy
blade like you would Mokume Gane (across the top, not distorted?)
.... now,
lay your slices on black clay and you have a neat dichroic mother of
pearl look
....run the left over sheet through the pasta machine and there
you will have a very nice mother of pearl sheet for a pendant (see Faux's-Many
>Dichroic
for much more on the dichroic effect)
Marie
Segal's lesson on making faux abalone
.... she uses a strip
of multiple Skinner blend mica colors, cut into sections and stacked
.........then
cuts down the stack parallel to the layers
http://www.polymerclaycentral.com/ms_abalone1.html
(pg. 2 also)
... plus many samples,
including some used in mosaics
http://www.polymerclaycentral.com/ms_abalone3.html
Desiree's lesson on using a wavy blade to
cut a flattened braid of Skinner blend canes which has been accordion-folded
into a loaf
http://pcpolyzine.com/march2001/altoid.html
I make stacked layers... then
I cut perpendicular to the layers but the cuts are angled
...
two side-by-side cuts makes a wavy-striped sheet. Donna (like chevron?).....
http://www.prairiecraft.com/ripple.html
(gone)
Jody's many
wavy blade effects (patched strips) http://www.nwpcg.org/ravensdale/classes.shtml
(gone)
Marie
and Jody's wavy blade techniques sampler
... marble/faux stone,
ripple mokume, ikat, optic dots, double cuts & inclusion
of cane slices http://www.nwpcg.org/ravensdale/catalog/segalbishel.shtml
(gone)
...(also) use the blunt side of a wavy blade to make wavy impressions in a mokume stack before shaving. Donna Kato
Jody's wavy/ripple mokume (stacked)
The
ripple blade is a cool tool for creating beautiful sheets of clay!! ... I wrote
up some ripple blade instructions for the issue of Poly-Zine that just came out
(and I'll have more in the next issue --see below):
....stack different
colored sheets of clay to form a loaf
...
then cut parallel to the layers ....(you'll need to shift the blade
to one side for each successive cut so that the slices are uniform thickness
....line the blade up with each previous cut so that the rippled sheet will be
of uniform thickness).
... flatten them by rolling them through the
pasta machine starting at the thickest setting and working your
way down to the thickness that looks good (remember to give the sheet a quarter
turn between passes through the pasta machine so it doesn't get distorted)...
this will result in a sheet with waves of color across it.
...next put cane slices or balls of clay (or scraps, etc)
between the layers when you build the loaf (June 2000). Jody
Denise's
wavy blade mokume gane (based on Jody's technique)
http://www.pbase.com/denise/image/4154571
I've
got a picture up of a little pill box that has the waterlilly effect on one side
and a rose/waterlilly look on the other. Both are ripple cuts, the rose side was
made by stacking waterlilly sheets with slices of rose cane.
....
It's a little hard to see in the scan, but you can look through a thin layer of
blue to see more flowers. Next time, I'll try for a lighter blue in the translucent.
Jody (see
website above--gone now)
Jody's Ripple Ikat (rolled up, then stacked)
sample of Jody's wavy blade, ripple ikat: http://www.pbase.com/image/2744069
Since
the second half of my ripple blade article, which would have been in the next
issue of Poly-Zine, won't be happening, here it is. Enjoy! Jody B.
(scraps
rolled up in a single color clay sheet before stacking and slicing
)
...If you enjoy making Natasha beads, this should appeal to you....
It's a great way to combine bits of different colored clay to produce exciting
new patterns. Because it goes through the pasta machine only once or twice,
the colors remain distinct.
1) Make about 1/4 cup of f scraps
(if you're are using cane sections instead, chop up or
cut slices)
2) Roll out 1/3 small block of clay in a complimentary
color ( #4 setting of pasta machine)
3) Spread the scraps onto
the sheet of complementary clay. ...distribute colors evenly
...... then
roll up the sheet, pressing out the air as you go
.......squeeze it
into a ball... and then roll it into a 1" wide snake.
4) Pass the snake through the pasta machine the long way at
the widest setting (this should give you a long sheet of
striped clay.
5) Make a stack... cut the strip in
half (crosswise), stack the two piece ...keep cutting until you
have a nice stack (stripes going in the same direction).
6) Square up
the stack
..... (to be able to cut slices from the whole stack without
it tipping), press the stack onto the (a?) lump of scrap clay with the stripes
running horizontally ... then let the clay rest for a half hour or
cool it in the refrigerator for five minutes.
7) Cut the stack with
the ripple blade parallel to the sheets (across the horizontal stripes)
........Remember to line the blade up with each previous cut so that the rippled
sheet will be of uniform thickness.
8) Flatten the sheets by running
them through the pasta machine starting at the thickest setting, giving
the sheet a quarter turn before running it through the next thinner
setting to prevent distortion (my sheets generally end up at the #4 setting,
but it really depends upon what you intend to do with them).
(When I use sheets
of ripple mokume or any sort of pattern sheet, I save the scraps, sorted by
color). Other odds and ends of clay, like distorted cane ends and bits of
faux ivory will work too.
(if the slices aren't
interesting enough, don't flatten
them... instead rReassemble the stack with the slices out of order, give
the stack a quarter turn, and cut crosswise to the first cuts).
Jody B.
(Ripple)
Ikat from non-scrap clay (3 colors of tiny clay ropes
extruded from clay gun or garlic press)
1. Using a minimum
of three colors,
press out strings of clay using your extruder (since I use a garlic press, my
strings are between 1/8"-1" long ... but if you are using the clay gun,cut
the strands into shorter lengths.)
....... Toss the strings together
to distribute the colors.
2. Roll out 1/3 of a small block of coordinating
clay at the #4 setting.
...... Reserve about a
quarter of the strings, and spread the rest over the sheet.
.......Roll
up the sheet up and compress it into a ball
...........then roll the
ball around on the reserved strings to pick them up on the outside.
.......Then
roll it into a 1" thick snake.
3. Give the snake a few twists
...and roll it through the pasta machine at the widest setting to
make a long sheet.
4. Make a stack... cut the sheet in half, stack,
and press it together and run it through the pasta machine again.
4.
Continue following the directions above from #5 (above) on. Jody
Tips:
..Don't be afraid to throw a little strongly contrasting color into the
mix of scrap clay.
......more translucent colors in the stack
will give a soft watercolor effect.
..I've gotten some great striped
and dotted effects by putting faux ivory scraps into the mix.
.. if the slices aren't interesting
enough, don't flatten
them... instead reassemble the stack with the slices out of order, give
the stack a quarter turn, and cut crosswise to the first cuts. Jody
B.
(Jody also makes a Crushed Helix type ikat design without a wavy blade ....see Canes > Ikat for more on that...and possibly Sheets of Pattern too)
Multiple
-blade cutters
&
fixed
and rotary
Cutters with more than one blade can be bought or they can be made in several ways, and for several purposes:
They
can be made with:
...long blades (wallpaper scraper, utility knives,
razor blades) or with shorter (pointed or rounded) blades like Xacto blades,
or with rotary (round, rolling) blades
They
could be used for making multiple cuts to create :
...several
slices from a clay log at one time (press down)... or tube
beads from a clay log which is surrounding a wire/needle (roll
over)...see below
...strips from a sheet (and/or those
strips cut again into squares,diamonds, etc )... or just
one strip (spring dividers, or two-bladed multiple cutters)
Fixed blades ...(& tube cutters)
(for "spring dividers" which look something like a drawing compass with two pointed ends, and which can be used as two blades for cutting one consistent-width strip, see below in "misc. blades/cutters")
Now, you can buy an adjustable, double-blade Exacto cutter with two blades ... it has 3 adjustable widths for the blades... don't know if only the pointed blades will fit in them (woulnd't think so), or any of their blades. Each tube bead would have to be cut separately, but at least they'd ben even sized and straight. Diane B.
You can make something similar by embedding Xacto-type blades or utility blades in raw clay, then baking. These would have permanent widths though. (Xacto-type blades would be only for cutting sheets into ribbons though, since they wouldn't make tube beads as well.)
I've
discovered that I *really* like making a multiple-blade slicer with Wilkenson
razor blades (the the very thin, double-sided blades, meant
for older razors (you can find them back by the Gillette blades and shaving
cream?) (lesson)
...
I cut them in 1/2 lengthwise (so you end up with 2 blades from each
original).
... have 2 logs of clay laying side by side, perhaps
with a piece of paper underneath that has been marked off in regular intervals
(maybe even graph paper)
...and then push the dull edge of each blade
crosswise into the 2 clay logs *carefully* because
the sharp side will be up, then BAKE IT.
It would only work with small
canes, but it would mark and cut as you go, and the
slices would be even, parallel.
...... The following multiple-blade cutters can be used as tube-bead cutters as well as sheet cutters, etc.(lessons):....
I took a class
with Steven Ford last year and he used one that was made of wallpaper scraper
blades and scrap clay. . . I made a simple one at home with 2 packages
of scrapers and scrap clay around the edges (top, side & in between).
...using
2 layers of #1 thickness clay between the blades makes a nice short
tube bead. Libby
These blades on a long
bolt work particularly wonderfully in making tube beads. ...you
can make 10 or more tube beads at once by rolling this device
over a polymer snake (which is on a needle, knitting needle,
skewer, etc --what you use will be dictated by the size you want the holes
in the tube beads to be). ...I think this was devised by either Lindly Haunani
or Elise Winter or CZC.
...Take a number of longer blades intended for
use in ultility knives or wallpaper scrapers (use
only the ones with at least two holes
in their sides), .... slide them onto a long bolt, using spacers (like
nylon or metal washers) between each blade (depending on the spacing,
you can fit quite a few blades on one threaded rod)
....I've made a whole bunch
of them with varying widths between the blades.. . .
....http://www.pcpolyzine.com/2004february/tubecutter.html
(Trina's lesson on making a 5-blade version in Feb. 04 Polyzine)
...Linda
Geer of puffinalia.com added the idea of using wing nuts instead of regular
nuts making it easier to put together... and she may soon carry the parts
at her website)
....if
you use metal washers instead of nylon spacers, you can adjust the
sizes of the spaces evenly..
...I made myself two of
the tube slicers. One is always set at 1/3 inch and the other one is
for switching around. Linda B.
...definitely put something stiff,
like cardboard or duct tape on the topside
of the blades. Otherwise using your cutter will be murder on your hands (voice
of experience here. LOL!) Linda G.
...see Rotary Blades below for threading
round blades onto a bolt too
Rotary blades (rolling)
rotary-wheel cutters have straight or wavy disk-shaped blades on a handle which allows them to roll over the thing to be cut (often fabric)... pizza cutters and tracing wheels with small teeth might work too, but aren't sharp (see in Scissors for more on the wavy rotary blades). Katherine
I used 4 cutting wheels (the kind that are used in sewing/quilting in rotary Olfa cutters) --the smaller wheels-- which I threaded onto a long bolt with nuts as spacers when I needed to cut uniform strips wider than the pasta machine's noodle cutting blades. Katherine Dewey
From the kitchen, there are also rolling, (5) multiple-disk cutter units meant for chopping/dicing vegetables, etc., which can be used . . . . http://www.clayalley.com sells those (click on Tools), or they can sometimes be found in stores with the kitchen gadgets.
I
was also able to cut uniform squares for parquet work by running
the wheels in one direction, then by running them at 90 degrees
to the original cut. I used a straight edge as a guide. . . . naturally,
I got carried away and cut diamond shapes as well, but all of those
uniform shapes made my parquet covered box a sweet little piece.
......running
the cutting wheels over a paper towel sprayed with Armorall
as a relase kept the wheels from sticking
to the clay. Katherine Dewey
to use miniature modelmaker's circular-saw blades (which are usually mounted on a handle like a tiny pizza cutter) for impressing lines of cut dots (used as guidelines) into clay sheets or canes for slicing ...see Stamping > Other Ways of Making Stamps
One flexible sheet of clay with a grid of diamond-shaped holes removed, can be created with a tool comprised of a series of closely spaced and fixed-position rotary blades, each with three even-spaced half-round bites taken from its outer edge, on a handle, which can be run over a sheet of clay (..this leaves behind a web of clay that looks a lot like mesh-like foam sheeting used for packing Asian pears, etc. http://tinapple.com/cynthia/arrowmont2.htm )
nifty accordion-expandable gizmo for cutting
noodles with rotary blades (very expensive though)
http://www.sharpknives.com/matfer_pasta_cutters.htm
. . . something similar could be created with one of those button-hole
"placers" that look a lot like that by adding blades or needles
to the ends?? Diane B.
pattern scissors (& wavy rotary cutter blades)
You
can use the fancy-edging scissors to cut very thin, baked (or unbaked)
clay. ...these could be cut into shapes, strips, whatever, after baking,
or even before.
....Tonja cut the edges of some of her
liquid clay transfer decals (prob. TLS) with pattern scissors
(then used them as loose collage elements on her journal
cover)
http://www.tonjastreasures.com/journals/tn12.htm
Wavy
(or regular, fabric-cutting, similar to pizza cutter) rotary cutter
blades (look in sewing/quilting departments) work great before baking and
the clay doesn't have to be thin... could also use with a thick ruler to cut baked
clay?
...use for a decorative border around your stamped image.
for xmas or other cottages/houses, or gingerbread houses: ...use pattern scissors or rotary cutting blade (wavy one) to cut white clay for scalloped roof edging or porches, etc.
...you can out the raw clay sheet you want for your draped bowl with scissors or pattern scissors. . .
Tanya
F's onlaid sealife frame, cut with pattern scissors around edges
(website gone);
Dorothy G's curved and spiraled strips cut with pattern scissors or wavy
rotary blade or wavy long blade (see Blades
below) on one side
(website
gone);
"guided" blade cutters ...for making oval and round shapes
(For cutting ovals, if
you don't have the size cutter you need)...sounds like you need someone to make
you a "Do-Nothing Machine" (like ones I show at my website; this is an
old children's toy, but if you add a blade to the crank end of it, it should cut
ovals. It consists of a plus-shaped groove in a piece of wood, and two small pieces
of wood which travel through them separately; these are attached to a wood connector
arm which has a knob on the end; turning the arm in circles creates an oval shape
at the knob end of the arm.
http://woodenuknow.com/donothingmachines.html
(her homemade one)
Just replace the (knob) with an Exacto knife ...Might
be able to make this tool with clay, but I don't know how freely things will slide
and rotate. Sunny
...the DH says one should be able
to make one with two layers of clay. . .the bottom layer would be a flat
sheet of clay, the top layer would have a plus-shape track cut out of it to allow
the arm to travel in it...Diane B.
http://www.ovalgraph.com/how.html
(animation)
http://www.ovalgraph.com/
(continuously adjustable)
For a circle, you can use a standard compass
with a blade inserted instead of a pencil.
Or a pushpin and
a string tied to an Exacto knife. Sunny
guided-height cutter
The 'toolmaker's surface gauge' is used to measure (or scribe)
a line at an exact height (all the way around or across something. Jeff Deaver
makes these amazing lidded vessels. You can use this to mark the line where you
are going to cut the lid. vrjames
...mark a perfectly straight and parallel
line at the exact height required. "Excellent for marking scale ship model
waterlines and for transferring gunport, porthole and other item locations from
the ship's plan to the hull. Can also be used for marking-out raised panels, windows,
chair rails, etc. in dollhouse construction. Adjusts quickly to approximate location
with coarse adjustment knob and then to exact location with fine micrometer type
adjustment knob. Measures and marks any height from 0 inches to 10 inches. Made
entirely of steel with ground and polished base and needle sharp scriber. Can
also be used with a pencil.
http://www.micromark.com
(then enter 60520 in the Item Number window)
misc. types of blades/cutters
Jean Sheppard suggests using " spring dividers
" (tools used for measuring, which look like a drawing compass but have
two pointed ends --would want one with the thinnest points if cutting),
or inside-type calipers, to either mark or cut even-width
strips from a sheet of clay
.... (or could use for other purposes such
as marking canes for even slices, or marking logs to see equal
amounts for same-size beads, etc) http://diytools.com/store/search.asp?ProductTypeID=540
(diff. kinds)
...don't know how sharp and narrow the points are though, but
could always tape needles or blades to the ends of these
(or of a regular compass with pencil, or of a makeshift compass?)
Kitchen PEELERS & SLICERS... come as straight or Y-shaped
... some blades are serrated, some smooth
...Y-peelers
work well for taking very thin slices (from the top of a brick of
clay, and possibly from other things too)
......pull
toward yourself as if using a cheese plane (I tried those already,
but they aren't sharp enough and they stick... though some planes do work better
than others even on cheese).
.....I have the "micro-finely
serrated" Y peeler http://www.internationalfse.com/kitchen_gadgets.html
(number 5602) which was recommended by Alton Brown of Good Eats... When I tried
it out on clay, it worked great
.....the serrated blade left tiny little
ridges on each slice but they wouldn't matter if you just want to put the
slices through the pasta machine or wanted to make funky little stacks of
colors; or the ridges could be highlighted with metallic powders, could
just give a visual ridging, etc.
......Desiree used a straight peeler
with regular serrations to cut one layer of mokume gane for a pendant
http://desiredcreations.com/gallery4pinsNframes2.htm
...ordinary,
smooth blade (non-serrated) Y-peelers which can be purchased at
grocery stores, etc., wouldn't leave those little ridges and would be great for
making stacks, but cheaper ones may not cut easily enough (maybe not as strong
or sharp...might depend on brand); might want to make the handle sturdier if it's
flimsy. Diane B.
...I use a cheese slicer
for lengthwise slices down a cane. Works great for me! LynnDel (wire
slicer or cheese plane?)
....mandoline slicers can work well too, but
be careful of fingers while cutting ...Desiree had a trick for this?
...for Dove Cutter (grabs and holds long blades taut) for slicing of all kinds.... see Long Blades above
...see also above for sharpening a dough scraper (in Long Blades)
Aaaah a band saw to the rescue (for cutting polymer) for slicing baked beads in half. I have tried rotary engravers (i.e., Dremels) jig saws, table saws, miter saws (with and without the box), scroll saws and others, but my favorite is the 3-wheeled, 10", variable speed, table top band I have in the shop, fitted with a 60 tooth per inch, 1/4" blade.
ordinary kitchen scissors, or the fancy pattern cutting scissors, will cut through thin sheets of baked polymer clay
I own a pair of Cutco Supershears. They actually do cut through pennies and don't need sharpening because I've been cutting pennies just for fun since I got them. Shades
straight end toenail clipper -- cuts wire cheaply as well as or better than wire cutters! Celie Fago
... handles can be made for most any blade, needle, etc.
Black & Decker drill bits makes a very clean cut holes in baked clay (Ai-Ping uses them for drilling decorative holes in baked clay ...see Vessels > Hollow Boxes)
Aaaah ...a band saw to the rescue for slicing baked beads in half. I have tried Rotory engravers (I.e. Dremals) jig saws, table saws, miter saws (with and without the box), scroll saws and others but my favorite is the 3 wheeled 10" variable speed table top band I have in the shop fitted with a 60 tooth per inch 1/4" blade.
For cuts
which are straight,
parallel or measured, a
work surface with grid lines is a good thing to work on ...
...and for
strips or squares/rectangles from clay sheets for boxes, covering,
etc., see Tools > Work Surfaces > Thinnest
to Thickest, for the gridded Omnigrid ruler + more info on other helpful
gridded surfaces)
These are great for cutting
larger canes, or many slices from a cane
....... they can also allow one to
cut slices which are evenly thick, and many slices which are the same thickness
....(they're
also handy for cutting slabs from blocks of clay, etc.)
....square canes are
easier to cut than round ones (just as with regular slicing), but some of the
versions below definitely work better with sqaure canes
....they can be a bit
tedious for cutting many slices (some more than others)
to
buy
Economy Cane Slicer with Blade....from
Poly-Tools
...short-medium size slicer ...for smaller canes (maximum
cane dimensions: 1 1/8" dia. and 5-1/2" long)...
($12.50 +s/h)
...low-height aluminum trough (approx. 5 3/4"
long x 2 1/2" wide) with sliding, Lucite-Tuf sheet (on which a narrower flexible
strip of plastic can be adhered to protect blade cutting edge ...so only
half of the width of the channel is used?) ...cane is pressed against
one side only so finger pressure is also needed to hold it
securely while cutting (blade is used only with cutting hand) ...8"
stiff blade included... 90 degree cuts only
http://www.poly-tools.com/Merchant2/merchant.mvc?Screen=CTGY&Store_Code=PI&Category_Code=SLICE
Precise-A-Slice ...from ValKat Designs
http://www.precise-a-sliceonline.com
http://www.pcpolyzine.com/2004aug/business.html
http://albums.photo.epson.com/j/ViewPhoto?u=4153008&a=31269505&p=68361001
http://albums.photo.epson.com/j/ViewPhoto?u=4153008&a=31266991&p=68340309
http://albums.photo.epson.com/j/ViewPhoto?u=4153008&a=31329855&p=68856994
... medium-size slicer (7.5"x 2.75"
x 3.10" tall) ...all but base made from clear acrylic
(base is 1/2" "board" of dense white plastic) ...lightweight,
sturdy... ($50.00 +5s/h)
...ruler engraved with 1/'8" down
to 1/32" increments...free sliding, but locks into place with tension knob
for cuts
...blade guides covered with stainless steel strips for smoothness
of blade movement and durability
...will cut slices 1/8, 1/16, 1/20 and
1/32" thick
.......also paper-thin cane slices (Valerie sliced
about an 1 1/4" long" cane into 63 complete slices, with less waste than a pencil
eraser).
...will cut canes up to almost 2" diameter ...for the
largest canes, put the increment toward the back of the
slicer and use the base alignment marks (otherwise the cane could block view of
the other marks)
...also, opposite end of the slicer makes angled cuts (45
degrees)
...no blade included... they recommend a stiff blade
of some kind (even a wallpaper scraper blade) ...old blades seem to
work surprisingly well, according to Kathy ...wavy blade can also
be used
...it's good to press the cane up against the
"back wall" (a thick lucite square which is glued vertically
to the middle of the slider base) to keep the cane even more stable
whilte cutting (don't think any of the other stand slicers has a similar wall)
...someone at the Columbus Guild was cutting slices from more than
one cane at a time so that all of her pieces were the same thickness
when she assembled them later. Kathy (...could use diff. canes, or cut one
cane in half & cut the halves simultaneously)
...also useful with mokume
gane as well as canes. Lenora
...it's fabulous and will definitely be
"the" slicer of the pc community soon ... very precise and lightweight and wonderful.
Cara
Super Clay Slicer ...from PolyTools
http://www.poly-tools.com/Merchant2/merchant.mvc?Screen=CTGY&Store_Code=PI&Category_Code=SLICE
...large-size slicer ...($47.50 +s/h)...long hardwood board
base ... gear-driven acrylic sheet (with slip resistant surface) on top of it
(11.62" long x 2.62"
wide, interior) which moves the cane 1/24" per full
revolution of the knob (so this step can be done one-handed?
as opposed to the other stand slicers)...
...two tall aluminum bar
guides, which can be set at either 45 or 90 degrees. ....(no blade
included)
...It has a crank at the back that turns 1/24" at a rotation.
I can take slices 1/2 rotation thick. I've tried a cane as small as 1/4"
in diameter and one as large as 1"... it would do about a 2 1/2" cane at
largest though .Gillian
AbleCane Slicer
YouTube video on putting
together and using http://www.youtube.com/watch?v=N5UWzdlieYE
buy
at PolymerClayExpress: http://polymerclayexpress.com/equip.html
...mostly
for large canes and slabs (up to up to 7.5" x
5.5") ...larger canes/slabs possible with booster kit
...$95 for
basic kit = thick acrylic base 12/5 x 7.5" with holes at each end to screw
in aluminum pegs/posts for holding guide strips... 2 thick acrylic strips (3/16")
w/ hole in each end to fit over metal guide posts in base....20 thin strips (1/16",
eventual slice thickness --for reference, the thickest setting on pasta machine
is usually a little less than 2/16")... plus rigid 8.5" carbon steel
blade
...$40 for optional Booster Kit to allow cutting
of canes that are 1.5" taller = 4 more pegs, 20 3/16" strips, 12 1.5"
strips
...requires a lot of scrap clay...
large "base sheet" which fits between guide strips and posts to hold
cane/slab firmly + tall thick slabs on either end of cane (same height as cane)
...blade
is drawn across cane/slab at a tiny angle (equal to bevel angle of blade), and
sometimes rocked at each end a bit
...good for making large slices to use for
switchplates, vessels, covers, etc.
Polyclay Cane Slicer(s)
... from Chalice House Atists .......(Mike Hofius' Cane Slicer)
http://www.3wave.com/chhome/cha/slicer.html
...large-size
slicer ... $30 (+plus $8 s/h) .......2" wide
or 3" wide, and 12-14" long ...larger sizes can also be ordered
...all
wood (coated with polyurethane) with grided plastic slider and knob ....(no
blade included)... may have a wood wall at the very back
JASI
cutter... from Judith Skinner
...large size slicer...may be best for
large canes --$50-65? (+s/h) …http://www.artsmountain.com/slicer.html
...blade itself is mounted on both sides with wood, and is very strong; very sharp
... ...the blade edge is angled just on one side to improve
slicing.
... wood board base, with grided 12" ruler held tight
by screw knob ....tall upright metal rods (bent in u shape) to guide the special
blade
...she wasn't selling them for awhile... now,
she's back in business?. Sarajane
The Butterfly slicer is less expensive but does NOT include a blade (she recommends especially the NuBlade from Prairiecraft. . . don’t know if there are other differences). not in production at this time. Linda Geer's Butterfly Cane Slicer http://www.drizzle.com/~caneguru/caneslicer.html
Professional
Bead Baking Rack "&
Cane Slicer"....
& Pro Bead Rack ...mostly
a bead rack though...
(2
versions)
...heavy
duty rectangular aluminum trough(s), with notches in sides to suspend
bead(s)
........small rack
(PBBR) ..$18-23,
sold by Amaco
............http://jewelsbyjewls.com/P620002.JPG
... http://tinyurl.com/cwkos
etc.... + JoAnn's, etc
........large
rack (PBR) has 3
U troughs in one unit ...$24,
sold by PolyTools ... http://tinyurl.com/6cppo
...to
use as cane slicer guide,
use rack's frame,
which is shaped like this..
!___! ..(end
view of smaller unit)
......place
the separate plexiglas sheet provided inside bottom of unit, and
slide outward a bit for working room
......place cane on plexiglas next
to one wall like thisl. !__o!
..
......then slide
plexiglas out again for whatever slice thickness you want
......hold
cane between one thumb and an index finger (pressed outside
the frame's wall) to hold it in place
.....(holding
onto blade with the other
hand, index finger on top of dull side),
cut slice using one (or both?) frame ends as a guide
.........since
using only one guide, will slices be even?...
difficult for some to cut while holding long blade with only
one hand?
see
just below for aluminum miter boxes & other things which
can be used in silimar way
"Miter
boxes" are squared, u-shaped troughs made from aluminum or plastic, which
are usually used for making straight cuts through boards
...the board fits
sits in the trough, and a long saw blade is held in place while sawing by in slots
on each side
...the slots are vertical for cutting 90° angles, and other
slots allow cutting of 45° and 135° angles
This
setup for a "cane slicer" is fast, simple and cheap!
.....buy a regular
size plastic miter box from Home Depot,
Lowe's, etc (Jorgenson's is best) )
.....cut a piece of wood
(see below for other materials) that fits inside the miter box and moves freely
and you can move your cane with a touch of your finger
.....you can also do
straight cuts, angles, all kinds of stuff with the various slots
in the miter box
.....all you need is your long blade ....
.....and
maybe a ruler glued to the bottom (or photocopy of a ruler) http://www.clayalley.com/links.htm
Karen
I
have instructions and pictures for making slicers from regaulr miter boxes
with a few modifications in my Polyinformer article, (Spring
2004) :
....for the smaller aluminum miter boxes
(available at Michaels, Hobby Lobby and MicroMark) I suggested adding a
small wood base so the slicer would sit flat on the work surface and can
be perpendicular to your body when you slice (that is how I prefer to cut instead
of having my cane sideways to me... I can look straight down on the cutting area
that way.)
.....for the larger plastic miter boxes
(found at Home Depot, etc)., I suggest making the cutting slot narrower
...
..I made a base in my miter box to put the cane on for sliding
it forward... a piece of clear plexiglass works great
tiny
(aluminum) miter boxes (sold for use with an X-acto saw blade)
might work well
.... (this one is at Micro Mark:
http://www.dxmarket.com/micromark/products/22114.html ...can also find these
at hobby shops?)...
. . .someone suggested this a while back on AOL
and it works pretty well!
You may still get a little "wobble" as you slice, but if you hold your blade tight against one side of the slot, you can minimize that. author?
(see Professional Bead Baking Rack "& Cane Slicer" above for same idea)
There
are various ways that metal "angle brackets" or plates
might be used to make stand cutters (these inexpensive hardware pieces are
designed to connect and/or brace pieces of wood --mostly at right angles)
1.
"angle corner brackets"
2. "flat corner brackets"
(aka "L brackets", L iron brackets, etc.)
...there are also
shapes of these come in:
3. ......"T
plates" (flat, similar to L brackets but in T shape instead
4. .......
"mending plates" (flat, straight)
http://houseandhome.msn.com/Improve/SelectingHardware0.aspx
(they
come in different sizes & lengths, and may have diff. numbers of holes for
the screws)
....some might be wider and provide more surface to press
the blade against
I bought 2 right-angle
metal pieces and glued these firmly either side of a narrow
plank of wood (narrower than my tissue blades), making sure they were
alinged exactly with each other and exactly the same distance in from the end
(I used a set square to do that) ...they have holes so could be screwed in
too?
... then I made a thin sheet of clay as long as the plank, which
exactly fits between the metal pieces so that it can be slid along between them
.......
made parallel lines along it and baked it.
.....Now I can put my cane
along one of the lines... slide it up to the right-angles
.....
..then pull my blade through it holding it against the uprights
so it's totally vertical.
....This could be improved with something to measure
the width of the slices, but at the moment I just use a Marxit. The Crafty Owl
Why not try using two lengths
of 1"x1" wood or acrylic?
... place them evenly
on each side of the cane slice.... move the cane (or the two square lengths) to
expose the desired thickness of your slice... then slice with the blade against
the end of the two lengths (Nan's version)
...or make your own version of the
AbleCane slicer by having your own strips and base cut (and perhaps drilled for
you) by a plastics store like Tap Plastics
measuring and cutting surfaces:
I taped a small ruler on to the (bottom)
surface of the miter box (under the plexiglas).
...... to use,
just push the plexi forward through the miter box and measure with the ruler underneath.
It works perfectly. Jackie in MD
....or use a photocopy of a ruler
...you
can set your cane in the miter box on a sheet of graph paper.... after
slicing, move the graph paper up in even increments
blades
do stay sharp longer if you cut on certain surfaces
...self
healing mat (these can be cut to shapewith a utility knife)....or inexpensive
plastic cutting mat ... or
...I always
cut my canes on top of strips of Plastazote http://www.acor.com/plastazote.htm...
a high density polyethylene (polythene) foam ...non-allergenic,
not affected by clays and greatly reduces the notching of blades which
is caused by cutting on hard surfaces, extending their life.... I bought mine
from a company called Trylon which supplies plastics to schools for crafts etc.
......I've found that a range of widths of strips is useful
(then I select one which is the same or slightly less than the cane's
width -(cylindrical canes can pose a problem, but if one is careful, they
stay in place). Alan
TIPS for using stand slicers
At first I had some
difficulty cutting round canes (with
these kinds of slicers) ...they cut square ones very well
.....but Judith
came up with the solution of making a cradle out of waste clay to
fit the cane, cornstarching the cradle well, and cutting down through
both cane and cradle. Kathy G
Another
problem I had was the blade dragging a bit
even though it had been cleaned with alcohol. Judith solved that one too
by suggesting applying a little bit or cornstarch to the cleaned
blade. I use this hint with my tissue blade also if it starts to drag.
Kathy G.
When your cane is getting short and starts to tip
when you cut it, stick some waste clay of the same diameter and
shape to the back of) your cane. This will allow you to use your cane
down to the last mm. Kathy G.
It takes
a bit of practice, so I'd practice with a log of scrap clay first…I do
like it. though
I also didn't realize
the ones with special blades (beveled on one side) are supposed
to cut on a slant, so you can't roll the cane every few slices to
keep it in shape. (I did read that cutting on a slant is better- easier for the
blade to get through, or something.. . .
I'm having a hard time reading
the rulerto make sure i place the cane properly for even slices, but that's
more likely a function of almost 40 year old eyes than a defect of the slicer!
Nancy in VA
angling the blade
against the guides so that only the edge of the blade is actually
touching the guide works well
...some like to saw
just a bit when starting the cut
...some people also like to
begin the cut to one side of the middle of the cane (particularly
square canes)
I've had good results using
a slicer to cut canes lengthwise by standing
them on end
. . . . the first time I tried it, though, I was attempting
to hold both the cane and the slice vertical as the cut was made...that resulted
in a great deal of drag on the blade. The next time,
it was much more successful when I let the slice fall away from
the cane
..... the key is to keep as little clay
as possible in contact with the flat sides of the
blade!
We use the (JASI) slicer
here for production work.... believe it or not we rarely use
it for canes.
..... I found a wonderful mix of half Premo and half Sculpey
whites for the angels. After we mix these 2 together (2 lbs at a time) we make
this big log of clay out of it and use the slicer to cut off equal amounts
of clay just the right amount of clay for parts of the angels ( Before
the JASI this was guess work with a lot of waste). Shane?
VARIOUS
OTHER CUTTERS and SLICERS:
Alan Vernall's Slinky Slicer (& foam cutting
surface)... for cutting straight, equivalent slices http://communities.msn.co.uk/ALANMARY/PhotoAlbums)
http://www.pcpolyzine.com/2004may/gadgets.html
I sometimes find it difficult to produce cane slices of equal thickness, and often,
accurately cutting vertically can be problematical. While browsing through a toy
catalogue, I found a miniature (metal) slinky (you know, the spring that
walks downstairs), and my mental cogs began to click. I sent for a couple.
--I first used masking tape to hold the coils together.
--Then I made a small
metal tray a bit larger than the spring (anything will do which is the correct
size, and won't leak! --cardboard box lid, etc.) and laid the tape-closed spring
horizontally in the tray.
--I estimated how much two-part epoxy glue would
fill the tray and heated it (not the "rapid" type epoxy)
in an old tin can, which was discarded afterward (==though it may work just as
well to heat only the slinky, and not the glue==).
--I heated both
to about 60 C (140 F) for 5-10 minutes (if your ovens don't go that
low - the lowest setting (say 200 F) will do for a shorter time);
that temp is fine for most standard epoxies.... I'm sure heating the whole assembly
helped penetration of the resin between the coils later.(*It may be worth mentioning
that Epoxy resins can be more toxic than clays and if one only has an oven which
is also used for food prep. - best not to heat it at all. I used a small enamelling
kiln for mine. However, a dedicated polymer clay oven should be fine, or the glue
could be heated in an aluminum foil baking tin sealed with a sheet of alum. foil
(as with the "enclosed baking method" for polymer clay) if you decide to heat
it.
--I then poured the (possibly warmed) epoxy resin into the tray
not quite to the top, making sure the inside of the bottom coils was covered.
--Then the assembly was left to allow the resin to set properly (see manufacturer's
instructions).
--After setting, the stabilising tape may be removed.
--I then made a small pad of foam plastic (Plastazote--see below for info) to
cover the lower part of the inside of the coil.
--Then the cane to be sliced
is placed inside the spring, and using two tissue blades (very thin ones
are best), the cane is sliced by leapfrogging the blades down the spring's length
(the blades never impede one another and with care they can be manoeuvred around
one another - gently sliding the second behind the first, then lifting the first
clear, removing the cane-slice and repeating the process.
My blades were
the same length, but ones of different length may be safer to use and keep track
of.)
Only the front half of the spring was used for the slicing process --otherwise
the weight of the cane which protrudes from the rear pulls the front of the cane
upward (unless that part is also supported at the same height as the foam pad).
When the blades reach the middle of the slinky, they should be removed and the
cane repositioned at the start point again.
...The external diameter of the
mini-slinky is 3.5cm; this allows a cane of approx. one inch diameter (or
square side) to be cut. Canes larger than this would need a full-size slinky version
(which is, of course, a possibility- but I haven't needed one yet - give me time!)
...I cut the canes on Plastazote (see above)
A band saw goes through ployclay like a warm knife through cold butter…
For the Dove Cutter hand-held slicer ...(grabs and holds long blades taut) for slicing of all kinds, see "Long Blades" above
One type of machine that might work as well is microtome
device used to cut thin slices of tissue for lab study and research.
....Usually,
the slices are then put on glass slides to be examined under microscopes. I've
seen a few used microtomes listed for sale at various obscure web sites with prices
ranging from $250 - $2000.vIn... if you bought those
Thomas tissue blades, all you need to do is buy one of the machines they're
designed to work in
...since I don't know enough about microtomes, I wouldn't
order sight unseen, but if I think about visiting a local used medical/scientific
equipment supply store, I just might find out if they have a used microtome
and "kick the tires". Desiree
Kids & blades
There
are several ways I've dealt with blades and kids:
...If they are really
young (7 or under maybe), I would probably give them just a metal potter’s
"blade" (also called a potter's rib)which isn’t sharp at all.
You can usually buy them at crafts or art supply stores. They’re about 4" long
and 2 ½ " tall, flat on the bottom, and rounded on the top. They won’t work well
with cane slices though, especially if the canes are soft. (smeared images could
be sanded though, then lightly buffed, after baking to remove the smear)
...When I gave my classes to end-of-3rd graders, I gave each kid a single-edge
razor blade which had been dulled somewhat by scraping the sharp
edge on sandpaper
.......I baked some clay over the top thick part of the blade
to use as a handle and so they could easily see which was the business
end
...... Each kid was given a jar lid to park the blade in
when not being used
...... I also told them to help each other notice when
the blade was not in its "home."
.......I also gave them a visual demonstration
of what could happen if they left a blade on the work surface and it got sort
of stuck with its edge upwards on a piece of scrap clay, and they began rolling
a log of clay:
........... I rolled the clay log just until my finger would
have touched the stuck blade and asked them to imagine just what would have happened
if I hadn't stopped. That made quite an impression!
......For the rest of
the lesson, I always tried to say "OK, blades up!" after they were to have
made some cuts --and they all helped each other. This worked really well, and
I never had a single problem. --now they're 6th graders, and I've eliminated the
handle, but kept the lids.
I let my child use one of these at home too with
no problems, even at that age. Some kids may just be more accident prone or careless
by nature though.
(The main problem with using a single-edge razor blade is
that it won't cut well through very thick canes
or pieces of clay well , because of the lip.)
...for
cutting slices, someone else also mentioned using one of those disposable
plastic snap-off blade knives, but pushing the blade farther out and leaving
a fairly long length of blade sticking out alone (instead of just one
snap-off segment)
.....to cut slices from a cane with this, place the cane
near the edge of the table (and parallel to it) so that the hand holding
the blade can d go lower than the edge of the table when the slice is beging made.
DB
http://www.cornerhardware.com/hardware/Hand_Tools/Knives/Utility_Knife_Blades-396.html
(several lengths and widths on this page, for various knives)
Xacto knives or scalpels ares another possibilities though they
are shorter.
Garie Sim makes all kinds of blades (long
and short, bent or not, various shapes), tweezers, and "aluminum-sheet
"dough scrapers' himself from things like the metal shutters that come on
floppy disks (which he cuts with scissors, and most of which he embeds in long
clay handles), some of which he uses with his young students
......the
metal piece pops right off and can be cut with scissors (just don't use
your best ones!!!) Kellie B.
......this is a fairly high grade of aluminum
(maybe tempered?) which is pretty stiff even when it's as thin as this
--1 1/4" x almost 2" for each side-- though each has a rectangular
hole inside)
..He also makes a larger tool from an aluminum sheet?
(like a small dough scraper) which could also function like a long
blade ...he curls one end of the aluminum over to act as a handle (especially
good for very young or disabled children)
(the first, and perhaps the second,
could also be used to cut cane slices as long as the canes aren't too old
and hard or too soft)
http://www.garieinternational.com.sg/clay/shop/handmade_recycle2.htm
http://www.garieinternational.com.sg/clay/shop/handmade_recycle.htm
When I was teaching school, I bought 20 small, plastic handled, paring knives at a dollar store (2 for a dollar).....then I made a knife holder out of a (folded-over?) strip of poster board, which I stapled together to make slots for the knives... each slot was numbered ... no one left the classroom until all the blades were in place. Patty B. (pretty dull though)
(.... see also "Safety" above)
for more on kids' working wtih clay, see Kids > Teaching & Working with Kids
(see also: Onlay. for cutting CD’s )
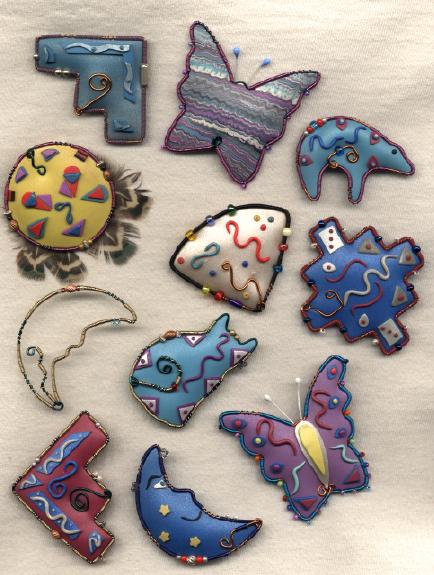
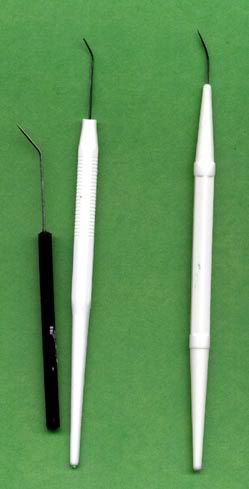
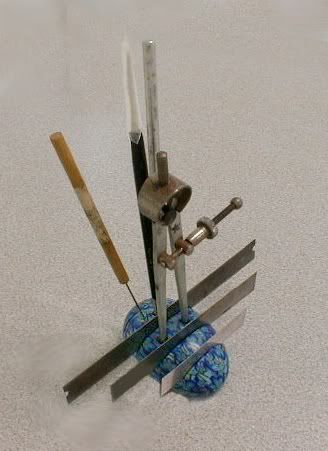