General
info re using molds
Purchased
molds (all kinds)
.....for polymer clay
.....other
purchased molds (plastic, metal, silicone, etc.)
Ready
Stamps (having molds/stamps made)
Making
molds yourself
...ideas & tips for all mold types
...stiff
polymer clay molds (regular clay)
...flexible
polymer clay molds ...MoldMaker, Bake & Bend
...glues
(flexible) & hot glue (deep & shallow molds)
.........casting in glue
molds
....silicone (flexible) ....1-pt.
tube & caulk
.......2-part silicones
...(liquids) ...putties
.......... brands of silicone putty,
like Miracle Mold, Alley Goop, Amazing Mold Putty, etc.
...........other uses
and info
...other materials for molding
......alginate, latex rubber (flexible)
......plaster, misc. (stiff)
......reusable
materials
......air-dry clays (for size reduction of molds,items)
...groups,
more suppliers
Reverse molds
2-piece
molds (2-sided)
Stamps
Antiquing,
highlighting, staining
.....(w.paints,inks,metallic powders/waxes, etc)
Other ways to use molds
....various
ways
....cameos
Releases
Websites & Groups
MOLDS
simplest basic instructions
...
to make a polymer mold from an object... soften a
ball of clay, apply mold release to it (and/or the object) if necessary ...
press the object into the clay to create your mold (...for fragile
items or those you want to have a flat mold facing, press
the clay onto the laying object (or while the object is still in place, flatten
the back of the mold against your work surface, if desired.) .... remove clay....
bake
....to create a molded clay item in a mold, soften
a ball of clay (& form a pointed area if the mold has a tiny indention you
may miss, like a nose in a face mold)... press clay into mold ... remove clay....
bake
NOTE:
..technically, I think "mold"
refers to a concave depression, and "cast" or "pull"
refers to the object or design made from the mold. . . unfortunately I
and many others have gotten into the habit of referring to both of these as "molds."
. . . hope it’s not too confusing!
many
kinds of molds can be used with polymer clay.
...purchased
molds of all kinds (intended for clay, or for soap, cookies-chocolates, etc.)
......objects
from around the house (which can be used as molds)
...molds you've made from objects around the house, or from something you
make yourself, then have made a mold from (e.g. a face)
....some ex's: Melnik's
Pez disp. head, figurine & ornament heads, hand she'd made http://melnik.freeservers.com/molds.html
when
filling a mold with clay... you can use just a bit less clay than
will totally fill the mold so its edges will be smooth and perfect
...or you
can use a lot less clay if using only one areas of a mold
...or you
can fill the mold exactly (keep trying diff. amounts of clay) ..... or
you can overfill
.......if overfilling, having a lot
of overfill can create a bit of "background" to the molded shape,
or excess can be presse backward around small armature for making the mold more
dimensional or used to create additinal parts, etc
...... or all excess clay
can be "shaved" off with a long blade
...... or the overfill
edges can be smoothed before baking or sanded after baking,
or they can be trimmed off with a craft knife, needle tool or mini cutters
...excess
background can also be cut into another shape (e.g., to create a frame)
... I sometimes like to cut
my raw clay for the mold into a square, rectangle, or any shape, just outside
the impression made for the mold. That way, when the mold is baked and pressed
into raw clay, a background of depressed clay is left around the raised
central image, leaving a raised frame around the outside. (...if a number
of these framed images are made next to each other, the result is a
raised frame area around the depressed one . . . or the same thing happens if
the area just outside the outer edge of the depressed frame is cut away. DB
...mica
clays can be have problems when casting in molds because the mica particles
can easily get un-aligned and dark areas will be created
.....Norajean has
some suggestions about avoiding this... basically rolling any cut edges
under, cutting things at an angle so the edges are not visible from
the top side, carefully pulling out areas of clay out to fit into depressions
in the mold (rather than just pressing in a smooth ball, etc.), and rolling
(over) the clay to move just a little clay at a time (like moving waves)
http://www.norajean.com/Biz-Archive/Egypt/004.htm
an
acrylic block (or sheet of glass-plastic) can be used to press down
an object (like a charm, etc.) to be molded into the clay when making a mold (or
also later when pressing raw clay into a mold)...using a clear block allows you
to see the process as it happens so that you can stop when you want, or
make any corrections. It and most importantly leaves the top and bottom of the
mold very flat which is often helpful later.
....to keep the
thickness of the clay mold as even as possible all the way though, three
or more small cubes or other small items of the *same height* can be placed
under the block before pressing. All kinds of things can be found around the house
which allow you to make different clay pad thicknesses (jewel boxes for tapes,
corks, etc.) If you can't find three of the same thing, cut one thing into three
pieces, or try two open books. DB
http://pcpolyzine.com/december2001/tools.html
(photo near bottom)
stiff clay molds you make can't have undercuts (okay for flexible molds) ...or you can mold only the non-undercut portion
to
remove clay, especially from stiffer molds ...often the clay will
come out fairly easily, but if not:
....use a release agent (see
Releases below for which releases are best for which clays or situations)
....let
cool awhile (in frig or freezer, or naturally) . . . and don't use really
warm or gooey clay (can cool or leach it)
....press on clay back with
another wad of sticky clay ...or with Blue Tac or semi-stiff
plastic sheet (or anything which will create a vacuum).
....(especially
if the molded clay item doesn't need a flawless back, or
if you plan to add a layer of clay or something later) you can insert a loop of
wire (I used phone wire) as a handle to help pull the baked
clay out of the mold ... or try inserting a needle or other tool horizontally
into the back and try to pull out the clay.
.......also like a cake, sometimes
you can run the tip of a blade around the rim to break the vacuum
seal
(...flex the mold or push from
the back, if using a flexible mold)
after
removing clay from a mold, the raw clay can be further manipulated,
or added to with more
clay, before curing
...add onlays,
or
parts from other molds...
or bases-backgrounds... or accessories .
...distort...
reshape any parts by stretching, pressing, manipulating with
tools ...or add impressions, etc.
...cut
out areas where you want holey-ness/filigree....
.. cut out or
impress areas where you want to replace with other clay, or "set"
a stone or other object or clay
(...
you can also add details to a baked clay
item from a mold to create a second generation object to then
mold
(... e.g., make a flower from a flower mold... bake ... then add to the
flower some raw clay leaves you've sculpted, or raw leaves taken from another
mold (with liquid clay or glue if no mechnical hold)... bake ... now you'll
have a flower-and-leaves mold to use as you wish
........Sarajane did
this with a face, to which she added headwear to create her final
mold from http://www.polyclay.com/molds.htm
....to
cut off part of a mold or cast without distorting, you can partially
bake it. Then it is soft enough to cut but stiff enough that it won't distort.
5-10 min will do it.
before
or after baking... molded clay items (or any textured item) can also
colored ...or partly colored
....can be "antiqued"
by coloring the crevices, or highlighted by coloring the upper parts
(doing this will bring out the detail, add dimensionality,
complexity and punch, and in the case of antiquing create an aged
look)
.......antiquing is
done with paints, inks, metallic or non-metallic powders or waxes... these
may be thinned for more of a "stain"
........highlighting can be
done with the same materials, and can add a metallic or elegant look
if using metallics
...molded items can be completely covered with these
materials as well, or be antiqued or highlighted after complete coverage...
if completely covered, sanding the top areas can create an antiqued effect
as well)
...(see below in Antiquing,etc. for more on all these)
Maureen
Carlson's online video lesson on pressing a teardropshape
of clay into a push mold (face)
....
then removing it by pressing a cylinder of raw clay on the back and begining
to loosed the edges...+ and other ways to use molds
http://www.youtube.com/watch?v=xpnPn7fbTyI&NR=1
(YouTube)
Heather R's lesson on
using different colors of clay to fill in a mold
(in this case, for a Santa figure)
http://www.sculpey.com/Projects/projects_SantaSled.htm
NoraJean's
lesson on making a molded face with gold (or other mica)
clay ...which is a problem because dark sides
can show when clay is cut or manipulated...one tip: don't
drag your tool over the face to move stuff...roll it instead, leaving the
surface intact
http://www.norajean.com/Egypt/004.htm
"carved-out" sheet molds
...draw
or transfer a basic shape (animal, etc.) onto the surface of two layers
of raw #1 clay
...use various tools to carve into the raw clay to create
the mold shape you want, keeping in mind that you're carving from the side which
will be the bottom of the mold (belly, etc.)
...can leave as
is, or incise or impress more lines, shapes etc., all around as a background
I used a tool (dental?) with a very small end to texture the molded (or stamped?) bits to make them look as though they had been carved out instead of molded ;-)... the molds were taken from a brass buckle, a brass calendar, a bone bead, and a plastic bead. Stacia
see more on these techniques below under Stiff Molds or Flexible Molds
also:
see Textures
for sheet molds and shallower patterns...also see Stamping
...(for some ideas on giving a demo on molds,
see Teaching
> Suggestions for Projects, Preparation (using Miracle Mold)
molds
sold specifically for polymer clay
(among them Maureen Carlson’s
character molds & house fronts, & Judi Maddigan’s flowers, creatures,
etc;
order online, or look at craft & other kinds of stores)
RETAIL
Polyform-Sculpey's
EZ Release multi-mold units ...semi-flexible
(no release needed)
... many molds (in 3 categories...see
full listing below),
some by Marie Segal
http://www.sculpey.com/Products/products_ezrelease.htm
Amaco's Push Molds...designed by Judy
Maddigan, Maureen Carlson, & others ...stiff resin and semi-flexible
rubber
http://tinyurl.com/c5lwr (or
enter molds in their Product Search)
Makin's
sheets of molds (craft stores... intended for paper clay)
http://www.provocraft.com/products/index.php?s=info&l=Makin's.molds
MAIL
ORDER ......(or just to see whole lines of molds )
PolymerClayExpress
sells many molds for polymer clay from diff. manufacturers (sitff
and flex)
......Maddigan, Carlson, other Amaco including
cabachons & houses... Polyform molds ...(&
"texture molds")
http://www.polymerclayexpress.com
(look under Molds category)
Judi
Maddigan’s
Design
Push Molds (manu.by Amaco, stiff resin)... various
http://www.angelslanding.com/pushmolds
Madaboutmolds
...single, stiff molds of reg.polymer
clay ...many shapes & themes
(...note:
most "molds" shown are actually the original items which
their molds are made from --to see actual molds, click on an indiv. item)
http://www.geocities.com/madaboutmolds
...also have a gallery of customer pieces
(click on Gallery)
...animation of using
molds their way (click on Accessories,
then click on Movie Clips
... take a while to download)
....... they
place a sheet of clear flexible plastic on top of the clay ball in mold,
then press down with an acrylic block (when removed from mold, clay sticks
to plastic)... remove from plastic if cutting out any holey areas with Xacto ...and/or
bake on plastic... then final result, painted
FACES + PEOPLE + MISC.
Cheryl's
small baby faces molds (polymer clay) ... and fairy face molds?
http://tinyurl.com/ymkc2v
......http://ctrottier.tripod.com/
http://ctrottier.tripod.com/babymold.html
.... http://members.tripod.com/~ctrottier/Babyfacelarger.html
Millie's
2-part molds ....for 6-6.5" tall whole women (one
wide hipped, one not) & man & 3" baby (+ 5" baby
faces)
http://www.onestoppolymershop.com/page/938936
Maureen
Carlson face molds http://www.weefolk.com/mold_example.htm
Maureen
Carlson's Designer & What A Character Push Molds
(manu. by Amaco) (faces... also, words
& more) ... flexible rubber & stiff
http://www.amaco.com/pdfs/AC10a.pdf?
Kathndoll's
molds . . my molds are from my original designs- so far I've got frogs/nature,
faces, dragons, dragonflys, etc. ...I hope to have some fairies soon.
They are totally copyright free- I'm allowing any use after purchasing
them- (other than duplicating my molds... and selling molds!) (still
available?)
Maureen Carlson's What a Character
molds ...elf-style? hands and feet
http://www.amaco.com/pdfs/AC11.pdf?
Robin's
3 pgs of flexible silicone molds ....faces and some bodies
(also ethnic, and masks, mummy, etc.)
http://www.backyardcards-gifts.com/Molds.htm
Krafty Lady Moulds --cameos,
faces, large torsos.... Asian, Egyptian, African, "Decor"
(various geometric, filigre-type button rounds-squares etc.)
....(flexible
polymer clay, or 2-pt silicone material?)... for use with clays (oven or airdry),
paperclay, coloured hotglue sticks, melted embossing
powders, beeswax, candle mix, soap mix, play doh, icing fondant, etc
...http://www.kraftylady.com.au/artmoulds/index.html
...http://www.kraftylady.com.au/artmouldsintro.htm
...
http://www.zigzag.co.nz/Jewelsmolds.html
(both sites in Australia, but
sell worldwide)
Somerset's
Art Molds ...
Chinese coin, King Tut and other Egyptian themes, leaves, African
masks, etc.
("can be
filled with clays, beeswax, plaster, cake icing fondant, UTEE or a myriad of other
materials. Each mold has a built-in release agent.")
http://www.somersetstudio.com/html/art_molds.html
(gone from site?)
single alphabet letters in square format http://www.backyardcards-gifts.com/Molds4.htm
house front molds (stiff)... Carlson, manu.by Amaco...http://polymerclayexpress.com/houses.html
Polyform-Sculpey's multi-mold
EZ Release Push Molds
....categories:
http://www.sculpey.com/Products/products_ezrelease.htm
.......click on
one of the 3 categories to see them all:
EMBELLISHMENTS
(strips, borders & indiv. designs):
....African, Asian,
Eqyptian, Etruscan, Victorian, Leaf borders and designs, Celtic knots &
braids, Sconce , Summer Floral Swag,
DOLLS
(faces, hands, feet, ears)
....Grandma/Grandma
or Santa , Angelic/Young Adult, Whimsical, Miniature Dolls
THEMED
(whimsical, childlike):
Alphabet... Zoo Life Elephant, Giraffe, Lion, Monkey,
Tiger, Toucan, Zebra, Chompers Crocodile, bulldog, shark, SuperFlea, T-Rex...
Garden Party Butterfly, Dragonfly, Grasshopper, Inchworm, Ladybug... Grow a Garden
: Picket fence, Bumblebees, Butterfly, Wheelbarrow, Birdhouse, Flowers (2 styles),
Garden glove, Bird, Spade, Flowerpot, Watering Can, Let it Bloom Roses (3 sizes),
buttercups (2 sizes), Daisies (4 sizes), Lilacs (3 sizes), Butterflies (2 styles),
Designer flowers (3 styles), Leaves (5 styles), ...My Sports Sport jersey, Baseball
bat, glove and ball, Football, Football helmet, Soccerball, Basketball, Golf ball,
Golf club, Gold putter, Golf bag, ...Family Time Mom, Dad, Sister, Brother, ...Country
Charmers Barn, Horse, Pig, Chicken, Cow, Milk barrel, Feed stock, Haystack, ...Sea
Life Blue whale, Dolphin, Tropical fish, Seal, Seahorse, Sea turtle, Starfish,
Sea shell, ....My Pets Dog, Cat Goldfish, Doghouse, Bone, Fire hydrant, Food bowl,
Collar, Fish skeleton, ....Baby I Love You Stork, Baby stroller, Rattle, Block,
Rubber ducky, Sheep, Rabbit, ....Stocking, Angel for All Reasons Angel and minature
snowman, Valentine heart, St. Patrick clover, Flower, Watering can, Birdhouse,
Flag, Watermelon, Apple, ....Teddy bear, Pumpkin, Turkey, Class Creations Chalkboard,
Schoolhouse, Open book, Pencil, Eraser, Apple and bookworm, ABC's, School bus,
....Not So Scarecrow Scarecrow, Sunflower, Corn, Pumpkins (2 styles), Oak leaf,
Maple leaf, Crow, Kringle & ...Snowman Santa, Snowman, Christman tree, Stocking,
Candy cane, Holly leaf, Christmas light bulb, and Ho Ho Ho, plus six architectural
embellishments, etc., ....Fairytale items, dragon, castle,
etc.
I just purchased one of the Sculpey
flexible push molds to see how well they
work. ...I was very disappointed in the quality---tiny
bumps where they should have been smooth, edges not crisp. If I had purchased
a rubber stamp of this quality, I would take it back! I'll probably never use
this push mold.....I went back to Michael's today and tried to look at some of
the molds without undoing the packaging. It appears that about half
of them have some slight defect---little bumps or edges not crisp so I
think they could do better with this. If you have tried them, you know that they
are also very, very thin. I would not make my own
molds that thin. Jeanne R.
**(see Karen P's lesson
on how to use the hands, feet, and face molds to make a
bas relief old word Santa on a plaque http://www.sculpey.com/Projects/projects_HolidaySantaPlate.htm
)
Maureen Carlson's Designer
Push Molds ...faces, masks, etc. & "words" (not
whole heads)...(flexible sheet molds, manuf. by Amaco)
http://www.weefolk.com/cgi-bin/fcp.pl?fcp=new.htm&words=molds&wt=be&bl=or
(for now)
(Sun: suns and faces.... Moons: quarter & full
moons with faces ...Tribal: 8 sizes of African mask faces (incl.one profile)
...Victorian: 6 faces (mostly women, + Santa Claus, child, one profile)
....also,
each mold sheet set comes with 3-4 moldable "words" which
can be added separately (for example, love, imagine, spirit, legend, dream,
etc.)
... It's easy to add all kinds of decorations
to the faces (or use for surrounded "medallion faces")... At the moment
I'm working on a Terra Cotta pot for my "Secret Garden" using a large sun face.
Dotty
fancy molds from House on the Hill, Inc.(expensive),
made from a composite of powdered wood and resin stained to look like wood,
and mounted with a hanging ring:
Angels, Animal Kingdom, Autumn, Babycakes,
Cakes, Christmas, Decorative, Easter, Faith, Farming, Flowers & Fruit, Garden,
Hearts, Home Sweet Home, Hornbooks, Medieval, Military & Patriotic, Miniatures,
Music, Nautical & Fishing, Renaissance, Rolling Pins, Saint Nicholas, Seasons,
Singulars, Speculaas, Spinners, Spring, Springerle Presses, Struwwelpeter, Vino,
Wedding & Courtship, Winter
http://www.houseonthehill.net/index.html
(hover cursor over, then click on each)
The
Amaco line of Push Molds (see links above) give permission
to make one of a kind pieces for sale from the molds... you may not hire
people to make the same item in quantities greater than twenty, and you can't
make small changes and produce derivative molds
... check on the back of packages
for molds by other distributors to see what their restrictions
might be. Elizabeth
ERA Graphics sells a number of (shallow)
mold boards (like the Ready Stamps ones but without the stamp sheet?)
3 1/2" x 4 1/2", $10.50
http://www.eragraphics.com/molds.html
other
purchased molds
(plastic, metal, silicone, etc.
...sold for non-clay uses)
candy
or chocolate molds–plastic ones or individual metal
ones (can use the outside of the candy mold as well as the inside…)
....many
kinds of molds in one place
.......http://www.sweetc.com/
(look in "catalog") . . . some hard,
some flexible, for butter, chocolate, gumpaste, etc.
.......http://www.sugarcraft.com/
(many molds --click near bottom of page, on the left side)
.....
http://www.winbeckler.com/candy_molds.asp
...many sheet molds for candy
... One
thing about candy moulds is that they are sometimes
quite thin plastic and you do need to push the clay
in firmly - especially if you are making a lot and want to work fast. So I have
on occasion made a 'support' for the back, by pushing the back into scrap
clay, baking that and then putting the result under the mould while I'm using
it. Only needed for larger and more delicate bits, of course! Crafty
Owl.
...very small candy molds (usually in a sheet mold) are often available
for making tiny shapes, figures, etc.... these could be highlighted or
covered with metallic powders,(or even painted) etc., to be hung on tiny
Christmas trees as ornaments, or glued onto gifts or gift tags,
etc.
also soap molds, candle molds, paper(clay) molds, and others
I love flea markets to find things to use as molds. It's endless. peg polymer
search eBay http://ebay.com
for words like candy mold, soap mold, candle mold, chocolate
mold, even cake pan, etc.
....search eBay Stores
for the same http://stores.ebay.com (under
Art, or Crafts, etc.)
........at this eBay store , there are also medium
to larger molds made from various materials (often intended
for use with plaster or concrete...but the shallower ones will work
with PC if used with proper mold release)...they often will to toss in a bonus
mold...at least they have each of my orders, and they combine shipping on multiple
orders. Barbe
http://stores.ebay.com/THE-MOLDS-AND-STATUES-STORE
(or...go to ebay.com > E-Bay Stores (Specialty Sites list) search for The
Molds and Statues Store (be sure and include "The")
You
can use plastic or metal measuring spoons as molds
for cabochons. . . . Sharon
....
little plastic protectors on tops of solid deodorants (Mitchum,
Secret) make fabulous cabochons... most have small handle built in. Crafty Michele
...
plastic ice cube tray.....use the cut-off wheel of a Dremel, and cut
off one 3 or 4 mm of a square from the tray. ...the one I have has lovely
slightly rounded corners and edges. jclausen
....the round plastic
flip top lid of my vinegar bottle makes nice round ones. jclausen
http://www.poly-tools.com/Merchant2/merchant.mvc?Screen=PROD&Store_Code=PI&Product_Code=GCT&Category_Code=MISC
...though
even the shorter rollers could be used for a long rope by molding each
length that will fit, then overlapping a bit for the next length... may need a
bit of finger smoothing to remove any small indentations
various
shapes and sizes of single, metal molds
... fairly inexpensive and the possibilties are endless! Jan
R.
http://www.jbprince.com/subcatmfgprod.asp?0=276&1=286&2=-1&6=3
(look around)
....they have pyramid 4-15cm, tartlette
50-100cm..these are the ones you can buy in cooking supply and Indian stores too,
petit four molds, timbale molds...like flower pot without lip...1-1/8"
high and larger
(also make making hollow items
a breeze!)
I've used my son's metal creepy crawler set (sheet) molds... They have tons of details and are really cool if you are into bugs...(glow in the dark, hanging from the ceiling?) Halloween?
spoons
make great molds for pendants. Soup spoons, tablespoons, measuring spoons,
etc.
Check out the thrift shops and garage sales for different shapes. The
blue domed pendant in the "newest stuff" folder of my photopoint site TLC
http://www.poboxes.com/TLC_Creations
is made from a spoon. I also used art emboss metal for each of those domed pendants'
innards. . . . The citrus blend pendant box is made from a citrus juicer that
I made a mold of. TLC
"hemisphere
molds" (stainless steel "molds-forms"). . . non-solid
...can use the inside or outside for shaping
http://www.jbprince.com/subcatmfgprod.asp?0=276&1=286&2=-1&6=3
http://www.jbprince.com/product.asp?0=276&1=280&3=1117
--smallest
to largest sizes, with more in-between
3 cm = 1-1/4" diam., 5/8" high,
(3/4 oz)
.............3-1/4" diam., 1-5/8" high ("single-serving")
10
cm = 4" diam., 2" high
20 cm = 8" diam., 4" high (70 oz) (good
for making bowls too)
I've tried various items for making hollow beads
etc (paint trays, light bulbs, glass balls etc but these work best for me and
there's no doubt that your two halves are the exact size). You can apply clay
either to the inside or outside of the molds so you're getting 2 sizes for the
price of one. I bought 2 of each size I wanted so I could bake them at the same
time. Jan R.
............Lynne
Wardrop's lesson on making lentil beads ... or cabochons using just
one dome made
on a 25 watt lightbulb
http://www.polymerclaycentral.com/cyclopedia/flyingsaucerbead.html
(see also other lessons on making hollow beads in
Beads >Lentil)
purchased
silicone molds
(...sometimes called just "flexible molds")
...silicone
can also be used to make your own molds, usually from 2-part putties...(for
more info, see below in "Making your own Molds")
advantages of silicone:
... will usually result in a somewhat more
detailed casting than polymer clay molds
....raw
solid clay can be baked while inside silicone
molds because
they can take high heat (often up
to 500 degrees)....(no
need to remove clay)
.......liquid clays can also be baked
in silicone molds
(...for more info on that, see below in Silcone Molds > 2 pt. putties)
.... silicone molds need no release agent with clay
......(however: "When first cast, silicone rubbermolds exhibit natural release
characteristics. Over time, however, the
reactant agents in most casting resins will deplete mold lubricity and parts will
begin to stick in the mold. A release agent should be used at the first sign of
sticking, and reapplied only when sticking reoccurs")
One
technique that I particularly like for silicone molds:
--I *lightly* brushed
the inside of (two of the round mold indentations) with Armorall
--applied
a thin coat of Kato Liquid polyclay and baked. Let cool.
--I applied a second coat, cooked, cool . . .
http://www.craftcave.com/candle/siliconemolds.shtml
--and then a third coat (don't bake this one yet)
. . . to
the unbaked liquid clay I apply very thin transluscent cane slices
--Gently press the slices into the mold and bake again.
(--You
can continue adding liquid clay and/or slices as desired.)
-- Once you're
satisfied with the design, simply pop the two halves out of the mold and join
the two halves using more slices and liquid clay.. . . For this final
bake, you can actually bake the ball in the mold so it doesn't roll around
and to hold it steady while baking. Jan R.
MAIL ORDER (or maybe LOCAL) silicone molds:
....silicups
... reg. and mini sizes of fluted
silicone muffin cups
...."pinch"
bowls (2-1/2 x 1-1/2")......called pinch because can pinch
bowl to make spout to pour spices, etc (up to 500°)... Norpro
....trays of molds
... http://www.jbprince.com/subcatmfgprod.asp?0=276&1=279&2=-1&6=3
(look at all pages)...each tray of
molds is 7x12"
......these sheets have round and
other shapes like ovals, candy mold shapes, etc. . . ..... for
example, the sheets of round molds produce items from 1-1/2"
dia. x 1/2" deep, to 2-3/4" x 1-1/4"
individual
item molds:
http://www.candlesandwoodcrafts.com/molds3.html
...silicone molds can also be used
for casting chocolate, aspic, tallow,
fondant, pastillage, salt, pepper, hot sugar, granulated sugar, ice, etc..
purchased
"rubber" molds... "silicone rubber"
or real rubber? (only up to 300
degrees or less? ).... many item shapes
http://www.flexiblemolds.com/index.html
.... http://www.flexiblemolds.com
http://www.sugarcraft.com/catalog/candies/rubbermolds.htm
Check
your local hobby store - the kind that caters to model railroad
enthusiasts. They have all kinds of cool textures (& molds)
for their railroad layouts, including stone and brick (molds made from rubber?---bakeable?).
Irene
...stone or brick walls . . . ....(lessons) . .
This is one of the ways I was thinking of for making a wall too, especially since
my son has a cool, rubber sheet mold comprised of lots of individual, small-rock
molds. I'm thinking that type could be used to make individual, differently-shaped
rocks which could be removed one at a time and set onto a clay sheet or other
surface puzzle fashion; after baking, grouting could be added between the rocks,
or the rocks could just be left on a mud/mortar-colored background. . .
...For
the finished stone or brick wall molds, I was thinking that a thickish
sheet of marbled clay colors could be laid on the mold, and pressed down (perhaps
with some scrap clay, or not) into each rock/brick, then grouted after removing
and baking. (If lots of different variations in the marbling were used, or bits
were added here and there before flattening into a sheet, it might look fairly
realistic; wish I had time to try it.) Diane B.
(see also below in Making
Molds, for Katherine's lesson on making your own stamp to create
a wall mold)
wooden
bird eggs which are cut in half....I have always had trouble making
cabochons, getting them even, rounded the right way...I found wooden, bird
egg forms in Michaels the other day and I immediately thought - MOLD!!!!
I was right!!
... I made a 1 inch square block of scrap clay, pushed the half
egg into it, and made a mold! Now I have a nice little mold for making oval
cabochons!! The packs range in size from 1/2 inch tall to 1 1/2 inch tall,
and I only paid .99 cents for the pack of 4!! Sharon
"Ready
Stamps"
(sending off to have stamps-molds
sheets made from images you select)
Ready-Stamps
(can use the "matrix boards" you'll receive with the stamp sheet, for
molds)
http://www.polyclay.com/ready.htm
This
is a great idea (and you get to support a worthy cause to boot!) All you need
to do is draw anything you like (with black ink), or paste on photocopied images
from Dover books, etc., or type type some text onto white paper (if you've pasted
on photocopies, re-photocopy the whole thing so you have just one flat sheet),
then send to:
Ready Stamps,The United Cerebral Palsy Foundation, 10405 San
Diego Mission Dr., Suite 10,San Diego, Ca 92108. . . (619) 282-8790. Call to order
first, and for any additional information; turnaround
time is less than 2 weeks.
....Be
sure to request both the MATRIX and PLATE with your order so you will
have the negative into which the rubber is poured. This acts just like a sheet
of molds and makes great raised designs in the clay!
(Jami -- you can use
both the positive and negative in your designs for wonderful effects. You don't
even have to purchase a sheet of rubber made from your designs.)
ERA
graphics have lots of great background stamps and
something they call mold boards to use specificly with polymer clay. http://www.eragraphics.com
WARNING <g>. You’ll never look at anything the same way again once you get into a mold-making frame of mind!!
Am I
enjoying my moldmaking? That might be an understatement. ;-) .... It's addictive!
but in a very good way.
...I like that when you make molds, you make them for
a lifetime... it's like building a collection. Mary T
Ideas & Tips for All. types of molds
Altoid boxes are swell for carrying a small powder ponce bag and lump of elasticlay (or regular clay) in your purse for taking impressions any time you see something interesting! --even tidier than the plastic baggie I was using, and not as suspicious looking. Sarajane Helm
I have used brick sidewalks, gates and fences, meant for model builders (dollhouses or model trains) ... they seem to be a good scale. (size). sensewhim
I
made molds last night using shells I've picked up in Bermuda
and Mexico and Sue Heaser's instructions in her "Clay Jewellry" book.
....
I have a metal hair clip with a row of star fish on it, so I have
a mold of that, too…
Don't
forget, you can make your own molds if you want to imitate chocolate candy.
I keep thinking someday I will make myself a chocolate necklace. . . .
.....
(lesson) Press the best-looking piece of chocolate into some nice warm
clay (I think I put the chocolate in the freezer for a few minutes to make sure
it was nice and hard). Throw that piece of choclate away and bake the clay...
You can see a book mark dangle I made like this. It really does look good enough
to eat. Nanette http://www.geocities.com/pckeepsakes/bookmark.html
LEAVES
Maria's lesson on making a leaf
by pressing an oval ball of (cold porcelain) clay --could use silicone or polymer
instead-- onto just the central part of a heavily veined tough leaf
... she
then cuts small bites from the sides of the leaf with a straw so they resemble
oak leaves, or poinsettia leaves
http://guide.supereva.it/hobby_femminili/interventi/2001/11/77634.shtml
...to
flatten a freshly picked (floppy or thick ?) leaf (for
making a mold of a fern or other leaf), you can carefully lay the frond onto the
sticky side of some wide, plastic packing tape,
making sure all the tiny leaflets are lying flat ....then apply the mould material
before the leaf can dry out. Alan Vernall
...Kathy also
makes molds from leaves by coating a real leaf with (Art Silver Clay or
Precious Metal Clay? paste), then uses them to make a mold after they are fired
in a kiln
.....or could cover with something else like plaster which
doesn't need a kiln... or use a few layers of liquid clay??
...various
clay leaves used in jewelry, made from impressing-molding real leaves
http://www.flickr.com/photos/stokesgalleries/sets/72157603734300483
(for
all other info making leaf molds, negative molds, stamps, and clay leaves,
see Texturing > Other Items & Ideas, leaves,
etc.)
I've made a mold from a real feather (I used Sculpey
Bake and Bend clay because it's soft)
...then make a raised feather,
cut it out, antique it or whatever.
...lesson: Roll a sheet of B&B
to 1/2 your pasta machine's largest thickness. Generously powder with cornstarch.
Roll the clay and feather through and bake the mold. Then use the mold against
another sheet of clay same thickness. Roll through pm together and don't forget
to cornstarch the raw sheet. Patti K.
interesting little trick for making
a mold from a button that has two holes so
the holes don't show (buttons with a recessed area work best).
....cover
the center area with the holes either with a half pearl or a rhinestone
before making the mold ...bake
... then fill the baked mold with raw clay,
and you'll get the shape of the button but with a raised area (hemisphere or faceted)
in the center of rather than a recessed are with 2 raised areas where the holes
were. Jeanne R.
Sometimes if you put a layer of aluminum foil (mostly?) around the (bakable) object you want to emulate, then put a layer of clay, and bake, it will work as a mold... some times you can pull out the object, leave the foil, then bake, then pull out the foil. the smoother the foil the easier it is to remove. . .
.....for non-bakable
items, another method would be to crush aluminum foil, unfold it back into a wrinkley
sheet, mold this around the (item) doll, form the armor (or just clay
sheet) on the foil (thick enough so it holds its shape).. carefully remove
the foil and clay armor leaving the doll out of the oven, and baking
it. . . . .If you fear the foil/armor shape will collapse, you could "stuff"
the foil side with scrap clay or sand or more foil or something to support it.
.... (In other words, you would be making a one-use, temporary mold
from the foil, probably doing half the body (front and back) at a time.)
After baking the foil could be peeled off or at least trimmed so it didn't show.)
This approach should work for lots of items of questionable heat
tolerance, as long as the inside doesn't have to be perfectly smooth...
Fingernail polish
bottles are just right for
(making) thimbles
with an aluminum foil covering .. but they are one of the items I do not bake.
...Sometimes these open-type plastic objects seem to shrink
inward a bit...
in that case, put it back in the oven, heat to 180'... then pull it out
gently before it cools.... I've made boxes and thimbles and bowls this
way…
liquid clays can be often baked in regular polymer molds, but not always reliably.... other mold materials and pre-bought molds can be used with liquid clay though (for more info on all these, see Liquid Clays > Molds)
making a mold for liquid clay with flour is
similar to a technique used by some chocolatiers (lesson):
-- place
flour (reg. baking flour) in a shallow pan (or box lid?), (I used
small, aluminum pie tins).
--GENTLY pack it down with a flat bottomed
glass or another flat object
(--make an impression
with something)
--carefully fill the impression with a squeeze bottle
full of TLS.... you have much more control of the flow and it is less likely to
disturb the impression
--bake (at 300 degrees)!
-- After baking, remove the object ... wash, sand, and finish. Jan R.
(...for more details and ideas on doing this, see Liquid
Clays > "using with Molds & Stamps &
Texture Sheets")
molds can also be made by pressing brass stencils (or other small stiff stencils) onto a ball of clay so that clay rises up through the hole; this can be baked and used as a stamp (possibly with some texturing added to the shape first), or pressed into raw clay and baked for a mold
(see also Stamping for other materials to use as molds: "Magic Mold,"" Magic Stamp,"" Pen Score," etc.)
STIFF
Polymer Clay molds + ModelMagic
Most molds
can be very easily made with ordinary polymer clay
... the resulting
molds will be stiff, show a lot of detail, and be quite strong
....stiff molds
can be created from most any items or texture as long as the item has no
undercuts
Flexible molds can be made from other materials when
necessary.
....these may sometimes give more detail, and are essential
for undercuts, but often more expensive to make
I like to make
most of my molds from SuperSculpey for several reasons:
....SS
is cheaper than most other polymer clays (and although plain
white or terra cotta boxed Sculpey is even cheaper, they're pretty brittle)
....it's always available at home, and I don't have to
decide which of my clay colors to use up when
I want to make a bunch of molds
....I can color code
all my molds to make them easier to find and to sort into groups
........for example, all my face molds are green, geometrics are purple, animals
are blue, nature items are red-ish, etc
........just adding a bit of colored
clay to SuperSculpey is sufficient to color it because SS is very translucent
so doesn't have much color on its own
.......although SuperSculpey isn't the
strongest of the clays, it is strong
enough if thin molds are not pressed
down hard over balls or wads of clay....instead,
put the mold face up on the work surface, then press the clay
onto it.
To make a polymer clay mold, press
clay against an item or some part of an item, remove it, and bake;
...
later, a reverse image can be made from that mold by pressing more raw
clay into the mold and baking that (also called a "cast" or a "pull")
. . . (more details below)
--often you will need to use a "release"
on the clay or on the item to be molded in order to make the raw clay easy to
remove; sometimes this isn't necessary though if the clay isn't too soft and you
can put the right "English" on it (see below in "Releases"
for details)
--to remove the mold/cast: ...press a piece of
clay onto the back of the cast clay in the mold and pull, or try to pry out a
corner first, or put in the frig for awhile... or bend back the raw clay if making
a mold.
--items with "undercuts" can't be molded
unless you use a "flexible" clay or other flexible material (see below)
--when making a deep mold (from a face, e.g.), form a wide cup of
clay which is thick in the bottom, and press the cup around the face back to the
earline, pressing on the face well.... then put this cast shape onto a ball or
egg shape of clay later to create a head (can blend clay to ball, or hide join
with hair, etc.)
--when making a cast of a face or other item with a tiny
recessed area (like a nose), form the clay into a teardrop & insert the
tip of the teardrop into the recessed area first
After stamping
or pressing a shallow flat mold into raw clay, you can cut just inside
the raised outer areas to give a depressed, smooth background;
...OR
you can make --or use-- a stamp or mold which is smooth along the edges, and then
create a frame around the image by cutting off the clay just
outside the outer raised edges. . . . (if a number of these
stamped images are made next to each other, the result is an automatically raised
frame area around each image.)
see more on these things above in Gen. Info.... and in Stamping or Textures > Making Your Own
You
can make molds from many household items, old or new jewelry, and
toys (figures and other things), etc., etc.
...some EXAMPLES:
.
. . . screwdriver tips, bolts (make great stripes), fancy buttons, wooden shapes,
shells, charms, wadded aluminum foil, the strip from rubber hose clamp, bracelets,
wooden shapes, bits of filigree, netting or fabric, combs, charms& anything that
doesn't run away when you begin to press clay onto it! ---this list could go on
forever!
If
you make a neat face or other item or pattern, make a mold of your creation
so you can make duplicates (...or the duplicates can be distorted or added to
for more variation!)
... Make faces,
or other body parts like hands from dolls, action figures,
Pez dispensers, and other figurines.. . I made molds of all my son’s
tiny animals before handing them down to the next generation ..
Molds
made from any polymer clay will be stronger the longer they're baked
(color-darkening usually isn't a problem for molds)
...I've usually baked my
molds for 30 minutes or more... sometimes for an hour
Melnik's
molds (& casts) made fr. Pez dispenser head... figurine &
ornament heads... hand she'd made
http://melnik.freeservers.com/molds.html
Irene's molded fern and other leaves on switchplates (antiqued)
http://www.good-night-irene.com/SwitchPlatesFernsBrown.html
Jeannie's lesson on making a mold of the suface of a sandwich-type cookie
(vanilla with creme filling) --to create a rosette pattern
http://www.pcpolyzine.com/2004aug/crumbs.html
(this one uses a silicone mold)
make
molds from charms, large and small (see tips above in Gen. Info)
http://www.fancifulsinc.com/default.htm
(click on Catalog Pages on bottom of home page) (over 3000 brass charms,
many themes)
Jan
S's lesson on making a flat mold from a baked clay sheet
with a shape punched out
http://pcpolyzine.com/december2001/punch.html
......or do this with multiple shapes punched out?
Christy's
bas reliefs ...some antiqued, or made with lightly tinted clays pressed
in mold, as if lightly painted
http://www.povn.com/rock/gpCarved.html
for making molds of letters, see Letters-Inks > Lettering > Molds
make molds of the Balinese Filigree patterns you create (these may not be quite as distinct as doing them from scratch, but could sure come in handy!)... DB (see Clay Guns > Balinese Filigree for more)
Carolyn
S's many small (probably) molded items (sculpted first?)...intended
to for altered books, collage, etc.....heads, sealife, etc.,
many faux ivory
http://www.picturetrail.com/gallery/view?p=6&uid=969632&
(click on "Embellishments")
Kathy Davis' (kathndolls?) photos of creating sculpt for mold, and other ideas
for molds
http://pcpolyzine.com/november2001/davis.html
(middle of page)
Dotty's
lesson on making a whole head from a face cast
http://pcpolyzine.com/0204april/vessels.html
examples of
molds made from sculpts, also showing their castings (these
by Kathndolls are for sale too) (website gone)
lesson on carving a
pattern in baked clay to make a flat mold for flat beads
.... (following
lines made by rubbing a previously drawn ballpoint ink image on tracing
paper onto raw clay, then baking...this will result in a reversed image
though unless you turn the paper over and re-draw the lines on the back)
http://www.sculpey.com/Projects/projects_EgyptianChoker.htm
Elizabeth's Carved Stamp Swap... In each photo, the carved/onlaid original "stamp" is on the left (and its negative --impression-- is on the right )... polymer is used for the molds. http://thepolyparrot.com/carved.html
(lesson on making a repeating pattern mold with one "stamp"
you've made:)
...(for example, for a brick wall) first make a prefect
brick to use as a stamp and bake it.
--make a template of the (desired)
bricks pattern on paper using a ball point pen, with the bricks drawn to the same
size as your stamp (or leave more "mortar" area around each brick).
(Ball point ink transfers readily to raw clay just like copy toner...once the
mold is baked though, the ink doesn't transfer)
--transfer the ball point
pen pattern to a raw sheet of clay (or) flexible clay (if you want to use it
curved as well as flat, e.g. for a tower) (either Sculpey Flex or Kato Polyclay).
-- use water as the mold release, and stamp the brick according to the pattern
you've laid out. It's a good idea to work on a baking surface, i. e. card stock,
so the mold isn't distorted when transferring to the oven.
......the (flat-stones)
stone wall is done using a similar technique, but a ball stylus is used
to push the clay aside in a regular pattern of irregular stones. ( Sometimes,
I'll make a positive by drawing lines in the clay so the rocks or stones
are in relief, and then make a mold of the positive. For irregular rocks,
I make a negative by drawing the impressions a rock would make in the clay.)
Katherine Dewey
(see other ideas for making walls above, in Bought Molds)
Model
Magic air-dry clay by Crayola
... amazing how much detail the
marshmallow-y stuff picks up if you use it as a mold and then press polymer clay
into it after it has hardened....Picked up every tiny detail of everything I was
making molds of.
....Only problem I found with it,is that after
a while it has a tendency to tear like
paper and I haven't found a way to fix this.Even the thick pieces. So now I only
will use it to create molds to impress with poly clay. Peggy
much
of the rest of this page may be sorted into the wrong category, or not quite accurate...
I tried to find out exactly what the differences were but probably was not always
successful, so keep that in mind!
(flexible
polymer clay molds)
MoldMaker --or SuperElasticlay
(improved version of Elasticlay)
Bake & Bend (SuperFlex), etc
Sculpey
Super Elasticlay MoldMaker is the new name for Polyform's reformulated
Elasticlay formula.
...sold in a 1/2 lb. box... at Joanne's and
other places
...cheaper than 2-pt silicone mold making material,
but more expensive than regular polymer
clay used as mold making material
...finished mold is somewhat flexible
...it's very soft and pliable when raw, so reproduces details
well
.......in fact, can also be used as a "clay softener"
when about 1% is added to stiffer regular clay
...condition it a bit,
and use a powder release (cornstarch, or metallic powder?
...bake
mold (don't overbake)
...these molds will harden over
time, and may crack with heavy use and age
(though old Elasticlay was worse).
.........Sarajane says that rubbing baked
molds lightly with veg. or mineral oil may help in the long term
....can
also be used to make texture sheets (flat molds)
...can pour
Plaster of Paris in the molds (instead of polymer clay)
...Sarajane
has a page with info on MoldMaker and Miracle Mold... in one photo,
she compares the two (referred to as Super Elasticlay here)
http://www.polyclay.com/molds.htm
...Super Elasticlay is more
rigid (than silicone molds) ---but I still have good success with those molds,
and so far mine have not degraded
......if
I ever have trouble with the silicone putties (which I prefer) and still want
a mold, I use Super Elasticlay ...it requires a different method of taking the
impression than silicone but I never get air pockets with it (like some
silicones). . Jeanne R.
(Don't know if the old
version, Elasticlay,
is still being sold... it tended to degrade over time and had other prob's ---see
Char's of Clays page for details)
Bake
and Bend, or SuperFlex
(special polymer clays)
....my
molds made with this clay turned out wonderful as far as detail
and flexibility ( but I don't think I would use this clay for too much
else since the surface does not "look" all that great.)
Jan
...I used Bake and Bend for all my molds for the swap and they
turned out great.... Jeanette
...I
work with Sculpey's SuperFlex (Bake and Bend) all the time. Yes,
it's tacky and somewhat greasy, but it's a problem
solver..... I use it ...for flexible sheet molds that can be run
through the pasta machine. . . Katherine Dewey
...I use Bake & Bend for thinner
molds in sheets which use low-relief textures and items. I recommend
it for my leaf molds, and texture sheets. ...It is extremely durable and
flexible and when the sheet mold is thin enough to go through the pasta machine
with more clay. . . It can be used for thicker pieces also, such as molding a
button or such, but it will not be as flexible in the thicker pieces as MoldMaker
is. Patti K.
Would Sculpey's Eraser Clay work??... it seems to have lots of plasticizer too (and may eat into other porous or finished woods over time??)
Glues ... Glue Gun Glue
(somewhat flexible
glue molds...and
casting glue in other molds)
These molds won't be able to create fine details.
(a
strong "white glue" --is
this the industrial quality version of Elmers? )
..My Dad made
these great flexible molds for me with Elmer's Stix-All Adhesive
(1 oz tube = $3.50) ...do a trial run first ...these
molds are super flexible
...he set a flat-backed
polymer clay shape on a piece of plexiglass (or glass,tile,etc.)
face up ..my pieces were 1/2" thick or less)
...then he (squeezed)
enough Elmer's Stix-All glue to cover the piece (using no release
on plexi-glass or clay)
.. let it sit overnight
...after the first coat dried, he added a little more glue to the
top just to make it a little thicker
...after that dried, he peeled
it up off the plexi-glass...and popped the clay piece out and presto an awesome
flex mold!!!
...the mold will be semi-clear when dry, so pushing clay
into the mold you can flip it over to make sure it's pushed all the way
in
......the glue levels itself out, and goes into all of the creases on the
original piece....you still have to watch out for undercuts, but you can create
deeper impressions than you can with a push mold from clay
....it picks
up a lot of detail too (I made a cookie shape and stippled the top
with a toothbrush to add texture... after the mold was made from this,
it even imprints the toothbrush marks onto the clay)
...If you try
this, I would definitely do it outside
... the fumes from the glue are VERY strong! Stacey Morgan
...there
is always slight
shrinkage from anything
that "dries" in the air to harden it (but used this way, prob.shrinks
only in thickness)
glue gun glue molds
some GEN.
INFO about glue gun glues:
...non-stick surfaces: glass,
ceramic tile, shiny metal, possibly aluminum foil, silicone sheets (Silpat?),
Teflon bakery items, special pads sold for use with hot glue, special "craft
sheets" like those sold for UTEE ... even on a surface of water, or ice
...releases:
glycerin, pigment inks (or
dye?), veg. oil, metallic powders like Pearl
Ex, water in some cases,
...guns are high temp or low temp... glue sticks
are either high or low, or more often now "hi-low"
...glue can be
heated in various ways... extruded through a glue gun, on a non-stick
& heat-resistant surface with a heat gun, or in a melting "pot"
(or possibly in 340 degree oven?)
... curved or other shapes can be
made by extruding glue onto a curved non-stick surface like a glass jar... a shape
could be reheated briefly in microwave or with heat gun, then bent to shape desired
(or draped over something) and let cool in position
...hardened glue can also
be softened slightly in a microwave ... undesired "strings"
of glue (mostly from low melt guns) can be remelted with a heat gun
...glue
sticks can be cut into smaller bits, especially when
melting it/them with a heat gun, and not much is needed
COLOR......hot glue
sticks come in opaque colors as well as clear... acrylic paints
can be used to color glue, and/or various colors can be swirled while hot
...inclusions
and embedded items can be added while glue is melted .... and new glue layer
can be created on hardened glue layer to encase items
...after cooling,
can be colored with metallic leaf (very slightly tacky), metallic waxes
like Rub N Buff, acrylic paints, etc.
...do not use plaster
or plaster-based materials in glue molds,
because the heat they create (120-160 degrees) can melt the glue
deep
deeper molds could be made by placing the hot glue
in a deeper compartment (perhaps with a release, or by using tip of Xacto blade
in an unimportant area and pulling out)...or maybe something like aluminum foil,
alone or lining another item
... after the glue molds
sets, press raw clay into it
...could also pour
in UTEE or other embossing powders?
ceramic
tiles tend to hold the heat from the glue and keep it from setting up as fast,
so I squirt them with water to help cool. Pam
...or put in frig.
or freezer a short time.
shallow, "texture molds" (or finished pieces)
shallow
molds and "texture molds" can be made from hot glue by impressing a
blob of glue:
...on the surface where you want it (as long as the surface
is at least a bit heat resistant)
...or (to be able to remove it later) while
it's sitting on a non-stick surface
...rubberstamps
could be used (really deep stamps work better
than shallow ones), or other items
.......would
our plastic texture sheets be heat resistant enough??
...use
a release on the stamping tool like water, pigment ink, veg. oil (Pam or
wipe), metallic powders, etc.
...let cool ... remove stamp, etc
.... (remove new glue piece from non-stick surface, if desired)
You do not need to push the stamp down into the glue puddle ....just gently set the stamp on top of the hot glue, and it will sink down ... meridee
I put an inked stamp into a large
blob of hot glue from my glue gun (which was extruded in a puddle on glass, a
tile, or whatever will release it), then let it harden
.... I slowly
peeled off the stamp, and pressed conditioned polymer clay into the new
*mold* (...because the glue *mold* was flexible, I was later able to pry the polymer
clay out quite easily). Barbara (website gone --DB,
ADD PHOTO?)
lesson on making
curved glue item by stamping into hot glue puddle while it's on
a bottle (or other object)... cool... remove, or glue on with another glue?
http://www.dotcalmvillage.net/nowwhatzine4jan03/makingtreasurebottles.htm
...an impression made with a wet stamp (of any kind) may become cloudy (temporarily?)
Could also use this shallow mold as a STAMP.
metallic
foil.... press foil (not leaf) onto (flattish)
glue while hot....let it cool a little, then pull the excess foil
away
...(to stamp into it,) heat again and watch the foil
change ... press your inked stamp into it... remove when cool and you
have a great embellishment. Carol C
...could also cut the cooled foil and glue
sheet into shapes, etc.
casting glue gun glues in molds
Glue gun glue can
be poured or extruded into various molds
......made
from polymer clay, silicone (including purchased "Push Molds"),
metal, glass, etc (also plastic chocolate molds?
bec. they're used for pouring chocolate melts in after melting?... or be sure
to use low-temp glue guns)
.......for
releases in clay molds, can use Pearl Ex, embossing
fluid (glycerin), or veg. oil, and maybe other things (water?)
before pouring in glue from gun (...can use 2 guns at once for speed, if want)
..after
cooling, the molded glue shape can be popped out, or an Xacto blade, etc.,
can be stuck in the back side to help pull it out
...cooled glue shapes
can be colored with acrylic paints (metallics too, and Patio Paints
are especially adhesive), Pearl Ex set with spray fix, metallic
leaf, metallic waxes like Rub N Buff, etc.
....they can
then highlighted or antiqued with acrylic paints, highlighted withor
Rub 'N Buff, etc, if desired
some of these glue castings are made
with colored hot glue sticks, some finished with Rub N Buff, etc.
http://www.astampersparadise.com/stampingaccessories/molds.htm
mcuniverse's lesson on casting
glue gun glue in plastic molds, with a wiping of dish washing liquid as
a release
...tips: casts made with colored glue sticks will be
stiffer than clear glue sticks ...heat glue gun/sticks well before starting ...pour
from deepest part and center and try not to stop while extruding or may see blobs
...put mold in frig/ freezer little while before trying to remove cast)
...she
paints her casts later too: clean cast with a tissue ...paint with
a water based primer (like gesso?)...let dry then paint with acrylics
http://www.mcuniverse.com/Glue-Gun-Dolls.929.0.html
... http://www.mcuniverse.com/Glue-Gun-Figures.946.0.html
glue gun glue can be put in flexible "Push Molds" (sold for polymer clay, etc.)
glue gun glue in polymer clay mold (....would work
in raw clay molds too?)
...use a release like metallic powder, or a spray of
Pam, glycerin, etc. (see all releases listed above)
plastic
"chocolate" molds should work okay because they have to be heat
resistant enough for pouring hot "candy melts" into
...though other
plastic molds may work too if using low-temp glue guns
plastic
cookie molds ...put a releasing agent on it first.... but if you forget, you can
microwave them until the glue is soft then use a toothpick to pull it out.
Brat
see more on hot glues and other
ways to use them in Glues > Hot Glue
....another idea would be to make some glue shapes to make polymer
molds from ... see "Freeform Glue" on that
page
Silicone,
etc. (very flexible) molds
(1-part
& 2-part silicones)
(for info on SuperElasticlay and Sculpey's SuperFlex polymer clays to use for making flexible molds, look in Characteristics > Elasticlay or Superflex . . .though some warnings for Elasticlay are below)
These molds will pick up very fine detail.
some types
of mold materials and their characteristics
http://www.mouldmaking.freeserve.co.uk/types_of_moulds.html
...and
moldmaking.com's explanations of kinds of mold making materials
http://www.mouldmaking.freeserve.co.uk/material.html
many
molds from a swap... mostly likely silicone
http://www.tonjastreasures.com/swaps/tn19.htm
(for already-made molds made from silicone in various shapes, see above in Bought Molds > Other kinds)
Two types of silicone materials we can use for making
molds (though they may have different characteristics and uses)
are:
--one-part silicones, which are generally
used as sealants (caulks)
--two-part silicones, which are primarily
for encapsulating and mold-making
http://members.tripod.com/RBWindle/rtv.htm
(has a great explanation of these, and their differences!
.......also, two-part
silicones come as liquids (non-bakable) or putties
(bakable)
(these are mostly "RTV" silicones, room temperature vulcanizing)
Nancy
Banks sometimes mixes embossing powders into 2-part epoxy glue (like
Devcon...?30 min. setting type) with a stick
...she then casts this
mix in a silicone mold ... wrap aluminum foil(?) (won't stick to epoxy)...
can wet sand, if needed... clear and very interesting
One-Part silicone (& Caulks)
--small
1-3 oz.squeeze tubes ....and 10.3 oz cartridges for caulking
guns
(may be called an adhesive or a caulk??)
--no curing
agent; curing begins immediately upon exposure to air; usually "skins" within
5 min. and completely cures within 24 hrs.
--advantages: toughness,
availability (hardware and automotive parts stores), cost (cheap but varies).
--disadvantages:
toughness (difficult to work with once it has cured...e.g. cutting), workability
when uncured state (more difficult to get into details); tends to stick to everything
including tools since it's designed as an "adhesive."
--There are many manufacturers...so
look for:
......100% silicone ... not "siliconized" caulk or "acrylic
latex caulk with silicone"
......will withstand temps of around 400
deg. constant, 450 intermittent... durability over time?
...Goop/E-6000?
(the
silicone you use around bathtubs etc).... press out the silicone
and foam up your hands with a lot of soap (which acts as a release).
....press whatever you want down in the putty and let it dry
...(later:)
this didn't work well. It was too
soft and never seemed to dry!!
..the industrial quality may work better tho...Christel :-)
lesson
on using just a thin layer of silicone
sealant over a plaster-of-Paris backing for an inexpensive
mold
http://members.tripod.com/RBWindle/plaster.htm
Two-Part
Silicones
( 4-to-1's
or 6-to-1's are harder to measure)
"Every
plastic product in your household was molded at one time using this material.
Since silicone is so flexible and has so many different uses, there are literally
thousands of silicone products out there, all with their own specific properties."
liquid
(liquids take several hours to set up, as opposed to putties below!)One to One, Rapid Mold Rubber by MicroMark . . .2-part, liquid type
Liquid Silicone Rubber for Making Molds Our two-part liquid RTV
http://www.dxmarket.com/micromark/products/82083.html
--pourable because it's a liquid
--resin (uncured rubber) and a catalyst (hardener) must be mixed together in correct proportions
--cost (about $25 per pound, retail, 1 lb. minimum).
--advantages: ease of use (liquid flows around rather than having to be squeezed onto), workability (not as tough as one-part raw), toughness (easily cut after curing with sharp knife).
--disadvantages: . .takes 4 hours to set up (rather than 5 minutes for putty types) ...can't bake?? all brands in oven with clay??.. mix/pour time is generally about 10 minutes...30 min. pot life?... set-up (cure) is 4 hr.. . .
...mix parts A and B together and pour into a mold box containing your (item)..reproduces every detail... genuine silicone rubber (withstands up to 600 degrees F)
--availability (now at some retail stores, hobby shops), and mail order:
http://members.tripod.com/RBWindle/sources.htmhttp://www.perma-flex.com (click on RTV Silicone Rubbers) .. Green Sil and Blue Sil
Toika's lesson on making flexible push molds with pourable silicone mold material which is workable for 15 min, and sets up in 4 hrs. (hers made with RTV silicone liquid from Micromark; she says you can't bake the completed mold in oven (wrong?) though she says de-molding of raw clay casts causes very litte distortion)
...she mixes parts A & B then, stirs it 40-60 sec.
....brushes the mold material on the item first (to avoid air bubbles), then fills in the area around the item to be molded (which is sitting in a small, taped down, cardboard frame on top of a sheet of plexiglas, etc.) with more of the liquid.... cuts around the edges of finished mold to loosen.
...to use the mold, she pushes the raw clay in, then puts in freezer 5 min.... slices off the excess clay from the top of the flat mold
...flexes the mold to release the clay (which she says happens without distortion)
...she makes a thin, ropey "frame" for using as a bezel or to hold tinted or other contained pools of liquid clay
...for thin or flexible items, she held them firmly to the plexiglas by using spray adhesive on the back
http://www.pcpolyzine.com/july2001/molds.html
These
putties come in two parts (generally one is white and one is a color),
which must be mixed together just before using, and
make very flexible molds :
....they
also set up rapidly
....the molds can then be baked in the
oven with clay (or with liquid clays ).
....they need no
release agent, and take undercuts well
most "RTV" (room temperature vulcanizing) liquids (?) and putties can handle 600 degrees at least, and most are very flexible after setting
Carrying around a bit of unmixed silicone putty in your purse, etc. (maybe in a metal Altoid or other box, but keep the two components separate) is a great way to do spur of the moment mold making when you spot a nifty bit of texture, etc....the putties set up quickly so then the mold would be simple to transport home.
Contact
with tin will keep the two
parts of silicone molding materials from setting up properly, so use plastic
spoons, or wood, etc. instead (all 2-part putties?)
...also
some
rubberstamps have tin in the rubber
(Stampin' Up, for example) ... Linda explained that those have IIRC.
lib
.......she also mentions a workaround
for those stamps though...using a barrier on the clay like Saran Wrap
I was wearing latex gloves and the Miracle Mold stuck to them. Lib ... latex is incompatible with MM. (all 2-pt putties?)
The two parts need to be kept entirely apart or cross-contamination
will cause either one to harden
...I would guess
that you contaminated one part with another when you last used it, causing it
to harden. It might help to measure out each part with a separate
plastic spoon. Libby
bubbles happen
occasionally, more often in some brands than others
... bubbles in the silicone
(one cause seems to be in the makeup of the particular formula) ... and bubbles
in the molded item from incorrectly pressing the object into the putty
...also,
I found more bubbles with an older batch of Miracle
Mold -after it sat in my shelf for six months, the molds I made did have
a few tiny bubbles,
as opposed to the first ones which had none (I'm at high altitude, and
I mix the MM by hand)
........now I do a final squeeze/impaction of
the MM lump before using it...press it hard in on itself and onto the work
surface to force out any hiding bubbles. Sarajane
...I
have had just a few molds (maybe only 10 out of a few 100!) where I did not push
Alley Goop in the right direction, and I trapped some air and did not get
as good an impression as I would like... so I then applied the Alley Goop in the
direction to allow air to escape. (this mainly happens when surfaces are very
smooth.... this is not the same as the "gas type blow-outs" though). Jeanne
R.
...Alley Goop does get the tiny bubbles as often as other brands
I've tried so far (Micromark and Miracle Mold)
...sometimes, molding very smooth
surfaces can be a bit troublesome (super detailed objects generally
are no problem, but when you are doing a smooth/glassy surface there is just nowhere
for those little airpockets to go....with a detailed object there are lots of
opportunities for the air to get released)
........what to do in that case?....basically,
you *shear* your object into the Miracle Mold, rather than
pushing it straight
in (in other words, you're trying to
push away the excess air that may become trapped in the mold; once you
shear your object in, then firm the mold material around the object.
I kind of cup it in my hands and push it all together to make it conform
.......also,
often you can carefully poke into the airpockets with a needle.
..the air escapes and the mold flattens back down. Worth a try, caneguru
...overmixing
the two parts can sometimes makes bubbles too
liquid clay
into silicone molds
. . . baking the liquid
clay in the mold is the only way to go for me. . . . the
Kato liquid clay works great too! It makes a more flexible piece
than even the TLS . .
...I had no little air
bubbles or
bumps in them this way like I had experienced in the past. Part
of the trick seems to be
(1) letting the liquid clay settle (...the
Mitchells suggest 30 minutes) for a bit before baking
(2) not incorporating
air into the silicone when first mixing the two components
.
. . If you look into the molded surface of some of the mold materials (brands)
with a 10x (or higher) jeweler's loupe, you can see air bubbles/imperfections
within the cured molds. You don't notice the imperfections much on regular
opaque polymer clays, but they sure do show up on the liquid clays
or PMC. Some brands (of silicone molds) seem
to be particularly prone to the problem. caneguru
... (I used the Bellicold
brand) I tried mixing oil paints with the TLS and it was a disaster. There were
all kinds of bubbles on the surface of the piece (which would be the bottom of
the mold). This was a fairly thick piece, almost half an inch deep. Should I have
let the TLS sit in the mold for a while before I baked it?... I also used too
much oil paint. Nancy
...added color in the liquid clay will deepen after
baking, so don't use too much colorant
(....see
much more info on all this in Liquid Clays
> "Air Bubbles" and also > "Molds, Stamps")
If properly handled, silcone molding materials should have a long shelf life. Libby
Nancy Banks sometimes mixes embossing powders into 2-part
epoxy glue (like Devcon...?30 min. setting type) with a stick
......she
then uses this in a mold made from silicone ... wrap aluminum foil
(?) (won't stick to epoxy)... can wet sand, if needed... clear and very
interesting
...lesson on using using Devcon
(2-pt epoxy adhesive) in a homemade 2 pt silicone mold a realistic
whole eyeball
http://www.bellaonline.com/articles/art25389.asp
(see more lesson details in Other Materials
> Epoxy Adhesives)
(see more on using
glues, etc., for making molds in Glues)
What about creating your own custom made fingertip protectors
with a bit of 2-part silicone putty ?? By making your own, you could make
them fit tightly, be smooth, and be as long or short, or
thick or thin, as you wanted (... for example, you could make the finger
part thin, but have a thicker area on the end for wherever you want, or usually
get burned when using a glue gun)...these protectors could also work for
already-burned fingers while using more glue too (or possibly to avoid allergic
reations especially when doing gross motor things with the clay like color
mixes, blends or conditioning, etc.).
(for use with glue guns, I think
most silicones clayers use for making molds are heat resistant up to about 400-600
degrees, so that should do the job, and I'm assuming that silicone would release
the glue easily but this is all just a guess.) Diane B.
FIRMNESS:
Some of the 2-part silicone mold materials are firmer than others.
. . Miracle
Mold is considerably firmer when set up than Alley Goop, and Alley Goop
is firmer than the vinyl polysiloxane products such as MegaSil. caneguru
......though
Alley Goop can be made thicker if the oil (from silicone) that shows up
on the surface after some time, is poured off
...amount of firmness has advantages
and disadvantage
COST: Alley Goop is the cheapest, I believe? (or just because not as much needs to be used?)
examples
of molded items made in a 2-pt silicone putty mold...scarabs,
and heads (used for onlay)... Miracle Mold
http://home.comcast.net/~puffinalia/commentspagepics/tlenderman.html
when making texture *sheets* (for the pasta machine), I think any of the flexible polymer clays work better than the silicone putties. Katherine Dewey (....although see the comments below on using latex rubber to make texture sheets instead)
hirstart's
lesson on casting plaster objects with silicone-rubber
molds or other molds
http://www.hirstarts.com/casting/casting.html
you
can make any silicone putty clay go farther
using the "mother mold"
concept:
...(see Jeanne's description of doing this with regular
polymer clay to cradle the silicone mold if necessary below in
Alley Goop)
....Make the
silicone mold relatively thin, and with near smooth sides except for a few localization
keys sticking out (to make them easy to insert in the correct place when used
again later?). Then, using cheap plaster, make a big heavy 'mother' mold
which would be basically just a plaster holder for the rubber mold. This
gives your walls extra strength while packing the mold (with clay).
. . .(mother molds made from plaster can't
be baked though). Remember
mother molds are merely holding the silicone mold while you are packing the clay
into the mold. . . .
...you could make
an assortment of basic shapes
of 'mother' molds. Making them
in either a truncated cone (sides sloping in) or a mini bowl shape
will allow the silicone mold to be easily removed with the clay loaded in it without
much flex. . . .then fill the cavity
with Miracle Mold, insert the 'object' into the MM, then let cure. This way you
do not need as many mother molds. . . .
To
quickly tell which molds & mother molds go together, you could
make an impression on the outside.
Get some of the cheap rubber stamp kits & stamp that into the MM before it
sets up. The rubber stamp numbers could also be applied to the 'mother' mold.
. .
...You could even make the clay a thin-walled object by pressing
in a cornstarch 'peanut' into the middle of the clay. Lysle
...mother molds
can also be to make a stiffer backing for molds made with flexible
mold materials ... I had some quick set plaster stuff around ...mix
up and pour onto the back side of the flexible molds and let it set up. I removed
the plaster from the mold to let it dry thoroughly overnight. I put the plaster
back in to use the mold and remove the plaster to pop the clay out. Now you have
the convenience of a firm mold, but the ease of a flexi mold. Tonja
could also make pencil grips or pen grips in special shapes with silicone putty? ( to fit around shafts and allow for easier holding and writing/drawing for children, those with arthritis, etc.) ...see more in Disabilities > Tools,Assistive Devices
some of the BRANDS of two-part silicone putties which have been tried with polymer clay:Miracle Mold, Alley Goop, Mystic Mold, Amazing Mold Putty, Mega-Sil, Quick Sil, Silicone Putty (MicroMark's), & BeliCold
the brands vary by cost, color, smoothness of detail, heat resistance
ALLEY
GOOP from Karen Rhodes at the Clay Alley. . .(gray
blue)
http://www.clayalley.com/goop.htm
COST:
4 oz "sampler" for $8.50 + s/h?......1 lb = $27.50 +s/h
....however,
if you buy 3 or more pounds of Alley Goop, there is a graduated
price break per pound that can't be beat with
any of the other silicone molding putties. Jeanne R.... (good for guild members
maybe?)
........3 lbs = $25.00 per lb .....5 lbs = $21.50
per lb ....10 lbs = $18.50 per lb ......(+ shipping
about $1 per lb)
..review and photos of Alley Goop by Jeanne
Rhea
http://pcpolyzine.com/0301january/0301mold.html
--Alley
Goop is thinner than most of the other putties, and some people feel it
can go farther because of this:
http://www.heartofclay.com/eb/alleygoop2.jpg
(showing the number of molds Jeanne got from 1 lb of Goop (8 oz
each of Part A & Part B)
......measuring: Jeanne R. likes to pour
out blobs of each color (parts A and B) separately ... let them level
out (because they are thinner bodied), then choose which two blobs are the
same size before mixing them together to get the exact proportions correct
(can put the rest back in the jars) http://www.heartofclay.com/eb/alleygoop.jpg
...........I just pinch a bit of the white and make it into a ball.... lay
it down ... then pinch a bit of the blue and make as close to the same size ball
as I did with the white. Karen
--Alley Goop is a Shore 35 so it is "softer"
than Miracle Mold & many others
....I like Alley
Goop because it is so flexible that I can easily pop out the clay with
no nicks or damage (I do not cure in the mold.) Jeanne R.
....if you
ever find a mold is not firm enough or too thin
(if you push hard when pressing raw clay into the mold), use a bit more
Alley Goop (especially around the walls)... or add more just around the
relevant area and let set up again
.......
I saw where someone was complaining that Alley Goop was too flexible... I am sure
though they were trying to stretch the material so far that it became too thin
for the size and type of item they were molding.... I do scrimp, and have had
a couple of molds where a part of the mold barely had a skin on it....even though
the skin was very tough, it would not work as a mold because the clay would distort
when pushing it out... so I returned the item to the Alley Goop thin mold, then
I used regular polymer clay to bake a hard shell around it (luckily,
the item was metal and could take the heat).
(......but so far, I have not
had success with any of the silicone putties if I made the molds too thin, and
tried to add more silicone putty.)
......(see
above for using plaster for a "mother mold" instead)
....detail:
Alley Goop molds are really quite detailed....crime labs use it to "pick"
up fingerprints... can actually mold the engraving right off a dollar bill
....I have also made "clay shapers" from Alley Goop by using small amounts,
and shaping it as it cures.
....veterinarians use it to pack the feet
of horses when the sore is too deep... it cushions the foot and helps with
healing. Karen
....re cost, Alley Goop goes much farther for less money than
other brands..
--Alley
Goop sustains temps up to 750 degrees
...the blue
part is the "hardener", so if you want the putty mix to set
faster, use more of the blue. Karen
......... I found this
out the hard way... I put more of it into the mix and it set up before
I had a chance to set my piece in correctly, and wound up with a very
indistinct looking mold.
Gwen
...when I opened the jars after a time, there was a layer of
'oil' on the surface. I mixed it back into the compound but working
with it was messy & slippery. Gwen
.......that oil is a product of the
silicone...you can mix it back in, pour it off, dab it off,
whatever... .if you get rid of it, the putty just becomes thicker,
but it does not affect the outcome of the molds since it's there to make
the silicone putty easier to work with. Karen
--Alley Goop is also FDA
approved for food ...in fact, confectionaries use it to make chocolate
items for cakes (they pour liquid chocolate into the mold, put it in the
freezer and then pop it out for cake decorations!
....... couldn't
we then make our own molds for liquid chocolate or craft "chocolate melts",
or for lollipops, jello, e.g., using items or textures
or bas reliefs, etc., we've sculpted or otherwise created first
from polymer clay? Diane B.
ALSO: liquid,
brush-on Alley Goop (no longer available?)
....Karen
also has a new, even thinner, liquid, brush-on Alley Goop product especially
for making texture sheets
http://www.clayalley.com/brushon.htm
...same cost as the regular AlleyGoop... uses two layers of Goop....don't
know if she'd mix and match for the discount though
...I have just purchased
some of the Liquid Alley Goop and made one mold with it of an antique button.
I had previously made a mold of this with regular Alley Goop. I do think the impression
is even better with the liquid. (It takes about an hour to
setup.) I'm anxious to work with it more. Jan
MIRACLE MOLD
from Linda Geer, Puffinalia (purplish-reddish
pink)
http://www.puffinalia.com/miraclemold/miraclemold.html
COST:
2 oz kit=$ 8.00 +$2.00 s/h .... 8 oz kit = $25.00 +$5 s/h (Tonja
guesstimated 8 oz.will make about 25 small molds)
1 lb=$50.00
+ s/h...2-4 lbs=$45.00 per lb + s/h ......5 lbs or more=$40.00
per lb + s/h
...review and photos: http://www.puffinalia.com/commentspage.html
& http://www.polymerclaycentral.com/prodreview_mmold.html
...Christy's
lesson on carving a bas relief in clay, baking, then making a
silicone mold (M'Mold) from it for duplicates
http://www.povn.com/rock/gpCDemo.html
being used on a bas relief sculpt
...Sarajane's
page showing Miracle Mold used for various
face molds
http://www.polyclay.com/mold.htm
...many
molds from swap... mostly likely Miracle Mold
http://www.tonjastreasures.com/swaps/tn19.htm
....heat resistant to 600 degrees... can bake the clay
right in the mold
...makes a fairly firm mold
...use
only amount needed at one time because it will begin to set up quickly
and the impression it can make after it begins to harden a bit isn't as good
...Personally
I'm liking this new material better that Micromark's stuff. I really
love that I can now use my new molds in minutes, not hours.... And it sure
seems to be tougher. I tried with all my might to tear it and I couldn't.
Most of my molded images also have more of the original detail now.
And this new Puffinalia Mircle Mold has an oily feel to it so I don't need
a mold release. I really like that, too. Tonja
... I'm with you
Tonja - I have used a number of two part silicone molding compounds for
PMC and polymer clay both. I had been sticking to Bellicold (the purple
stuff) which can be finicky if you don't use the right ratios. However, this molding
compound is super forgiving. I even purposefully mixed uneven amounts
just to see if it would still set up. It did EVERY TIME and I went down to almost
a 30% / 70% ratio. It still kept the nice sharp detail as well.... I don't need
mold release for anything - not even paper clay anymore. Meredith
...you
can "tweak" the firmness and set-up time of your molds by adding
more of the red part (then will get a softer
consistency, and longer set-up time). Linda
...I mentioned that I had
I ended up with some sticky molds...Linda told me
to try less of the catalyst (the red stuff)...and I did...Instead of trying
exactly half/half, i purposely went under in the red...The mold was not sticky
and it cured super fast... Just in case anyone finds themself witht he same problem...
NF
... (Many of the other similar molding materials might be able to
baked in the oven), but some ...will likely degrade
after a certain number of bakings due to the
ingredients in the mix. But your mileage may vary. ...the catalyst in MicroMark's
(Silicone Putty) only is rated to 300 degrees and don't know aobut PoYo.
Mine is definitely rated to 600. Linda
........Linda's tests comparing
Miracle Mold to two other putties (blue one and purple? one), in
which she shows a less even surface before and after baking in the
other 2 mold materials and the subsequent casts
http://home.comcast.net/~l.p.geer/moldtests/comparisons.html
. . . .There are other issues, too when you are considering silicone molds. Many
of the products in the market will degrade after being heated (IF they can tolerate
heating without melting or noxious fumes) and have a shorter
shelf life. Moreover, I've used several products on the market and am certain
that they are not all created equally - in ability to be repeatedly baked, in
sharpness, in ease of mixing, in how forgiving it is with inexact mixing....(Puffinalia).
caneguru
..I have used the 2 part (blue and white) silicon mold material (Mega-Sil,
the blue ear mold stuff) and Puff. Miracle Mold, and I definitely
prefer the Miracle Mold! I have made the same mold out of both of them and then
did a side by side comparison. Yours is sooooo much more flexible, and
what comes out has better detail. A few of my blue ear mold ones have split
when trying to get the item out.
.... Yours take a little longer to set,
so I have more time to make sure I get it right, or fix any problems
that might happen when trying to make the mold.
...Another thing I noticed
is that I can make very large molds with your stuff and they are flexible
and stay together well. I tried to make a large one with the blue stuff
and it split in two the first time I tried
to get the clay out. Kimba
....Be aware that making molds on glassy
surfaces with Miracle Mold can sometimes cause a less than super
smooth surface. I've been in touch with my chemist and he advised me that glassy
smooth surfaces sometimes don't give the air in the mold anywhere to go when the
mold is setting up. (This does NOT happen in detailed pieces.) . . .The work
around according to the chemist is to "shear" the item into the raw mold instead
of just pressing it in. Slide it in the raw mold
and twist it a bit to release the air. And then build the mold
material up around the sides. caneguru
...(THE FOLLOWING ARE ALSO TRUE
OF ALL SILICONE PUTTIES?:
.......Miracle Mold may stick to latex
gloves
.......tin (including tin
that can be present in rubberstamps) can react with Miracle Mold (in that
case, cover stamp with Saran wrap?... and/or
......bake for a few
minutes to speed up the setting?
MYSTIC MOLD Compound,
by Artique (Linda Bernstein) (very light blue,
or other colors). . .
COST: 8 oz. kit =$14.95 + $5 s/h ... https://www.commercecorner.com/artique/productlist1.aspx
...Linda is using is for metal clay as well. Bette
AMAZING
MOLD PUTTY, Alumite Corp (yellow)
http://amazingmoldputty.com/ProdDetail.cfm?Category=Silicone%20Rubber&Name=Amazing%20Mold%20Putty
...also
carried by Michaels and Hobby Lobby, and others? (near the polymer
clay?, or near the mica powders or stamping supplies?)
...label has pics of
baby on front "to indicate non-toxic"
COST: 10.6 oz (2/3 lb)
= $20 ...or larger sizes
...longer curing
time: 20-30 mins --a disadvantage, but craftygoat says that
"gives longer working time and time to make other molds if she has any mixed
putty left over"
...has instructions re using as craft
video lesson
on making a miniature pan using regular epoxy resin, in Amazing Mold Putty,
by GardenOf Imagination
http://www.youtube.com/watch?v=DmaG_jM9i_k&NR=1
video
lesson on making a clear(ish) "molded Jello" by GardenOfUtopia...
she used a floral setting resin instead of a regular epoxy resin
so after curing coated with acrylic finish to keep cover stickiness on outside
http://www.youtube.com/watch?v=80TMY1usH3M
MOLD-n-POUR
(Ranger Industries & Suz Weinberg) (med. blue)
..."pour" refers to fact that can pour melted embossing powder
into cured molds
COST: 1.5 oz.= $13 +s/h (makes 8-10 molds of small
buttons) .. more expensive
than others, but may be available at
retail?
http://www.schmoozewithsuze.com/product/product.php?pID=030201180055
http://www.rangerink.com/product_moldnpour.html
MEGA-SIL...the
ear mold stuff... by Microsonic (blue, or
yellow?)
...(this is sold for the use of making a mold of an ear- for
making hearing aids)
http://www.earmolds.com/store/merchant.mv?Screen=CTGY&Store_Code=MI&Category
OR http://www.earmolds.com > the
earmold store.... you'll want the blue Mega-Sil I think. Kathndolls
....comes
in handy single packs as well (MegaSil "Solos")
but you have to buy 24 at a time, or you can buy it in bulk.
...
the ear mold compound (Megasil) is an entirely different composition (from
the others). It is vinyl polysiloxane. It is the ONLY one I haven't put
through heat trials because it is so different. Feels really different too,
in both the uncured and cured states. Linda G.
.....There's a "freshness"
dating of about 3months... but we think that's for sanitary purposes- and doesn't
seem to effect our use of the product.
.....The main page says that these
products are only sold to health practitioners. Is this true? ...No, anyone
can order it.
.....This stuff from Microsonic, Inc. is ear-mold material,
and from I can see it is very simular to the stuff that Suze sells, and
the stuff that Ranger is coming out with. It is called Mega-Sil - it comes
in bulk or in small two part packages. The price is GREAT and it works
wonderful - I have been using it for my polymer clay molds for quite some time
and I haven't had any problems with it. BTW, they are very fast to ship too.
.....my experience with Microsonic. . . I love using microsonic moldmaking material,
it is easy and makes incredibly detailed molds. I've used it to mold an
old cinnebar bead, handcarved santa, just all kinds of things with great results.
On the cinnebar bead I covered it and then cut it out of the mold, then marked
both sides to line up design, worked great! Karen K.
....Don't make the edges
of molds too thin though,
or they might tear.
... As far as large molds, I don't think there is
any limit to size ...as long as you can get the two parts of the material mixed
together right, it should would. However, taking a mold (cast?) from a very large
silicone piece may be a little difficult as the silicone is so very flexible.
It may distort the image. Dotty in CA
....I tried to make a large mold with
the blue stuff and it split in two the first time
I tried to get the clay out. Kimba
...I just
used mold material I bought at least 10-12 months ago. It worked the same
as usual. I never read about shelf life and now am glad I didn't know; I might
have tossed it out. It feels and looks like molds I've made before. Perhaps
if the product is used as intended, ear molds, there is some important
difference related to shelf life.Kay
..............You can also get the Mega-Sil
in bulk but you don't save much that way, and you have to try to measure it correctly
which isn't all that easy. At least not for me. You can buy the Mega-Sil
Solos individually (or save some money and
buy a full box of 24 Solos for about $21). Dotty
...The reason I buy
the individuals (which are only about a dollar more by weight), is that
I can carry the individuals with me when I go visiting, just in case there
is something that I want to make a mold from. Also, I would rather pay the little
extra to not have to measure out the two different halfs - this way it is pre-measured
for me.. judy
.... They now offer a scoop to measure the bulk
stuff. However, the catalyst is in a tube, which is a different form than with
the Solo's and I have not tried it so I can't comment on how it works. There is
one advantage to using the bulk type and that is you can choose how much you need
for a particular project. With the Solo's you have to use one pack or two, or
more. Dotty
....how big a mold will one packet of Mega-Sil Solo
make?
For a very flat item, that's not too deep, you can go a max
of about 2 1/2". ...Deeper items such as ornate buttons, you may need one
packet to do right. Dotty
SILASOFT, READY PRESS, MICRO-SIL,
etc., also by MicroSonic . . . .how are these different
from others?
http://www.earmolds.com/materials.htm
Castaldo's
QUICK SIL (light blue green)
.http://www.miniaturemolds.com/quksil.htm
or http://www.miniaturemolds.com/mainframe.htm
Castaldo website about the material makes it sound very easy to use: (no careful
mixing, self-lubricating/no release, can be used with metals, 0 shrinkage)....
the main drawback is that the Quick Sil is sold 2 lbs minimum
everywhere for @ $40. Darlene
...I have researched many different
groups and their comments regarding the various molding putty compounds. They
all sound similar (Quick Setting Silicone Putty Compounds). . .
...Quick
Sil claims to be heat tolerant up to 900 degrees, and only sounds like
a different color mixture.. . This mixes really fast...molds are done in
less than 10 minutes (shorter working time could be an advantage or disadvantage
depending on what you want to do). I didn't need clamps, or cold frames (for one
piece molds). Mixing took less than a minute, no gloves needed, it is safe. Overmixing
can make air bubbles.. Someone said they got air bubbles in the new material (Miracle
Molds) too that you mentioned above, probably from overmixing. They both don't
require exact mixing (I used a regular old metal teaspoon and filled them
unevenly a couple times). I don't know the exact differences other than this one
worked great, and sounds to have very similar end results. This may have a higher
heat tolerance, and is a great price for 2 full pounds. Molds of even the
smallest items were crisp and clear. I baked in the molds at least 20 times
and they were still pliable, no cracks, and worked as good as new. I even
cut my multi-molds into smaller molds, and baked them several times, and they
didn't crack or break down. I don't need any mold release at all, even
after dozens of bakes. CrystalLuv
...I'm not clear that it holds its sharpness,
and whether it can sustain repeated sustained bakings.caneguru
SILICONE
PUTTY from MicroMark (rose pink)
5
min set up. This is an excellent brand. Kathndolls
....fairly
cheap ($27.50 per lb +s/h?). It is strong and produces a
mold with wonderful detail. lizzylayd
http://www.micromark.com/casting.html
...maybe not as strong as some others
though?
BELICOLD from Rio Grande (very,
very light blue?)
...suggested by Donna Kato...Actually I
was asking her where to buy Elasticlay for molds and that is when she suggested
the Beli Cold. Lavender Lady . . .http://www.riogrande.com/pmc/701-033.htm
..... I learned about Belicold in a PMC class and really like it. You do
not have to purchase the kit that has the forms. The package that has a
jar of the two parts is about $30.00. Jan S.
....may be a little
finicky if the ratios aren't exact (but true
for most, right?). . . .
Try Knead-a-Mold
or Exaflex , two silicone based putties, at $40 to $50 dollars.
....Knead-a-mold
is the softer of the two and takes about 3 hours to set after blending
the two part compound together, but there's only about 15 minutes working time.
...If you're casting with liquid resins, the shore hardness doesn't need to
be too great if the mold walls are thick enough, but you'll need universal
mold release, available fromSynair, the company that makes Knead-a-mold. Katherine
Dewey
Exaflex (dental
putty, silicone based) : 2-pt impression material, type O ultra high viscosity;
....Exaflex sets in 15 minutes with about 5 minutes working time
and is the firmer of the two with a greater shore hardness;
... takes incredibly
detailed impressions; $60-100/gm; Patterson Dental Supply 301 210-1050
#138301, 07 326-210): I only made a small dent in the jar, the two jars are three
inches in diameter and three and a half inches high. Seems as if a whole guild
meeting could make 4x6" plates on a #4 thickness. Lindly H (Nan Roche
showed her)
I like the putty MicroMark sells and the putty Linda Bernstein sells as well. Both have a high shore rating and are a bit firmer . . . Katherine Dewey (written before Puffinalia & Alley Goop? came out)
MISC. PHOTOS of molds and casts:
Kathy
Davis' dragon molds with casts attached around slender glass
candlesticks (black clay with bronze Pearl Ex) .. kathndolls
http://www.picturetrail.com/gallery/view?p=999&gid=2971316&uid=487483
other uses & info for silicone molding materials
Try
making your own rubber stamps ...Linda
.....they
make great "stamps" to use with inks, especially with molds made from a
cut glass vases, etc. jjoan
....I dye silk, and like to use stamps
to accent them, but I don't want to use commercial stamps... so I'm going
to design and make my own. Tess
...."resin"
texture molds for impressing clay leaves http://thaiartdecor.hypermart.net/tools-flowerth/index.html
(gone)
I've used them to make safety covers for the tips of my carving tools..... (in other words, I take a small blob of MM and form it over the ends of my Dockyard tools, for example.... when it is set, it allows me to keep the tips covered when not in use. Linda G. (Miracle Mold)
lesson
on making a mold with several coats of silicone
rubber over a rock... then later filling with a
shell of plasteras a mold
http://www.hirstarts.com/tips7/tips7.html
Graphi's
site for molding with latex rubber or silicone-based rubber
(...and many other molding materials) etc.
http://www.mouldmaking.freeserve.co.uk/indexlinks.html
hirstart's
lesson on making casts with plaster (from silicone
or other molds)
http://www.hirstarts.com/casting/casting.html
Other Molding Materials (plaster, latex... misc)
(for making your own flexible molds with hot glue, or with Elmer's Stix All glue, see above in "Hot Glue & Glues")
....those
with latex allergies
should not use this material
liquid latex mold compounds--
paint layers onto anything --and undercuts won't matter because
the finished mold is flexible.
.... so if you had an item, or an item made
out of polymer clay, you could paint enough layers of latex until you had a rubbery
mold that would hold itself up and together. hmmm.. maybe if you paint the whole
thing laying flat, and then slit it open around the top-- then you could hold
the edges open and pour into it\
...you can get liquid latex mold compound
at craft stores right next to the resins, or online. chica grande
mas bonita
May not give quite as detailed an impression as silicone molding materials?
I
have used several of those thin liquid mold builders . .often one must put a layer
of gauze on the item and build up from there
....also some of the instructions
say that for for more rigid molds, to use a plaster cast over them ("mother
mold" concept?). Jeanne R.
for more info on
using liquid "latex
rubber" (such as Mold Builder), see
Textures >
Making Your Own...especially for making
flat "texture plates" with this material to then use with
clay
....liquid latex rubber can also be used to make "glove"-type
molds (from 3-D objects)
Tap
Plastic's video lessons on using various types of molding materials
(latex, etc.) to make molds
http://www.youtube.com/profile_videos?user=tapplastics
Graphi's
site for molding with latex rubber or silicone-based rubber
(...and many other molding materials) etc.
http://www.mouldmaking.freeserve.co.uk/indexlinks.html
Another
fun website for that sort of thing is at http://www.monstermakers.com
http://www.monstermakers.com/howto.html
(latex rubber masks... over an "oil-based clay" model)
hirstart's
lesson on making casts with plaster (from silicone or
other molds)
http://www.hirstarts.com/casting/casting.html
lots
of good info about molding and casting with various materials
http://www.polytek.com/catalog/catalog.pdf
....for
resins--sealers, Molding/Casting,
see casting groups below, in Groups
alginate/alginate
based compounds (semi-flexible ....molds last
only a few days?):
....Alginate
is a wonderful material. As an ex-dental assistant I MUST warn you of a
few facts:
1) It MUST be mixed thoroughly. Don't leave lumps. It should not
be runny when finally mixed.
2) The temperature of the water is critical.
The
warmer the water the faster the set up time. And I mean it can set up
before you finished mixing!
3) Use a rubber mixing bowel and a plastic wide
spatula.
4) Clean off the bowel and spatula as soon as possible. Many people
will tell you that it is ok to let it set up and then peel it all off, but you
will probably have to use scotch brite to get it all off and that will scratch
the bowel. I used to teach dental assisting and after 21 years of experience it
is better not to be lazy. Have someone help you while you do this. Use a small
plastic container to put your alginate in and then "lay your ear" into it itll
it sets up.
5) Clean excess off your skin as quickly as possible. Around ears
we have fine hairs that will harden up along with the alginate and it will be
very uncomfortable to get off!
6) The biggest problem with alginate is air
bubbles, so mix well and place your ear into it slowly to allow for the
air bubbles to escape.
7) Yes! I have done this before! Good luck! Robin R.
....Depends
on how much of your body you want cast, and in how much detail. Face
casts are usually made using prosthetic grade algenate, a substance
made from seaweed, which picks up everything down to zits and the fine lines that
texture your skin. Larger areas that don't need such fine detail can be cast using
plaster bandages made for this purpose.. . . . Whatever you do, don't use plaster
(directly) on your skin, it can cause burns.
....Check your library for make-up
books. "Techniques of 3-D Makeup" will tell you all you need to know about
casting faces, ears, hands, etc.
....Also check out www.fxsupply.com
and www.monstermakers.com.
The former has a section about making tummy casts during pregnancy which might
give you more information. Bethany
......Alginate. FX supply houses carry it in bulk and
it's cheaper than dental alginate. It sets up quickly, doesn't heat up
the way plaster does and is more comfortable during the mold process. . . . Katherine
Dewey
....see
also latex mold sheets below, under Stamps, for this use
....see
more on Texture Sheets in general in Stamping
and/or in Textures
Plaster of Paris
. . .(not flexible)
.... when I want a very detailed mold for small
shapes, such as buttons and jewelry, I make it from plaster
....I
also use for molding polymer containers
ADVANTAGES
... quick
....easy to clean-up ...cheap
...can be baked with
the clay still in it without worrying about not having enough release on
it.
...needs no release when using polymer clay piece in it.
Jacqueline
......(but problems when removing from objects
from objects used to make the mold itself ...see below in RELEASES)
DISADVANTAGES
...
no flexibility so if you have undercuts in the thing you are making a mold
of, forget it.
... It's pretty easy, although it can be somewhat messy.
...precaution ...make sure the mold has even thickness sides around
the mold cavity. ...not for safety, but rather for preservation. If the sides
are different, the mold may crack and you will have
to make another one. :-(. Jacqueline
RELEASES
As I mentioned, releases
are not needed for polymer clay, but they are necessary for the objects
to be used as models for molds.
... I'm not sure about Armor All,
but it would probably work.
...The traditional way to coat things that are
going to be molded is liquid mold soap, about three coats, each drying
between. This is not just your average dishwashing lotion. It's available from
clay suppliers, and it's not expensive. Buff between each coat so no brush
marks show.
...Spray silica mold release is another good release.
It's arount $15 for a can. Any place that has materials for clay or sculpture
will carry this too. I've gotten this in a plastics supply place, and at an art
supply store.
...You can also use Vaseline, but it's not good
for things with fine detail because the vaseline
will fill up the detail. Jacqueline
........I
use vaseline petroleum jelly instead (I have used both)... dabbing vaseline
on the sculpt, box mold sides, and plaster, 1st half of 2 piece mold, and making
sure you brush out and minimize its final amount before plastering
begins. Dane
...Oil
is also ok, but like the vaseline, watch out for pooling
in the detail areas.
.......I've also used spray oils, like
Pam, etc. (not the sprays with butter tho'); brand name isn't important
:-) Jacqueline
.......If
you use Pam, make darn
sure you sop up the extra Pam residue or you
will have an unstable finished plaster mold surface that will prematurely
disintegrate from the foreign oil matter in the plaster. Dane
DRYING:
Finished plaster mold pieces must be very throughly
dried before attempting any
slip casting. The weight of a fully dried plaster mold decreases substantially
from its freshly created counterpart. Drying plaster molds should never be accelerated
by heat guns or placing inside an oven. The water
contained in the wet plaster (which boils at 212%) will expand and BLOW UP your
mold! Plaster pieces can be placed near a heat or sunny source after 3 or 4
hours (I reccomend over night). If you have a wood stove that is an excellent
place to place plaster molds near by, but not on, until the second or 3rd day
of drying.... You can also redry the used plaster molds the
same way after two to four slip casts per molding session. Of course mold release
agents should not be used when slip pouring clay into the finished plaster mold.
The Dane
.....lesson
on using only a thin layer of silicone sealant with a plaster-of-Paris
backing for an inexpensive mold.
http://members.tripod.com/RBWindle/plaster.htm
...lesson
on making a mold with several coats of silicone
rubber over a rock... then later filling with a
shell of plasteras a mold
http://www.hirstarts.com/tips7/tips7.html
....
If you try to use the plaster molds made for porcelain
slip as they are for polymer clay, the clay can
stick like mad (although it doesn't always, somehow!). However, if you
seal them with a spray varnish or a mould release, they work fine. I have a set
of little owls, intended for moulding slip to make ceramic buttons, which I use
with PC with no trouble. Crafty Owl.
...hirstart's
lesson on casting plaster objects
from silicone molds or other molds
http://www.hirstarts.com/casting/casting.html
gypsum,
drywall . . . sheets of drywall can be carved with linoleum cutters
etc., to create shallow carvings
...could also be used as molds for clay?
(...or printing plates?)
...wet and remove thick paper from one side of drywall
... keeping gypsum damp, carve with linoleum tools or anything else that works
http://www.art-rageous.net/GravestoneCarving.html
(for info on making your own mask on your face with Plaster gauze, etc., see Heads/Masks --Masks)
I also say a mention of someone using papier mache to create a form, then cut it in half to use as an armature and mold for anything. Lynda B.
Rio
Grande has 2 mold materials that shrink intentionally .. Linda G.
...(the
orig. is called) called Reducit http://www.pinkhouse.com/Reducit.html
......Pinkhouse has Reducit and technical information on line; I think it's
originally their product. I know it's cheaper at Pinkhouse than at Rio Grande.
Katherine ... it may leave a rough surface though.
...their Reducit II
takes several weeks to dry (and is a polyurethane product) but will dry smooth-surface
re-meltable Vinyl materials ??
Protoplast
low temp thermoplastic pellets and sheets have been used
in the medical field for years to make splints. This stuff is great. It makes
the most exact molds I have ever seen. It is easily softened in
hot water, quickly molds and hardens and it can be used within minutes.
The best part is, if you no longer want the mold, drop it back in hot water and
reuse it. You can order this stuff directly from the company. Their website
is
http://www.wfr-aquaplast.com
... It is available in pellets (in 1 or 3 lb. containers) or in sheets. Dorothy
...PolymerClayExpress
has it too: http://www.polymerclayexpress.com/tools3.html
(5 oz, $8.00)
...I just happened to go
by QVC this afternoon and saw something called Mold Magic...Looks like it would
work for just about anything. It's white pellets that you drop into hot
water till they turn to a clear gel-like substance. Then they pressed it into
a sheet and just molded it over all kinds of things. Jean/PA
It made
a very flexible?? mold and they removed it from what appeared to be a hardened
piece of clay, though I can't imagine that it would be bakeable. And it's reusable
-- when you've used a mold as much as you want, you just drop it back into hot
water and start over! Sunni/Colleen
... It's basically the same stuff
as Friendly Plastic pellets http://www.amaco.com/jsps/amacohome.jsp
(and Protoplast pellets) is. The sheets come in colors too :) Jan
@->---
(but used for theatrical purposes?) BUT would the Friendly Plastic
pellets be really flexible, soft?
'GELFLEX'
(remeltable and remouldable PVC) ... http://www.geocities.com/fredaldous/SF98remeltablerubber.html
...its melting temperature of it is pretty near polyclay (120-130C) which
would cause trouble (for some things)
...(great for moulds though - and will
melt in the microwave) Alan V.
....this is interesting stuff. Is it
actually meltable rubber? And is the correct price 10.20 pounds for 1 kilo?
.......Since it's reusable, and meltable in the microwave, it might be a good
thing for us to make temporary molds with? (I guess the items to be molded
have to withstand 250-275 degrees F though, so some things wouldn't work).....
Do you think it would make a finely detailed cast from a polymer mold, so it could
be used as is or used to create another mold? Just trying to get a handle on what
we might want to use it for... Diane B.
Gelflex
i s a remeltable PVC whose composition (plasticisers, colourants etc etc)
allow it to be used over and over again
...moulds made from the stuff are
flexible enough to be bent out of the way of smaller 'undercuttings' in the
material being moulded, but larger flexations aren't possible wihout mould damage
...The
formulation would be ideal for use with cooler setting materials (less than say
100C) such as epoxys, polyacrylates - even low melt metal alloys like Wood's metal.
...
I think it could be great for making short term use moulds for polyclay
items, but I'd be inclined to use a releasing agent - just in case!
...There's
no reason to suspect that the material would be as well conforming as Silicone
moulding products...Alan
other reusable materials?
...If
you used hot glue for your mold, you could remelt it in one of those little
heated containers sold for doing that, or you could just heat in another way.
...For certain items, you things like wax (well-worked paraffin, beeswax,
etc.), might be stiff enough... or silly putty... aluminum foil...
wire mesh covered with well powdered clay, etc.
...Raw clay
itself (particularly firm clay) could be used in some circumstances by coating
it heavily with cornstarch or maybe a metallic powder, or with ArmorAll
or Kato Repel Gel or a CA debonder??
....there is also a way of making
a mold for liquid clay with a mound of packed flour...similar to
a technique used by some chocolatiers (see Liquid Clay
> Using With Molds, for details)
I carry kneabable erasers in my purse - once you work them a little they take texture pretty well. They are a little stiffer than polymer clay, but, don't leave a residue or hurt anything. You can find them in the art store wherever drawing tools are sold. To clean the eraser you just knead it like dough & all the graphite disappears, (or whatever is on it). ... I gave a tip on having some with me at the hardware store to see which knobs I wanted for polymer texture tools. Meredith
plastic
fishing worms... top of a double boiler, pouring it into a mold
and letting it cool until it was solid. The casting was as soft and squiggly
as the original worm.
....plastic army men
work the same way (but would cool hard) ...as a kid I used to melt
them all the time. Seth
(see more on melting or softening plastics in Misc. > Melting or Softening Plastics)
air-dry clays .... (for size reduction of molds, items)
Since
air-dry clays shrink while drying (from very little up to
50% depending on brand/type and amount of water in the raw mixture), they
could be used to make smaller versions of molds, and/or casts
from molds, especially.
....also, if air-dry clays are used to make both
the mold made from an item and also the cast later made in that
mold, the size reduction would be additive
......could then
make a permanent polymer clay mold of that air-dry clay cast, and have a permanent
smaller mold of the original item
...it would usually be best to use an
air-dry clay that had a fairly smooth surface texture (e.g....bread clay
with glycerin, purchased CreativePaperclay or Makins, some of the cornstarch
clays, etc.)
...could select an air-dry clay that shrinks the propotion that's wanted....or do consecutive moldings/castings to end up with the desired size
Rio Grande has 2 mold materials that
shrink intentionally .. Linda G.
...(the orig. is called) called Reducit
http://www.pinkhouse.com/Reducit.html
......Pinkhouse has Reducit and technical information on line; I think it's
originally their product. I know it's cheaper at Pinkhouse than at Rio Grande.
Katherine ... it may leave a rough surface though.
...their Reducit II
takes several weeks to dry (and is a polyurethane product) but will dry smooth-surface
Groups.. More Suppliers, etc.
The Compleat
Sculptor, Inc., 515 West 24th Street, New York,
NY 10021, 212) 243-6074
This place is great for sculpting
supplies. They have carving tools, sculpting tools, shellac, moldmaking
products, casting products, and marble, alabaster and stone (which can be
used for bases instead of corian). They have a nice looking catalog. http://www.sculpt.com/
Industrial
Polymers Incorporated . . many molding compounds (spray, etc.), and
more
....Speedliner, Rigid Casting Urethanes, Semi-Rigid Casting Urethanes,
Transparent Casting Compounds, Molding Compounds, Brush-on Molding Gels, Coatings
& Sealants, StyroSpray, Hard Coatings, Primers, Expanding Urethanes, Clear Elegance
(fake water)
http://www.industrialpolymers.com/
Cementex Latex Corp. , 121 Varick Street , New
York, NY 10013 , 1-800-782-9056
A good source for anyone who
works in latex for molding and/or casting and related products.
They include a really good manual with instructions with your first order.
Alumilite Corporation , 225 Parsons Street , Kalamazoo, Michigan
49007, (616) 342-1259
(resin casting) Ask them to send you a
catalogue of all their products. This is the stuff June Goodnow uses. (or see
Molds > Resins)
(?) Productions,
P. O. Box 996, Hampstead, NC 28443, I understand "they carry
Dow Corning RTV Silicone rubber for making molds, casting resin & all supplies
to make and cast rubber molds. They've got a great how-to book. Write for
price list. "
TSBC MOLDS
Goldenwest Manurfacturing, California
has what you need. I am a mold-maker\model maker\sculptor. I work with many different
kinds of resin. Phone # 901-751-3664 ask for Shayne.
Polyresin? Try
http://www.fibreglast.com/ They have
clear polyester casting resin by the quart and by the gallon. Get their
catalog.
Synair Corporation, 2003 Amnicola Highway, P.O. Box 5269, Chattanooga,
Tennessee 37406, 1 800 251-7642, 1 615-698 8801, Fax 1 615 624 0321
This company
supplies bulk molding materials and casting resins. They recently
started offering the materials in 1 quart cans (a half gallon kit). Their product
line offers many different kinds of molding materials and different hardness and
colors of resins. Lysle
Eberhard Faber (Helmut W. Gerber), EFA
Strasse 1, Neumarkt, D92318, Germany, 49
9181430231, 49 9181439221 fax. http://www.eberhardfaber.com/
??
fimo,fimo-soft, efaplast, holzy, ceramofix
ETI/ Environmental
Technology, South Bay Depot Rd., Fields Landing, Ca.
95537, 800=368-9323, 707 443-7962 fax
Envirotex,
ultra glo, fiber Lok, Castin craft, mold builder, clock Coat
By making a mold *of your mold*, you can create the same image that you began with. This is very helpful in certain cases, i.e., if you want to create raised lettering (or any image) from stamps, or an impressed image from an originally raised one, etc. This can be done with thick clay or thin as in a sheet of clay.
Tyra's
lesson on making a reverse mold of a stamp to make "stained
glass" with TLS, oil paint and powders, on baked white clay
http://netnet.net/~cloud9/
(look under Mini Tutorials, then
click on Stained Glass Polymer Clay Sailboat)
Heather's lesson on simple mold
made from puffy heart charm; then clay added for duplicating
http://www.polymerclayhaven.com/lessons/molds.htm
my simple molds made by kids
(website gone)
Melnik's molds and some casts
(website
gone)
pendants made with molds (& powders, etc.) by kids
(website gone)
Jewel's lesson on using
a mold
http://www.zigzag.co.nz/instructions.html
Heather R's lesson
on making & using molds
http://www.polymerclayhaven.com/lessons/molds.htm
Toika's
article (lesson) in PCPolyzine on making molds (using 2-part silicone,
but many tips there & photos)
http://www.pcpolyzine.com/july2001/molds.html
Nora-Jean's visual lessons on molding (starfish, etc., abalone &
shell, others)
(website gone) (website
gone)
http://www.pcpolyzine.com/july2001/molds.html
Jeanne's FAQ on
molding
http://www.jaedworks.com/clayspot/polyclay-faq/molding.html
Tory Hughes' video
on molds/stamps
http://www.gameplanvideo.com/videos.htm
lesson:
I first sculpt a master (of my heart) - an absolutely perfect
shape. It might take me a couple of hours to sculpt a perfect heart.... I cure
it in the usual way, then meticulously sand it.
... I make my molds out of
polymer clay - the firmer the better. ...I use Fimo.
...
I usually use half of a small brick. I like to make my molds in a metal jar
lid, or something that will confine the clay and keep it from spreading when
the master is pressed into it. For purposes of strength, be sure that there is
at least 1/4 inch of space between the edge of the master and
the rim of the jar lid.
... Roll the conditioned clay
for the mold into a smooth ball. Now apply a generous dusting
of talcum powder to the entire ball. Press it gently and evenly
into the jar lid, but don't worry about getting it to spread to the edges of the
lid at this point.
.... Now center your master
on the powdered surface, and gently and evenly press the master into the clay.
....Smooth around the edges to make them conform to the
edge of the master. Don't press too deeply, because you will end up with a very
thin bottom that could break through the first time you use the mold!
....
When everything is smooth and even, give a good hard puff of breath
between the edge of the master and the mold. This will usually
cause the master to release, without distorting the mold.
.... Now, this
is important - bake the mold in the jar lid. You wouldn't want to risk
distorting the mold by trying to remove it. Cure at the usual temperature, for
a good half hour.
... When done, plunge into cold water
to cool.
...unscrew the mold from the
jar lid. If it's stuck, so what? Leave it there!
... Then with a piece
of 600-grit sandpaper wrapped around your index finger... sand
the inside surface of the mold. Voila! Elissa
lessons
on making molds from polymer clay originals. That's what these guys do.
They both have web sites
--Adrian
S. Bruce's site has several pages on sculpting and mold making. Start at Sculpting
and Figures How-To(lesson) by Adrian S. Bruce http://www.artandtechnology.com.au/moldcast/moldcast.html
--Loopy's Sculptures
Gallery - Sculpting and molds lesson http://dreams.2launch.com/brak/
Vesta
Abel's lesson on impressing Veggie Leather with a stamp to create
a sheet mold; she covers and presses in a sheet of clay, removes it (refrigeration
might help stiffen it?), (then highlights with copper, verdigris, Decor-It inks
on a make-up sponge) and bakes for a pendant
http://www.hgtv.com/HGTV/project/0,1158,CRHO_project_27250,00.html
(Making fabric stiffer in order to make a mold from it) Or even a piece of cross stitch fabric might work...might could dip a piece in future (Alene's Stiffener or a strong sugar-water or white-glue-water solution) and stiffen that baby right up to fit your needs!! Michele/luny
. . what about using Royal Icing to pipe
a shape, then make a mold from it for future use with the clay? Diane B.
...I
have thought a lot about using royal icing to make hollow forms. I remember
it being very stiff when I worked with it. Pipeable, but very stiff. Anyway, the
idea is is pipe and/or sculpt the icing into the shape you want. Then cover w/clay,
bake, and then wash the icing out. . . . . similar to using cornstarch stuff,
except it would probably take more effort to wash it away.
...I think it would
work. We use it for our display wedding cakes. It's pretty hard to break unless
you really try. Make sure to use the recipie with cream of tartar. There
are several different recipies out there, but the ones without cream of tartar
aren't as strong.
(foil armature to save clay?)...What if the artist put a double slab of clay into the mold, then filled it with crumpled foil wrapped in scrap clay? Kim K.
2 -PIECE molds ...& two-sided beads,etc.
using
SILICONE PUTTIES for molds:
advantages: silicone molds will usually
result in a more detailed casting than polymer clay molds
silicone
molds can be baked at our curing temps, so raw clay can be baked
while inside the molds....(no need to remove it)
...liquid clays
can also be baked in silicone molds
(read more on all brands
of silicone putties and their characteristics & quirks above
in Silicone Putties)
(no Repel Gel)
...I just form a ball of Puffinalia's Miracle Mold all around the
whole item I'm molding ... and let it set up
... then cut
the mold in half with a blade
.......since I'm usually molding
beads, I've also put a wire or a skewer through the bead & molded
that way, which gives me a good registration mark. Jenn
...or could
mark with blade or pen, etc., across the two the parts for registation lines?
(no
Repel Gel)...I don't use a release of any sort when I use a silicone putty
...I
just let the first half of the mold cure (completely?)
...then
make the second half of the mold and press it on (the two-part silicone
mold making material doesn't usually stick to itself). Elizabeth
.......whether
the two parts will stick to themselves must be according to how much of
that oily substance is in one of the parts ...(with
some silicone putties, I have been able at times to add additional molding
material to the actual cured mold, but with some others I have not been
able to get it to stick at all)
.......I'll try some more experiments, and
also see if Repel Gel helps with the different brands. Jeanne
Kathy
W's two-sided beads made with Miracle Mold (exact technique not
given)
http://home.comcast.net/~puffinalia/commentspagepics/kweinberg.html
using
POURABLE SILICONE RTV mold making compound
....lesson
on using Micromark's "One-to-One/Rapid" mold making rubber....use equal
parts of A and B... this rubber also has a 4 hour cure time
http://www.hirstarts.com/moldmake/moldmaking.html#torch
using
POLYMER CLAY for molds
...polymer clays can also be used to make 2-part
molds, but either paint with Repel Gel, or heavily dust every
single surface with cornstarch, to be able to separate all the
parts later
...Sunni's lesson on making a two-piece mold from
polymer clay... with random lines impressed for registration...
http://sunnisan.com/crafts/doublemold.html
....this
is my way: Make two blocks of clay. Press a chess piece (or whatever you want
to make a mold of) halfway into the top of one block, and make three or four small
holes on the top of the clay block around the piece for registration.
Bake, allow to cool. Press the second block down onto the first. Bake, allow to
cool. Take apart. Now you've got a mold in two pieces. The small holes in the
first piece should match up with small pegs on the second, which
will make it easier to line the two halves of the mold up when you use it. Avram
I got inspired to use my new Molding Mats (by Clear Snap's ...rubber sheets of images and textures...10 available at http://www.polymerclayexpress.com/images/cboxmat02.jpg), so I made these doubled-sided, textured, disk beads . I (made a mold by) rolled balls of scrap clay, powdered them and pressed them onto the mold mat with a 3" square piece of plexiglass to keep them flat. ...To make the beads, I took little balls of clay covered them with Pearl-Ex, placed a ball on one of the texture disks and placed a second over the top of the ball of clay and pressed down until the ball was flattened a little bit. That's the hardest part, making sure not to flatten them too much. I put the holes in before I baked the beads. Tonja
To make a 3-D
mold (no flat side) with Super Elasticlay (or Sculpey's Superflex?),
condition the clay, make a slab big enough to push the figure half-way into
with some cushion to spare, roll the slab flat (you can use a brayer or straight
sided drinking glass or other roller). Dust the original with talcum powder lightly
but thoroughly, and press the figure half way into the clay. (If you want you
can add a registration mark first -- like, for example, add a "bead"
of elasticlay to the flat surface of the mold on diagonal corners, making
sure it's attached well. Later these will help make sure your mold halves are
lined up right.)
OK, you now have half
the mold baked. Make a second slab of elasticlay with a flat surface. Dust
the original with talcum powder. Dust the baked mold and the surface of the new
slab with talcum powder. Put the original back into the baked half of the
mold, precisely as originally positioned. Very carefully position the new raw
slab onto the baked mold half and the original. Press down, trying to make sure
the clay forms tightly around the original, without stretching or moving. Flip
the mold over so the baked part is on top, and remove it carefully, lifting straight
up so you don't disrupt the raw clay. Let the original figure stay in the raw
clay half of the mold until you have removed the baked half and inspected the
new half witht he figure in position. The beads from the registration marks
on the other half of the mold should make little holes on this half. Bake.
Another useful thing is the pasta machine .... it is critical for my two part molds because it insures that I am alway starting with the same thickness, and therefore the molded parts come out uniform each time. (If you just use an unmeasured wad of clay, there will either be too much or too little clay for a exact fill.) So I start with a sheet of about the same thickness as the (item to be molded...could be several pasta machine layers. Lysle
Also, when I make my molds (I make an) edge ridge which acts as a sheer to cut into the sheets, leaving space outside the mold location for the excess clay to squeeze into. Lysle
making a double-sided button (lesson):Claude's lesson
on making a similar mold for a double-sided bead... he uses a round
textured silver bead, impresses it into a wad of powdered clay, cuts a flat
shelf in the excess clay around the bead at its equator (and makes a hole),
then gently removes the mold and bakes it; he makes two of these raw
clay halves, then joins them; he smooths the join with the side of
a tip of a paring knife.
http://www.chez.com/creabijoux/interieur/ATELIER/9_lecon.htm
...Mitchells'
lesson ... they make their molds with a leather stamp, then make two -sided
beads
http://www.hgtv.com/hgtv/cr_clay_jewelry/article/0,1789,HGTV_3238_1389622,00.html
(or
use a silicone molding material if you have it, and/or Repel Gel
for doubled sided items...see above in Silicone Putties)
(for
more on two-sided beads, see Beads/Double-Sided
& "LUMPY" beads)
( to save clay?)... what if the artist put a double slab of clay into the mold, then filled it with crumpled alum. foil wrapped in scrap clay? Kim K
Much of the this whole molds category is interrelated with stamps. A stamp is usually flattish and something which has outie-type lines delineating the subject, much like drawing with a pen; a mold usually has upraised sides and the delineating lines are indented; but they can overlap a lot!
One of the texture type tools I've been planning to do is to take my textured buttons and create a double ended tool with the positive image on one end and the negative on the other (each end being mushroom shaped –the whole thing being hourglass shaped). Helen
Small items are good to put on a teardrop shaped piece of clay. You press the FAT end into the piece, then you have the other end as the handle which makes it easy to use. Once you have made and used some of these molds, you'll see what sizes and shapes work best for you. Dotty
Flat
Molds, made from stamps
(see more in Stamping
and Texturing)
Patti's lesson on making a flat mold from a stamp,
which can be run through the pasta machine with clay (she made a holiday gift
tag with reversed lettering)
http://www.polymerclayhaven.com/lessons/gifttag.htm
(gone)
(KA Dewey) . . . lesson: make
an all purpose feather or leaf stamp, etc. (carved/impressed/thin)
mold.
...Begin by rolling a sheet
of clay (I use "leached Premo) at the 1/8th inch setting. Cut the sheet
to form a rectangle 2 inches by five inces and bake. After it's cool, rub Diluent
(or liquid clay) onto the surface and top with a another sheet of clay (I use
the number 4 or 5 setting)
.... Press tool gently to create a groove. With
the slightlest of back and forth motion, make this groove a little bit wider at
one end.and use a fine needle tool to draw a series of parallel lines on each
side of the central vein.
... To use it, cut a feather shape from a sheet of
clay and taper the edges with your fingers. Lay your feather blank on the mold
(don't forget mold release!) so that the tip of the feather is on the tip of mold
and the central vein is aligned according to feather type.
(for a texture sheet) I used a flat latex mold that I had made by painting Latex Rubber (one company is Woodland Scenics)-- the rubber latex stuff model RR people use, from hobby stores --on a rubber stamp to make a mold, peeled it off (let it cure for awhile). . . .and ran it through the PM with the clay. It didn't stick to the clay at all!!!! No release agent used. After impressing the texture, I did the usual shaving off of texture and smoothing with the PM. . . . .You just paint a few coats (onto your stamp)..., let it dry in between, don't do the coats too thick....My pics are of the mica shift, the rubber stamp and the latex sheet... .Anna
You could branch out a bit and show them how to make "outie" molds from their stamps by brushing a wad of clay with a soft paintbrush dipped in talcum powder or cornstarch, then pressing the stamp into the clay….
Dotty's outie stamp mold used on black clay, highlighted wtih metallic powder (website gone)
(see
Stamping > Basic Techniques, for creating
an upraised clay pattern on a flat sheet of contrasting clay,
using a deep stamp sheet (or smaller stamp?) http://www.hgtv.com/hgtv/cr_clay_other/article/0,1789,HGTV_3239_2932966,00.html
ANTIQUING...STAINING...
HIGHLIGHTING
(with metallic powders,waxes, paints, inks,etc.)
SUMMARY:
Molds (or any textured item created with stamps or texture sheets,
etc) can be "antiqued" by coloring only its crevices,
or highlighted by coloring only its upper parts,
or even stained ("glazed") all over or just in crevices.
...
doing this will bring out the detail, add dimensionality, depth,
complexity and punch (and in the case of antiquing, create an aged
look)
... gives an impressive look with just a simple
technique
...antiquing
is done with paints (oil or acrylic), inks, metallic
or non-metallic powders or waxes, etc.
....... to
create more of a translucent "stain," these
may also be thinned
...highlighting can be done with the same materials,
and will add a metallic or elegant look if using metallics
...staining
is usually done with more translucent (or
thinned) materials or
oils....see Staining just below for much more
Molds can be completely
covered with these materials as well... or they can be
highlighted after complete
coverage by sanding top areas after baking.
(......see
also Paints,
Faux--Ivory, other
Fauxs... and Powders
for highlighting molded items
with Pearl -Ex and other metallic powders)
....oil
paint gives the clay a more glossy look .... acrylic paint gives
a more matte look. Dotty in CA
An
option after baking your molded object is to "antique" it....this
will make the object look more dimensional by leaving another color in the crevices.
....
the most common material we use for antiquing is probably dark brown
acrylic paint...though other materials can certainly be used
........"Burnt
Umber" acrylic tube paint is the most often used brown. . .but
Marilyn uses a warm brown by Ceramcoat called Autumn Brown)... and
Raw Sienna is popular when a reddish tone is wanted
lesson:
After baking, rub an acrylic paint (preferably tube-type) all over the piece,
and especially into the crevices.....after the paint has dried (somewhat or completely,
depending on the effect you want)...then wipe away the excess paint from the upper
areas using several thicknesses of folded fabric or paper towels to make a flat
pad( so that there is less tendency for the cloth to go down into the crevices)...make
sure the cloth isn't too wet because too much water
will remove too much paint.)
...if you have most of your crevices running in
a particular direction, wipe perpendicularly or diagonally to those lines
--across, rather than along, them
...stop wiping when you have the effect you
want ....or reapply paint for stronger effect
....can
rebake to set the paint even more (200-250 degrees for 5-10 min)
.... (but
is not necessary)
.... I've used
acrylics for years and find them to be quite permanent.... after drying,
I re-bake the piece for 10 min or so at about 200 degrees
......these
won't stand up to being cleaned with household cleaners like 409
or Fantastik, but for normal handling and
even cleaning with a damp cloth, acrylics are fine. Irene
I use my fingers to rub the paint in, which seems to work better than a paintbrush even tho I had tried to make sure I was pushing the paint in with the brush. It looks more natural that way....DeB
Antiquing can also be done over metallic powders or leaf, crackled finishes, in different areas or different colors used sequentially, etc.
I find that I almost always have to "play
with" my antiquing a bit when using paint
.....sometimes thicker paint
works best, sometimes diluted works best.
.... I'll usually just have
my tube of paint and some paper towels at the sink so that I can rub on the paint,
wipe... then re-apply or thin the paint with a wetted paper towel, or run a little
water over the piece at will. Ulrike
If I find that there aren't enough crevices or deep enough ones, I may take an Xacto blade or a pin tool to the surface of the piece to create more lines, pits, and crevices for the paint to get into. Ulrike
If you want
to clean the paint residue even more from
the raised areas , you can use a touch of soap on your wiping cloth....
I run a damp cloth across a bar of Ivory soap and that seems to help clean up
the slight film that might be left after regular wiping.
...Helen uses a baby
wipe dipped in ArmorAll to remove some antiquing paint from the surface
when it's just beginning to dry.
If you want a shine or sheen on the upper surfaces after antiquing, rub the item with 0000 steel wool after the paint in the crevices is completely dry (using no water?).... then buff with a buffer or cloth.
Desiree's
lesson on antiquing http://desiredcreations.com/howTo_CAivoryHorn.htm
Jenny's
lesson on stamping and antiquing (with various colors)
http://www.pcpolyzine.com/february2001/fragments.html
Sarajane's
mostly-antiqued face molds (plus some highlighting on headwear, etc.)
http://www.polyclay.com/molds.htm
white
(or other light neutral) paint can be very effective when used as an antique
too... it creates an archeological, just-dug-up look
....
(see more on doing that in Faux-Many >
Aged Looks)
Donna Kato's two carved beads antiqued with white
and parchment-colored oil paints
http://web.mac.com/donna_kato/Site/tutecarvedbead.html
(bottom of page)
I once
made some skull rings for my son's classmates by making a mold from a small,
cheapie, plastic skull I found somewhere (might even have been from a bag of Halloween
rings)..... I pressed glow-in-the-dark clay into the mold,
then baked....
...then antiqued some of them with brown acrylic
paint and some with gold acrylic paint. . . .Diane B.
antiquing can also be done with one of the metallic waxes .... e.g. Baroque Art Gilders Paste (which comes in 28 metallic and non_metallic colors) ...rub off of upper areas immediately after application (....see much more on these in Powders > Metallic Waxes)
Sarajane's
molded buttons highlighted with metallic powders
(see Powders for most examples and
info about highlighting)
http://www.polyclay.com/buttons.htm
(top of page)
Sarajane's many molded buttons highlighted black clay...
with (antique?gold powder) http://www.polyclay.com/2button.jpg
Kathy W's examples of highlighted textured clay for beads (gold
powder on black clay)
http://people.delphiforums.com/kkephart/jewelry.htm
Jody
Bishel's mulitple-technique method to get lots of depth &
richness ...... (antiquing + highlighting + sealing)
... after stamping/molding
gold clay... she "antiqued" in crevices with burnt
umber acrylic paint for deeper definition...then highlighted
with gold Pearl Ex in Varathane.... lastly, sev. layers of TLS to
cover all... bake.
http://www.jacquardproducts.com/support/artists/holt/gallery/friends001.htm
stains, glazes
Stains (or "glazes") can be used to completely cover or to
antique (instead of thicker acrylic paints)--especially when a more translucent
look is desired
....straight oil paints (which are naturally thinner
and slide more easily into crevices) stain the whole surface, but also leave a
heavier coating in the crevices
....thinned acrylic paints...
or inks?
....clear liquids such as Future or Varathane or liquid
clay, mixed with powders of all kinds, oil paint, etc.
oil paint gives the clay a more glossy look .... acrylic paint gives a more matte look. Dotty in CA
The trick I find works best is to have it be a thin enough wash---then you can build up layers (apply, wipe, repeat!). Sarajane
I've used oil paints as glazes since they are much more gentle than the acrylic paints ... (on etched clay... or for other antiquing). Louise
Last night I tried adding a layer of a wine-colored acrylic glaze (thinned acrylic paint?) on top of the raw umber antiquing...which when rubbed away, added a warm rosy glow and nice buffed matte effect to the antique look. Ann P.
When I use
clay colors like red, I'll use more black in my stain
mix for it
..... for the lighter clay colors like faux ivory, more translucent
stains are better Sarajane H.
Cre8it's translucent glazes
for sale http://www.dotcalmvillage.net/nowwhatzineaug02/twotieredtile4.html
I
have several stains made with Flecto's Varathane:
--there's "old
dirt" which is Flecto Varathane mixed with black acrylic paint, plus
antique gold PearlEX (...or metallic gold acrylic paint).
--then there are "yellow dirt" and "red dirt" which involve
adding small amounts of yellow or burnt sienna to the Varathane
and black acrylic. Sarajane
You
can also tint liquid clay with mica powders and use it as a sort
of antiquing, dabbing it all over a piece and into the recesses, then wiping
off the excess, and baking it. Dotty
For antiquing plus backfilling sort of applications, I've
used (liquid clay) TLS tinted with oil paint... or I've used a clay-made-mushy-with-Diluent
mixture --although in either case it does have to go back in the oven for curing.
Jules
(....for more on "backfilling," see Carving)
staining effects of varying opacities can also be achieved with one of
the metallic waxes
...e.g., Gilder's Paste (a brand of
metallic wax which comes in 28 metallic and non-metallic colors)
...can be
thinned with paint thinner or mineral spirits, then brushed,
or washed or sprayed onto surfaces (....see much more
on these in Powders > Metallic Waxes)
http://turtlefeathers.com/text/products/baroque.html
Heather R's lesson on using different colors
of clay to fill in a mold (in this case, for a Santa figure)
http://www.sculpey.com/Projects/projects_SantaSled.htm
Heather
R's lesson on using diff. colors to fill in a mold, and placing
the baked molded items onto clay-covered papier mache boxes
http://sculpey.com/Projects/projects_BabyBlocks.htm
Christel's
use of face molds with added details for pin (big hat, scarf, etc.)
http://home.online.no/~raje/Polymer/ethnic/index.html
Sarajane's faces with added details (metallic folded, textured, sheets,
etc.), mostly antiqued with black
http://www.polyclay.com/pendant.htm
Melnik's
face molds used as onlays on top of covered Altoid tins
http://melnik.freeservers.com/atins.html
face-cane
slices themselves can also be used in face molds
....can create
some hilarious results that teeny-boppers would love to buy....! kelk
...Maureen's
face
(actually a face slice made 3-D) atached
to a cloth doll (&) blackboards (on Grapevine
Wreath)...
......use a face cane slice
the appropriate size and color of the doll.... make the cane slice dimensional
if desired (by "sculpting" it "Dimensional Millefiori" http://www.weefolk.com/10_1996.htm
or by using mold?)... put holes into edge of slice. ... bake... sew onto cloth
head
http://www.weefolk.com/ideas.htm#home
(see more in Faces >
Other Methods for Making Faces)
for making lifesize molds of people's faces (see Heads & Masks > Masks)
my
favorite book... "1/12 Scale Character Figures for the Dolls'
House" by James Carrington. My favorite thing is sculpting dolls and
figures, so that's part of why this book ranks so "off the scale" with me. Very
clear lessons for creating dollhouse scale figures with tremendous life and humor
and vitality to them, all presented with clarity and thorough explanations.
New material, here, including how to make molds for your basic figures,
so that you don't have to start from scratch every time you want to make a doll.
Elizabeth
During the swap 'faces with attitude' Roberta Schwartz did one. I am not sure but I think she pushed a sheet with a transfer into a mold.
long
ropes of clay (of various shapes) can be "molded"
with PVC pipe or other materials which are cut in half lengthwise
to form troughs
...any shapes
of bead roller (or tubing/cylinders) (see more in Beads
>Rollers>Trough> Make your own) could work for long shapes as well, and
may even be a supplement to the clay gun for even though
larger, "extrusions"
......fill
your trough with clay, trim, and carefullly remove.
......or if
you have a decorative layer you want to use (cane slice sheet, transfer,
e.g.), do as Patty did and lay that #1 sheet in first, face down, and an
acrylic rod or cornstarched dowel to press it in well; then trim
overhang; lay in a narrower strips of clay until full, pressing down;
remove carefully and use
...(see details on making a hidden-channels, cuff
or tile bracelet (with a transfer) using this technique
in Jewelry > Bracelets)
Can you make some kind of mold of your wrist to use as a form for measuring or shaping?? (see Jewelry > Bracelets for various ways)
I made the bugs wings (for this necklace) with clay in a mold made from SUPER ELASTICLAY, paint with LUMIERE paints and refinishing with Pearlex green/violet/brown. No there aren`t anything inside.They look likes false nails (very fragile to be worn as a necklace even been made of PREMO). All the pieces took me 3 months of work. I made 50 wings. Paulo Guimaraes
Marty's molded faux ivory face on pendant
http://hometown.aol.com/Martywoos/index.html
(bottom of page)
Judi
Maddigan’s Push Molds and
various lessons on using molded items to embellish other items,
etc.
http://www.angelslanding.com/pushmolds/ideas.htm
*Sculpey's
lesson on using colored clays in molds to simulate painting
(click on Snowman Votive)
http://www.sculpey.com/Projects/projects_SnowmanHolidayVotive.htm
Maureen's
lesson on angel ornament (high-relief) with wings
and dangling feet under skirt, using her pattern shapes-- & head and wings
mold
http://www.weefolk.com/12_1996.htm
I
recently carved some simple pictorial and abstract designs
with linoleum cutters into baked clay and into plastic erasers, then pressed
thin-layered colored clay stacks (like what you'd use for mokume gane)
in contrasting colors into the carvings, then sliced the raised
areas off. Looked nice -- sort of a variant on sgrafitto -- Georgia
(see also Mica for "ghost impressions"
made with stamps in mica clays this way, in reverse)
Marcia
B's lesson on using a mold to create a painted onlay for an Altoid Box
(or terra cotta pot, xmas ornament, etc.)
http://www.rubberart.com/classes/class21_claybox.html
liquid clays can be baked in some kinds of molds (see Liquid Clays > Molds)
edible
candy doughs that look and work like polymer clay, can be made (simple)
or purchased can be molded, as well as sculpted, or caned... then eaten if desired
[for
all details, see Kids-Beginners > More
(Various)]
HydroSpan
can be used to enlarge any 3-D object (a sculpt, mold, pattern,
real world object, etc.) you can create a mold for; it can be increased
in size (repeatedly, if you wish) ... two-part urethane polymer which will
expand 60% (or x1.6) after soaking in water, so ... working life
=10 min, full cure = 24 hr . . . feels dry to the touch even if cut... "simply
make silicone (or polymer clay?) molds from small objects and directly enlarge
them. . .
....a flexible urethane polymer, which over time absorbs individual
molecules of water deep into itself until it is completely saturated....as water
is absorbed the polymer matrix stretches to accommodate the in coming water ...
Hardness of cured HydroSpan (before soaking) =45 Shore A, hardness of expanded
HydroSpan (after soaking for 14 days @ 72°) =35 Shore A."
http://www.industrialpolymers.com/water_abs_expanding_urethanes.html
Cameo
"effects" can be created in several ways with polymer clay, possibly
adding other mediums too.
1. cast white, translucent,white-translucent, or
even tinted-translucent clay in a mold (with a release if needed)
......can
overfill mold then remove excess around image later, or underfill mold slightly
to avoid that
...remove from mold (after cooling for refrigerating awhile if
nec)... then apply to a sheet of contrasting-color clay (often a pastel, but certainly
wouldn't need to be)
2. cast liquid clay in a bakable mold (silicone,
glass, metal, etc.)...then treat as above
3. rubberstamp embossing ink onto
baked clay... heat to set and make dimensional
(4. rubberstamp pigment ink
onto baked clay, or raw clay creating slight depression... not real cameo
dimension tho)
5.
sculpt a bas relief and place on clay, or perhaps carve two layers
of clay (cameo image color on top) in various ways
Flo's
white cameo (white + a little Pearl?---no translucent) onlaid on covered
matchbox
http://www.picturetrail.com/gallery/view?p=999&gid=297873&uid=155794
lesson
& tips on making cameos with polymer clay using mold
http://www.madaboutmolds.com
(click on Cameos in list...
then click on Tips for Making Cameos at
bottom ... then click on See Tips for Making
Cameos Here at bottom )
plus
"antiquing"
... cameos can be antiqued or stained with various
colors if desired to delineate them more, if desired
...... generally a color
that's close to the color of the cameo will keep it more natural looking
(just a bit darker or lighter), but also a neutral color just a bit darker
or lighter than the cameo, or even a regular darker antiquing color, could be
used
...I've done something similar with a mold (using tan as the base
clay)
.....but after baking I put a white wash over it (white
acrylic paint, watered down very thin)
........ then wiped off the excess...I
was left with a very nice finish, which was a bit darker in the grooves,
etc (....this is just your normal antiquing process, but using white on
a light color clay sure made it look different).
...meiljolie's
witch cameo pendant with antiquing
.......face made from a mold made
from female face on a coin.... white + translucent mix cast in the mold,
then face/hair/hat distorted
.......SuperSculpey used for the background
(perhaps marbelized a little with the white + translucent face mix).... baked
.......cameo
and background antiqued with reddish-orange (oil?) paint
.......frame
for cameo cast in a mold using black clay...baked cameo pressed into raw frame,
baked... part of frame painted with gold (acrylic paint?)
http://i229.photobucket.com/albums/ee2/thinnen/oyp%20halloween%20swap/cameo_witch_pin_02.jpg
(Sue
Heaser's instructions for cameos are in her "Clay Jewelry" book)
molds
....candy or other molds
http://www.geocities.com/madaboutmolds/index_files/Page2459.htm
(faces, and other molds)
http://www.sweetc.com
(see "catalog" for 2" mold for traditional
cameo)
…shallower
molds
......or make your own shallow clay mold with a rubber stamp,
or by carving out baked clay sheet, etc.
(see Molds
for lots more possibilities)
beadizzygrl's
cameos on various backgrounds, using a deeply engraved crystal as
a mold
...dropped liquid clay with inclusion of white
chalk into the face depression
...then either baked that, removed, and
placed onto raw clay ...or added the raw clay before baking
http://hometown.aol.com/fourleafcl1064/page63.html
(see also Releases below)
other ways to create cameo effects
Jane Beard's lesson on making a cameo
from clay (in several ways)
..for a flat or slightly-depressed
inked cameo image:
....roll out thin layer of white or ivory
clay ...ink a rubberstamp with Colorbox crafter's ink (any color), and
press into raw clay (can heat briefly to firm a bit)
....(then trim around
image smoothly so can apply to a raw base clay background)
..(also uses
shrink plastic for her tiny cameos)
http://www.hgtv.com/hgtv/dc_faux_other/article/0,1793,HGTV_3401_1373583,00.html
agnesdei5 used embossing ink on a rubberstamp, to create a raised (white) image on baked clay
Katherine Dewey has done a lot with sculpted low bas relief (same eventual effect as cameos)
SUMMARY: releases used for regular clay molds:
....
none ....or refrigeration
or freezer before removal
....powders like plain cornstarch or
"baby powder" ...or
baking soda
........also other powders like metallic powders (mica
or real-metal)...embossing
powders.... powdered chalks
... metallic leaf
....water
....glycerin
...Armorall
or Vaseline are sometimes used on molds/forms which will be baked
with the clay, e.g., a non-porous?, upside down form used for a vessel
...
Kato Repel Gel is now available in some places...
it's a thick, paintable, water soluble polymer clay medium which prevents
polymer clay from adhering to itself while curing (baked or raw)...
this would allow raw polymer clay to be baked in cured polymer molds
and still release??
http://www.prairiecraft.com/Merchant2/merchant.mvc?Screen=SFNT&Store_Code=P
........(see
more brands in Glues > Superglue
Solvents)
...molds can also
be varnished as a permanent release
(...silicone molds need
no release --see more above in Silicone)
If
a clay is too soft or too sticky
(because it's a soft clay in the first place, or because it's become too warm
from manipulation or air temp), let it cool before trying to remove it
from the mold
... it sit for a few hourse or overnight (in the mold)
...or
put in the freezer or fridge a few mintues.
Smudgeable
clays (those that "smudge" well for sculpting --Sculpeys & Premo)
tend to be insoluble clays so water is the release agent of choice,
especially for intricately detailed molds.
..Fimo and Cernit,
both initially firm clays are soluble clays; both possess a filler (possibly kaolinite)
that absorbs moisture so water isn't so good as a
release for them... talc or cornstarch are the better
release agents. K. Dewey
...Kato clay??
I generally use pure cornstarch rather
than baby powder.
.....the talc or whatever else is in baby powder definitely
leaves a residue that won't wash off after baking and I don't want to buff
everything I make. The cornstarch does wash off (with cool water),
even after baking, in my experience. (also real talc
isn't great for the lungs)
...Just a note about
"baby" powders. Some have talcum powder
as an ingredient, which is magnesium silicate. Once
inhaled into the lungs, it cannot be expelled -- as with asbestos, porcelain
dust and many others.... corn starch on the other hand is not dangerous
(unless you get a huge lung full). misty
...I believe that most "baby
powders" no longer contain
talc because of the inhalation hazards ... they're pure cornstarch.
potato
starch for a release-- seems it leaves *no* residue? Not sure where
to find it. . maybe a health food store?
Look in places that sell kosher foods. Lots of potato starch is sold for Passover
and some of these stores might still have some, probably on sale.
Use
baking soda instead of cornstarch. It dissolves much more readily.
...I found that the corn starch "wants" to cook on, especially when the hot
clay is cooled with water. The baking soda is not affected by the heat,
and as a bonus also helps with odor control. Peggy
corn or rice flour also works as well and has the advantage of being smaller particles and semi-transparent to begin with.
I was in the natural food store when I remembered I needed to get some baby powder for a release. On my way to that aisle, I went thru the bulk stuff. There in front of me like a shimmering white angel was a tub full of arrowroot powder at 2.69 a pound. So much for baby powder! This will last me well into my next incarnation... -- Kelly
pounce
ball (ponce?). . .There was one little nifty technique we used to help keep
from overdoing the talcum. That is, if you take a section of old nylon stocking
and dump the powder inside a layer or two and then tie or rubberband it up in
a tight little ball and then tap that ball gently on the mold to use it. You will
find that this evenly releases a small amount of powder rather than random blobs
that then show up on the piece.. .
....At retreat I saw someone using
a cornstarch-filled sock, & of course, I made my own version as soon as
I got home (thanks, Oscelyn!). Did I make a ponce bag? I had been using rubber
stamps with clay, & I didn't really *need* to have a release agent, but it works
a little more smoothly with a little tap of cornstarch. Marla
......
I use one of my 7 year old's old gym socks. It's the perfect density of fibers,
and it lets through a light enough dusting of powder without clumps. I can put
almost a full cup of cornstarch into one sock. Then I just put a knot at the top,
and stick the whole thing in a plastic bag. Easy as pie.... Adult socks work just
as well. Karen H.
....Mine is a small square of cotton, with
a spoonful of powder in the center, draw the corners up like a bag, and close
it off with a rubberband at the neck. They are used traditionally to transfer
quilt markings with chalk dust. Sarajane H
......BTW,
it also works for spreading colour pigments (in this case some pearl ex
powder) to items. The result is really good ! PoRRo
.... use an 6-8" circle
cut from an old 100% cotton Tshirt! One that has been washed 10 thousand
times or so and is very soft... in the center of the circle place about 1/4
cup of rice starch (flour) or potato starch ( if you cant find
these use cornstarch, but the rice starch or potato starch tend to be a
finer powder.)... gather up the edges to make a pouch and use either string
or rubber band. SL
I've tried pounce balls, but still keep coming back to a small tray of powder with a fluffy paintbrush that picks up the right amount to use. My tray has two sections. I put the powder on one side and lightly tap it into the empty section if I want to use less. Jeanne R.
I
have found that the method of dusting the mold/clay for the best results
is as individual as the molds used.
.....When
I need to use a powder or release, I first dust my clay lightly
and then dust the mold lightly.... I tap my mold on the side of
my table to be certain that all loose powder is removed (so far I have had no
build-up with powder and my resulting impressions are crisp and smooth and may
I say near perfect? :)
....if they are not perfect, I just roll that clay
up in a ball and try, try again. This is why I do not use water as a release.
I could trap moisture in the clay and although I know that is not the worst thing,
I suspect that some problems with bubbles I had were the result of trapped moisture.
....For some molds I roll a
clay ball into a point then push the point into a low
point of the mold (without a release)
......(even though
it sounds like dusting the ball would be the best---it often is not the case...
because the clay is being smooshed around every which way to get into every little
crevice, it would be impossible to get a mold release on the clay INSIDE the ball
of clay that sinks into the crevices. This is hard to explain, but the surface
of the clay that has been dusted is not guaranteed to be the surface that touches
the inside of the mold at any point, but for sure the mold surface will be touched
with clay at every point.)
...My method is to first test (if using
the silicone putty molds like Alley Goop, Miracle Mold, and MicroMark's)
with no release. The first few times they are used, they may not need a release,
but later they may.
.... Also the consistency of the clay makes
a difference. Jeanne R.
I brush my molds with plain ole water. Enough to make them moist, not dripping. I use a clean paint brush to just brush around in the mold and then mold the stuff usually 2 or 3 impressions from one damp mold. Shaneangel. . .
~sometimes if you put a layer of aluminum foil around the object you want to emulate, then put a layer of clay, and bake it will work as a mold, using water as a release and it works great. I keep it in a small spray bottle (about $1 at the drugstore) and can apply a fine mist, which seems to be enough.
It's gross, but spit works better than anything as a release.Just try it once & you'll never go back.
Has anyone tried KY jelly? It's not oil-based, so it shouldn't react with the clay.
glycerin
... I learned (about using glycerin as a
release from Tory Hughes) years ago and I'm not sure what she's doing now. It
works fine;
.... I've used it a lot, especially when casting detailed items
that might not have been able to hold up to something oily, and would have been
clogged up by talc or cornstarch.
.....glycerin
is an alcohol sugar which is clear, thick and sweet... used in foods and in many
other things to make them softer, more lubricated, thicker, etc.
.....it's
also soluble in both water and alcohol
.....
And it doesn't affect any paint, lacquer or Pearl-Ex on the
clay piece.
.....since glycerine is related to sugar, it mixes easily with
water and doesn't mix with clay at all
...... so after the piece
is baked you can rinse any residue off, then dry the piece, so the glycerine
won't interfere with paint or glue.
.........or
you'll have to knead it into the raw clay very thoroughly
so it won't make a weak seam where it is folded in,
if you don't like your cast
.....
It sticks pretty well to smooth surfaces (when making a mold) where talc
and cornstarch don't stick.
..... molds you make will be very precise
and detailed.... the
glycerine doesn't distort the surface at all
..........you
can also use it on a polymer clay mold to make a very detailed casting, but you
can't then bake
the mold and raw clay together, as you can using Armorall. (???)
Georgia
large
molds especially ? . . . I learned two ways of releasing the finished
clay from a mold from Bonnie Bishoff and Dan Cormier at Ravensdale. Bonnie lined
her mold with foil, then used a thin layer of Vaseline on the foil.
Dan used 100% cotton rag paper to line his molds, the clay will adhere
to the mold's shape and then release easily after it is baked. Note: I've only
tried this with round, square or cylindrical molds, not anything small or detailed
(face mold). Cassie
...About Bonnie Bishoff
- to make lampshades, she covers a bowl or box or other object with foil,
then Vaseline as a release agent. The reason for the Vaseline is that the
clay sticks to it, doesn't slide around, then slides off very easily after baking.
Randi
metallic powders
(mica-based like Pearl Ex, or real-metal powders) also work well as a release...they
stick to the clay and leave a metallic surface on the front side of the
molded item as well
.....or a sheet of gold or silver metallic
leaf can be used between the clay and the mold as a release
You could also try varnishing your mold to seal it- - - as a release. Jody Bishel
(for other ways to help pull the clay out of the mold, see above under Gen. Info re Using Molds...)
Armorall
This
is a product designed to coat vinyl (esepcially in cars) and is a great mold release,
however it can cause some things not to stick later.
NOTE:
since brand names generally can't be mentioned in books or on TV shows, one author
finally came up with the term "non-aerosol automotive vinyl protectant"
to describe it.
Armorall
... it's silicone, not regular oil.
...As
any auto/house painter will tell you ...nothing sticks to it.
....Unlike
oils, nothing will remove it either (other than hydrofluric acid,
a bit extreme), and it gets down in the pores of whatever it's on.
......solvents
and detergents that remove oils off just move the Armorall around . Laurie ...(but
may thin it by doing trying, or can wipe some off with tissues, etc)
After
applying, be sure to wipe off any excess
Armorall to get as thin a coat as possible because in those areas:
.... the
clay won't stick to itself
.......clay
onlays, etc., won’t bond to the clay....try
wiping or rinsing well with alcohol, and/or using superglue under
the new pieces
....maybe powders won’t
adhere well ?
... liquid
clay will not flow and adhere to any spot that had been in contact with
Armor-all.
...I've also noticed a distinct weakening
of clay when using Armor-all. If I used it on thin pieces of
clay, they often would not hold up to any stress. Jeanne
Future
and Varathane don't like to stick to items that were molded with Armor
All as release when they're fresh from the oven, or even freshly cooled. If
I'm very stingy with the Armor All, there's a chance I'll get glaze to stick
and not bead up. .
....I have used Varathane,
but I use an paper towel to wick off most of the Armorall
before baking so I haven't had a problem with that. Dotty
....I have used
Armor All as a mold release, and Future won't stick to it well. (I had
to use alcohol to get it off the piece very carefully so as not to make
the clay colors run.) I still had to use several
coats of Future to
cover the clay and get a nice finish. Caroline SD
When using molds, etc., some people like to put the Armorall on the clay, and some put it on the mold
Marie
uses Armor All as a mold release ...she can make up to 10 impressions
from one application.
.......she has not tried painting her molded
pieces, so she couldn't say whether the Armor All would interfere with acrylic
paint adhesion
...yes, you can use acrylic paints after molding with
Armorall.
Can also
use inside the barrel of clay guns, etc
...I
wonder if one could spray this on cookie cutters, kemper cutters for a
better release?
The
problem with clay and Armorall, at least for me, is that if you are going to
use the clay for anything else after Armorall, I find it is almost useless.
...
It never feels the same afterwards.
I try to use just the amount I need for the mold so I don't end up with clay that
is unusable for anything else. Ka
I
have had it also make the clay, especially the light colors, turn
brown in baking. dnieder
...Only effect
I've seen using Armor-all as a mold release is that it tends to darken
Super Sculpey and make it more translucent
after baking. In fact it makes it a very desirable skin color, which leads
me to wonder about incorporating a small amount some day while conditioning some
for a figure. Halla
Also, when trying to push the clay into the mold, it can keep slipping away on you.
While Armorall works as a release agent, it does eventually build up a residue. A soft bristle brush and "Simple Green" will clean this film. If not enough release agent was used and clay sticks to the mold, "Simple Green" will solve that problem, too.
Armor All contains (uncured?)
silicone. Silicone is almost always a problem when applying
finishes.
...Most of my work is
with iron, and metal artists usually avoid silicone. I won't have anything in
my studio that contains it, because even a tiny bit can contaminate a finish..
. . ...When I mold paper, I use PanPal (a spray oil/lecithin for cook
pans) as a release agent, if I have to use one at all. Is this an option for
polymer clay? There are "orange peel preventives" made as additives
for finishes, that are meant to counteract the effects of silicone contamination.
They're added in tiny amounts, carefully measured, to the finish before applying
it. This might work with the Future or Flecto applied over Armor All. (Woodworker's
supply stores are a source for this.) If Dawn doesn't remove the silicone, perhaps
another solvent will work - alcohol, naptha, or mineral spirits (followed
by Dawn to remove the solvent.) Cathy
.
. . the silicone in ArmorAll and most releases... Happened to run into a mold
release in the Enco catalog (www.enco.com) that says it's made to avoid this problem.
It's called a Paintable release - Model 505-1200, 12-oz bottle for $3.47.
800-873-3626…Cathy
WEBSITES
Irene
D's (fatbak) --some molds used for onlay, texture
http://www.good-night-irene.com/
...Syndee's
lesson on putting a molded shape plus some long molded rope shapes onto
metal, ceramic or clay pots (and baked with them in the
oven... or glue on if can't be baked) ...she says her metal pot color altered
slightly when she baked it.
http://www.sculpey.com/Projects/projects_PotEmbellishment.htm
*Cheryl's stamped (molded?) multi-powdered pieces (website
gone)
*Dotty's molded items, mostly powdered or antiqued (website
gone)
Melnik's jar covered with molded items & Rub 'N Buff (website
gone)
GROUPS
--mailing list for those who are interested
in scratch-building, molding, and casting their own models and
parts. It's called "The Casting List". We have over 500 members worldwide,
a searchable archives, and a web site with lots of links and great information
on it. If you're interested, check it out at http://mc.cyklone.com/mc/castlist.htm
--I'm going
to be publishing a free E-Zine covering model-making, mold-making, and
casting, starting in June (2001). This will allow more in-depth coverage of
these topics, as opposed to the Casting List (my discussion group), which is mainly
a question and answer forum .... Everyone is invited to join, the cost is free,
and I am very excited about the possibilities! There will be limited advertising
/ sponsorship in the Zine ... If you're...already a yahoo groups subscriber, you
can just send a blank e-mail to: castersnews-subscribe@yahoogroups.com or go to
the web page at: http://groups.yahoo.com/group/castersnews
. Pat Lawless
P.S. Since I announced the E-Zine on the 29th of April, it's
grown to 281 members already!
New
forum now online: MOLD MAKING http://www.mouldmaking.freeserve.co.uk
http://www.your-new-site.com/cgi-bin/ikonboard/ikonboard.cgi
Latex, Rubber, RTV Silicone etc.. . . Topics include: #Safety #Types of molds
#Flexible Molding Materials #Casting (fill) Materials #Resins #Fibre Glass (GRP),
(FRP) #Release Agents #Sculpting # Release Agents #Power tools, hand tools and
accessories #Melting Equipment #Vacuuming Equipment #Mold repair and finish surfacing
For beginners and Professionals alike. Graphi
(see also Heads for molds & 2-part molds, Sculpting for ApoxieSculpt, epoxy clays, etc, Stamping, Textures, Vessels for bowls, Mokume Gane, Clay Guns for cookie presses, Paints, Faux’s )
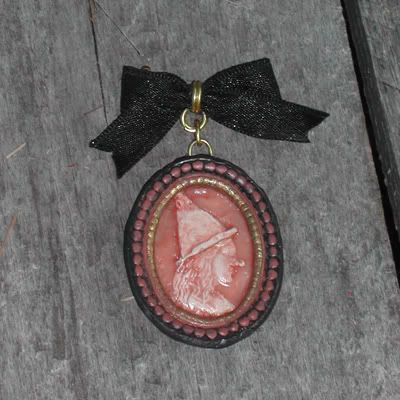