General info
Marbled-Paper
(or "Dragged Lines")
Flattened
Pattern sheets
....cane slices
........shreds
& bits + torn pieces (Rainforest, watercolor-torn, etc.)
....(textured
sheets, colored with paints,etc).
Pieced
(fitted-together shapes...crazy patch) + collage
Damascus
Ladder (crushed helix)
....Reduced Dam.ladder, etc
Other
sheet techniques
...holey layer(s), slice painting,
......dot slices,
crackled clay, etc.
...origami & folding
tech's
Please NOTE:
All
links on this page go
to (correct) pages, but those pages also include my navigation bar on their
left sides!
This is a problem we
haven't been able to figure out yet.
...to go to a
page correctly if necessary, just copy the link then paste it
into your browser window instead of clicking it
SHEETS
of pattern
There
are many ways to create sheets of pattern with polymer clay!
I've tried to put relevant information and websites on the category page at
GlassAttic which most deals with that example,
but there is LOADS of OVERLAP!
General Info
The
techniques below will result in one final sheet of pattern.
This
sheet can then be used whole, or it can be cut or manipulated
further to use in other ways, or it can be used as a background sheet.
some
ways to use sheets:
...take cutout shapes (or strips or freehand
shapes) from these patterns using cutters, blades or stencils,
then:
.........use the cutouts where you'd use any other cutouts (onlay,
etc.)
..........inlay
them with baked shapes, chips (textured or not... baked or not)
.........stamp
or draw or otherwise impress shapes, details or outlines
into sheets, following outlines of color changes or adding details, etc.
.........
fit them together like puzzle pieces
..........overlay
on each other then flatten all together
........ place
on another sheet for a different sheet of pattern
...
cover base clay (for beads, e.g.) (or to cover anything
glass/metal/eggs/pens/etc)
...make vessels
...use stamps
or textures on them (with or without ink... or antiqued)
...add
transfers
...or,
they can be used as a background sheet for anything else
at all
.......Nora Jean' various pattern sheets as backgrounds under
her onlays (on Altoid tins)
http://www.norajean.com/Tins/Index.htm
"sheets
of pattern" can be created using almost any technique
in polymer clay
---the technique can be used directly on a flat sheet
of clay
---or the clay can be flattened into a sheet after the technique
is done on it
Here
are just a few possibilities for techniques and/or materials:
...cane slices or cane techniques (ikat, faux ivory, faux fabric, making pictures
with thin cane slices, etc.)
...stamping, texturing
...mokume
gane
...paints/inks
(crackling, sponging, random or symmetrical patterns)
...metallic leaf (also crackling)... foils
...inclusions
...mica sheets
(ghost mica, etc.) or mica bits
...translucents
(many, including translucent floating canes)
...random
strips of clay
...scraps
of clay colors
other techniques or
items which could also be considered "sheets of pattern":
---Skinner Blends... carving (maybe with backfill)... cards, ATC's/postcards/books...
clothing and fabric for sculpts... tiles-mosaic... masks... houses... mixing media...
molds (lay sheets into)... other pasta machine stuff ...transfers
.........(see individual
pages here at GlassAttic for more on each technique or material, esp.
Cards > Samplers, ATCs)
Any of the techniques on this page can be combined with each other for even more complex sheet patterns.
artist trading cards
can use virtually any technique within polymer clay, but are generally
fairly flat so they're a good way to see lots of sheet possibilities
many examples: http://www.polymerclaycentral.com/atc_swap1.html
(3 pages)
http://www.polymerclaycentral.com/atc_swap2.html
(2 pages)
http://polymerclaycentral.com/atc3_swap1.html
(2 pages)
TIPS:
If any sheet of pattern you make is becoming
too thin when you roll and enlarge
it, simply back it with a scrap sheet of clay (or
a complementary color) and run it through the pasta machine to bond the layers
(this can be done several times if nec.).
When
I want a shiny, glass-like surface on my sheet of clay,
I bake it between 2 ceramic tiles ...this also causes the
sheet to be completely flat, with no bubbles ...I also usually weight
the top tile with a heavy casserole dish.
.....the important
thing when using tiles is to allow about 20 min extra baking
time to allow for the tiles themselves to heat up and for the heat
to penetrate to the clay
........ I may also heat up my tiles
prior to baking so as not to have to add too much additional time in the
toaster oven... then I'll put two "ready to bake," filled tiles on top of my toaster
oven while another one is baking ... then when a "cooked" one is taken out, usually
a waiting one is hot enough that I have to pick it up with my pliers.
(...I
often use this shiny sheet technique for the simulated stone or wood shets I use
for a form of marquetry, among other things). Sue (..see
Mosaics > Pietre Dure)
most
of the info (of all kinds) on
air bubbles can be found
in Pasta Machines > Problems
> Air Bubbles
...some of the causes of bubbles have to do though
with: the way the clay is conditioned or trapped clay under pasta machine scrapers
pulling on sheets, particular type of clay or soft stretchy clay, particular type
of box or bar of clay you happen to get, covering or layering clay sheets trapping
air, not letting clay rest before baking, moisture from hands or white glues creating
steam bubbles, etc.
MARBLED
or COMBED paper stripes (dragged lines)
(made
with regular solid clay)
(dragged
line patterns can also be created with colored liquid
clays --on a sheet of glass or tile, or on water--
...
for those, see Liquid Clay > Marbelized-Dragged)
A
clay sheet with lines of "scalloped" stripes
of different colors ... like some of the marbled paper effects
on old books (aka combed, feather patterns; paste papers; nonpareil)
...This
technique was popularized in polymer clay by Donna Kato.... in her video PotPourri
of Techniques, I think
EXAMPLES:
http://www.brpcg.com/Galleries/sue/GallerySue01Trees.jpg
...Sue D's Christmas tree cutout
http://www.glassattic.com/imagesCANES_COV/cov-BOH/BOH.htm...2
of my bottles have dragged lines pattern (4th row)
http://www.polyclay.com/mbars.htm
... several of Sarajane's barrettes
http://hobbystage.net/art/tatercat/
(click on 2don1, Tatercat's black and silver lines pulled with wide
stylus, variably) (not accessible)
http://www.tinapple.com/cynthia/98retreat/98retreat4.html
(gone) on the left and right...the middle
photo is ikat
http://members.aol.com/CAPCG1000/pendantswap.htm
..Juli McCarthy's dragged-lines heart shape ...
NON-POLYMER,
but same dragged lines design
http://marbledpapers.booksworth.com/Nonpareil.htm
(not polymer)
http://www.dianemaurer.com/decpaper.html
Diane Maurer's paste paper patterns (not polymer)
LESSONS:
(lesson)...
gather some colored scraps of clay and roll them together into a snake.
--twist
the ends of the snake in opposite directions and you will notice that the "stripes"
that run horizontally along the sides of the snake arrange themselves vertically.
Roll the snake into a shorter, fatter snake by rolling back and forth along
the work surface while pushing the clay with your hands from the ends in to compact
it... The stripey bits will become thinner and closer together if you're doing
it right.
--Now flatten the snake into a short, squat sheet and
use a rolling pin to flatten it to about 1/4" thickness.
--Place
sheet firmly on a slick surface so it will not slip while doing the next
steps.**
Use a sharp (but not too?) pointy thing like a tapestry needle,
knitting needle, or the back side of the tip of a fingernail cleaning tool (the
rounded side) to actually drag individual parallel lines ACROSS
the stripes (perpendicular); some hair picks, or combs?, might work but take an
even pressure all over which isn't easy.
--To remove the indentions made
by the dragged tool, run the whole sheet through the pasta machine, possibly
more than once (...so that the dragged stripes are perpendicular to the
rollers if you want to lengthen the lines, and parallel if you want to
heighten them).
--------if you want a much larger sheet or don't
have a thick enough dragged sheet to begin with, back the dragged sheet
with another sheet of clay before flattening as above (this second sheet may
show thinly when viewed from the side)
Jeannie's
lesson on making "marbled paper" clay sheets .. with ugly
duckling canes
http://www.pcpolyzine.com/2004january/uglyduckling.html
OTHER
DESIGN POSSIBILITIES:
.. if the lines are dragged in alternating directions
(up-down-up-down, for example), you'll get the effect of vertical rows
of chevrons
...try dragging in all kinds of directions,
or perhaps dragging one way in one area, and diff. ways in other
areas (**placing the sheet on a small turntable or even a small movable
piece of acrylic sheet might help if trying to do curves, etc.)
...try pressing
the "comb" teeth together as you drag (creates a kind of bouquet
effect)...prob. hard to do though...could stack alternately
...try using
different stylus types or thicknesses for some of the draggings
...try
dragging over thicker stripes created with stacked layers of clay rather
than twisted
...try combining different scrap ropes, blocks or
shapes together before flattening totally
...this effect could also
be created with a stack of thin layers of clay, cut and stacked together
on their sides like making faux ivory, before dragging the
stylus over it ... using regular translucent, or a mica and
opaque combo might be interesting
?'s
BOH covered with a beautiful sheet of dragged layers in a stack, made of up of
tinted translucent cherry/yellow/green, separated by layer of white (&
layer of translucent?) (first dragged upwards, then downwards)
http://scpcg.org/images/rnbostrp.jpg.
simulated
stone beads ... Susan F's lesson on making faux rhodochrosite
(rhodofauxite) or any stone, by creating a log of striped colors (with
individual logs rather then a stack as above) (she uses 7 logs of the same hue,
from light tint to darker shade), then cutting short lengths, pressing a needle
onto the side and dragging down multiple times... she then rolls smooth, cut lengths,
and gently shapes into beads
http://www.polymerclaycentral.com/rhodo_faux.html
Rebecca
D. has a lesson and examples re making disks to be used for 4-5"
coasters... (the lesson doesn't include dragging the lines though) she makes them
by laying 6-8 colors of clay in narrow strips (or could use ropes) around a large
main color log... roll to smooth and till 12-24" long (the longer, the thinner
the stripes will be in the coaster)..adjust log until the same line is centered
all the way down the log...lay in a tight spiral and flatten gently
(staight down would be better than rolling...place paper and book on top and push
down)... she says to use a rubber eraser to clean any parts that look dirty after
use; drips can be rinsed off
http://echomtnc1.homestead.com/pccoasters.html and
http://echomtnc1.homestead.com/instructions.html
(to create the dragged
line version, simply drag your stylus from the center to the edges and flatten
again (or not)... may be best to drag in half, then quarters, then eights, etc.,
to keep lines equidistant)
(see sub-categories "Stripes" and also "Stacked Stripes" in Canes-Instr. if you're looking for caned chevron effects)
FLATTENED
pattern sheets
(uneven areas, flattened
into a smooth sheet)
(this sub-category overlaps with the following sub-category ... so check both places for examples)
New clay sheets can be created by onlaying a base sheet of clay with various clay things before flattening them all together into on new, smooth sheet.
Some
things which can be onlaid include:
....(clay) ...
cane slices ... or shapes of other colors
(e.g. twisted ropes) or crumbs ... mica
clays or patterns... translucent clays or cane slices
....(other
materials) ...metallic leaf on its own base clay (crackled
or solid) ... paints, inks, powders (though these
aren't very dimensional)
... and/or just anything
at all!
The
base sheet for receiving the onlays doesn't have to be a solid
color... it can be already variegated or patterned or embellished,
etc.
......or the base sheet can even be the flattened sheet you just
created (second-generation) ...or another different sheet or wad of clay
you've created
...Skinner blends (gradations of clay color) are popular
as base (background) sheets
...regimented stripes of clay or wavy indistinct
stripes, etc.
...sheets with inclusions of powders, spices, herbs, etc
...sheets
of fauxs (wood, stone, coral/jade, etc.)
The sheet and its additions
are then flattened together with a roller and/or a pasta machine
to create a smooth sheet of pattern
.....some people refer to this technique
and effect as "collage," but
since collage could be dimensional or flat, these below will refer only
to sheets which end up totally flat.
(After a sheet has been created, it can also be torn into pieces, or cut with a blade, scissors or cutters, for creating onlays as well.)
This
new sheet of pattern is often used as a sheet for:
...
covering items
... backgrounds for other embellishments like
molded items, or framing for transfers, etc.
...further
manipulations like stamping, or texturing ...... or cutting out
shapes from, for example.
(see next category called "Piecing" for fitting together same-height pieces, or for cutting holes then inserting same-height and same-size pieces into them)
Cane Slices, etc.
SIMPLE
--ONE CANE
Susan B's lesson on slightly
overlapping slices of a spiral cane on a base sheet, then rolling the
slices into the sheet (to make fabric "clothing" for tiny wire figure)
http://www.sculpey.com/Projects/projects_wiredwomen.htm
Naama
shows how to place slices from a flower cane (slice backgrounds
slightly overlapping) onto a thick base sheet... roll them into the sheet...
then cut and useon a barrette finding
http://www.livecity.co.il/site/detail/detail/detailDetail.asp?detail_id=100376&depart_id=2431
Judith
Skinner shows how to cut slices from Skinner blend jellyrolls (and a tiny
blend cutout?), then lay them on a regular Sk. blend sheet (flatten
with pasta machine)
http://members.aol.com/polyannie/amoebae.html
(gone now... look at
judithskinner.com eventually)
Lindly
H's mostly overlapped slices from various canes rolled onto
background sheets (then cut into triangle shapes)
...slices from several.
bullseye canes, as well as orange and lime slice canes
http://albums.photo.epson.com/j/ViewPhoto?u=4153008&a=31266991&p=68349445&f=0
COMPLEX
--MORE THAN ONE CANE
Bev's
excellent lesson re overlapping slices
(....she first covers
a glass ball with a base layer of clay... if you're creating the sheet
flat, skip to step # 6)
....to her base sheet,
she first adds many simpler slices over about 70% of the
available area
....then she adds her favorite or more complex
slices to the remaining areas (partly overlapping previous slices,
or actually centering them on top of prev.slices)
... to smooth
the seams, she rolls ball in her hands, then on a hard surface... bakes,
and sands.
http://www.polymerclaycentral.com/pcc/ornament.html
Cat's
mini-lesson on making pattern sheet with clay slices (using several
canes, one layer of canes at a time, rolling into background between
each... begins with leaves scattered here and there, then adds flowers, more flowers,
etc.)
http://www.pcpolyzine.com/2005fall/barrettes2.html
(see Step 2 )
Tina Gs various shapes
and cane slices spread out on background sheet
http://www.mhpcg.org/clayDays/claydays04/feb2004/images/tGuguler.jpg
Heather
P's many slices from various canes completely covering (or almost) entire
surface of background clay
http://humblebeads.com/cuff_beads.html
Eileen's
interesting flowers and leaves in cane sheet (as frame)
http://www.mhpcg.org/clayDays/claydays02/sept2002/eileen.JPG
flatter
beads especially, can be covered or partly covered with cane
slices (+ other dimensional or flat materials like metallic powders,
leaf, etc.)
.......
then all slices & bits flattened into the surface (...or some left dimensional,
or dimensional things added afterward)
...Christel's
female face cane slice plus added hair rope + background
metallic leaf...onlaid, then flattened onto a long bead
http://home.online.no/~raje/Polymer/projects/womanpin/index.htm
(for
lesson details, see Onlay > Flattened
Onlays)
Nanetto's
lesson on making a sheet with thick slices from a cane (flattened
& stacked, then wrapped)
....slices are placed together in very loose
rows (and on the diagonal)
...the uneven sheet is then topped
here and there with slices from a fancier cane (flower)
......
and also with tiny wrapped cane slice dots (before flattening
the whole sheet)
http://www.sculpey.com/Projects/projects_WearableVessel.htm
(look down to middle of page)
various
pattern sheets using slices and bits, and lessons, from NoraJean
http://www.norajean.com/Sheets/Group-thm.htm
(click
all around)
cut
out taken from a cane slices sheet, in shape of the state of Florida
http://www.geocities.com/ncfpclay/page3.html
Nina
K's pine tree & other shape cutouts (from sheets of onlaid slices
and bits, including translucents).. surrounded by thin clay
rope frame
http://www.polymerclay.co.nz/nzpcg/nina.html
Lynne
Manning's hands & elephant, etc., made from cutout marbled,
caned or scrap sheets
http://pcpolyzine.com/january2002/craft.htm
Shellie
Brooks, crackled leaf, bits of cane slices, etc., put together....
then a shape is cut out for pendants
http://www.designsgallerycollection.com/brooks.html
(gone)
Lindly's
very fabric-like patterns, (flattened?), cut into patches
for assembling into a (Tumbling Blocks) quilt pattern (raw?)
http://albums.photo.epson.com/j/View?u=4153008&a=31266991&p=68349447&Sequence=0&res=high
many
unusual patterns mostly created with caning by James Lehman . . some fabric
-like (some flattened, and some pieced)
http://www.akrobiz.com/polymer_clay/i_20.html
the
clothing is made at of little (colored) millifiori cane slices (made
into a fabric sheet)
nat
.....(see much more on creating all-clay
sheets which simulate "fabric" in Sculpting-Bodies,Tools
> Fabric, and Canes-Info
> Sheets from Cane Slices... though many other pattern sheets could qualfy
as fabric too)
Lynne's long cane slices? placed on black for sheet http://cgpcg.org/photos/clayathon01_lynne_demo1.jpg
Emma
R's illuminare beads ...background created with marbled clays
and/or metallic streaks and patches created with powders and
maybe paints, etc (in clay or on clay, then flattened in)
... she
then adds few cane slices on background sheet and flattens
those in as well
http://www.pcpolyzine.com/2004sept/emma.html
cane
slices can also be used to "cover" forms
... forms
made of baked clay (solid or hollow)
...or forms made from other
materials and items like glass ball ornaments, egg shells, cardboard boxes,
3-D papier mache shapes, etc., etc. (see more in Covering
and in Beads > Covering a Base,
and in other places)
...for
much more info on the technique of making sheets of patterned
clay from cane slices, see Canes-Gen.Info
> Making Sheets from Slices
...and also the sub-category
Overall Techniques there for more info on insertions of
all kinds
Raw cane slices can also be placed together in radially symmetrical patterns (like pizza slices) and be flattned into a whole smooth sheet to create mandala patterns (see Onlay > Uses > mandalas)
Baked clay tiles (plain or can slices) can be placed together to form mosaics (usually with grout separating the tiles) (...see Mosaics)
heavily
visually textured pattern sheets can be made with
shreds (or gratings or chopped bits or tiny snakes-clay
gun extrusions or perhaps shavings
from ghost image or other mokume gane?, etc,) of
other clay (or canes or scraps)
..... randomly
dump, or carefully place, them on a base sheet of clay (which could
itself be solid color, marbled, Skinnered, whatever) ..... then flatten
....
(base sheet will show through as a background color if some space is left between
the shreds... and/or one of the colors used in the shreds could be the same as
the base sheet to add more "background")
...some uses: regular
sheets for covering/etc.... cut or torn into shapes (for
tiles, or for stacking with other sheets for framing elements, etc)...
impressed with texture (for "clothing" etc) ... stamped
and backfilled-antiqued ... used as onlays
http://www.mdpag.org/clay%20day.htm
(look at photos from Barbara McGuire's and Jean Comport's classes for samples)
Lindly's
very fabric-like patterns, cut into patches for creating a quilt
pattern
http://albums.photo.epson.com/j/ViewPhoto?u=4153008&a=31266991&p=68349447&f=0
see
also Margaret R's coyote and animal Skinner blend cutout shapes
on votive, just below in Pieced
....... could have been made
from thin blend sheets flattened into black background clay
faux
pique ....Jeanne R's lesson
on simulating a woven fabric using ghost impression technique &
piece of plastic canvas... produces a coarse to fine (depending
on texture sheet), even-weave, grid-like pattern....for miniatures esp,
may want to flatten gridded sheet in pasta machine thinner and thinner to create
less definition
http://www.heartofclay.com/pc/fauxfabrics.htm
torn.
bits
(Rainforest-bead
effect.... Watercolor bead, or Torn-Paper
effect, etc.)
making
sheets from:
... very thin
cut shapes or bits ...or "torn" bits...
of Skinner blends or marbled clay, or other patterns,
or tinted translucents, or inked sheets, etc
...or shaved
bits from textured mica sheets or from textured 2-color-layer clay,
or other thin patterned sheets
TIPS:
...sheets
of clay will "tear" best if they don't have
too much plasticizer. So use a stiffer clay like FimoClassic or
Kato, or leach other clays awhile
...... then let any of them rest
(preferably overnight) before tearing
.......don't know if Sculpey
III or the new version of FimoSoft will work
very well though, even then (too much plasticizer)
......where
any two colors meet, the effect could end up like a miniature Skinner Blend, so
think of combining colors with that in mind
Donna
Kato used of torn bits of paper-thin layers of 2 colors (blue-green
& gold-copper) to create the "oxidized copper look" in her
book
... she says that the more and longer the torn bits are
rolled onto the base bead, the the more blendy
the edges will get
(see
also Beads > Cane Slices, Bits)
Kathy
W's lesson on using alcohol inks on white clay, then adding cane
slices (some opaque + translucent) to create a background sheet for
covering an Altoid container (then onlaying a brass char)
http://www.hgtv.com/hgtv/cr_accessories_jewelry/article/0,1789,HGTV_3225_4246668,00.html
....Elissa's
crackled the dried inks on a thin
clay sandwich of clays and inks
by putting through a pasta machine... torn
into strips or bits
Dorothy's
lesson on her "Rainforest" technique...with Skinner
blend + solid color...(+ overlapping, and texturing)
...first
I roll out a clay base layer (usually black) on a medium setting
(#3).
...I created several Skinner blends (some with black or white
pearl, or one wide one with a lot of colors close together) ...I roll these
blend sheets out on a pretty thin setting on my pasta machine (#5
on Atlas brand)
....then I cut shapes out of them with a blade,
Kemper cutters and pattern scissors
....I place the shapes
on the black base one (piece) at a time, and smooth them
lightly with a brayer or acrylic rod after each (leaving some
areas uncovered) until I am satisfied with the image
......... I found
that a using a large piece of one blend as the first layer worked
well (completely covering the black base?).
....the (finished) images usually
have about (one to) four layers.... some may overlap
....then I placed a template (a Shapelet) on top of the image and traced
it with the needle tool & cut out the image with a blade
....stamped
(textured) the whole thing with a (texture sheet or large) rubber
stamp... then trimmed it clean with the blade
.... I like the effect
the rubber stamps provided and was surprised that the details of the art came
through so well after being impressed with the stamp.(It was also a better option
than sanding and buffing when I used these to cover 20 knobs!) Dorothy.
..I
did something like this last night ...I made a background piece, then for the
designs I rolled my clay out as thin as I could and still work with it. Then I
just cut the shapes I wanted and put them on my background until I had my picture.
I used a knitting needle as a small roller and lightly rolled over
the top to smooth everything down. The only difference I see in what was done
here and what I did was she stamped it with a texture sheet in the end. I didn't
think to do that, but I will next time :o).
..... Also it really helps if
you place your thin clay on waxed paper so you can lift it off easily after
you cut your shape, looks like she might have used plastic wrap.... It
looks like some of her cutouts were from thin layers stacked and cut so they went
horizontal. Very Pretty! Nancy
http://www.picturetrail.com/gallery/view?p=999&gid=9322727&uid=2343137
(+other
albums)
http://www.pbase.com/joanie/dorothy
http://www.tbpag.org/drthy.html
http://albums.photo.epson.com/j/ViewPhoto?u=4153008&a=31266991&p=68339443
(bottom of photo)
http://albums.photo.epson.com/j/ViewPhoto?u=4153008&a=31266991&p=68339965
http://www.pcpolyzine.com/may2001/technique.html
...
(& photos of her covered square drawer knobs) http://tinyurl.com/5o6ut
(accessible
only if member of PolymerClayPeople yahoogroup)
....Kim
Redcat's symmetrical, butterfly shapes made with a tweeked version of Dorothy
G's rainforest beads, also using narrow Skinner Blend sheets (see
Blends > Multi-blend and Narrow) for her component pieces
http://photos.toast.net/kcredcat/Butterflyz
watercolor-bead
effect
Maggie
Maggio layered a very thin sheet of white over a very thin sheet
of black .... then put that sheet underneath a decorative
sheet
.......(she used a streaky-colored or Skinner blend
sheet) to make a sandwich sheet
...... let it sit a few days... then tore
the sandwich sheet into pieces with ragged edges (....all layers will
be visible at torn edges)
.........these
torn pieces can then be applied onto base clay separately (or overlapping
& completely covering) to make various looks
......apparently,
the trick is to get that top color layer thin enough that
it just barely starts to blend into the lower white layer, kinda
washing out the color and thus creating the "watercolor" effect.
...here's
a
pile of scraps from Shelley's sheet using Margaret's technique (streaky
sheets, over white and black layers)
http://cgpcg.org/photos/maggie_ShellyScraps.jpg
Maggie's
lesson on making a watercolor bead
...(translated to English) http://tinyurl.com/2s47wv
(also examples of using inclusions, transfers, etc., in decorative
sheet)
... (in French) http://paroledepate.canalblog.com/archives/2007/01/29/3726350.html
("plate" = sheet)
OTHER
top sheet or layer possibilites:
..... Skinner blend sheet, or a
streaky sheet ... will allow lots of different but complementary
colors to be torn from the same sheet
.........ex's
of blended streaky or marbled top sheets http://www.pbase.com/stargazer/image/1050192
......
translucent or
Pearl, or
gold, or any
color clay (...or as any layer)
......
paint or ink or metallic leaf
.......patterned
clay sheet
made
from canes or marbling/ dragged lines, etc.... mokume gane sheet... mica
shift sheet... transfer sheet...etc..
...I
decided to add a very thin layer of translucent clay on
top of the (top) color layer also to give the overlapping pieces a
little more depth (then maybe it becomes more of a torn paper
effect than a watercolor effect).... I really like that sharply jagged
edge look with the white and black
though. Desiree
http://www.desiredcreations.com/images/galleryFivePics/WCB2.jpg
Desiree
......Kathi's
lesson also uses a top layer of translucent (over pale Skinner Blend),
then puts whole sheet thru pasta machine at #5 before tearing into large-ish
pieces
http://www.dragonsglass.com/tutorials/waterc.htm
...Naama's
lesson ...but she uses a base layer of gold clay, and only 3
colors --purple, orange, red--in her Skinner Blend
http://www.naamaza.com/site/detail/detail/detailDetail.asp?detail_id=100383&depart_id=2431
......
you will get a blended effect, or a sharply-contrasting effect,
along the edges of the pieces depending on which
colors are used next to each other, and also how thin the layers
are
...Jackie
used tinted translucents (no Skinner Blend, or colors are individual anyway)
with her white and black layers
........also her topmost layer of torn
pieces is partly overlaid with more torn pieces
of plain translucent with white or only very lightly tinted translucents
(...no black outside?)
http://gallery.gundo.com/gallery/album61/JackieHeartOfHopeTin1
Tania's
almost neutral-colored, light-ish, watercolor bits ...medium gray,
warm white, translucent tinted peach?
http://www.flickr.com/photos/1001artbeads/2080834327/in/set-72157603807072150
Tania's
"metallic" and polished- woodlike browns, black, translucent
http://www.flickr.com/photos/1001artbeads/2225032213/in/set-72157603807072150
...Barbab's
lesson on making the final sheet with gold leaf (under 3 tinted
translucents & over the white & black)
...... she also "pulls
off" her bits from the edge of the final sheet rather than tearing them?
http://tinyurl.com/ylo4yh
...various
watercolor items ...onlaid on black base clay (most not completely
covered)... white edges not showing or no
white used
http://cgpcg.org/photos/maggie_TrayOfPendants.jpg
.....Jean S's bead http://www.pbase.com/stargazer/image/1050189
(only a white sheet underneath?)
...kabidesign
possibly uses a mokume gane sheet on top of two solid-color backing sheets
for her pieces
http://i239.photobucket.com/albums/ff122/kabidesigns/ED2.jpg
By
using
that "torn" technique with a transfer, I
can imagine creating the effect of a paper
edge torn out of a book or newspaper.
Susan
Textured Sheets, Colored with paints, etc.
If sheets of clay are first textured or stamped, then color from paints, powders, inks, etc. is placed only on the upper areas, or the lower areas, or in both areas sequentially, that textured sheet can then be flattened to create the same pattern (though spread out a bit) in a flat sheet of clay.
lots of possibilities for the coloring materials to use on textured sheets (e.g., paints, metallic powders, chalks, etc.), as well as ways to apply them, before flattening, plus the final effects (including Donna Kato's "brocade" effects) are discussed in Textures > Flattening antiqued and/or highlighted textured sheets
PIECED
sheets + collage
(....not necessarily
flattened ...some component pieces or finished pieces may be textured
also)
(this sub-category overlaps with the previous sub-category ... so check both places for examples)
Many individual pieces from various clay sheets can be put together (contiguously) to create a new sheet of "crazy patch" pieced pattern (or a more traditional pieced pattern, or in a grid )...generally geometric . . . this is also called "collage" by some.
Simple shapes (like
rectangles, or simple curves) or or not-simple shapes (animal shapes,etc.) from
different sheets of patterned or any clay can be pieced together in several
ways:
...cut
out a hole (of any shape) from the original sheet, probably
using a cutter .. remove cut shape... then inlay the same shape but in
a diff. color or pattern back into the hole created
...or cut
apart a sheet, then insert strips or other shapes, etc,
into it or next to it
....or piece or nest one shape of clay
exactly next to another one (along one or more sides) by
lightly placing a clay shape on top of another shape or base sheet... cut
the bottom sheet by tracing around one edge of the shape (or more than
one edge) where you want to nest it ... remove upper clay shape... then remove
clay from bottom sheet which was under the clay shape .... add the shape back
to the cut edge(s)
......whole shapes can be cut around in this way as well,
even from the center of a sheet
...one side of a cutter (cookie, canape)
can also be used to create a particular edge for joining another piece
........
cut both sheets to be joined with the same part of the same cutter,
then join the positive edge of one sheet to the negative edge of
the other
...templates (paper, etc.) can be used instead of clay
shapes, if you want to plan ahead
.......draw out what you want on paper, and
cut the puzzle pieces apart (probably best to number these
so can rearrange later!)
...... use these as templates to cut the exact shapes
from various sheets of clay
...... then join the clay pieces (on a thin base
sheet, or not)
Mike
High's crackled leaf cutout frog, heart, dragonfly shapes placed
into holes in background sheet the same size and height ...(used
as pendants)
http://www.mhpcg.org/clayDays/claydays04/june2004/tinaG1Lg.jpg
Judy
B's various examples of cutting out squares and discs of clay to
replace in holes in another sheet (to create her fabric for torso)
http://www.hgtv.com/hgtv/cr_clay_figures/article/0,1789,HGTV_3237_2831708,00.htm
(step 7 only)
Margaret
R's coyotes, etc., cut out from Skinner blend sheets and placed onto covering
of black clay on votive (probably into cutout holes, or thin cutouts flattened)
http://www.mregan.com/portfolios/portfolio3/photo4.htm
FimoBob
used sheets of faux wood (made with mica clays)
in a similar way to create a parquet effect (with diff. shades and shapes
puzz
http://polymerclaycentral.com/clayday_faux1.html
Tonja's similar (highly colored) faux wood parquet pendants
http://www.tonjastreasures.com/tn6.htm
...Valerie
made her faux wood parquet patterns with slices from tiny
striped canes made with mica clays...
(...for Bob's lesson,
plus more examples of parquet: see Faux-Wood >
Parquet)
purplepapillon's various-shaped sections, each textured & metallic
powdered in a diff. way, fitted together
http://www.imagestation.com/2999060/4266957995
+ http://www.imagestation.com/2999060/4266957984
Kris Richards' strip work, with stamped, Pearl-Ex'ed
"patches" (first patched strips are created, then they are fitted
together diagonally)
http://www.jacquardproducts.com/support/artists/holt/gallery/friends003.htm
Debbie J's African-style strips for pendants
http://colspolyclay.org/Debbiejackson/dj3.jpg
tallmouse's African
fabric (strips of pattern) (not polymer, but could be)
http://www.tallmouse.com/projects/kids/african/index.htm
kimono made with strips by Marlies ...(not polymer, but could
use cane slices or patterned sheets for the strips just as easily)
http://www.mcuniverse.com/Stamp_Geisha.654.0.html
Kim Cavender's pieced shapes of various types, one with text, on a business
card case
http://www.flickr.com/photos/kimcavender/2228049085
Liz's strips and rectangles pieced
together on Altoid box
http://www.libzoid.com/files/stmpaltoid0103.jpg
rectangular tiles of various
patterns/colors used together, puzzlepiece...no grout
http://www.mhpcg.org/clayDays/claydays04/may2004/images/mosaicLg.jpg
kites made with four separate pieces (like those in Irene SD's book)
http://www.polymerclaycentral.com/claypen_summer.html
(click on Jackie's photo)
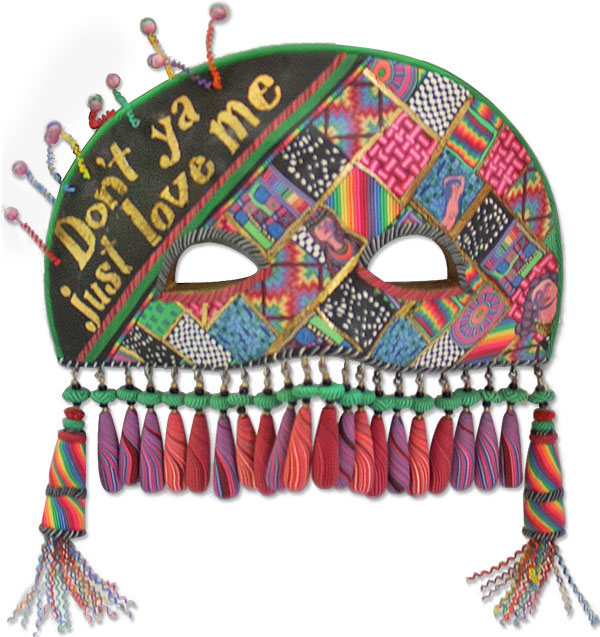
various cane slices made into sheet, then made into mask by Kathleen Dustin
http://www.polymerclaydaily.com/images/dustin_mask_600px.jpg
Dora
Arsenault's lesson for making millefiori sheet (for a crazy quilt
simulation) ...each shape differs in cane pattern ...(with
LS "stitching")...sheet laid on box lid on diagonal
...she
smooths out the clay pieces and seam boundaries by rubbing the surface
with tightly stretched plastic wrap using thumb and forefinger.
http://members.shaw.ca/clayquilt/crazy1/
Karen's
crazy quilt Christmas stocking ornament, with dimensional clay "stitches"
between the pieces
http://www.sculpey.com/Projects/projects_ornamentinspirations_Karen.htm
Lindly's
very fabric-like patterns, (flattened?), cut into patches for assembling
together into a (Tumbling Blocks) quilt pattern
http://albums.photo.epson.com/j/View?u=4153008&a=31266991&p=68349447&Sequence=0&res=high
(gone?)
Judy
Dunn's box covered with crazy quilt piecing, and a bit of simulated
dimensional stitching (onlaid)
http://beadyeyedbrat.com/crazyquiltbox.jpg
sinilga's pieced
shapes of (usually textured clays, often with mica powders and
onlays) placed around a photo (coated on both sides with
liquid clay)
...scallopped strips cover all the joins of the
pieced clays, and the edge of the whole clay cover is also scallop-cut (slightly
smaller than the album)
...she creates her cover on a sheet of glass over the
photo album for correct size, bakes, then glues to the front of a book-photo
album --she uses Sobo white glue, but any strong white glue should work, or
better 2-part epoxy glue) ...see more on making "covers" in Books
> Notebooks, etc.)
http://www.craftster.org/forum/index.php?topic=235709.msg2581183#msg2581183
Marcy
uses cane slices, onlaid bits, all kinds of things, to create
the sections (of her pieced flat hearts)
...she also
separates the parts of her pieced pattern sheets by laying
clay gun ropes, or strips of pattern, or dimensional dots,etc.
along their edges
http://www.marcysclaypen.com/hearts/heart4.html
(click on all galleries)
Jayzor's
site has lots of diff. collage effects
http://www.jayzor.com
(look all around)
Dayle
Doroshow uses lots of collage ... ovelapping, dimensional, clay things
of all types
http://albums.photo.epson.com/j/AlbumIndex?u=1751472&a=32123747
Cheryl's
fairly flat figures (art dolls) with
pieced sheets for clothing, hats ( lots of mixed media as
well)
http://members.shaw.ca/gera/new_page_1.htm
Margi L's magnet-backed
figures or simple pictures... done coloring
book style with each Skinner blend sheet component surrounded
by black
(created on backing sheet as onlay, then trimmed?)
http://www.studiocrafts.com/Products/Lm/pcmagnets.html
Diane
Maurer's pictures and landscapes (made with paper, but could be
polymer) for inspiration (pieced or puzzle-pieced, and more)
http://www.dianemaurer.com/collage_art.html
and http://www.dianemaurer.com/wearables.html
This technique can also be used to create "paintings" by combining component (flat or bas relief, possibly textured) pieces into one (realistic or abstract) "picture" (....see Paints > Paintings for details on those)
smooth
Jacqueline's draped bowl using puzzle pieced pattern on
top layer of Baklava Platter
http://home.nyc.rr.com/ateliergikow/Evryday_dreams/crafts.html
Lisa
P's patched squares of various "fabrics" ...covering
a base sculpt of a rabbit
http://www.heartinhandstudio.com/Bunny.JPG
James
L's bowls created by using sections of cane slices or other patterned
clay, puzzle-pieced together, over form for bowl
http://www.akrobiz.com/polymer_clay/i_13.html
... http://www.akrobiz.com/polymer_clay/i_20.html
(some flattened, some pieced?)
Kellie's strips of flattened mica clay twisted
ropes and red clay
http://www.kelliesklay.homestead.com/CopperMetallicRopeTin.html
Jenny
used a patchwork technique for her flat hearts .... she also separated
her 3-4 sections with 2-3 strips of twisted mica ropes (see Mica
> Buesseler > beehive)... and her patterns were symmetrical rather
than "crazy"
Desiree's
and Debbie's eggs covered with strips or crazy patchwork of different
patterns (website gone)
textured
*Dotty McMillan's many uses of caning, metallic powders
with textures, stamping, etc. on the "clothing" of her kaleidoscope
women
http://pcpolyzine.com/0301january/0301fantasyart3.html
(click on each image for larger view & more)
http://pcpolyzine.com/0301january/0301fantasyart2.html
(pieced and onlaid)
Jessica
A's 2 large pieced sections, onlaid as a unit onto the background
of this "collage" (but other parts are onlays or freestanding)
....many examples of metallic powder, stamping, etc
http://polymerclaycentral.com/chall_jan04.html
(click on "Details)
some
of Deborah Brams'
sheets for pieces are also highly textured
(before cutting) .... she uses metallic clays of diff. colors
for barrettes (could be seascapes??)... (few bits are onlays)
http://albums.photo.epson.com/j/ViewPhoto?u=4153008&a=31266991&p=68339805&f=0
Margi
L's swtichplates covered with collage of pieced colored clays in abstract
shapes ("modern" style )... pre-textured
http://www.studiocrafts.com/Products/Lm/switchplates.html
Lisa's
assemblage pins (upper and lower right) (pieced, or could be baked pieces pressed
into soft clay sheet... onlaid, and more)
http://fragments.iwarp.com/jewelry.html
Kellie's silver and gold patchwork strips
(could also be onlaid, baked, backfilled like a mosaic)
http://www.kelliesklay.homestead.com/Pins.html
Denita's patchwork of wood like rectangles covering box
http://www.polymerclaycentral.com/chall_may01.html
Marie's & Jody's
curved strips of wavy blade patterns, colors
???
ArtsyCraftsy''s
faux origami shapes made by making a 2-D representation, differentiating
areas by using various shades of same color, etc.(kimono, geometric...could be
stylized leaves)
http://ths.gardenweb.com/forums/clay/gal0619220216666.jpg
Keith B's African-color,
patterned canes with simple (mostly Skinner blend) canes placed
next to each other
http://www.polymerclaycentral.com/chall_jun04.html
Margi
L's Skinner blend sheet component pieces for bodies
(other parts are onlaid or behind) ...each surrounded by black before being
pieced together for (magnet-backed) figures or simple
pictures
http://www.studiocrafts.com/Products/Lm/pcmagnets.html
also
Susan's complex heart (the one on left could also be done this way, with
parts cut apart and line insertions added)
http://www.nwpcg.org/ravensdale/classes.shtml
(gone)
Of
course, same-shape-and-size pieces can also
be placed together (rectangles, triangles, etc.), in which case they may
also be referred to as "tiles" to create a frame or some kind
of grid
BRPCG's logo with various squares of different textures, surface
techniques, used as a frame
http://www.brpcg.com
(see
more on these just below in Pieced But Also Textured, Onlaid)
Bob's
lesson in Polyzine on using a cutter to make a thin inlay of a larger
shape to place into a background hole (inlay same size/shape as hole
into which it's placed)
http://www.pcpolyzine.com/september2001/cutters.html
...If
you want to prebake a bunch of Kemper cutter shapes to use as inlays,
etc., just press a raw sheet of clay firmly onto a smooth tile or other
surface, and cut quickly while rocking the cutter... or use cornstarch
over the whole sheet (see below in Cutting Tiles)
........if you put the sheet
onto a smooth tile, you can then peel the excess clay off,
and bake the whole tile with the shapes on it. Works great. Bean
Lines
or other impressions can be made in raw clay by using stamps, or
drawing with a blunt needle, etc., or impressing with small tips
like the end of a screwdriver or a ball-headed tool
....these lines, dots,
etc., can also create details in a less detailed shape
........ (e.g.
in a plain cookie cutter cutout or silhouette, as in creating facial
features and beard lines on a Santa cutout made with a cookie cutter, or adding
decorations to an pine tree shaped cutout)
....or they can follow the shapes
in a pattern of clay (like sheets of pattern, marbled clay,
mokume gane, etc.), coloring them in with different color
.........(e.g.,
impressing and backfilling a new dot made in the center of a bullseye slice,
or doing lines or series of dots, etc. along the outline of a color or
shape, etc.)
..this example isn't backfill, but it could be done that way
by rolling figure cutout silhouettes into a background clay sheet, then drawing
along the edge of the silhouette, and backfilling with white clay
http://www.purplemoon.com/Stickers/batik-rainbow-ppl.jpg
to insert shapes (of filigree or non-filigree) into a prepared sheet of Balinese Filigree, use a cookie or canape cutter to remove some a portion from some portion of a BF spiral, sheet, row of ropes,etc....then fill in with the cutout from another color using the same cutter. (placing plastic wrap over the sheet before cutting should leave the edges rounded rather than evenly cut, if that's what you want.) Diane B.
(For choosing colors for pieced sheets) I learned from Lindly Haunani this summer about making a color wheel, choosing colors from it or from a magazine photo, and then making many individual 'swatches' of clay to be combined into a finished piece. It was a fantastic, eye-opening experience! No longer am I stuck with the idea that I must use on or two canes to cover an object! Anna
Slices from canes with translucent clay backgrounds (floating canes) can also be placed next to each other or slightly overlapped to create areas of pattern or pieced scenes (edges melt into each other becoming effectively invisible) ...for more on this, see Canes-Instr. > Translucent, Close-Together
pieced...but also textured or onlaid
box
lid made with various techniques of pieced components
(Wilma box, at Terry Lee C's)
http://www.pbase.com/tlccreates/image/25780458
Karen Sexton's
many beautiful pieced pieces (some flattened, some textured, some pieced???)
http://www.mhpcg.org/images/members/sextonKaren/may2003/karenS2.jpg
Carol
Zilliacus first made a beautiful and interesting clay sheet
from her version of a tight, multiple Skinner blend which she textured
in various ways (often using color changes as guides)
.... then she cut
out some shapes with tiny cutters and replaced them with
contrasting-color (and textured) cut-outs from other areas of the sheet
....(she popped them out after baking and reinserted with several drops of
superglue... but wouldn't be nec??)
(....see also Kim Redcat's butterflies above in Pieced...flattened... she textured the whole new sheet after piecing and flattening it)
some
of these sheets may also have bas relief elements here and there
*
Violette's small samples book of fancy and embellished polymer sheets,
cover is all polymer too. . .& "box-book"...cool! ... all kinds
of collage
http://www.picturetrail.com/gallery/view?p=999&gid=1340337&uid=477851(
http://creaplastic.free.fr/10vio_06.htm
and http://creaplastic.free.fr/10gal_vio.htm
...various
sheet patterns, made various ways ...Teeny Tiny Tiles swap,
MDPAG)
http://www.mdpag.org/swaps.htm
(bottom of page)
Also see Inlay?
and ... or Sue's pietre dure simulations (see Mosaics)
...for more info
on insertions of all kinds, see Canes-gen.
> Overall Techniques
...for caned landscapes (see Canes-Instr.
> Landscapes)
DAMASCUS
LADDER
...made from "canes",
but not using traditional crosswise slices...
The
cuts in the logs of these canes are made lengthwise, rather than
crosswise as with most canes, yielding long "slices."
These
long slices may be further manipulated by flattening (and by cutting again,
rotating, and recombining for the crushed-reduced helix version) to form sheets
which can be used for many things like covering items, forming background bases,
etc.
(They can share some similarity with other symmetrical techniques ...e.g.,
Natasha Beads ...see more on those in Beads
> Natasha).
>
Duh, is Damascus ladder the same thing as helix cane?<
....Yep, it's a Damascus steel technique that bladesmiths use. I've been
messing with 'em for years, exploring fancy, fabric design for the sake of single
sculpture. They have ways of twisting and folding varying grades of carbon
steel, then pounding flat, and grinding the blade to expose the
pattern. In fact, they use polymer clay to explore ideas for new ways to fold
the steel. Katherine Dewey
...sample of the original metalwork
design, http://www.africut.co.za/images/LadderDamascus..A.JPG
Alan V.T
....The regular helix (Damascus Ladder) cane starts the same way as the crushed or "reduced helix"version below, but for this one you simply cut slices lengthwise (from the long side of the twisted stack of sheets instead of running it through the pasta machine then cutting tiny squared strips which are rotated and joined)
Alan Vernall's lesson on making Damascus Ladder canes from plain clays and also mica clays (metallic, or pearl mixes) at PCC (thanks for finally getting around to it!)a
few of the BOH I made... one with metallics, some without
http://www.glassattic.com/imagesCANES_COV/cov-BOH/BOH.htm
(3 pinkish-gray bottles, in 2st 2 rows)
Cristie's (though not a great photo...sorry); her stuff is very nice http://www.glassattic.com/images/BOH/BOH,Cristie2.jpg
(need new URL)
Jean
S's mica clays "holographic" caning
http://www.pbase.com/stargazer/hologram
Pat L made a beautiful helix? cane with black and gold
Amy W's
stacked beads use this technique but she rolls her stack of layers into
a ball then a log then a tapered log before cutting in half
....to
make the result into an interesting bead, she then coils one of
final halves around into like a snail (beginning with the tapered end)
so that the pattern shows up on the outside rim of the resulting
fat disk
http://www.ovenfriedbeads.com/stackertutorial.htm
Paula's
Damascus Ladder made with a stack which had been distorted
with a tool (from above)
http://polymerclaycentral.com/faux_paua.html
(the rectangular piece)
Could
Damascus Ladder patterns also be made in solid clay with oil
paints, or dried acrylic paints, etc?? (other colorants)
(see Mokume
Gane for more ideas?)
Damascus
Ladder Reduced (also called Crushed Helix)
The crushed helix makes a much finer pattern than the regular (Damascus) one does.
Jody's
helix, and then crushed helix, patterns (lessons)
http://www.angelfire.com/ct3/lujs/demo-helix.html
...Jody
later wrote a how-to article on this cane in the Summer 2003 issue of PolymerCafe
magazine
Jody
B.'s "crushed helix" (or Damascus Ladder "Reduced")
(lesson)
-- begin as for a basic Damascus Ladder cane:
........make
a long squared stack of colors,
....... twist* it, compress into a rectangular
log by hand (let rest 1/2 hr. or refrigerate a few mintues)
--
flatten it a bit with your hands, then put the log through the pasta machine widthwise
(like laying a hot dog in a bun)
--mark and cut many even (square? ..Jody
says 1/8") thin strips from the resulting sheet
--rotate
them so their sides are up, then lay them side by side (like making faux ivory)
... fully join them by placing a sheet of paper over them and brayering... let
rest overnight for best results (Jody)
....run through the pasta machine,
starting at the widest setting and then work down to the thinness you need...
I usually go down to #4). Jody
Jody
B's mini-visual-lesson on crushed helix (Damascus Ladder-Reduced) cane
this one is not cut after twisting, but is run through pasta machine to
flatten, then small strips are cut from the resulting sheet and each strip is
turned so its side is up before butting it against the other strips, creating
a sheet
(http://www.angelfire.com/ct3/lujs/demo-helix.html
("step" #2 is actually finished examples)
http://www.pbase.com/image/2744058
On the demo page I'm holding a small slice of regular helix
in one picture. What you get is a long strip with pinwheels down the
length. It's pretty too but the pattern is larger than
what you'd get by crushing/reducing the cane. Jody
(lesson
summary)
..... make a stack of colored layers, and cut into long
rectangle log (colors horizontal)
..... twist the rectangular stack of layers,
then compress into a rectangular log by hand (let rest 1/2 hr. or refrigerate
a few mintues)
....slice
the cane lengthwise one or more times, keeping the slices the same thickness
....open each pair of slices like a book to see what you have
...decide
which paired slices you like the best, then butt them together matching the pattern
exactly all along, and pasta machine to flatten
The final sheet appears to have the same number of repetitions of pattern as the number of twists originally given to the stack? --I think Jody's shows six.
...see also Faux-Ivory for sheets simulating ivory created with technique similar to Reduced Damascus Ladder
more from Jody:
.... It's more interesting if the initial layers
or color are of varying thickness, or at least one layer is doubled.
....The pattern I like best is made by flipping every other
strip after rotating to create a mirror image rather than keeping them
all going the same way.
I
also like to take that striped sheet, stack it so that the stripes are all running
horizontally and ripple cut it. Unfortunately, the patterns are too formal
and graphic for me, so I haven't incorporated them into a leafy vessel yet. I
guess that just means I need to try harder, maybe downplay the color and contrast.
.........(see
Cutters-Blades > Wavy
Blade for Jody B's "Ripple Ikat" sheet technique (using a
ripple blade,and starting with either clay scraps on a base sheet, or clay
extrusions from a Clay Gun)
...
If you put a sheet of striped clay in your loaf with
the stripes running across the short way, it will make a cool dots pattern
in the damascus!
....I've
also found that I get more usable cane if I add scrap to the ends before
I twist the loaf. Gives me something to hold onto.
...The basic cane
can be cut into two pieces, with one piece made into a simple Damascus Ladder,
and the other made into the finer patterned Damascus Ladder Reduced. Jody
sheets made from crosswise cane slices (butted)
Teri's
feather-ish pattern made by manipulating an unloved Kaleidoscope
cane (like Ikat )
(lesson) ..I .flattened and pasta machined
for long flat snake, cut lengths crosswise, and stacked them,
then took thin slices (crosswise) and laid next to each other to
form a sheet
http://www.picturetrail.com/gallery/view?p=999&gid=611741&uid=452502
(gone)
...Clayfreak's
lesson on similar pattern made pretty much the same way for a bookmark?
http://hobbystage.net/art/clayfreak/gallery/1011045392-000389.html
(gone?)
(?) I took some scrap clay chunks,and made a log of them. After twisting the log and running it through the pasta machine, instead of cutting the thin strips I just cut it and stacked it into a new cane, turning the slices as I stacked. I got pretty nice results from the cane slices which look quite similar to what was on your demo. Lenora
...see also Canes-Instructions > Ikat and Crushed Ikat and SB plug Ikat ... for making into sheets of ikat
holey
layer(s)
James L's 2-layer sheets: holey top layer
of clay (holes made with tiny cutters) pressed onto solid under layer...
in this case a variegated metallic holey layer and a solid color underlayer .
http://www.akrobiz.com/pc/i_72.html
.....lots of variations possible
........would be fun to use a cutter
for cutting a shape from the holey layer placed on top
of an solid or blend underlayer (....plastic
wrap trick would hide the edges of bottom layer)
...see also Ai-Ping's
many samples of a holey layer created in baked clay with
tiny drills and sometimes an Xacto... these have a contrasting color layer
underneath, and are curved during baking to create interesting tops
for her "hollow box pins"
http://www.glassattic.com/imagesOBJ_SEAS_MISC/vessels/Ai-Ping_boxes.htm
Marcella's
clay disk earrings with many small holes of various sizes (no
second layer-color underneath)
http://albums.photo.epson.com/j/ViewPhoto?u=4327525&a=32133773&p=73970553
Dan
Cormier's holey top layer, plus indentions (antiqued)... and space between
two shapes which creates a "line" where the bottom layer also shows
through
http://www.polychic.com/memories.html
(see more on ways to use a wavy blade to make very interesting sheets of pattern, in Cutters-Blades > Wavy Blade)
Donna Kato's slice-"painting"
technique
.....(make one or more canes which could be component pieces and
repeated, like a petal cane for the many petals of a flower, or a leaf cane,etc.)
...you
must cut your slices very thin! .....then put some of
them down on the clay sheet... roll the sheet with an acrylic roller
six different ways (end to end, side to side, and then both
cattycorner to avoid distortion).... then put down more slices and repeat....
continue until all your slices are done and rolled into the sheet of clay. . .
. use some pressure each time.
......then you can then fit the sheet
directly onto whatever you wish to cover, or add a backing sheet
for strength, and cut whatever pieces you might need.
..... I had tried rolling
the slices in before, but had never done it this thoroughly,
and that is what makes the difference. I found I can completely
eliminate any lines around the cane slices. It's well worth the
time spent doing it. Dotty in CA
(for much
more on this technique, see Canes-Instr
>Flowers >Slice Painting + Canes-Instr
>Later Manipulations >Slice Painting)
dot
slices grid pattern (...generally using automatically-wrapped logs....aka
"Extruded Mokume Gane", "mod blocks")
http://www.good-night-irene.com/Pens.html
and http://albums.photo.epson.com/j/ViewPhoto?u=4153008&a=31266991&p=68339803
Lisa
also uses this pattern often, sometimes with various colors all with black
centers, sometimes not
http://www.polkadotcreations.com/gifts/listseries_Accessories.html
(look all around...
keep clicking)
...showing the sequence when making auto.wrapped
canes http://desiredcreations.com/howTo_TLExtruder.htm
(see Clay Guns >
Uses > Automatically Wrapped for more info and more
examples of these dot slice canes...)
An
interesting sheet could be made by running a baked (or old) sheet
of patterned clay (even marbled or pasta-machined cane ends) through the pasta
machine on top of a raw clay sheet.
.....The baked
sheet will get crackled and pressed into the background color
sheet.
...fine granules of clay colors could be created
by whizzing clay (raw or baked) in a food processor and then could be placed
on the raw clay for a trip through the pasta machine too.
...the bottom
(background) sheet could be the patterned one instead, or
in addition.
....I had old stiff sheets and sheets
of pc "fabric" that I'd made a year ago which I forgot all about...when I tested
them last week they cracked when I touched them. So today I 'excited their
molecules' by smacking them between their layers of plastic
wrap until I'd hit every inch of each. I used both an acrylic rod and
then switched to a rubber mallet. I must say IT WORKED like a charm....
I later used a lot of them to make mokume gane (slabs) after they were softened
up.
. . . you need to be sure that the clay is covered completely with plastic
wrap and that it is smooth. or otherwise you're going to be
smacking textured lines into the clay. . . . after the sheets have been "worked
over" sufficiently, I usually test one corner... . ..you'll have to run
it through the pasta machine several times on the same setting
as the sheet was originally run through on. Carolyn
...I had a thin
sheet of raw, patterned clay that I had used as a laminate several
months ago. When I went to use it recently, it cracked. I tried back-filling
those cracks with liquid clay --but I colored the liquid clay with
gold. jayne ...looks like grout in a mosaic but outlines
the pattern shapes
... this could be very interesting if I had used some Glow
in the Dark liquid clay--imagine walking into a darkened theater! Better yet,
spider web designs for Halloween! jayne
......(see much more
on this method in Scraps >Hard Scraps)
A
ragged edge can be intentionally achieved along a sheet of raw clay
(for an aged or rock-like look) by tearing "dry" clay
(FimoClassic, old clay, or leached clay) rather than cutting it .... and sometimes
just by running unconditioned clay through the pasta machine
....for
tearing clay, I bake first for about 5 min... then
while still warm, I tear the piece around the edges and then finish
baking. ....made a pin that combined a transfer image and torn egde to make a
collage pin that looked like an antiquity shard. Linda LI
...
....
I marble some colors together (sometimes it's cane scraps) and run through the pasta maker on # 4 or 5, and wrap around the egg. Then, with the tissue blade laid against the egg (or other curved surface), slice little dots off, turn them over and press them back on (preserving the curve around the egg). This is a nice way to get a more complex surface than just the marbled effect.
would a sheet of baked polymer clay
(attached to a magnet sheet) be erasable since ceramic tiles
are (when written on with erasable markers intended for whiteboards?)
...especially if the baked clay sheet is very slick from having been baked
face down on glass?... or Kato clay were used?
...could use as a memo
pad or grocery list on frig... DB
...could also stamp with Fabrico
inks, then bake, for permanent decoration which won't erase
lesson
on covering a large flat shape of shaped wire, with
a "layer" of panty hose to fill in the negative space
...could
be done with a decorative sheet of clay instead of the panty hose
though
...(each end of the long wire was embedded into a block of wood... then
the wire "loop" was shaped)
...clay sheets simulating wood, stone,
or metal would be interesting too
http://www.art-rageous.net/WireHose.html
...http://www.art-rageous.net/WireHose-LP.html
For doing origami or tea bag folding or other folding techniques with raw clay, I suppose it would be best to use Kato's Repel Gel (or another CA debonder) on the clay, or possibly a heavy powdering of cornstarch on both sides of the sheet to prevent them from bonding during firing?... or just in particular areas
Sharon
M's lesson on fan-folding diagonally a small powdered-then-textured
1/16" thick, 3 1/2 x 3" rectangle of clay (from which she's removed
a 1" triangle at one corner) with a chopstick, then pressing
the folds together near the trimmed corner, and wrapping several times then "tying"
there with a strand of clay (in a square knot), to make a pin (at joanns.com..
Fimo Clay Pin)
http://tinyurl.com/4fu5v
Kaz
Kono's folded kimonos --origami (Happi brooches... may not nead
a release for these tho)
http://www.polymerclayart-japan.com/pixkazworks/brooch_folder/kimono2.JPG
http://www.polymerclayart-japan.com/pixkazworks/brooch_folder/hantenray.jpg
http://www.polymerclayart-japan.com/newkaz/englishginzaten.html
(gone?)
Judy Dunn's video lesson (2-part) on folding an origami "peace"
crane with raw polymer clay (she calls this "claygami"):
http://www.youtube.com/watch?v=wyHFCYHJa0w
..... http://www.youtube.com/watch?v=ckf4uNJsVQc
...she makes a sheet with a few cane slices rolled in (on one side)... then
takes the sheet down to # 6 on pasta machine
...cuts a square
with a template, then covers both sides thinly but evenly with cornstarch
(from tails of a cheesecloth bunch)
...makes all folds gently and handles the
clay lightly to avoid distortion... at end, she defines the folds more sharply
...supports
each in a muffin tin for baking, which results in flat wings, for 45 min.
(could be best to use a tissue in cup to avoid shiny spots)
(she says polymer
clays are more breakable in their new formulations, so must handle more
carefully after baking than before)
Judy's examples of many cranes:
http://www.moms-studio.com/id45.html
.....(she's
also made a kimono, and a cicada
http://www.moms-studio.com/id37.html
gone?
NOTE:
The Crane Project
is Judy's large-scale endeavor for making cranes for peace to represent
all those killed in the Iraq-Afghanistan wars
...you can make cranes
to donate too --make them from 4" waxed paper or deli paper
squares (she also uses pages from newspapers or magazines with articles about
the wars)... then mail them flat (don't open them up at the
end...just leave flat after folding up head and tail).
...check it all out
at http://thecraneproject.blogspot.com
(and watch the videos, and see the 20 great reasons to fold
cranes for the project!...lolol)
... seriously consider
donating cranes, especially if you use Judy's lesson above!
...(look on the right side of that page for address to send the cranes to, link
to an animated lesson for folding a crane, a donation button**
if you'd rather give money
(**that
page at Judy's blog may come up with the GlassAttic navigation bar on the left,
so you may not be able to use that button --that's also happening with all the
links on this page for some reason we can't figure out... if so, just copy out
the link rather than clicking on it and paste it into your browser bar to go to
Judy's blog page)
someone mentioned an origami crane having been folded with metal clay
for
beads made with folding techniques, see Beads
....>
Pillow Beads for origami "fortune cookies
...
> Foldover & other folds
for "foldover" beads (like taco shells)---spirals of extruded
clay colors folded over a skewer, baked, then removed
and "folded weave
bead" ... a working pinwheel bead
...> Mobius for Mike B's
cane slice with folded back corners (mobius beads)
...>More
Bead SHAPES & TYPES for various coiled strips, twisted
strips, and others
boxes (see Vessels for Barbara McGuire's lesson on folding a wire mesh and clay sandwich into a vessel)
could
use warm, baked clay sheets for folding or origami? (Kato
clay used to have the characteristic of "warm repositionability," though
less in new formulation)
...for
details on technique, see Covering > Removable
sleeves, sleeves from warm clay
the
"tea bag folding" technique creates a dimensional, round
design ---like from a kaleidoscope
...tea bag folding begins with
squares of paper of the same size ....usually 8 squares
...each
is folded the same way ...then the individual folded pieces are
interlocked (or laid side by side)
http://www.polymerclayexpress.com/design2.html
(see photos of books half way down page.... also click on ornaments??)
--could origami or other folding techniques be done with films (clings, decals) of liquid clay ?)
--could
origami, etc., be done with
fabric impregnated
with translucent clay or liquid clay?
...(stiffened)
fabric origami ideas ...transferrable to polymer (wallet,
purse, checkbook cover, box, card, etc.)
......can be later embellished
with beads, embroidery, paints and by numerous techniques
http://www.fabricorigami.com
kimono template (very simple origami), shirt, etc.
kirigami
(figures or solid geometric shapes)
The Japanese word kirigami, translates
to "cutting paper." Kirigami, therefore, is the art of folding and cutting paper.
....e.g., snowflakes from folded and cut paper examples:
http://lar.5u.com/kirigami.html
geometric kirigami
Investigating
Symmetry and Tessellations ... projects
http://lar.5u.com/kirigami.html
http://www.adrianbruce.com/Symmetry
polyhedra
solid
geometry http://www.mathsnet.net/geometry/solid
http://www.mathsnet.net/geometry/solid/nets.html
(see shapes come together)
(platonic solids ... same shape & size
for each piece (cube, tetrahedron, octahedron, dodecahedron... etc.)
(pyramids....
a pyramid's horizonal base can be triangular, square, or pentagonal at least...
number of "vertical sides" will depend on # of sides its base has)
(prisms...
a solid shape in which the top and bottom faces lie on top of
each other (parallel) so that the polygons connecting their sides are
rectangles....these are "right prisms".... (If the top
and bottom faces are rectangles, then the prism is known as a cuboid).
http://www.mathsnet.net/geometry/solid/prism3.html
see
more lessons & templates for making boxes and bags from paper
(but transferrable to clay?) in Boxes-Gift.)
(...see
ideas on using stiffened origami paper,
in Mixing Media >
Paper ....or stamps, stickers > Stamps & Stickers
....also
strengthening fabric with liquid clay or translucent clay
in > Fabric)
......I used liquid clay to adhere and to overcoat some
origami paper (much like decoupage) and noticed that the difference between ones
that buckled and actually separated from the clay base beneath was the length
of time I let the piece sit before baking. . . .The ones that sat overnight
before baking (my goal was for the liquid clay to self-level) seemed to totally
absorb the liquid clayand remained the way I wanted them. ....but the ones that
got popped straight into the oven warped.. . . I know that for paper to shrink,
it must first get wet --wet with the liquid of the clay seems to do it. Jeannine
`````````````````````````````````````````````````````````````````````````````````````````````````````````````````````````````
for
cutting strips or squares/rectangles from clay sheets for boxes,
covering, etc., see the gridded Omnigrid ruler in Tools
> Work Surfaces)
for clay coasters, see Sculpting-gen > Other Items
See top of page for more techniques and items which can also be thought of as "sheets of pattern."