Pendants
General info
Loops & Holes for cording
...flat
holes (made in flattish clay)
...top
loops
......U's
......full loops
(eyepins, making eyepins, eye screws)
.........loops + frame
......already-baked
clay
...tubes
...bails
& foldover clay bails
Framed pendants
Stacked pendants ...lesson +
Amulets
& fetishes
Tiny glass bottles,
etc.
Hinges & Lockets & Tins
Other pendant ideas
Websites
(pendants)
Cording
Many
types (waxed linen, braided nylon, leather, etc.)
Plastic
cording
...clear plastic tubing, filament (dyeing)
Rubbery
cording
...Buna, Viton, decoy cord
...using... closures
…sm. o-rings...
websites
Woven,braided,knitted --by
you
Misc.
...finishing,
tying
...adjustable cording (sliding
knots, snug fits)
......pins-into-pendants
More “architecture” for all
PENDANTS & CORDING
The
subjects of pendants, cording, pendant “architecture,”
jewelry, clasps, etc. all tend to overlap,
so look around all those pages if you’re looking for something in particular.
...To try and separate the topics though, the following category page will
concentrate on necklaces which feature one primary "bead"
or piece --large or small, flat or dimensional.
MORE KINDS
of pendants and NECKWARE, at GlassAttic:
--for "rock" amulets/vessels,
small containers worn on cording which are made over a rock which is removed
after baking, or for
a tiny tin which isn't removed after baking, see Vessels-Rock
.....for
inro (small containers worn on cording made over Advantix film cannisters
or other materials, see Vessels-Rock
> Forms)
--for covering
a matchbox then removing it for a pendant with a "drawer", see
Covering > Paper,Cardboard
--for
pectorals, collars, larger "pendants," rods
and torques, see Jewelry >Necklaces
--for
tiny, bottle pendants (some bubble wand bottles,
some empty), see BOH >
Embellishing
CORDING
--for
thinner cords, often strung with beads (Stretch Magic, SoftGlass, SoftFlex,
Tigertail, etc.), see Jewelry > Cord
for Beads
PENDANTS
A pendant can be any shape,
style, etc., that you want…it simply needs to be small enough to hang around
your neck comfortably
...they can be flat or dimensional, or
even be openable containers like “rock amulets” (see Vessels-Rock)
or tiny covered bottles
...they can be created with almost any polymer technique
or pattern.
...most pins could be also pendants if they were
just hung on cording
...most "tile" type beads could be pendants
(see also Jewelry > Bracelets >
Tiles.... Transfers)
You can
re-form purchased metal cookie/canape cutters to use as clay shape
cutters for pendants:
….I got a bell at Christmas. By cutting off
the "clapper" part of the shape, I get a nice "abstract" form
that makes a nice pendant (I like it upside down from the bell orientation).
…or bend the cutter to another shape (see Cutters
for more)
spoons make great molds for pendants.... soup spoons, tablespoons, measuring spoons, etc. Check out the thrift shops and garage sales for different shapes. My blue domed pendant is made from a spoon. TLC
to add weight ....if you only need to add a small bit
of weight, you could imbed a BB or 2 in the piece. Joanie
...or
get the tiny sinkers that fisherpersons use ... these come almost as small
as BB shot, and I got a box of them assorted for under $4.00 (a hundred)
....since
these are lead, they cut easily if they're too big or the wrong
shape, and they weigh a lot for their size. This will make those light pieces
hang right. Janey
thin clay
pendants may not be as stiff as you want ...(this is normal
for most clays since flexibility equals strength in thin clay... Sculpey
is stiffer, but also breaks easily)
...you can make thin pendants a bit stronger
by:
......making them thicker, covering a Sculpey core with
a stronger clay, embedding something (wire mesh, cardstock, thin metal,
etc.), backing with another layer or stack two unequal layers together
with the larger one behind to create a "frame," etc.
use an unattached
drawer knob for a gently curving surface (to form a pendant or pin
on top of)
http://www.tinapple.com/cynthia/98retreat/98retreat7.html
...or use a smooth glass jar for a surface that curves in
just one direction, etc.
flat
pendants or slightly rounded pendants.... can be completely or partly
covered with cane slices and other dimensional
or flat materials like metallic powders, leaf, etc.) while flat ....
then all slices & bits can be completely flattened into the surface
(or some left dimensiona) ...pendant can then be reshaped a bit, have its edges
rounded, onlays added, or left as is
..Christel's
female face cane slice plus added hair rope + background
leaf...onlaid, then flattened onto a long bead
http://home.online.no/~raje/Polymer/projects/womanpin/index.htm
(for
lesson details, see Onlay > Flattened
Onlays)
caneguru's pendant finding
for interchanging pendants or focal beads (curved
metal tube fits over cord and has perpendicular straight rod extending down from
its middle, with a decorative screw end
http://www.puffinalia.com/focalpoint/focalpoint.html
http://www.blessedbeads.com/findings.htm
(see also below Cording > Pins Into Pendants)
for
FRAMES, bezels, cabochon settings, etc.
....please see
Frames > Very Small Frames for Pendants & Pins
for
making magnifying lenses (magnifying glasses) into pendants as a substitute
for reading glasses, see Other Materials >
Magnifying Lenses)
LOOPS
& HOLES
for cording or findings
For
making perfectly round holes in flat-ish pieces of raw clay, it’s better
to remove clay (than it is to simply push it
aside with a pointed tool)
....so press & rotate a drinking
straw (or a small cutter) where you want the hole... remove cutter
from the clay, leaving a hole
... if using a straw, the clay can be blown out
of it (not good for multiple holes though!)......or press the clay out with a
rod of some kind that's narrower in diameter than the straw's diameter... or cut
off the bit of straw with the clay in it and use the straw again
U-shaped
(carving) gouges can also be used by pressing and rotating them
in the clay (this works with clay raw, or even baked if the clay sheet
is thin enough).
Top "Loops" ....(U's, eye pins, eye screws)
U- shapes
One
of the simplest ways to create a connector at the top (or bottom) of a pendant
or other clay piece, is to insert the two legs of a U shape of wire
into the raw clay, leaving a U extending from the clay (..note: this is not
openable like a jump ring etc.)
...regular wire can be used, or
various colored wires including telephone wire... even the ends
of paperclips (plain or colored) or old-fashioned rounded-end "hair
pins"
...liquid clay or another glue can be added to any of
the wire legs before insertion in raw clay (plastic-coated wires
may not need glue since they often bond with the clay)
......or regular
wire can be pulled out of the baked clay, and glued back in more
securely with superglue
...be careful to put any wire in straight
and not wiggle it around before baking, because the hole
can become enlarged yielding poor contact
liquid
clay works great if you're inserting a metal finding into a
raw clay item (lesson):
..put some liquid clay on the metal...
(make tiny hole first?) and push finding into the hole
..then dab more liquid
clay around the entrance, stabbing with a needle tool to "pack"
it in ...bake... holds great.
the plastic
coating on telephone wire actually bonds with the clay during baking
....Pier Voulkos uses staple-shaped bits of telephone wire in her jewelry
designs, to hang dangles from
...someone made their own telephone wire
by coating regular wire with tinted liquid clay, twice
(baking between the two coats)
(....see Wire
> Telephone
Wire for more details)
I made my U? connectors by twisting two strands of wire together and coating it with liquid clay (before inserting into raw clay?). It was very strong.
I use
the round looped end of a small brass safety pin
(for my top loop) --I find that the complexity of the shape
really seems to catch onto the clay inside the piece and lock into posiition.
...I
create a slit in the raw clay at the top of the piece, then push the pin
in... then press from the front and rear of the pendant to snug the clay
into surrounding everything but the loop. Jeannine C.
I folded
the wire in half ... ran the 2 loose ends up through the bottom
hole in the bead
... I left a loop of wire at the bottom of the bead...
then I "folded" that loop around and under, to the back of the pendant.
...at the top of the bead, the two wires were both coming out... I put another
bead over both wires, and pushed it down to the top of my pendant
....then
I pulled one wire right and one left, and began adding the rest
of the beads onto each side of the main wire. Jai
(openable,
so other connectors can be slid on when open)
eye pins
...
the simplest way to create a full loop of wire as a connector is to insert
a shortened wire eye pin into the raw clay (1/2" or more)
(an
eye pin is a length of straight wire with an openable loop at one end...
can be purchased at Michaels, etc, in pkgs)
...as above, the eyepin can have
liquid clay or other glue on it
...or the bottom area can be
bent slightly zigzag at the bottom, inserted, and then have the clay
snugged around it before baking
...or the eyepin can be removed
after baking, and glued back in with superglue
I make
the bend very tight so it lines up parallel with the other part of the
pin
... then carefully insert it keeping the "eye" part turned just
the opposite from the way you want it to be when it's finished
....
snug the clay up around the pin, then give it a twist so that the "eye"
is in the right position (this will help to embed the clay in the buried bent
portion of the pin shank. I've done this for years and have never, to my knowledge,
had an eye pin come out.) Dotty in CA
The zigzag method doesn't create distortion in the pendant since it only takes a little squiggle in the wire, and the clay can be snugged up and smoothed around the entrance hole fairly easily.
If you want, you can even slice a short, small slit (instead of a round hole) with the tip of a sharp blade across the area where you want to embed the squiggle... then insert the squiggle part of the wire in the same orientation as the slice. That will allow it to go in without much distortion, and even any pattern lines can be aligned again easily when snugging (...and there really won't be any distortion on the surface of the bead/pendant caused by the squiggle itself ... it's too small for that unless your clay is really flat and thin.) Then snug the clay around the slit. Diane B.
Or
an "eye pin" can be created from regular straight
wire, then used in the same ways as above.
http://www.jewelry-tools.com/WJU/techniques/loops/eye1.htm
(for making holes in baked clay to insert eyepins, etc, see below in Already-Baked Clay)
(openable)
Nanetta's lesson on sandwiching a straight length
of wire (or a trimmed headpin) between a decorative shape of baked
clay and a raw backing clay of the same shape
...a
vertical trough is cut on the inside of the raw half with an Xacto
knife to create an indention for the wire to lay in... liquid clay is added
in the sandwich before baking together
...(this can leave a length of straight
wire extending from the top and bottom of the pendant)
...she then curves
both these extending wires into top and bottom loops
to create loop connectors
http://www.sculpey.com/Projects/projects_EgyptianEarrings.htm
(openable)
I make a sort of S shape of wire - large at the bottom and small
at the top (the top loop sticks out of the clay).
...I put a small pancake
of clay onto my worksurface and press the large loop into that. ...then I press
on the clay that is going to be the pendant, making a sandwich and allowing
the small loop to emerge at the top
... the big
loop of wire curves inside most of the length of the pendant (I think
an embedded small loop could pull out so I actually go for a big loop that is
only a little smaller than the overall pendant size). Sue
(non-openable)
... wrapped shank (wrapped eye loop)
... a loop can also be created
in the middle of a length of wire
http://www.jewelry-tools.com/WJU/techniques/loops/wrap1.htm
...Heather
R's lesson on making one wrapped wire loop ("hangman's
noose) to insert into clay at the top (Tropical Goldfish Necklace)
http://www.sculpey.com/Projects/projects_tropfishjewelry.htm
.......wrapped
straight end of wire is inserted into clay
http://www.ejrbeads.co.uk/holographicearringstwo.htm
...sunni's
colored wire wrapped around a top loop, extending down onto
pendant as well
http://sunnisan.com/crafts/02/dragon009r2.jpg
....Micki’s
lesson on wrapping a flat stone, and also creating a somewhat
fancy top loop... with one unit of 2 connected wires
http://www.geocities.com/mick62001/simplecabwrap.html
....or
put the wrapped part of the shank into the clay to use like an eye screw
.......I
make my own loop and leave the wrapped tail end a little over 1/4" in length.
Then I (screw) this into the clay before baking (the wrapped tail end is like
a tiny "screw", and because of the texture and thickness of the wrapped
portion, it is much more secure than a simple pin would be.) Jai
.........instead
of the wrapped part of the shank being outside the clay, it can be embedded
in the clay then have the clay snugged back around (like the bent-shank eyepins,
etc) for a very secure hold, or it can actually be "screwed" in
--may even want to separate the wires of the wrap just a bit if doing this
for more toothy threads
...Emma's lesson on making a long
top loop connector unit, which has a small
tube bead threaded onto it
...... the wire is wrapped around
itself in the area just below and just above the small bead...
(final loop at top) (...one 12 cm wire used)
Danqing’s many
wonderful & creative (fancy) ways of using wire
to act as top loops, bails, etc.
http://icoldwell.com/danqing/Jframes.html
Julia S's wire architecture for pendants
http://home.insightbb.com/~mgrasso01/julia/setslide.jpg
I
also attached bead dangles (each dangle created on a straight
head pin), to the connector loop on the bottom of my pendant
(
a head pin is a length of straight wire with a flat
head at one end --like a nail, or silk sewing pin-- can be purchased at Michaels,
etc., in pkgs)
.....(I made a loop in the top end of the headpin after
adding the beads, so it could hang from the pendant's loop)
(...much more info on creating loops --with or without wrapping the shank, connectors, eye pins & head pins, etc.in Jewelry > Connectors and also in Wire > General Info, etc.)
eye
screws
I sometimes embed little brass eye screws into the clay
before curing, for the top of my large heart pendants .
....these are much
stronger than twisted wire, though admittedly not as aesthetically pleasing.
But, if the loop is going to be obscured by the cord anyway, it shouldn't make
much difference. . . inserting the screw eye for a heart pendant is tricky (without
distorting the raw clay). . ..
...I first make a pilot hole about
1/2 inch deep with a bead reamer needle, and with a tiny circular motion enlarge
it slightly.....Then - here's the trick - I reinsert the needle into the hole
about 1/4 inch deep, and press sideways with the needle point on each side of
the pilot hole to create slits to accommodate the sides of the screw
eye. There is no distortion this way. . .
. ...Then I very carefully insert
the screw eye and pinch the open spaces closed around it. ....now this
is VERY important - After inserting the screw eye, check very carefully to make
sure that the screw eye is seated perfectly parallell with the plane
of the heart. If it is at all crooked, the heart will not hang properly. It's
easy to correct with some needle-nose pliers or tweezers before it's cured, but
impossible after! Elissa P.
...Sometimes I've used a little liquid clay
in the hole, then poked the eye screw or whatever else it is into
the hole, then bake. So far so good... Jennifer
...see also few paragraphs
above for making a "wrapped shank" loop which can act
as an eye screw
......instead of the wrapped part of the shank being
outside the clay, it can be embedded in the clay then have the clay snugged
back around (like the bent-shank eyepins, etc) for a very secure hold, or it can
actually be "screwed" in --may even want to separate the
wires of the wrap just a bit if doing this for more toothy threads
...Look
for small screw eyes in the miniature wood things section
of Michael's, rather than in the jewelry findings aisle. Besidethebox
...also
look at any hobby or craft shop that sells supplies for making miniatures
(dollhouses, etc.)
... http://www.firemountaingems.com
has a bunch of different screw eyes... I attach them with a bit of liquid clay,
just drive them into the raw clay holds beautifully, I attach a bail after.
adriaf
...I was looking for eye screws last Feb. when I was working
on my GD's wedding favors because I needed a lot of them and could only
get 5 or 6 in a package that ran $3.58. Karen at Clay Alley http://www.clayalley.com
came to my rescue and found a supplier who had both gold and silver
and they are much more polished and not as bulky as the hardware store
variety. No, I don't work for Karen, just a happy customer. She went out of her
way to provide an item that we as clay addicts use.... They come in lots of 12
per pkg. and were very inexpensive. Marilyn
......see
other jewelry supply sources in Jewelry
> Supply Sources.
(one piece) loops + frame
Desiree's lesson on using
a 4"length of brass wire to make a wire frame-outline around
a clay pendant which also has 1 loop at bottom (for dangling
other things, or just design), and 2 loops at top (soldered or wire-wrapped
together to hold wire frame closed) ... sort of like a bezel
...first
she creates the bottom loop at midpoint of wire length by holding there with round
nose pliers while crossing each end to opposite side ... flattens both ends of
the wire slightly... wraps the wire around a hard form of some kind to create
frame's shape ...forms loop at each end of wire --flat side out (then solders
or wire-wraps the necks together)
http://www.desiredcreations.com/howTo_PJBrassFramePendant.htm
...could
do upside-down if wanted the single loop at top
(for
more on how to make a clay bead by forcing the wire down into
a sheet of decorative clay, and many more examples of Desiree's use of
this technique, see below in Framed Pendants)
also see Linda Goff's
(and others') outlining with wrapped wire around various clay shapes
in Wire > More Uses
...she either
carves a groove around side of the baked clay piece with a gouge to create
a channel to hold the wire securely (often using wrapped wire, and/or various
beads on the wire)... or just superglues the wire around the exterior
for larger items
.....Linda used copper or brass 20 ga. for inside
wire or main frame, and 28 ga wire for wrapping around that wire. Geo
...You
could use metal craft wire or (more easily) PVC coated wire like telephone wire
or a plain (white?) wire... this would work as both decorative trim and a way
to get a loop for hanging. Linda Goff
http://www.lindagoff.com/wire4.html
(also click on pages Wire one, Wire two, Wire three)
http://www.lindagoff.com/mokume.html
.....(red shell earrings also show a top loop which was twisted before
surrounding the clay shape
...and orca earrings create a small space for
hanging rather than a loop by extending just a bit of the frame away from
the clay
A
hole for an eyepin (or a pilot hole for an eyescrew) can be made with the
red hot tip of a pin or needle of the desired
diameter (use pliers to hold the pin during the whole operation, preferably
bent-nose pliers)
.....once the tip has turned red hot in the flame, quickly
press it into the clay where you want ... there will be tiny
puff of smoke (which you don't particularly want to inhale), and a tiny
corkscrew of clay will come out of the top by the nail ... remove pin and pick
clay corkscrew off
......insert the wire with a little bit of superglue
and hold briefly, or use a 2-pt epoxy glue, or use liquid clay but
in that case bake again to cure
OR, make
the hole with a small-diameter, round, bead reamer file (these are coarse
to fine, round files in handles, usually used by hand, often with "diamond
tips" for strength while drilling)
OR, make the hole with a small
drill bit (held in a homemade clay handle or a pin vise, or in an
actual drill) drill a tiny hole in the clay.... then insert an eyepin shank or
the legs of a U, etc., with a bit of glue if necessary
If a hole
is too large, you can fill it with raw clay of the same color (with
perhaps a little liquid clay on it).....then make the proper hole in the raw clay,
and/or put in the shank of an eyepin/etc.... then bake
(for
more info on drilling into baked clay, see Beads-Holes
> Holes in Baked Clay)
(For flat holes, U-shaped carving gouges can also be used by pressing and rotating them in the clay --this works even with baked clay if it's thin enough, or pre-warmed)
One
or more tubes can be used to hold cording as well
...generally
these small tubes are placed somewhere near the top, or on the sides
of the pendant, but they can also be placed on the back so they don't show
...they can also be part of the visible decorative "architecture"...
e.g., rock vessels or inro (small wearable container pendants) often use two long
tubes on each side for the cording to run through
....tubes are also part of some hinges (see "Hinges" below).
....(the
following lesson was for short tubes to hold the cording on the
back of pendants...to make longer tubes, just
don't cut the segment(s) short):
To make a tube is relatively easy
as long as you know a few tricks:
--find something straight and stiff
like a long doll needle (or crochet/knitting needle, esp. for larger holes)...
the smoother it is, the easier raw tubes can be removed (shiny metal is good)
--turn the (piece) over, so its back is facing up
From here
there are several ways to go...here are a couple:
--roll a log
of clay a little bigger around than you want the tube to be, and a little
shorter than your needle (though you can cut the log shorter if it's too long
after rolling)
--slice your log along its length like a hot dog bun...not
all the way through though
--press the needle into the cut and close the
clay around it
--roll over the clay with your fingers, pulling your
hands away from each other at the same time... this will both smooth and lengthen
the log
--if you press to hard or take too long, the hole
will get too big and sort of
flop around... if that happens, twist the clay log on its needle
from both ends till it's tight again... then roll again
--using a long blade
(or a single-edge razor blade or wallpaper scraper blade...long Xacto might work
too), place the blade on the log (perpendicular) at the spot where you want to
cut the first tube... then roll the blade forward, letting the clay
log-needle roll freely underneath for one revolution or so... this will create
a cut all the way around the clay . .. then repeat for as many tubes as your log
is long
--I pulled off my raw tubes at this point (holding the
needle with my left hand, and gently *twisting* each little section off
the end with my right) (....however, this segmented unit could also have
been baked first, then removed as a whole and broken or cut apart ... if
cutting, do it while they clay is warm; in fact you don't even need to make the
initial cuts if you cut the clay while it's still warm)
(--for some
of my raw tubes, I stood them and sliced a tiny bit off along one side
to make them flatter, but it worked fine either way)
--then I put a tiny amount
of liquid clay onto the back of the forehead of the ghost, and placed the
tiny tube on top of it rubbing on the glue a bit for good contact (if you
don't have liquid clay, just pressing them well should work, or you can use a
bit of white glue or let them set together a few hours to make a better bond)
---if possible, bake upsidedown to keep very flat (on a piece of paper
on a tile or baking sheet, etc.).. if the front is dimensional, you may still
be able to bake with the front down, or bake on a cloud of polyester stuffing,
or bake right side up on a riser so that the tube area can hang off while the
rest stays flat.
another option for getting
the clay onto the needle and avoiding the floppy hole
problem is to use a sheet of clay about the thickness you want the
tube sides to be; place the needle on the clay sheet and roll it one revolution
(cut away the excess), then join the long edges.
...or a thinner sheet
of clay can be rolled up on the needle until the desired thickness is achieved.
A fun thing to do is to make a "fancy"
tube using a round cane slice, even a small one... roll the slice around
the needle, then remove and bake; these make interesting spacer beads or even
tiny dangles for earrings too, etc.
...or make tiny croissant beads by rolling
up a long isosceles triangle of patterned clay, etc.
tubes
can also have rubbery cording glued into one end rather than acting a a pass-through
... Beckah's use of tube beads with end caps to glue
ends of cording into on both sides of pendants (plus one tube across
top for cording to hang from)
http://www.bearingbeads.com/Images/_faux.jpg
Desiree's
solid rod of clay (which looks something like a tube) has wire "headpins"
inserted into each end, to which the cording is attached
http://www.desiredcreations.com/images/galleryTwoPics/langloEggNcklCU1.jpg
http://desiredcreations.com/howTo_PJNcklClosures.htm
Claudine's interesting tops, Japanese style (clay
loop bails, sometimes around clay or metal tubes)
http://www.essi.fr/~claudine/Fimo/Gallerie/Textures/japo3.htm
MHPCG's wire coil strung on cording (both
feet placed into a bead) ... tiny o ring at each end of coil
.... also
2 perpendicular top loops to hang each flat bead
http://www.mhpcg.org/clayDays/claydays02/jan2002/janClyDy02/pages/inspire12_jpg.htm
Puffinalia has a metal tube finding for allowing
interchangable pendants or focal beads
(... it's a small
curved metal tube, to hold the cording.... which is welded to
a thin metal rod which extends downward and perpendicular to
it, to hold the pendant/beads... with a decorative screw end,
to hold the pendant on) ... could make your own??
http://www.puffinalia.com/focalpoint/focalpoint.html
..."brooch converters" can also be tubes to thread through the pin from
a pin back, allowing pin to be used as a pendant
(this shows a long thin metal tube, which hangs hoizontally, attached to a short
loop or tube above it, for the cording to pass through
http://www.gwensjewelry.com/
rg/rg429.htm (see more on this in Jewelry
> Pins)
Karen O's bails and interesting top connectors http://www.polychic.com/gallery_next.html
(.....see much more on tubes in Beads > Tubes)
Regular
metal bail "findings" can be purchased and
used on top of clay pendants ...(or they can be made from clay--see below)
... bails come in various types... "prong" or "ice pick"
bails (v shaped, which clamp on when the two legs are closed tighter)
....
also come as "snap on" (openable, closed clip-type loops, bit
like a lanyard hook).... and "triangle" (wire triangles)
......the prong and snap on type can also have a hole of some kind attached to
the top end of the bail for the cording to run through (rather than using the
foldover area formed by the bail)
...the prong type
is a metal strip, bent to form a V, with a "claw" on each end...
when the sides of the V are closed tighter together around the front and back
of a clay piece, the claws at the bottom will clamp on the clay but leave an open
space above for cording to pass through
http://www.clayalley.com/misc.htm
.... http://www.artbeads.com/thquteforusb.html
http://www.jewelrysupply.com/EJS/bails.htm
.... http://www.rings-things.com/Catalog_Pages/023.htm
However, a shape of clay
can also be used as a bail, when it's folded over or otherwise added to the
top of a pendant (or could be sides or even back too)
..... for the folded
clay bail, a space is left under the folded area for the cording
to pass through ..space can be held open with a toothpick, dowel,
or needle, or may not be nec
...a hole could also be created
in the top of the foldover clay if no space were left (as long as the
clay is thick enough in that area)
...or a strong U-loop or donut-shaped
or other bit of clay (perhaps with an armature inside or under the clay)
could be added to the top of a pendant
Tonja's various clay
bails... mostly clay foldovers and tubes, but others as well
http://www.tonjastreasures.com/jewelry1/jewelry1.html
sunni's
various ways of using spirals and curls of clay rope to make
a loop or bail
http://sunnisan.com/crafts/dragnswap.html
Monica's
faux gold clay bail on heart-shaped pendant
http://albums.photo.epson.com/j/ViewPhoto?u=4311023&a=31790690&p=72004758
Claudine's
simple clay strip bails, sometimes around clay or metal tubes
http://www.essi.fr/~claudine/Fimo/Gallerie/Textures/japo3.htm
Gillian's
clay strip (loop) and wire (loops parallel to pendant) at
top of pendant
http://www.art-e-zine.co.uk/pcgill15_213x240.jpg
Or..
a whole clay piece (probaby thin) can be folded over or
rolled toward the front (or back) to create a place for cording to pass
though
...if the pendant is backed with a diff-colored clay
sheet, when folded over the second color will be visible for that area
*Desiree's various pendants with disk and/or other pieces folded
over top of pendant to look like large faux bail... embellishments may
be added beside foldovers too
http://www.desiredcreations.com/gallery2necklacesPg2.htm
(click on lentil pendants
at bottom) ...look all around
Catherine’s folded-over strips
and curved tube bead on top of pendants for hanging (gone)
Susan W. used a long isosceles triangle to fold over (point in front, widest area in back)... she also used a second slightly larger triangle underneath as a "frame" for the top one ... she further embellished the foldover area visible from the front by adding a (squiggled, then spiral rope of black)
Claudine's
interesting tops, Japanese style (clay loop bails, sometimes
around clay or metal tubes)
http://www.essi.fr/~claudine/Fimo/Gallerie/Textures/japo3.htm
Marie Segal's large pendant plaques
(with onlays) sometimes folded over very thick woven?
cording
http://www.clayfactory.net/marie/gallery4.htm
Desiree
hid? a tube or loop behind a cane slice
http://www.desiredcreations.com/images/HowToPics/Langloisia/langloPendants1.jpg
Any other item (clay or
not clay) could be used as well over the top of a pendant
... something
oven safe which could be attached before baking, or something that could
be glued on after baking
Of course, wire
of any kind could be bent and attached in any way, or wrapped around the pendant
to hold it on.
.....Danqing’s many wonderful & creative ways of
using wire to act as top loops, bails, etc. (pendants with mixed media)
http://icoldwell.com/danqing/Jframes.html
(jewelry ideas from the Daily Planet gifts catalog)... they feature "ethnic" stuff, the real thing or that look, and a number of pendants had bails which were very unusual and reminded me of Celie Fago's work... like a pendant hanging from a horizontal silver bead which the cord passes through, for example.) Sherry
Tallie created a baking surface
for baking pins (or anything with an overlap of clay
on the back of a flat piece) because if the piece is baked with the non-flat piece
attached, it can cause it to be uneven after baking
... she make a shallow
box top and cut a rectangular slot out of it, then lays the piece on
it so the non-flat part sticks through while baking
http://www.talliesplace.com/html/tools.html
Claude's
faux or "half-bail"? on front
of flat pendant ... a length of wire in wavy + spiral shape,
with spiral end glued? onto pendant front ... a loop formed at the other end for
the cording
http://www.chez.com/creabijoux/interieur/GALLERIE/grandes%20photos/197.htm
fishing
swivels (without an added hook) can be used as swiveling bails
to create reversible (flip-overable) pendants... just
embed the loop at one of the swivel into the pendant.... patsy turned me
on to this idea. Laurel
...this also might be handy for pendants that end
up facing the wrong direction because of how the connectors were attached
(hook/clasp on right vs. left)... or as a substitute for a locket (picture
or other focal thing revealed from the back side, rather than from the inside,
etc.
Miscellaneous
Julie’s focal bead pendants have
(both ends of) a Buna-type rubbery cording
glued into the top (in the same place)
http://members.aol.com/wisecraftsweb/afterallpendants.htm
...in this particular case, she also has a faux o-ring
(small black ) which acts as a finish "bead"
on the cording ...created by placing a small flattened ball of clay
on the pendant top, then poking a hole though it and into the pendant
(to made hole for the cords)
Wrapping
wire, or twisted wire, or wrapped wire around the outer
edge of a flattish or dimensional clay shape clay shape
..Linda Goff first
showed this technique on her fabulous pins and pendants... she also interspersed
beads, loops, etc.
.....(create the finished wire frame, then press
it down on a sheet of decorative clay to cut it out, then) you can adhere
the wire framing with with super glue.
........or if you are into time-consuming,
you could carve a groove with a gouge which is what I'd do for jewelry
.....you
could use metal craft wire or (more easily) PVC coated wire like phone
wire, or a plain wire.
..... this would work as both decorative trim
and a way to get a loop for hanging. Linda Goff
….Linda (Goff) used copper
or brass 20 ga. for the inside wire or main frame, and 28 ga.wire
for wrapping it. Geo
....she also further embellished the framed
clay piece with more thin or tiny bits of clay
http://www.lindagoff.com
(click also on Wire 2, Wire 3, and Wire 4 for
many wonderful examples)
http://www.lindagoff.com/mokume.html
...Karen G's similar random clay squiggles and
shapes onlaid on animal shapes outlined with wrapped wire (with
occasional beads interspersed on wire)
http://www.mhpcg.org/images/members/Kg/Kgpins3.jpg
…James
L’s twisted and non-twisted wire wrappings around pendants
http://www.akrobiz.com/polymer_clay/gallery-00-01.html
(gone?)
...
......she
....places this cut out onto another sheet of clay (backing color,
#1), and repeats removal of excess clay
....embellishes the top
by pressing indentions and adding another wire shape, etc.... bakes....
antiques... sands/buffs
http://www.desiredcreations.com/howTo_PJBrassFramePendant.htm
Desiree's
wire-frame outlines around pendants, beads
http://www.sdpcg.org/sc8album7.html
... http://desiredcreations.com/gallery2necklacesPg1.htm
http://desiredcreations.com/images/galleryTwoPics/brasswrapLeafNckl.jpg
http://desiredcreations.com/gallery5bracelets.htm
...
http://tutorials.theclaystore.com/beads-buttons-and-jewelry/pink-flower-applique-pendant
(...for those, see
just below in Stacked Pendants)
see also "mini photo album" pendant below in Other Pendant Ideas
(for many more possibilities for small frames, see Frames & Mirrors > Very Small Frames for Pins/Pendants)
(for
decorative clay sheet sandwiched between 2 microscope slides, see
Covering > Glass)
my class notes (condensed lesson) using cutters, stamps, powders, and simple cording
1. Begin with leafed, powdered, textured-with-a-cutter, marbled, or plain clay.
2.
Leave it a shape you’ve created
3. OR if the clay is in a sheet
form:
--Cut a shape from clay with cookie cutter, canape cutter, etc
(if using a small cutter, the clay may stick inside; to avoid this, powder the
cutter, dip it in water, or use a quick rocking, side-to-side motion to cut &
quickly remove).
--Cut a shape with the tip of an xacto or other kind
of blade.
--Cut a shape by dragging the tip of a needle through
the sheet, at a slant.
--Cut straight shapes with the sides of razor
or other blades.
--Cut arcs with flexible, long blades (a tissue blade,
or Kato blade –stiffer).
--Cut sides with pattern-cutting scissors
for fancy edges.
-- use stencils & templates from Premo-Sculpey
kits (or your own) to cut out these shapes–see Cutters-Blades
> Stencils and Shapelets for details, for examples of
this kind of stacked pendant, and website link)
--(see
some possible shapes to cut, on Ways to Hang page)
4. ADD info re POWDERS, STAMPS, MOLDS, etc. (or see Powders, Stamping, Texturing, Molds)
5.
Stack pieces together, if desired (remembering to leave enough room for a
hole not too close to the edge)
--(if you want, press small baked shapes into
an unbaked piece (inlay) first,) then
--place one piece (for instance,
a molded clay shape) on top of another piece (a flat piece)
….however,
they won’t stick together if there is complete powder coverage on the bottom
piece though—so don’t put powder there, or make scratches on the area)
(--you could also use a larger piece to act as a frame around (under) another
piece)
(--Before baking your item you can leave it flat, curve it over
a rounded index card, or curl the edges.)
....see Barbara McGuire's baking
shapes on the curved side of an upturned glass bowl
...http://www.hgtv.com/hgtv/crafting/article/0,1789,HGTV_3352_1399580,00.html
6.
Make the finished item stringable:
--make a hole with any size
of straw (largest at McDonalds, smallest are coffee stirrers) by pressing in,
then twisting; remove straw and blow clay out, or cut off the tip with scissors.
--or use one of the other techniques shown on the Ways to Hang Pendants
page. ADD
7. Bake
--lay your item flat on a piece of paper on
a baking sheet
--bake in a preheated 250-275 degree oven for approx. 20 minutes
(if the item is very light colored, Sculpey clay, or if it’s very thin, reduce
temp. to 225-250.)
8. Seal if necessary
--Powders and leafing may
require sealing to prevent rub-off, and also tarnishing in the case of leaf.
(However, some sealers seem to darken the powders; if using Future, for example,
try applying a bit more leaf after the sealer has dried …and seal again?. Try
other sealers listed in the original Basic Information sheets I handed out also.
....For powders or foil, most people use glossy sealers rather than matte.
9.
Cords and stringing
--We used waxed linen cording because
it’s cheap and available. But there are many other things you can use for cording;
one problem with other cording though, is that because it’s thicker, it won’t
go through the holes in many (manufactured) beads. Try things like rattail
(fabric store), leather and vinyl thong or cording (craft
stores & bead stores), elastic cord (black, white, metallic)—convenient
because the cording can be shorter and still fit over the head, etc.
--There
are many ways of connecting the cord ends; we simply tied both tails as
a single knot, then trimmed. I will include a diagram for making a bead and loop
closure, but if you’re interested in more closure methods, check out beading
and jewelry books.
10. Pins
If you want to make your piece into
a pin, use a purchased pinback and glue onto the back of the piece, near
the top. Some glues to try are gel superglues, Goop/E6000, or possibly Gem Tac
glue. (also see Jewelry/Pinbacks for other methods)
11. Barrettes
--If you want to use these methods (or cane slices, etc.) to make barrettes, either
glue the raw clay on the barrette with a superglue and bake upside down on a layer
of stuffing or batting, or lay the clay over a rounded index card to bake then
attach to the barrette with Goop/E6000, superglue, or possibly Gem Tac glue.
--The bottom part of the purchased barrette forms (craft stores) can be removed
for baking.
………To see this type of stacked pendant taken to a very high
level! take a look at:
uniquebead’s (Barbara Sperling) many wonderful
onlaid stacks and bits of other things
http://www.beadunique.com/catalogue/catalogue%20mosaic.htm
http://www.beadunique.com/catalogue/catalogue%20mosaic%20brooch.htm
http://www.beadunique.com/catalogue/catalogue%20mosaic%20pendants.htm
Beckah's
stacked pendants with a transfer on top layer
http://www.bearingbeads.com/Images/_iartpen.jpg
nenuphar's
triple-layer of shapes..top one is stamped and powdered (see Powders
> crevices for details)
http://isisesc.supelec.fr/gallery-nenuphar/album01/aah
(g0ne?)
Karen Sexton's many beautiful pendants
in layers
http://www.mhpcg.org/member.html
multiple layered items pendants
http://www.aloha.net/~coral-c/jewelprc.html
pendants from my kids' class
Cheryl's pendants in layers, with
powders (like my class) (website gone)
Cre*it!'s
textured, white-Sculpey-in-the-box clay tiles, folded double thickness after one
pass through pasta machine, which are mounted on ceramic tiles, notebooks, cards,
vessels, even jewelry, giving them sufficient strength and retaining
lightness; double deck effect, cameos, etc. (then finished with
their special tinted glazes)
http://www.dotcalmvillage.net/cre8it/polyglaze.html
http://www.dotcalmvillage.net/cre8it/polyglazetech.html
(lessons to come)
Amulets & fetishes
go to Sculpting--bodies > Abstract Figures > Amulets for most info about amulets and fetishes
Amulets and fetishes are small figures, animals or items which have traditionally been used as magical objects which confer protection, help or assocation to the wearer. They are often abstract and stylized figures --no legs, simplified bodies or torsos, for example, but can be other things.
often used as stand-alone
pendants or pins .....or can also be attached
or connected to something else
...can also be used as vessels,
pouches, containers which are worn (...some
original amulets were for holding a medicine, or recipe for it)
.........(for
rigid, hollow, or somewhat hollow, amulets which are formed over small rocks,
see Vessels-Rock
> Websites, mostly)
...but
they can also be used as embellishment on items such as vessels,
jewelry, covers and mini books/journals, covered gourds,
etc.
attached to them can be things like:
......all kinds of embellishments.... (even hair,
bone, a belonging, etc. of one of the parties --intertwined with, attached
to, or enclosed within, some real amulets)
......dangles comprised of
beads, shells, or anything which can be hung or strung
.....framing
or background piece ... or something to interact with, or to be
associated with
Tiny
glass (or perhaps acrylic) containers can be purchased,
then filled with various things or embellished with clay, and hung as pendants.
...if
they are filled with a liquid, the stopper or lid will have to be very tight
...could
fill with small items or mixed media, particulate or powdery substances,
thick or thin liquids (water, glycerin for globes, paints, etc.) or paints/liquid
clay/etc. could be drained from inside as sometimes done with clear xmas balls),
or clay, or made into "bubble bottles with removable wands"... or fill
with nothing at all
To make the
containers into hangable pendants, see above in Loops and Holes
...or
create clay or other tubes/flaps/etc, or use wire (wrap around neck
or embed through clay)
...or use eyepins or eye screws, into the clay
or stoppers, etc.
(see above in Bails
for many more ways to create places for cording to be strung for hanging
pendants, as well as below)
Tonja's
tiny bottles covered with clay... small cork in top with inserted
brass eye screw? for hanging
http://www.tonjastreasures.com/vessels/tn2.htm
...clay loops are added to the top of the black and gold bottle at center
left so can hang http://www.art-e-zine.co.uk/bottles.html
Tonja's slender hanging pendant bottle, covered with clay, then flower slices
onlaid
.....to hang, wire is wrapped twice around a "neck" depression
created in the clay covering, then extended upward and outward before a
connecting loop is made (wire spirals) http://home.centurytel.net/tkaylen/group3.html
many
bottles (med and small) covered with mixed media and (often) polymer
clay ..including transfers, beads, fibers, etc
...many have wire embedded
into clay areas near neck or top for hanging
http://www.art-e-zine.co.uk/bottles.html
Parrish's various interesting pendant bottles, with parts which are
faux stamped metal ...Medieval-style
...many are hung
(separately on each side) by embedding an eye pin into the outside of a
faux metal "bead" which is around the "neck area" of the bottle
...many
interesting partial covers, etc.
http://www.parrishrelics.com/vessel.html
Linda H's pendant bottles, with gold liquid clay drizzles? http://pg.photos.yahoo.com/ph/scadventurer2001/detail?.dir=e8ac&.dnm=8a8e.jpg
(gone)
Tonja's sand?-inclusion bottle
pendants (loop ring in cork stopper) http://www.tonjastreasures.com/jewelry3/tn1.htm
(gone?)
(see more on using colored liquid clay, etc. inside or outside glass bottles, and other ways to embellish glass bottles, in BOH > Embellishing )
Making
bubble wand bottles from tiny bottles are a heck of a lot
of fun! My sister and I were brainstorming ideas and came up with some more
(see BOH > Stoppers for making the
tightest fit).
...cover a small bottle (make as a pendant if desired
by wrapping neck with wire) then turn it into a bubble bottle with wand
cap
...Connie's various bubble wand pendants http://users.adelphia.net/~cclaycreations/html/BubbleBottles.html
(gone)
.......some are flat squares of
clay placed on opposite sides of a tiny bottle with edges pressed together
and embellished... some are large flowers over the front and extending past the
bottle... some are goddess figures with cork stoppers for heads
That
looked wonderful!!! ....like a mix between dichroic glass and raku!!
Laura (website gone)
....I
mixed Kato liquid clay along with the coloring agent inside the
little vial....then I gently turned the vial and drained til
the whole inside is covered with the color
..... both coloring + liquid
clay on the inside stand up to water just fine...no sanding needed (and no puddling
around the margins of canes applied to the surface)
.....Pinata
alcohol inks plus Kato liquid clay was the best combination... (though
I don't have any Fimo Gel to compare). Sarah
.....Kato liquid clay
tinted with Pinata inks is beautifully transparent and vivid
......(this
inclusion--alcohol ink-- seemed to bubble less? than when it was
mixed with either oil paints or Pearlex.)
....the color won't bake true.
tiny
glass bottles with rubber (or cork) stoppers that people
usually use as pendants for perfume are cute... they hang from a top handle...Helen
(....see examples of these used with clay in BOH
> Embellishing ....some are bubble wand bottles)
I cover small (glass) bottles
that I get for free from eye drs....contact lenses come
in them and they are just thrown away after the lenses are given to the patients
(They will usually save you a pile of them and just give them to you. I've gotten
tons this way. They feel better that they are recycling and not just chucking
them away..)
....Little bottles: also vaccine bottles from vets’
offices ...... and those little insulin bottles from diabetics.
..... I then can carry my Tylenol with me on a necklace when I don't want
to carry a purse.
.... I do this too to make little toothpick holders
(holds around 20-25 toothpicks). Cute!
(for many,
many of these, see BOH)
(for much more on covering glass in general, and on various ways glass items can be embellished outside and sometimes inside, see Covering > Glass)
suppliers of small
pendant bottles
...various
shapes of tiny bottles to buy... with metal
triangle top loop embedded in tops (glass or rubber), or eye
screw screwed into cork tops
http://www.creditcardcastle.com/cgi-bin/products.cgi?
(click on "Glass Bottle Items")
....Necklace
Perfume Vial Holder & Atomizer, metal on outside
http://www.artcraftworld.com/pclay.htm
+lesson http://www.artcraftworld.com/pcinst.htm#neck
....mini bottles (pendants).... 3 shapes of 1" tall mini bottles, with
brass loop in their cork stoppers ...Rebecca
...artclayworld
. . .Necklace Perfume Vial Holder & Atomizer? + Twist
Ballpoint Pen -Key Chain -Ceiling Fan Pulls
-Letter Openers -cabochon Bookmarks & Purse Mirror,
http://www.artcraftworld.com/pclay.htm
and http://www.artcraftworld.com/pcinst.htm
(+ lessons for covering each item)
...Parrish
Relics various sizes and shapes ... no tops: http://www.parrishrelics.com/glassvials.html
..........for many more
suppliers of glass (or plastic or metal) bottles and other containers,
see Supply Sources --esp.Bottles
& Containers
Hinges & Lockets ...& tiny tins
dangle-joint "hinges" (connectors
which separate)
...Mike B. used beads as hinges to separate his pendant shapes
into several pieces so they would dangle
.......he put a small bead
between segmented parts of a single pendant form (movable in one direction)...
in this case, like separated puzzle pieces)
http://thepolyparrot.com/mikeb.html
...Beckah's hinged dangle pendants (like Mike's) with molds, stamps, transfers
.. using 2 short embedded eye pins in each piece, which are then directly
connected (without a jump ring) http://www.bearingbeads.com/inspiration5.htm
(gone)
Julia S's dangle joint hinges between glass slides, using
wrapped loop in one segment, eyepin with small bead in other
segment, connected with a jump ring between
... and various ways to
use coils and hinges
http://www.juliasober.com/polymergallery.html
(2nd half of page) & http://home.insightbb.com/~mgrasso01/julia/setslide.jpg
(gone?)
Mike
Buesseler also used metal or clay tubes as hinges between parts
of his hinged pendants
http://thepolyparrot.com/mikeb.html
faux dangle (rigid "dangle")
...Claudine's
3 segments placed onto a vertical strip of clay slightly separated
and slightly unaligned
...she cut apart a decorated pendant (one
an impressed gold stamping on Skinner Blend pattern ...one a transfer)
http://www.essi.fr/~claudine/Fimo/Explications/transferts.htm
(almost at the bottom of the page)
Dotty's multiple-hinged pendant, made
with muslin fabric & TLS backing
http://albums.photopoint.com/j/ViewPhoto?u=1580264&a=12021883&p=43406412&f=0
Sunni’s small wire-twisted mini-hinge lesson for mini book (like the eye
half of a hook-and-eye notion, with a coiled middle)
http://sunnisan.com/crafts/hinge1.html
Dayle's several hinged pendant triptychs http://www.dayledoroshow.com/pics1.htm
swing
sideways pivot
hinge ... flat shape on flat area of pendant, which swings open sideways at
one point
... wire or baked clay rod, etc., passed through a small hole
in pendant and door (with something added on each end, outside and
inside, to act as stops ...e.g a bead, or could have used a
headpin or eye pin)
Ginny's swing-to-the-side
pivot "hinge" (made with a bead? of clay) ..spade and heart
http://imagesinthewind.homestead.com/Lockets.html
(gone?)
Celie's pivot created at the top of
two long leaf shapes (which otherwise lie exactly on top of each other)
http://www.celiefago.com/gallery_2003.htm#
(Pierced Pod)
....(see also mini photo album of
discs sort of like a locket, worn as pendant, below in Other Pendant
Ideas)
For more
info on hinges and types of hinged items, including vessel lids,
frames, and books,
see
Vessels >
Hinges + Books
> Hinges +
Frames >
Tri-Fold Panels
PURCHASED or MODIFIED metal hinges
Mike Buesseler's
uses a metal pinback finding to create the hinge for the
tiny door on his beautiful lockets
...I was just playing
with design and made some holes in pendants...then I needed a lid...ledd to the
hinge. Mike B.
http://polymerclaycentral.com/mikeb/Lockets.html
... http://polymerclaycentral.com/mikeb/LgLkt2.html
http://www.polymerclaycentral.com/mikeb/LktHnge.html
...closeup of hinge , showing the body of a locket (thickish rectangle
of clay) with hole cut out in lower half for adding image... the actual pin of
the pinback is inserted all the way into the body of the clay at top of the image
hole (hinge side upward), with the tiny hinges actually resting in a square area
cutout area ...so the only part of the pinback now extending into the open hole
is the flat part ("tang")... a lid is later glued onto that
....Now
that I've sort of got an idea of the mechanics, I'm thinking it would be really
neat to put a baby picture in the locket part for my daughter, or make
one for my Mother with an old tintype transfer in it.
... one has
rose-leaf transfers inside. Zig
...Ginny's
MikeB-inspired hinged lockets http://imagesinthewind.homestead.com/Lockets.html
(gone)
...Since
I've been making pendants this week with oval, round, and square transfers
that are framed, and with a little door that opens and closes
over them, I've found that the easiest way is to use oval, round or square cutter
sets with graduated sizes of cutters in each set.
.....lesson:
I just plan my transfer picture to fit inside the cutter area and cut it out.
I then cut an opening in the clay I'm using for the frame the same size as
the picture, then I remove the cut piece of frame clay and pop in the picture
which fits perfectly.
Trim the frame nicely.
Then I cut another piece
the size of the picture and make that the little door that opens and closes, using
Mike B's pin back hinge.
Tip: I bake the transfer picture
piece first before inserting it into the frame. I can then snug the frame around
it nicely without distorting it. . . . I then lay a sheet of clay underneath the
frame and picture, and trim the excess. Dotty in CA
What
if you take one of those metal button covers, the one with the hinge,
and surround it in clay.... make a locket out of it.
.... the button cover
part is deep and can keep a photo or a lock of hair or..... I sealed some button
covers with glue and am going to embed them into clay. Put a necklace bail
on it and see what all I can do with it.. Karen
tiny, real hinges....
Lee Valley Hardware catalog http://www.leevalley.com/hardware/index.asp?category=3&SID=&ccurrency=2
(click on Box Hardware, at least)
Oh, my yes. Those hinges,
etc., have great potential. Right off the bat, I'm thinking pendants. Desiree
hinges created from TUBES and "PIN" to run through them)
*Mike
B’s hinged lockets ...using metal or clay tubes, with
wire running through
http://thepolyparrot.com/mikeb.html
Gerri's amulet necklace mini-books (spine is at top, steno-style...
clay tubes & wire)
...one type of hinge has a tube of clay
with flap at end (portion of rectangle not rolled) which is attached
to the back cover (sticks up/extends a bit higher than the back
though); stiff wire is passed through the tube, bent, and pressed between
the two layers of the top cover... a seed bead cording passes through
the tube to suspend it
...the other type has the clay tube directly attached
to the back cover? (doesn't have the extension and doesn't stick up); then other
parts the same
http://www.newfry.com/Jewelry.htm
Darla’s several hinged plates... connected with eye pin in each
piece, and a jump ring to connect
http://hobbystage.net/art/celticdolphin/jewelry/pins/1010839223-000313.html
(not accessible)
Celie's
fancy hinges ... all wire, various wire shapes used for tubes or
loops, and pins
...one on traingle box pendant http://www.celiefago.com/gallery_2003.htm#
Irene Y's "hinged" pendant ...all wire ... hinge made
from a long coil of wire
could be done two ways
...(with
short bit of both ends left uncoiled, so that they can be glued into the dangle
part of the pendant...another wire put through, bent, and glued into other part?)...see
top hinge also (for cording)
http://thepolyparrot.com/right.html
Robin Beaty's many hinges ...some like mini-books and/or
pendants
...transfers are sometimes "hidden" beneath a
hinged cover ...
http://www.pcpolyzine.com/july2001/mafa.html
3 ways to make hinges in pendants (or for frames)
...video: Hinges in Polymer Clay, by Tory (Victoria)
Hughes
1. hinge on the side
2. hinge two parts together
3. hinge within, creating a swinging part
...she
mainly uses the "door hinge" type of hinge, in which a
pin of some kind is run through tubes of clay which are attached to each
side (usually two tubes on one side, one on the other side)
... she creates
the hinge tubes in place for an exact fit; these can be bent or finished with
a bead, etc. on each end;
... she also shows a method of running a pin/wire
through one clay tube (attached to one piece of pendant), then bending the ends
90 degrees and supergluing into the non-tube piece.
http://www.polkadotcreations.com/books/gp17a.jpg
other
objects could be separated-hinged, or could have a hinge added in some
way
for more info on hinges
and types,
see ... Books
> Hinges .... Frames
> Tri-Fold Panels ....Vessels
> Hinges
Karen
O's lesson on making a large, thin walled, tube bead (pendant)
by baking textured clay on a large wood dowel covered with aluminum
foil, baking and removing. . . then making end cap units with
3 stacked, progressively smaller disks, which she then made a hole through
and TLS'd onto each end before baking again. She strung these like vertical pendants
with a tassel below.
http://www.polymerclaycentral.com/hollowbead1.html
Emi
Fukushima's lesson on embedding a translucent-covered, baked, washi
paper onto a larger shape of double-thickness black clay (textured with
lace while a needle is retaining a hole in between the layers for cording),
then rebaking (she also adds a Chinese coin to the black base clay for
her final pendant)
http://www.hgtv.com/hgtv/cr_clay_jewelry/article/0,1789,HGTV_3238_1383759,00.html
for sandwiching a decorative clay sheet between 2 glass microscope slides as a pendant, see Covering > Glass
http://hobbystage.net/art/kathyweinberg/
I think you're right, some of tattoo tile designs are so square or something and lend themselves better to more regular shaped objects like boxes. But some of those flowing floral patterns should make good pendants. Desiree
I made some tic tac toe pendants last year. The "board"
is the pendant..and X and O cane slices were strung on the
cord until you wanted to play (they could easily be removed). It would
work great for tins too..and I dont see that you'd have to have the pieces "stick".
Just use the box to store them..and then take em out when you want to play...Jan
R.
http://freeweb.pdq.net/janruh/clay/de2.jpg
sinilga's
mini "photo album" hung on cord as pendant
... comprised
of 4 large cardstock discs -- front and back "cover" discs are are fancy
clay baked and glued onto the cardstock...the 2 interior discs have photos glued
to them (no clay, but could be transfers, or decoupaged--- and disks cold be clay
instead of cardstock)
...... she put a sheet of glass over the disc so could
see shape and size for making the front and back clay discs, then baked on glass,
and glued onto cardstock discs... discs held together by decorative cording through
holes in top
http://www.craftster.org/pictures/showphoto.php?photo=103285&ppuser=126038
see
also swing sideways pivot "hinge"
above in Hinges for similar idea re multi-pieced pendants
The
blank backs of dominoes can be used in various ways --take a look
at these, e.g. (not polymer)
http://www.heartsintouch.com/items_embellish.htm
metal
military dog tags can be covered on the front or all over with polymer
clay, then hung through the hole that's already there
... one source for blank
dog tags http://www.inlandproducts.com/dog_tag_blanks.htm
real
pet tags for dogs, cats, or other animals could be suitable too
1st Kokeshi Doll ...Yes, the bottle is still underneath her.... Her head is the stopper and she could easily be a bubble bottle with the addition of a wand. I wonder if you'd want to use a mold? The forms are not difficult to make. I used scrap clay to fill in the neck of the bottle, make the sleeves and the bottom section. After baking, I covered her with #4 thickness decorative clay. The head is made over a ball of tin foil. I used to bake the stopper in place in the bottle, but I've found that the best way to get a good fit is to powder the bottle well, fit the stopper and take it out to bake on polyfill. Jody B.
iPod case (cover)
--a thin box, open-topped... in this case also hung from neck with beaded
necklace as a carrier... aluminum foil form used as a temporary armature, by beadizzygrl
...for photos and lesson, see Vessels-Rock
> Other Small Vessels & Containers
many lessons using polymer
clay to make jewelry
http://www.sculpey.com/projects_jewelry.htm
many
types of connectors for cording on pendants
http://www.art-e-zine.co.uk/pc2.html
Marie Segal's many pendants
http://www.clayfactory.net/marie/gallery2.htm (and
the other Galleries too!)
http://www.clayfactory.net/marie/gallery4.htm
Tonja's many types of pendants
http://www.tonjastreasures.com/jewelry1/jewelry1.html
Shelley M’s many pendants of different types
http://www.shelleym.co.uk/jewellery/pendant1.htm
MHPCG's various pendants and cording attachments
http://www.mhpcg.org/clayDays/claydays02/jan2002/janClyDy02/pages/inspire13_jpg.htm
Helen
Breil's many artistic pendants
http://www.picturetrail.com/gallery/view?p=6&uid=447834
uniquebead’s (Barbara Sperling) many wonderful onlaid stacks and bits
of other things for architecture (pendants and earrings)
http://www.beadunique.com/catalogue/catalogue%20mosaic.htm
http://www.beadunique.com/catalogue/catalogue%20mosaic%20brooch.htm
http://www.beadunique.com/catalogue/catalogue%20mosaic%20pendants.htm
various pendants by StokesGalleries, onlaid
stacks, framing ideas, faux metal leaves from molds, etc.
http://www.flickr.com/photos/stokesgalleries/sets/72157603734300483
Christel's long-shield shaped pendants or pins (click on women's pins too)
http://home.online.no/~raje/Polymer/pins/index.html
http://www.geocities.com/Wellesley/1644/ma-hmpge11pcg10.htm
(gone)
Donna Kato's lesson on (open)
swirl-shape & clasp-shaped pendants ...Buna cord glued
into
http://www.jewelrycrafts.com/clayproj14.html (gone?)
Tawan's many "heavier" necklaces with large pendants and med.size
beads along complete length of cording
http://pages.infinit.net/tawan/index.html
(....click on all Galleries)
*Nora Jean’s fat
U-shaped log pendants (tops scrolled to hold cording) (website
gone)
Crafty Michele's pendants (more
in other galleries?) (gone?)
Simply Annie’s
many pendants (mostly stamped and metallic), also interesting architecture
http://www.imagestation.com/album/?id=4291579709&p=4252890045&idx=3
(not available?)
Dorothy G's pendant shapes
(made with flattened onlays, some translucent) (gone)
Susan’s abstract and some-powdered, some mokume,
etc., pieces (website gone)
Alicia's mainly
ethnic pendants and necklaces
http://creaplastic.free.fr/05gal_alicia.htm
Cindy’s “goddess” (mixed media, wild women) pendants (gone?)
http://www.geocities.com/claycrazy1/GoddessVes.html
... http://www.geocities.com/claycrazy1/goddess.html
*LadysMaidJewels Medieval, Renaissance, etc., pendants, earrings,
etc., made with gold powder and jewels http://www.ladysmaidjewels.com/Polymer/polymer.html
Alicia's lesson on making a Renaissance pendant w/ red glass
pebble & pearl cabochons (textured painted w/ gold acrylic
paint, top layer wiped off)
http://www.pcpolyzine.com/0306june/ren.html
many Celtic-etc. pendants and necklaces
http://www.kalupe.com/Kalupe-PN.htm
Stephanie's faux metal pendants, some with glass pebbles
http://www.teawithstephanie.homestead.com/claystuff2.html
Emi Fukushima's pendants (oops, new digital camera…) DB--replace
old photo
Danqing’s many pendants with mixed media...wonderful
& creative ways of using wire to act as top loops, bails, etc.
http://icoldwell.com/danqing/Jframes.html
Tonja's thick pendant with 4 square holes inside which a bead (is strung?)...
see similar items in Vessels > Closed
Box Construction, Ai Ping
http://www.tonjastreasures.com/jewelry2/tn43.htm
Sara J's pendants with transfers and frames
http://www.sarajenkins.com/Galleries.htm
Tonja's
tiny metal tin "pendant" made by covering the
top of a small rectangular (Altoid?) tin
..... (cording runs through sides
of tin) ...top has dimensional "frame" around transfer
with cane slice corners over it
http://home.centurytel.net/tkaylen/tinpendants.jpg
*Robin Beaty’s many mini-book and transfers pendants
http://www.pcpolyzine.com/july2001/mafa.html
Troika's lesson on making pendant frames (from silicone molds)
http://www.pcpolyzine.com/july2001/molds.html
PöRRö's lesson on framed pendants, using two sets of
symmetrical slices from scrap clay logs to create one design
http://www.pcpolyzine.com/may2001/mirror.html
Geo's unusual cording & photo encased transfer pendants--see below
(& Transfers) (website
gone
Tracie's framed watch pendants http://albums.photopoint.com/j/AlbumIndex?u=1158358&a=8538929
Ronda’s rock amulet pendants:
http://members.home.net/rohowo/rock.htm
“Rock Purse” (containers) Swap!!
(see Vessels/Rock
for those swaps)
Joanie's drawings of possible stringings for rock
amulets
http://members.tripod.com/PolymerClay_Interest/amacord.htm
polymerclayhaven's
tiny pendants formed on polished rocks (lesson)
http://www.polymerclayhaven.com/lessons/rockvess.htm
Pax's pendants & rock amulets
http://www.ixpres.com/frodin/polymer/pendants.htm
students' various-shaped
vessel pendants (from a Gwen Gibson class) & some of Gwen's
http://www.gwengibson.com/gallery/students-1999-soreze.htm
http://www.gwengibson.com/gallery/evolve-1999.htm
Japanese inro examples (inspiration for rock amulet pendants?)
http://www.japancollection.com/inro.html
Polymerclayexpress' lesson on making a box pendant with petit four
(small) cutters (oval or other shapes)
http://www.polymerclayexpress.com/nov2000.html
Marty W's matchbox covered pendants (website gone)
Tory Hughes (pendant bottles, & philosophy)
http://www.gameplanvideo.com/videos.htm
http://craftsreport.com/april00/onlineexclusive.html
Leigh’s many variations on connecting a pendant to hanger with
wire, beads, etc. http://hobbystage.net/art/sincereleigh/
(not accessible)
Sandra
gets inspiration for some of her pieces (not polymer) from
photos she takes, using simulations of the images
or just general patterns, colors, etc., in them
http://sandramiller.com/Merchant2/merchant.mvc?Screen=CTGY&Category_Code=FGP1
for cordings
used for stringing beads like
Soft Touch,
Soft Glass, Nymo,
Stretch Magic,
Tigertail, etc.,
see Jewelry > Cordings
cording
for pendants can be purchased at various places
....craft stores
and bead stores ... fabric stores
... and also online
at places like: ....Polymerclayexpress (which carries Bunka yarn, braided nylon,
waxed linen, satin cord, elastic, Stretch Magic, dyed leather cord, Stringth,
Buna, and plastic lacing)
http://www.polymerclayexpress.com/cord.html
......(see Jewelry > Suppliers for
more mail order suppliers)
Tawan's many "heavier"
necklaces --large pendants + med. beads along complete length of the cording
http://pages.infinit.net/tawan/index.html
(click
on all Galleries)
lessons
on attaching thinner cording of various types to findings
http://www.rings-things.com/index.html
making
a floppy-type cording into a "needle"
...use
a little dab of superglue on the end of your cord ...this can be trimmed
off afterward
... you can also use clear nail polish if you're going
to trim the end after stringing anyway
....also, sewing stores sell a product
called Fray-Check that works nicely.
........rayon and nylon may be mislabeled below???.....
"Venetian
blind" cording (a kind of braided nylon... or polyester?) ...Sears doesn't
carry it any more...hard to find retail
.........I
found found Venetian Blind Cord in several sizes and many colors
at Blinds Across America..... I love this stuff
...the
only caveat with this cording is that it does unravel
so you need to glue the ends so the cording doesn't come apart. Margaret D.
http://www.blindsacrossamerica.com/liftcords.html
braided (rayon?) is similar
to venetian blind cord . .it's actually fishing line (for really
big ocean fish,etc.)...could probably find it at a fish/tackle/sporting
goods store near where sport fishing for large fish is done, or on the internet.
Kathy W.
...my very favorite cording is braided rayon over a nylon
core ... not shiny.. drapes beautifully ..strong and cheap
...elegant..
perfect for stringing inro and box pendants.... .5, 1, & 1.5mm ... black,
white
.....goes nicely with many different types of polymer pieces (layered,
transfers, fauxs, Asian, Egyptian, artifact, industrial, modern, glossy, matte,
it looks good with almost anything)
.......the black goes perfectly with the
black Bunka tassels. Elizabeth
braided nylon (wider than Bunka)... silky nylon type of cording that drapes nicely ..(often used for cording on Inro Boxes and/or pendants). Kay
for making your own
kumihimo braiding to make cording for pendants (or have beads
added in it, over it, etc.), plus other knotting techniques like the "new
macrame," see Mixed Media > Braiding,
etc.
.......(for cordings that are woven, braided or knitted
by you, see "Woven,Braided,Knitted" below ...)
wrapped polyester cord from Beaded Toucan has a nice hand and comes in
a fairly wide range of colors... it's one of my favorites.... 1504 Lampard Road
Friday Harbor, WA 98250 360- 378-5180 (wholesale only,
color card available). Lindly
One of my all-time favorites from the fabric store is "soutache" braid. It has real character of its own and comes in a wide range of colors and at least 3 widths.
Bunka
...slender, shiny, silky nylon (or braided
rayon??) type of cording that drapes nicely (often used for graduation
and other tassels)
.....Bunka
yarn (solid or variegated)
....can also be used for doll hair http://www.sculpey.com/Projects/projects_littleangel.htm
.
One source for silk thread and silk
cord is Lacis at http://www.lacis.com (go to
the catalog, look at Materials, then to threads and scroll down to where you will
see silk cord mentioned that can be used for jewelry).
....crinkled silk
cord ... no dye allergenstakes and holds knots well... colorfast.
"satin"
cord (not true silk cord) ...rattail, etc... woven from manmade
fibers ...colorfast
...its sizing is kind of wierd... turns out that rattail
is 2mm, mousetail is 1.5mm, & bug's tail is 1mm.
Tim
....In my experience, satin cord works for lighter-weight pendants,
but not heavy ones - it just doesn't hang nicely. Irene
...polymerclayexpress
has some larger 3.5 mm satin cord http://polymerclayexpress.com/cord.html
waxed
cotton cord ......looks like leather, but is stronger
...(braided) ... like Su-Preme
....it is waxed for ease of beading,
but don't let the descriptive fool you - it's not waxy feeling,
but fairly smooth.
....tightly woven cotton cord ....takes and holds knots
well... colorfast.
....I've used it with success, and it comes in mostly
earthy colors ...colors will not crack off
... it's a braided cotton
cord with a nylon filiment inside, so it is *really* strong.
...don't
know if that's what it's called everywhere.... I got it here: Irene
http://earthguild.com/products/cords/waxcoton.htm
waxed
linen ... inexpensive... stiff (must run through hands a few times)... may
still a bit waxy feeling... many colors
http://polymerclayexpress.com/images/waxlin.jpg
"macrame"
cords ...various kinds of cords for variations of macrame, in various sizes
http://shop.vendio.com/MacrameBoutique/store.html
(Chinese knotting cord)
....I used cord that I ordered from Whiteswan
... think it's conso
http://miva.comsvr.com/cgi-bin/mivavm?/merchant.mvc+Screen=CTGY&Store_Code=TLS&Category_Code=T2
(Nylon Hand Sewing Thread ....used to sew buttons onto thick cushions
by upholsterers..... smooth, shiny, holds the knots well but also
is fairly easy to untie ...stiff, yet fine enough to fit through most 11/0 seed
beads...ends can be melted... at least 20 shades (2 oz spools, approx.130
yds)
...macramé beading cord ...variety of colors...resists fraying ...not
colorfast (all macrame cords though???)
hemp
(not the same material as jute) ...like Hippie Hemp
... hemp is much stronger
and less prone to breakage than jute (and doesn't itch nearly as much, although
it still does get itchy if you wear it too long - a problem which can be minimized
by applying beeswax to the cord
....Fire Mountain has hemp spools.
750 feet long for $9.95, less if you order more.
...hemp beading cord
(same?) ...variety of weights sizes.... uniform, fray resistant, knots easily...our
hemp beading cord is colorfast.
"leather cord" at PCE, in many colors: http://polymerclayexpress.com/cord.html
suede lace leather cord is made from genuine leather and permanently dyed so it is colorfast.
leather cord has a smooth,
round cross-section....made from genuine leather and permanently dyed so it is
colorfast.
leather boot laces work great for bolo ties --you
can add clay beads or other embellishment to the ends. Jeannine
....look for
bolo tie cording at Firemountain Gems online…
....best place is Tandy
Leather, and it's online. http://www.tandyleather.com ...I've also
seen them listed as bola. Kim2
imitation leather lacing with crimp ends to go with it is made by Beadalon... a lot of bead shops carry it. Laurie
Pleather ... imitation
leather cord ..soft round cord, made from some kind of plastic
http://www.macramesuperstore.com
....(same??)
imitation leather cord is a woven round cord, stronger and more
uniform than animal leather....made of biodegradable cotton....takes and
holds knots well. (not colorfast).
....since
your leather cord bled onto your clothing
(you didn't say whether it was smooth and shiny or closer to suede), I suggest
you try sealing the leather cord you bought with acrylic matte medium
if you don't want a shine, or gloss medium if you want a shine. You could
also use acrylic paint. .....Depending on what it is already coated with,
you may have to clean it with alcohol or similar first.
.... I have
had the same "bleeding" problem with certain black fabric cords....
my body chemistry also causes leather and some vinyl cording to harden
after a summer season. Karen in NC
I've stopped using leather cording in the jewelry or zipper pulls... over time, the color comes off the 2mm stuff, and the 1mm stuff breaks. Laurie
imitation sinew is spun from a continuous filament of polypropylene fiber for 60-lb. breaking strength...it is waxed and easy to split.
ribbon... another nice way to make a pendant into a necklace is
to hang it from a grosgrain, velvet or satin ribbon
--
for children, try using a ribbon just wide enough to prevent the pendant from
slipping along the cord.
You can even make your own cording from polymer
clay
....use the Bake and Bend clay (which used to be called Sculpey
Super Flex clay) and mix it 1 to 1 with Premo to get the best cording...
ends can be glued together for longer uses like weaving
.........while baking,
the extrusions must not touch
each other or touch he tray though (use paper,
etc. to separate) ... see more info in Characteristics
> Flexible Clays and in Clay
Guns > Weaving)
..(lesson): syndee and Marie say
that plain Premo can be used for cording too... they extrude a thick rope
with a clay gun, roll in Pearl Ex, insert ends into premade holes in pendant
with liquid clay, bake in the shape that's expected when placed on the body,
then wipe down with a damp cloth after baking rather than sealing the Pearl Ex
(and possibly cracking finish).
http://expressionartmagazine.com/FTRND02.html
colored
pony bead lacing
material (tubular, much like SoftGlass..."Tooobs Pony Bead Lacing"
--Pepperell Braiding Co)
.... s another option for cordage ....I've used
it like buna cord several times and it seems to work
just fine.
....found in the kids area of JoAnn fabrics.
Kathy W.
flat plastic lacing.... it's bakable too!...
....11 colors (including glow-in-the-dark at PCE http://polymerclayexpress.com/cord.html
SAME
AS?
..."S'getti" craft lacing is durable.... glossy
and stretchy and comes in a gazillion (well, not quite) colors... (WalMart)
.......if
baked at 275 degrees for 20 min, nothing at all happens to it!...
will stay glossy if left alone while cooling
..........if you stretch
it while it's still warm, you lose some of the
gloss from the surface but none of its stretchiness (...repeated pulling exhausts
it for the time being and leaves it a bit stretched out, but come back later and
its memory and stretchiness has returned)
......attaching to clay...
if the cording is embedded in approx. 1/4" polyclay (Sculpey III) bead
(with and without Diluent), after baking cord pulls out of both but leaving surface
compressed and abraded.
.......you might
get *some* adhesion though with longer 'sit' time for the Diluent, but
I think a crimp bead, or something of the type, would be nec
.......or you
try maybe deglossing the plastic cord with sandpaper would help
.......or,
as with wire, add a drop of superglue (...or liquid clay?)
Tattu Magic ...strong monofilament cord (somewhat rigid?) ...retains shape when making tattoo type jewelry...holds crimp well...sev. colors
plastic --clear (not stretchy)
monofilament
and tubing.....+ dyeing it
cautions
for some beads ...monofilament fishing line itself is fine
for anything that doesn't use metal or glass beads that may have the slightest
sharp edge inside the bead hole which will
eventually cut the monofilament
... I have used monofilament for lightweight
lariats that are mostly made up of seed beads, but would be cautious
of using it in something that needs to withstand more
weight (will become brittle and break after a few
years --especially where it is stressed at knots.
I was at this art fair and I saw this awesome jewelry that just
jumped right out at me, lol. I said, WOW is that fishing line -how did you do
that??
....oh that’s just dyed monofilament fishing line,
using Rit dye and a little vinegar. (I had been dying some t-shirts
for the kids and just dunked some fishing line into the hot colored water
and it took on the color right away,couldn't believe it!
.......I unwound
some monofilament from the spool, dyed it, rinsed, then rewound onto another
spool.
...I had seen this colored monafilament wrapped tightly around
fan-like shapes of high-polished sterling silver pins and earings... beautiful.
...could also use lengths as cat whiskers, etc.
...licalee
used hers for stamens
licalee uses Kool Aid to
dye her monofilament nylon cording, and also nylon-covered beading wire
...in
a coffee mug, boil water ... add a spoonful of vinegar to
the hot water and soak monofilament for 10 min
...in a different mug,
add a package of kool aid (don't add any sugar) and add hot water
...add monofilament... pop the mug in the microwave for a minute and a half, and
remove the monofilament (use a utensil so you don't dye or scald your fingers).
This is where you boil if you are using nylon covered metal.... Rinse it off
....(can
mix colors but best done when the kool-aid is wet so you can see the eventual
color)
....also, if you heat the monofilament too
high with a flame, it turns clear
again as it melts. licalee
(Kool Aid can be used to dye
fabric, but will fade on cotton or cotton-poly
over time, esp. if wash frequently or wash with harsh detergents)
nylon
tubing.... I made cording from (clear nylon) tubing that I dyed
yellow using Rit dye... and threaded some rubber cord from Rio, (which I won't
buy anymore), threaded through it ...I also embellished the cord with artist wire
and o-rings
...lesson: Rit dying is just too much fun!
....I save it in jars and use over and over
......I use a small
amount of water,maybe 2- 3 cups... add maybe 1/2 a package of Rit
dye... and a tablespoon of vinegar to the water.
......I bring the water
close to a boil...then dip the tubing in and out of the
water till I get the color I like (this takes a minute or less).
......Rinse
in cold water. Geo (websites ...gone)
Dianne
C's lesson on dying clear vinyl tubing
....You will need vinegar,
liquid Rit Dye in your color choice, vinyl/rubber gloves, hot water
and a glass bowl or one that will not absorb the dye.
1.
Bring water to a boil. Pour about 1 1/2 quarts of hot water into the bowl. Add
about 2T. Vinegar, 3T. Liquid dye to the water.
2. Carefully put the clear
tubing into the dye bath. The time in the dye bath depends on how deep you want
the color. I like to leave my tubing in for 6-8 minutes. I check it about every
2 minutes.
.....Also, you can mix the liquid dye into the hot water to attain
new shades. For example, I used dark green and navy for a rich teal color.
3. After dying, place tubing in hot water to rinse it. Carefully blow out
on one end to blow the excess dye inside the tubing.
4. Then, place it in
cold water to further rinse the tubing.
5. Finally, using a small amount
of dish soap, wash it in soapy water, rinse and dry. Each time make sure you blow
on one end to clear the inside of the tubing.
I went to Walmart last night
and picked up 25' of nylon tubing for $1.97. Boy, that goes a long way!
Lori
..........I wonder what kind of tubing Lori got? My Walmart charged $5.97
for 25 feet.
...the tubing that I had tried from Walmart was aquarium
tubing and had a very strong odor...I did not
like that smell. Dianne C.
The clear tubing that I ended up purchasing for selling (hardware stores) does not have the nasty odor or the aquarium tubing, and I felt that that fact alone makes it well worth the price (20 cents per foot). Dianne C.
(for stretchy
plastic used for cording, see Jewelry
> Cords for Beads)
(for plastic ear wires which can be dyed, see
Jewelry > Earrings)
(for using paints
like Lumiere on rubbery cording, see Decoy cord just below)
for making somewhat rubbery strands from polymer clay, see Clay Guns > Weaving
“Decoy Cord”
I came across a very good stringing material in a local
sporting goods store... called decoy cord and is used somehow with duck
decoys
....be sure you get extruded PVC version though, not
the "braided cording
...it
has a nice weight, is smooth, and is very, very dark green (looks
black)... will not rot, mildew or fray
...I like it better than buna
N... definitely easier to obtain
...also far less expensive than buna
(which can cost between .25 -.60 per foot, where decoy cord can cost around
.04- .11 per foot.)
...comes only in one
diameter (approxmiately 3/16" ), but with the huge cost
advantage over buna-N, I can happily accept the single-size limitation. Desiree
...unlike buna, decoy cording has a semi-gloss finish
.......
if I don't like the shine though, I use a fine grit sandpaper to make it
matte
....the decoy cord also bakable
... since it is PVC
just like polymer clay, you can use the same adhesives you'd use on baked
clay
The two brands I've
seen are really not equal to buna in appearance or "behavior" - they don't
drape as
nicely as Buna, and seem to want to decide for themselves how
to lie....IMO, it would have taken a pretty hefty
pendant to make the decoy cord drape well. Elizabeth
...I found the
decoy cord to be a little stiff until it warms up....a few minutes after
I put on my necklaces strung with the decoy cording, the cording softens and drapes
nicely. Desiree (....but still maybe not for a lighterweight
pendant)
one brand
even had a "seam" type
line running the length of the cord - some sort of extrusion mark, probably. Elizabeth
It
can be baked with the clay, etc., but...
...decoy is PVC,
and we know polymer clay is PVC and quite sensitive to temps.
.......(I
read the typical high end of the temp range for buna-N o-rings is 250-
275 F...Viton is 400 F)....since it's a form of rubber
and I assume behaves a bit differently if overheated.)
Desiree
...it can't take too high a temp.
...my temp was a little too high (300) when I first
put the cord in...it will melt some if too hot. Judi
I like
buna cord, but there are different
qualities of buna are out
there. ...I have some that stiffened considerably
within a year. It's a pendant that I purchased, so I don't know the supplier.
....I did purchase some rubber cording a few years ago
that left black marks on light fabric.
.....Also
rubber cording is kind of industrial looking, which I like, but doesn't work for
all pendants. Irene
Decoy cord would make a nice bracelet if you're using a clasp... it may not stretch as much as buna though and slip over your hand. Ginger
I also use the cord from Cabelas for the Audacious Rings I make, as it is more stable then the Buna. Dotty in CA
painting
decoy cord: ...I found some of the dark green at a local sporting goods
store and decided to experiment. I love working with the buna cord, but hadn't
baked it. I did a test with both. I placed in a piece of each plain, and
then painted a piece of each. I was afraid the decoy cord wouldn't take the paint
since it's shiny, but it seems to be just as good as the buna cord. . I wasn't
able to scratch the paint off of either type of cording. I used the Genesis
paints.
...I've only ever tried the Genesis and the Lumieres for coloring
buna cord, but I'll bet there are a lot of heat-set substances that
would do it. Eliz.
...I have heard that some have tried painting decoy cord
with acrylic paints. I haven't seen it nor do I expect
the paint would adhere well, even if it were first sanded to roughen the surface
for better adhesion. But I haven't tested this so I don't know how well it would
or wouldn't work. Desiree
...I painted buna cord for some of my pendants.
...it's very strong, but it will shrink (and get
thicker) if baked in the oven to cure the heat set paints.
....Doesn't hurt it, but you need to cut extra length. Judi (same for decoy
cord?)
I painted a bunch of the decoy cords, and then heat cured them in the oven and they shrank substantially in length. So if you're doing that, cut them longer than you need. Ginger (same with buna)
....It takes super glues and
other adhesives just like buna.
...I've jammed the decoy cording into
those leather coiled spring crimp ends.....it seems to have the same or
a little less stretchability than buna, though that would depend on the
type of buna cord and the type of decoy cord. Desiree
....rubber cording can
be connected to itself with superglue. Slice the cord ends at a
sharp angle (or some people have success with butt cuts), add a
tiny drop of superglue, then join….
...ends of rubbery cording can be glued
into clay itself (each end separately, or both ends together
at top of pendant)... poke a guide hole, add a bit of superglue or liquid clay?,
then insert into clay and bake
I also ordered some of "crimps"
for the cord from Cabelas
.....they DO hold the cord well but they're also
(fairly large)..
I was thinking about covering them with clay. Karen H.
...the crimps sell for
$10.00 for 150 crimps.... size is about 1/2" X 1/2".
......they
also offer black cord crimps which I sometimes use when I make a piece
that will fit over the head
......you can also use the crimps to make a (loop
and ball closure) .. loop at one end (held with a crimp), and a clay piece
at the other to fit through the loop. Dotty in CA
Sometimes I cover the entire cord with small beads I've made (with a hole large enough to accept the cord), mixed with some commercial beads with large enough holes. Dotty in CA
SUPPLIERS:
LOCAL:
I just got back (from Bass Pro Shop) and there was quite a selection
of decoy cording brands.
.....one brand
came in a very dark green, but the rest were black.
.... all
types were slightly shiny except for one, which has a non-glare
finish... there were rolls of 100, 200, and 500 ft.
....I bought the non-glare
one, in a 100 ft roll, for $7.99.... you cannot visually tell the difference
between this and buna cord. Ginger
...Thanks so much for this info...
it's great to hear the selection of extruded pvc decoy cord is growing.
Desiree
ONLINE:
..Cabelas sells the best decoy
cording and reasonably priced (I bought some other stuff, and it was stiff)
...this cording has a wonderful drape to it ..they also sell crimp closures.
Margaret D
..... if you want to buy a quantity, there's absolutely no cheaper
way to do it than to go to Cabelas.. it only comes in black and in one
size, but it's a nice size! And it's unbelievably cheap--a huge spool
(lifetime supply) for about $5! Suzanne
......I just bought the duck
decoy cord from Cabelas and I LOVE it! What a great deal. It's perfect for the
larger beads I make, and a lot cheaper than the buna.
http://www.cabelas.com
(search for "Quick Fix Duck Decoy Cord")
..Bass Pro Shop
is online too …. http:///www.basspro.com , then search for decoy
cord. It's called Greenhead Gear Quick-Fix Cord. Sells 200ft for
$7.99, order # 38-801-460-00, or 500ft $17.99 order #38-801-461-00. Sharon
..Grain
Valley Dog Supply..I got a spool of about 100 feet for $9.00 here:
http://www.grainvalleydogsupply.com/Other/bagacc.html
(scroll down to the entry 'Knot-Proof Decoy Cord)'.Desiree
http://www.basspro-shops.com/servlet/catalog.TextId?hvarTarget=search&hvarTextId=20586
….specifically,
the brand Hunter's Specialties ® QuickRig Decoy Cord is great (locally?)...
Another option for cordage is pony bead lacing material found in the kids area of JoAnn fabrics . . . it is a tubular material, much like SoftGlass. The product is called "Tooobs Pony Bead Lacing" made by the Pepperell Braiding Co.... I've used it like buna cord several times and it seems to work just fine.Kathy W.
“Buna
N” & “Viton”
Buna
Buta-N is a copolymer
of butadiene and acrylinitrile. One brand name is Butaprene (buna N).
…buna-N (nicknamed "buna") is one type of material used to make
"o-rings". Desiree
…It's one of my all-time favorites for
jewelry, despite being sensitive to sunlight
and ozone after time (see below in Viton,
for more on that)
…(large?) o-rings come in colors ... black,
red, white and clear. Desiree
...and come in several thicknesses.
Irene
...maximum temp for Buna is rated at 250?
…the smell
of Buna will dissipate after a while.. I wear my buna necklaces all the time and
never notice it.. and I have a very very very keen sense of smell. . . Dave
Buna
is cheaper to buy as o-ring cord instead of as o-rings,
but unless you are near an extremely well-stocked bead store, you'll probably
have to purchase buna online. Desiree
...“o-rings”
are rings (as of synthetic rubber) which used as as gaskets for sealing two parts
of machinery. They can be used in various ways with polymer clay, depending on
their size. They come in many sizes, from very small to large.
I've
found o-rings (made from buna-N) in auto repair supply stores
...you
need to ask for "o-rings" and even then some auto store clerks
will look at you funny.
...In the stores I've shopped in, o-rings are usually
in a little storage bin.
...Since they're used for sealing in
various machines, o-rings come in various diameters and thicknesses.
.....but
they are rings, so you would need to cut
them to string beads onto rings... and you might need two rings, which
you'd cut and glue to make a long enough strand. Desiree.
...I got mine
at a True Value Hardware store which has cords of the stuff that they sell
to make your own size O rings
... they had a small grey box next
to the place where the O rings were stored filled with 3-4 different sizes
of buna cord, priced about $.15 to $.25 a foot. ...you might try also some
of the good hardware stores. Peggy
....try looking for them in automotive
parts stores. Desiree
....also any industrial supply store like
Grainger Supply will have also.
....the kind I found was called “O-ring
“splicing material” at my local hardware store, near the O-ring display.
It comes on a spool (in lengths, not the rings themselves)…. don't
know if it was Buna brand or Viton. Denise
…....the (large) o-rings
in automotive parts stores are for sealing, not splicing
(rings, not lengths)…Desiree
…...but will this stuff work the same as Buna
etc.?
ONLINE
---I get mine mail order from IB Moore
-- phone in credit card orders, they mail….they work with you on the phone to
figure out what size/s you need and sell it by the foot. Also sell o-rings,
in fact this is really "o-ring cord.") Ask for Grace
at I.B. Moore . . . Irene
.........do ask for Grace, but also ask it
be shipped the least expensive way. I didn't do that the last time,
it was sent out ups special, and increased the cost
of the cord by fifty percent per foot. Yikes! Carol
….Polymerclayexpress sells black, white and rust Buna cord
........they
also have a "Buna-V" cord which is supposed to last longer (same
as Viton?) http://polymerclayexpress.com/cord.html
….Clay Factory sells Buna-N.
....this site sells
both rings and cording: http://www.globalrubber.com/ocord1.html
….I purchased my black rubber o-rings from H & D Distributors,
Inc. Not online as far as I know phone number 214-351-1251. I called my order
in & rec'd it in about 4 days. Oscelyn
….Oh, by the way, I've never used
the cord sold by the Clay Factory, so I can't compare it, but the Rio
Grande rubber cord left marks,
so I returned it. IB Moore's cord didn't leave marks. Y'all keep in mind that
IB Moore supplies rubber products to an *industrial* market, and they think we
are a little kooky to want to use this for jewelry…Irene
…If you use a lot
of the Buna-N rubber cord you can buy it in large quantities for a much
lower price than anywhere else at: http://www.alliedseals.com I bought 300
feet of it for $40, about 7 1/2 cents a foot this is not the really fat stuff.
It's the thinner type. I have this lovely big spool of it under my work table
and can just reel off a few feet whenever I need it. . .. they carry all the
sizes. Dotty
After bringing (buna? or other) it home, I realized that it
is sort of crinkly. I should have paid more attention
when I bought it, since it was off of a spool that was near the inside core. Does
anyone have ideas of how to "relax" the kinky-ness out of it? I did try
putting a piece in hot water----and that didn't seem to do much. Fayette
...This
may not help you in the near term, but I have been very satisfied with using plastic
duck-decoy cord instead of buna cord. (see above)
If you
want to get hip deep in info regarding o-rings, here's a url for
you:
http://www.marcorubber.com/index.htm
(click on either "O-rings" link, then click on the link "O-Ring
Material Selection and Design Guide") Desiree
Viton
Actually, I got a lecture from my machinist at work that we should be using Viton because buna-N is sensitive to ultraviolet and heat.
Viton
comes in all the same sizes as Buna-N
... it's used
for 0-rings like Buna... just a stronger material ...and it doesn't
get brittle or break down as easily
...better for baking than Buna because
upper temp is 400 degrees?
....it costs a little more though.
Okay, I understand that Viton is preferable for that reason, but how
much UV light is it really going to take to degrade Buna-N cord?. . .
no one seems to know if we're talking after a week, ten years, or what. ...And
must it be constant exposure, or is twice a week for an hour at a time going to
do it? Irene NC
…I have a piece of Nan Roche’s from about 5
years ago that has broken twice because the Buna-N has gotten brittle.
. . . none of those conditions (Irene). I do live at the beach, but the piece
is not in the sunlight or changes of temp. syndee.
....I did eventually replace
(Nan's cording) with Viton and have had no further problems.
I found a
great source for various types of cord and o-rings, including Viton
and Buna
.......the prices are great, and they have lots of details
about the performance.
.......McMaster-Carr http://www.mcmaster.com
(when you get to the main page there is a search window on the upper left... enter
rubber cord there) Judy
...the material is available by the foot
from Real Seal - 619-743-7263 in Calif. and Grainger, which is national.
Syndee
...polymerclayexpress has 2 sizes of "Buna-V" which lasts
longer than Buna-N... may be same as Viton?
http://polymerclayexpress.com/cord.html
There
are 4 kinds listed: (this is what that catalog says)
Buna-N -outstanding
resistance to petrleum oils and gasoline; temp range -40 to +250
degrees .
Viton -Withstands excessive heat and crosive chemicals; temp
range -65 to +400 degrees
Silicone
-especially resistant to chemicals, solvents, fuels, oils; temp range -65 to +400
deg.
Ethylene Propylene (EPDM) excellent resistance to ozone,
oxygen, heat, and weather; temp range -40 to +250 degrees
....there
are two types of EPDM, one with a max. temp of 300 F
(see here for
another chart: http://www.marcorubber.com/material_chart.htm
)
……For what PC people want to use it for my DH says the best thing would
be EPDM.
……For cost comparison I picked one size (1/16"
0.070" Dia. 1-49' per foot 50'+ per foot):
...........Buna-N 14 cents...Viton
89 cents... EPDM 16 cents... Silicone 15 cents
.....all
4 are avaible in the following sizes:
...........1/16", 3/32",
1/8", 3/16", 1/4", 5/16", 3/8", 7/16", 1/2".
Christine
Using
Because an
O-ring is a solid circle …hence the name ;-) . . .it has to be cut in order
to string beads. Desiree
…this problem can be solved by splicing two
o-rings together, gluing cut ends into clay or into findings, or using
a mechanical hold alone (crimp or wire-wrapping, e.g.), or some combination.
--the
other problem is that just one o-ring is too short (for most necks), at
least with the ones I found. It was about 6-8 in. in circumference.
But two, cut and eventually spliced together with a little dab of superglue
(cyanoacrylate) works very nicely.Desiree
….I'd recommend using a fresh
razor blade or tissue blade or the like to cut buna. I think scissors would
leave a slightly rougher cut edge. If you plan to splice two buna cord ends together,
you'll want the smoothest edge possible.Desiree
…this cut should be made diagonally,
not simply crosswise for the smoothest appearance and the best hold (Desiree)
…the ends can be glued together with superglue and they hold fine. Irene
I use the thinnest buna-N for stringing pendants, and so far, so good.
...that
buna cord dried and broke
after a time. To my surprise it was dry only in the places where the clay
parts were attached to the buna cord with super glue. Varda
...cyanoacrylate
glues do indeed seem to harden (and even crack) rubber and vinyls. (We learned
this while attempting several household repairs that didn't work for all that
long). Sarajane
...Buna rubber is extremely reactive with solvents
and may have reacted with the solvents in the glue, I dunno. What I do know is
if you put rubber in paint thinner it will expand to many times it's original
size then as the solvent leaves the rubber it will shrink and harden, becoming
brittle. Kathmandu
...two-part epoxy glue always works. Meredith
…Future
Glue made by super glue inc. says works on oily or dirty surfaces and
holds the best for me. Cheryl
. . . for that necklace, there was no gluing
…one end of each cut o-ring was finished with a spring finding. Desiree
http://desiredcreations.com/howTo_PJNcklClosures.htm
The Buna Nitrate cord won't stay tied on it's own, at least for very long when there is pressure and movement of it. You have to use a (superglue) such as Zap-a-Zap to secure it (or a mechanical hold). I use a crimp, first super-gluing the end of the cord into it, then crimping the metal around the cord. Then you can fasten a jump ring and a clasp to the leather crimp. The website Desiree put up shows pretty much how I do it, the second one with the spring connectors. Dotty
I superglued the
other ends of the cord into both ends of the curved rod pendant (baked
clay?). Desiree
…I thought she (Donna Kato, that is) said just to glue
the cord into the holes in the clay. Thalassa
…for some I don't
make holes, just indent it….yes glue the cord to the bead, I indent the
same size (hole) in the clay first. Cheryl
Buna is bake-able at
our regular clay temperatures - you can cure bead ends and closures
right on the necklace if you wanted to. Elizabeth
...someone said above that
the decoy cord which is similar can't take more than 265
though?
....I baked the o-ring cording I got a True Value at 275
and had no problems. Peggy
Nan Roche video: Ancient Structures
and Surfaces ...make integrated findings with polymer clay and
Buna rubber (and much more).
This video presents http://www.abbadabbavideo.com/NanRoche/nrpages/nan.html
Cindy P's lesson on making end caps for rubber cording ...by
using it as a "needle" (poke a hole across one end for
an "eye," then insert a doubled length of wire through it to thread
wire through a bead (then making an eye loop with the wire and and
wrapping the wire tail underneath) in order to finish cord ends so they
will be able to accept a hook/etc. finding
http://www.geocities.com/pcinterest/bunahead.html
(gone)
polymerclayexpress’ lesson on
applying (metallic) Lumiere paints to Buna cording (layered
and spongy appearance, or solid)
http://polymerclayexpress.com/jan2001.html
...I painted buna with Lumiere... just dabbed it on, let it dry
and then baked it for about 15 minutes at regular clay heat. Voila! I haven't
been able to rub it off at all... and it looks COOL.) Teresa
...I frequently
paint my buna cord with Lumiere paints...they have a tendency to crack
at stress points...then agsin, I could be doing something wrong. Valerie
...I
painted buna cord for some of my pendants. ...it's very strong,
but it will shrink (and get thicker) if baked in
the oven to cure the heat set paints. ....Doesn't hurt it,
but you need to cut extra length. Judi
… I discovered that the buna I ordered is larger diameter than I should have ordered. I guess I'll have to make some larger beads to use that with. Laura A/Sparkle
Closures
larger
pieces can hold their own with a polymer clay type clasp, whereas to make
a piece look more delicate, small fancy metal clasps are
good. Dotty
A very simple loop and ball for the
buna cord is to slice one end of the buna diagonally; drop 1 drop of Zap-a-Gap
onto its edge, fold it over so the diagonal edge with glue on it attaches to the
side of the buna cord; thus making a loop. With the other end, slide a bead that
coordinates with the necklace onto the end-- usually I put on an o-ring, then
the bead, then another o-ring, cementing the o-rings to either side of the bead
with a touch of Zap-a-Gap. Works great and the Zap forms an unbreakable link with
the buna. Dianne C. (see website above)
Desiree’s lesson on Buna clasp
(loop and ball) and examples of other closures types
http://desiredcreations.com/howTo_PJNcklClosures.htm
http://www.desiredcreations.com/Misc_PCgallery2.htm
Kellie’s lesson on making a loop and ball closure with buna
cord
http://www.polymerclaycentral.com/cyclopedia/bunacord.html
Cheryl’s
closure using a small black ball on the end (website
gone)
Cindy's lesson on making polymer bead enclosure
for ends of Buna cord
http://home.earthlink.net/~claycrazy/buna.html
(gone)
Dianne C's lesson on making long-diagonal-cut, Buna
loops (Za-pa-Gapped, with the join covered by o ring-s) for attaching beads
to wire loops, or as closures (slipped over a large bead)--see below for more
http://www.pcpolyzine.com/february2001/technique.html
Donna Kato's methods of embedding Buna ends (in clasp & in
pendant)
http://www.jewelrycrafts.com/clayproj14.html
(gone?)
Donna Kato's two bracelets made from tiles joined with Buna cord
http://albums.photopoint.com/j/ViewPhoto?u=1197327&a=8842373&p=28761466
Very small O-rings
Think of them as little donuts, about as big around as a pencil shaft.
(the very small --3/8"?)
o-rings are used to:
--finish a pendant (on top or anywhere to cover
a hole for cording, etc.)
http://www.kelliesklay.homestead.com/inro.html
(various sizes, shapes...these are made from clay, but show the general idea)
--for decorative purposes, place on both sides of a single bead
(on rubber cording or not) hold an end loop in place and to conceal the ends of
cording. Dianne C.
They make great spacers (between
beads or other hardware). Dotty
Desiree's http://www.desiredcreations.com/images/galleryTwoPics/hornNeckl.jpg
…You can use the o-rings themselves as (end) caps beads, to leave parts of the cord bare. In other words you could use a OD cord and string beads on it every two or three inches instead of all together (glued to cord?). Or you can space larger heavier beads some distance apart. Dotty
When you use three or four of them together, they look as if they are wrapped around the cord. Dotty
more websites & info (rubbery cording)
Desiree's various uses of
Buna with beads & pendants (some w/ glued metal findings
on ends)
http://www.desiredcreations.com/gallery2necklaces.htm
Dianne C's various stringings using Buna (website
gone)
Cheryl’s many necklaces featuring rubber cord (website
gone)
Desiree's covered mini Altoid
heart box hung as pendant with Buna
http://www.desiredcreations.com/images/galleryThreePics/AltoidHeartPurseCombo.jpg
...tell us how you managed to get the buna cord strung onto the mini altoid...did
you drill?
I've found that different rubber cordings are of different quality. I got some a few years ago that left black marks on light fabrics. And that was from a jewelry supplier! So be careful what you buy..... You might consider taking a white rag with you and rubbing the cord on it to see if the black transfers. Irene
Woven, Braided, "Knitted" (by you)
...for
cordings which are purchased already woven or braided, see above (Braided Nylon,
etc.)
...for weaving, braiding, crocheting, etc., with strands
of polymer clay, see Clay
Guns > Weaving, Crocheting, etc.
Marie's clay ends connectors for a thick cord http://www.clayfactory.net/marie/gallery5.htm
Cool Corder (used to be called Magicord) ...
...I
used it mostly to make interesting looking "cording" that's kind of lacy
like chain "mesh"... but it also works for embellishments, and other things.
...various
kinds of threads, cords, and lightweight yarns can be used
in it (...the overall thickness and appearance of the final cord will depend on
what's used).
...the cording is
"knitted" in this gadget by turning a crank which moves the four "needles"
up and down, quickly creating a long mesh tube; it's fun to use, though
the first parts can be a little fiddly ...the finished cord comes out through
a hole in the bottom of the corder (a weight is clipped onto the bottom of the
finished cord so the tension will be kept even)....
...finished cord looks
more holey until the weight of a pendant, etc., pulls on it, which makes it appear
to be sort of chain-braided ...also makes it much longer
...resulting cord
is actually quite attractive because it's very even.
......one of my
favorite cords to use in the machine was some old rayon? cord (gold, kind of shiny),
but pearl (perle) cotton works well too for making the thinner cords... my finished
pearl cotton cord is about 1/4" when loose and 1/8" when stretched.
......the
fattest cord I made was with baby weight yarn, using one of those multi-colored
ones; it's final width is 5/8," and 1/4" when stretched lengthwise ...this one's
too thick to stretch much though.
instructions: string the cording
as directed, crank a bit, avoiding the 2nd and 4th needle only on the first round
....
then just turn the handle to crank out the cording, pushing or pulling down at
various points if needed (go slowly until the first few rounds are completed...
then zoom)
...None of these photos show the finished cording very well though!
http://www.bond-america.com/help/help_cc.html
(the link below for the WyrKnittr shows the needles action as the handle
is turned, and when to push or pull)
photos and projects for Cool
Corder http://www.bond-america.com/products/cool_corder.html
http://www.bond-america.com/projects/cc_proj/cc_project_index.html
(not good projects, unfortunately)
other places to buy... Michaels,
Hobby Lobby, etc. http://www.bond-america.com/dealers.html
This gadget is actually a mechanical version of the old "knitting knobby"
or "knitting mushroom" you may have played with as a child. . . . (...here they've
made a coaster by spiraling a length of the finished knitted tube http://www.caron-net.com/mar00files/mar00kid.html
)
Wyrknittr....does the same thing as the Cool Corder
but with lightweight wire... (don't know if it will also work for yarn,
etc.).
...uses 28, 30 or 32-gauge wire, to knit a tubular mesh
...the
finished mesh cording "can also be flattened, compressed, braided, folded,
or twisted as well ....knitted mesh will be light as a feather
...Bond
America sells thin, colored wire too
...can also drop one or more 6mm or 8mm
beads down the center of the Wyr Knittr (inside the forming wire tube)
and tube will automatically enclose the bead.... or can thread the wire with seed
beads or small bugle beads
...shows the pattern that the cording makes somewhat
better (when the cording is stretched by the weight of a pendant, it won't
look as large and holey as it does here though) http://www.wyrknittr.com
...projects... http://www.bond-america.com/projects/wk_proj/wk_project_index.html
....http://www.wyrknittr.com/projects.html
...photos of the Wyrknittr in action ....http://www.wyrknittr.com/howto.html
These gadgets are actually mechanized versions of the old
"knitting knobby" or "knitting mushroom" you may have played
with as a child
http://www.caron-net.com/mar00files/mar00kid.html
)
Have you considered Kumihimo (Japanese "braiding")?
...(seems to be similar to the Cool Corder, but isn't mechanized ... large
though)
....http://www.mtnloom.com/Kumi.htm
("loom") ....http://tinyurl.com/4m4nm
(finished braids)
...the braids take a while, but I can exactly match the
colors I need by using embroidery floss. Diane V.
I've used
lucet (a Y-shaped tool often made from wood) to make really nice cording
for many applications. It's an ancient technique using from one to four different
colors woven together. You can find an example here: http://kws.atlantia.sca.org/photos/lucet/
You can buy a lucet here: http://lucettelady.50megs.com/
It's easy, fast, and makes very pretty cords. Talia
...With luceting, since
the floss or string needs to be able to slide against itself while you're making
the cording, it's best to use a smooth floss, string, cording,
yarn, etc for making your cording. You can use slubby yarn, but you won't
end up with an even-looking cord. I have used lucet cords made from both cotton
and silk embroidery floss for polymer clay beads and pendants and they look
lovely. Embroidery floss works well for the luceting, and the cording is not so
heavy that you cannot string beads on it. The nice thing is that you can color
coordinate your lucet cord to your pc project! Talia
...Another place to purchase
a lucet is Lacis, in Berkeley, California. Cordmaking on the lucet is delightfully
low-tech and no-think--the perfect occupation for TV watching or sitting through
boring meetings.
.....They also have a very nice instructional book
from which you can learn how to make different kinds of cords. http://www.lacis.com/cgi-bin/lekeys.cgi
...Lucets
are still common tools for weavers and spinners. I have a couple of sizes .
"cable"?...Quickest
of all is the spinster tool to make cordage from different fibers
that are twisted together, and then twisted again on themselves.
I have seen the spinster tool in the Clothide catalog. You can make a custom twisted
cord to match your piece in about 3 minutes!! ...available through http://meinketoy.com/catalog2.htm?category=Tassel+Making+Tools
...but you can do it without a special tool... my weaving friends just
use a cup hook in their portable drill .... Karen in Florida
...I
think this is what we did with the kids one time... two kids stood a distance
apart and each held the end of one or more yarn lengths (yarn can be
doubled, tripled, etc., first).... both kids twisted the yarns (in opposite
directions) until it was pretty well twisted... then they (or an adult) grabbed
the middle of the long "rope," and one kid brought his end to the
other kid, then grabbed what used to be the middle (now the end)... one then released
the end they held and the two twisted ropes twisted again around each other
automatically.
...adults can do this alone, by hand, also by
attaching one end of the yarns to something non-movable, then twisting
the other end...when it comes time to grab the middle, if the cord is long try
using a foot <g> ...Diane B.
Miscellaneous & Finishing & Tying
Finger
buffing the surface with cornstarch or talcum powder is another technique
good for large areas...
(
wear gloves to keep the clay from sticking to your hands when you first cover
with clay to avoid bubbles.) Katherine Dewey
Micki’s
lesson on doing a simple wrap/holder/top loop with wire
for a flat oval stone (or whatever)... more in Wire
http://www.geocities.com/mick62001/simplecabwrap.html
Eni's lesson on "wrapping"
a doubled-back cording with thin wire to create a loop for jump
ring (and also making an S-hook for a clasp)
http://www.enioken.com/jewelry/012leather.pdf
*Annie's interesting mixed media pendant hangers http://albums.photopoint.com/j/ViewPhoto?u=1168751&a=8667789&p=36040362
how
to rivet with polymer clay while making a neckpiece from components made
with these surfaces
... and make integrated findings with polymer
clay and Buna rubber (in Nan Roche's video: Ancient Structures
and Surfaces)
http://www.abbadabbavideo.com/NanRoche/nrpages/nan.html
Goodness, no. I anchored a couple of brass fishing swivels to the bottom/back of the box and linked those to spring findings. Personally, I think spring findings were made for buna cord. ;-) Buna fits so nicely into springs. Desiree (see more on fishing swivels in Jewelry)
I have been trying to finish some necklaces with the spring connectors
(the last coil on one end bent up).... it says to pinch the last coil at the end
to hold it in place. Well, I'm having a hard time with this. I wind up with it
going diagnol, or smushed ... what am I doing wrong? Annadara
...I use those
a lot and still, every once in a while, I spaz out and screw up while trying to
crimp the unbent coil end. Usually this happens because I'm impatient. Practice
is one answer. Another is a little harder to explain. But I'll try.. . . From
the end of the coiled wire, mentally mark the spot that is about halfway around
that last coil. Gently and partially pinch the coil at that spot....
Then about 1/4 up from the end of the coil, do another partial pinch.
(Overall, you're doing little pinches on the last coil, instead
of trying to do one big pinch on one spot). Desiree
There are special jewelry findings for having things hang flat against a neck, and they are (at least by one company) called charm holders. They allow the bead or charm to swivel so it will lay flat. Charli
To add weight to a light pendant
so it will hang well . . . pendants may not hang nicely if you use a cord
that has "body" to it, like buna rubber. And if you're making small
pieces, even the lightest cord won't drape well - the pendant ends up on
your shoulder, behind your neck, etc. Elizabeth
....if you only need to add
a small bit of weight, you could embed a BB or two in the piece.
Joanie
...tiny sinkers that fisherpersons use come almost as small as
BB shot, and I got a box of them assorted for under $4.00. (a hundred.) ...select
a sinker (or cut one up) that is small enough to hide in the clay object. Since
these are lead, they cut easily, and weigh a lot for their size.
This will make those light pieces hang right, or help a figure to stand up (or
kneel, or whatever) in just the right way. Janey
...I think that the fishing
weights is probably the best answer to this - you can buy them in lots of sizes
and weights. Elizabeth
....For really big pieces, I have used metal washers,
and those work too. Just be sure to bury the metal well into the clay, as you
don't want to "find" it when sanding and buffing. Janey
...Other possibilities
are to shape the pendant over a flat stone.... or to use weighted accent
beads above the pendant itself. . . . (Unless they are made of lead)
the weights that are sold to hold down draperies or the hems of garments
might be another possibility to include inside the clay pendant. Karen FL
Joanie's
drawings of possible stringings for rock amulets
http://members.tripod.com/PolymerClay_Interest/amacord.htm
Donna Kato's lesson on using ball chain as cording... she
embeds each end of the ball chain on one side of the top of a pendant by making
a 1/4" hole on each side with a (flat-end?) skewer (don't meet up),
adding a small black ball over it and repiercing, then dropping
3-4 balls of the ball chain into the hole and pressing the clay in
around it
http://www.hgtv.com/hgtv/crafting/article/0,1789,HGTV_3352_1399750,00.html
(click on photos to enlarge)
...colored ball chains at PolymerClayExpress...
http://polymerclayexpress.com/findings.html
I wanted something simple yet more interesting than leather or buna cord, plus
I wanted to be able to match the pendant colors. I made polymer sleeves
to thread onto leather cord.
lesson: Extrude a bunch of clay
with the second smallest round die of your clay gun. Powder it well with
cornstarch so it can't stick to itself. Wrap it around a skewer the right
diameter for the cord and bake it. When it's cool, slide it off the skewer. You
should have a long flexible polymer clay spring! . . . .I ended mine with
a round bead of clay at each end, blending in the end of the spring. To put together
the necklace, I crimp and glue a bead tip to the leather, pull it into the end
bead so it's embedded, string the sleves and pendant and finish the other end
with another bead tip. The leather cord supports the weight of the necklace and
the spiraled clay flexes beautifully.
...The springs are pretty cool to play
with, though they aren't very strong by themselves.
... Jody B.
There are many ways of connecting the cord ends; we simply tied both ends into a single knot, then trimmed the tails.
My other favorite trick for a very simple necklace is threading both ends through a metallic pony bead or large-hole clay bead, then tying a knot in each... it looks more finished than a plain knot and is easy. I learned the first from my husband's former employer a jeweler, and the second from a book on beading. Adrienne
back-wrapping...there's
a nice looking finish which is quite strong for securing and
also making a decorative finish around any thick cord (rubbery cording
like Buna, round leather cord, etc.)
....the end of the cord will be made into
a small loop by turning it back on itself so that it can hold a
jump ring or other finding
...... or made into a large loop if it will
have a bead passed through it as a toggle closure
....this can be done
with fine wire around any kind of cording... or with embroidery
floss around a satin cord, etc.
....note: back-wrapping
a bare cord is easier than wrapping the 2nd end if that end
now has beads strung right up to that area... in that case, may have to hold the
3 parts in the opposite direction (loop right) and make each revolution of wrap
in two passes because the free end inside your hand
(lesson) WIRE:
...use
a very fine wire (about 12" long to start)
...it's helpful
to cut the end of the cording on a diagonal so it will create
a tapered area where it overlaps the main cord (rather than ending in an
abrupt straight cut)
--holding cord end in left hand
(if right-handed), fold it back on itself creating an end loop of
the size you want ...the amount of overlap where the cord will be wrapped
(and where the cord now touches iself) should be the length of wrapping you want
minus a little bit (...say
1/2 -3/4" in all)
..... (be sure to
thread on a finding before
closing the loop if you want one)
--lay
the wire along the cording and loop (on top of, or beside it), with a 1-2"
tail extending past the overlap (to the left) and the rest of the wire resting
to the right
--grasp tightly and
hold the 3 parts together with thumb & forefinger fairly close to
where you want the loop to end and the wrapping to start (the closer fingers are
to the wrapping, the stiffer the parts will be and easier to wrap! )
--(just
below the loop) make a couple of tight wraps to secure the parts, then
move fingers back a bit and continue wrapping around and around
....make the "coil" warp nice & smooth by going slowly
and being sure each wrap lies exactly next to the previous wrap without overlaps
--continue
wrapping a bit more, then trim off the short tail of wire
--finish
wrapping over the cut-off tail, and till you're a bit past the diagonally-cut
cord end ...the wrapping will taper a bit at this point
--use needlenose pliers
to crimp the end of the last wrap into the cording (so it won't
feel scratchy or come loose)
(1/2" of wrapping is plenty for security...
more can be stylish)
--string
on beads or pendant, etc., then make a similar loop at the other end
for a jump ring or clasp if needed
(lesson)
FLOSS:
--Cut a length of embroidery thread (several strands)
about 6" long
--Fold cord end back on itself creating an end loop...keep
about 1" of the cord end lying next to the main cord (below the loop) ...(hold
in your left hand, if right-handed, with the loop free --pointing left)
--Lay
the floss ON TOP of the overlapped part (below the loop)... it should extend at
least 1-2" below the cord end
--Hold all 3 parts together with your thumb
& forefinger, fairly close to where you want the loop to end and the wrapping
to start
--(just below the loop) Start wrapping about 4" of the floss
around and around OVER the 3 parts --make the "coil" nice & smooth
by going slowly and making sure each wrap lies exactly next to the previous wrap
without overlaps... continue wrapping until you've achieved the look you want
(1/2" is plenty secure, more can be stylish)
.....it's helps to make the
unit as stiff as possible, so hold the 3 parts close to where you're wrapping
then release and regrasp a little farther down when you've reached your thumbnail
(and can't wrap more)
--When you've wrapped as far as you want, tie the
floss in a good strong square knot with the other end of the
floss (which will be lying next to it at that point).
--A tiny dot of
glue makes it secure (or Fray Check).... trim the streamers &
the extra satin cord... string on beads, etc..
...if there a bead happens to
be right at the end of the cording and the bead has a good sized, as much or as
little of the cord can be hidden in the hole
Tania's
18 ways to create clasps on cording
http://step-by-step-tutorials.blogspot.com/2008/03/18-methods-to-clasp-necklace.html
(click also on next page)
For knotting up close to the bead (when knotting between beads), use a large needle like an embroidery needle. Put the point of it inside the knot then pull the needle towards the bead and pull as hard as you can. Good string wont break! then carefully remove the needle, grab each side of your string and tighten by pulling. I make knotting tools for myself and others using the embroidery needles, making a clay handle on the end to grab on to. Cindy
Cordings of various kinds
can be made adjustable in length in several ways.
... the primary ways are
to use sliding knots and "snug" beads (latter probably looks and feels
a little better)
... there are other methods too, such as hidden knots, etc.
(or simple tied cordings, perhaps with a bead on each end of cord for more
finished look)
(some techniques won't work with stiffer
cords like Buna, etc.)
sliding knots
Ruby's
lesson on sliding knots
http://www.rubysbeadwork.com/SlidingKnots.html
Emma's
lesson on adjustable knots on each side of a bead (when shortened completely,
these knots lie on each side of the focal bead)
http://ejrbeads.co.uk/adjustable%20page%201.htm
Laurel's
lesson
-- Cut your cord extra-long, then add your beads.
--I
lay the necklace down on the table, and kind of cross the top ends over
each other (in an X?). I visually do the best I can to ensure the knots will be
"centered" when (I'm finished) (this takes practice).
--tie the left
cord to (around?) the right-cord (where?). A regular old (overhand)
knot is all you need--so I loop it once around the cord, but loop the tail back
through twice, and pull the tail tight, leaving as little tail
as possible.
--Then I tie the right tail to the left-side cord.
(--
I use a pair of pliers and a needle-type tool to help pull my knots tight.)
--When you're done tying, slide them away from each other to lengthen
the necklace, and pull them toward each other to shorten it.
-- I don't
imagine this would work w/ buna cording.
....Works terrifically w/ leather & w/ rattail though, and with single-strand
or multi-strand designs. Laurel (ADD MY DIAGRAM--same?)
Tephra's *wrapped slider knots (more finished looking)...
also in Bead and Button
. . a bead with two (parallel)
holes in it rather than one, can also be strung between the knots
so that the wearer can more easily feel and separate them for adjusting
(website gone)
snug fits in beads, etc.
What a wonderful way to finish a cord using
beads that match the rest of the necklace! m'lis
An easy to make
an adjustable necklace is to make 2 beads, each of which has 2 holes
(the holes should not touch, i.e. they should be at least 1/16 of an inch apart)
...one
of the holes should be drilled half way through the bead,
the other hole needs to go all the way through (holes should be
just large enough for the cording to barely fit through ... snug!)
.....take
one of the beads and put the cord through the complete hole so that the partial
hole is pointing out.
.....now glue the other bead onto the end of
the cord using the partial hole
.....thread the other end of the necklace cord
through this second bead, and glue the end into the partial hole in bead one.
Bob (fimobob) .
Cindy's explanation http://home.earthlink.net/~claycrazy/buna.html
though she uses a drill bit the exact size of the
cording she intends to use to make the initial hole larger after baking? ...she
also uses wire somehow to attach a clasp??
For a box-pendant, I put
twisted cording through the slides (tubes) on the sides
with their ends toward the bottom
....then I threaded each free end through
a snug bead, using a dental floss threader.
.......the
bead is polymer clay with a hole about the size of a soda straw (and the
twisted cord is about the same thickness as a soda straw... it wasn't particularly
easy to thread up, but is not so tight that it damages the cord or bursts the
bead).
...I knotted the ends of the cord afterward, and left a trimmed
tassel on each.
(this lets you loop the necklace over your head, and adjust
the height of the pendant with the slide bead).
Desiree's criss-crossed
cord ends (with bead on each end)
... after each passing through a small
central clay flap-loop, each passed through another flap-loop over
the top pendant edge farther to the outside
(if you pull on the balls at the
ends, it's adjustable). Desiree
hidden knot in vertical hole...
...I
make the hole in a pendant so it runs vertically, top to bottom,
and I make the hole large enough to accept 4 strands of
the stringing cord
(...the cord at the top of the neck will end up being continuous)
...the bottom of the pendant is a square knot with its ends tucked
up inside the bottom of the pendant's hole
...Longer, shorter,
and then glue or not later on, gravity holds it together. Lindly H.
I'd also like to figure out how to make beads that can be snapped onto cording, kinda like the concept of button covers. That kind of bead could really take advantage of the adjustability. Desiree
ways to make pins function as pendants ? There must be a variety of ways to do this...
making pins
the Rio Grande gems and findings catalog shows several sizes of yellow and white finish base metal pin backs with bails which allows them to be used for both pin and pendent. These are available in lengths from 3/4" to 1 1/2".
there
is a pin finding that has a metal loop attached to the pin back, so that
the one attachment on the back of a piece of jewelry can be worn either as
a pin or a pendant.
…The pinbacks are 1.5 in, and have a double loop
in the top for the neckchain, cord or whatever to go through. The stock number
on the bag is 631-240. It is a package of 10. I can't put my hands on the
catalog at the moment, so I can't tell you the price.
….Rings and Things
in Spokane, WA carries the finding you are talking about
…I used to use those
types of pinbacks...but, when the wearer gets a bend
in any of the pin parts, it becomes almost impossible to EASILY flip that little circular part around...so...when I found this other type (Fire
Mountain), I decided I liked it *much* better. My customers
do too...also the pins "lay" a little closer to the clothing.
tubes
of all kinds
....slip a small length of vinyl tubing over the pin part,
then thread the cord or chain through it
....metal tubing of various
kinds (some may be findings, etc.)
....some purchased tube-shaped beads
may be narrow enough too
... even clay tubes if they're made strong
... or fabric tubes
lesson on creating a wire coil
(tube) with extra loop at each end to slip over the pin
......leaving
a 2" tail of wire loose, wrap wire around a metal turkey lacer or other small
rod/toothpick creating a coil that's 3/4" long
.....(leaving
coil on the small rod) place a larger rod or dowel (diameter at least as
wide the clasp and cording you'll be using) along the top of the coil-on-rod
.....hold
all firmly, and wrap original tail twice around both larger and smaller
rods
.....repeat for other end of wire so and you'll have a hanging loop
at each end of the coil... remove wire from rods
...to use, slide
wire coil over pin, and close pinback... thread cording through loops at each
end of coil
..if the pin is to hang veritically, create coil
as above, but trim off the excess first tail rather than wrapping it.... wrap
just the other end around both rods and trim excess... bend the 2 wrap-loops
outward till they stick straight out from the end ... then bend the loops apart
slightly so they form a V ....thread cording through the 2 loops
http://www.twocraftyladies.com/pendant_bail.html
could
also use a chain... either run some loops in the middle of of a full
necklace chain through the pin before closing it
...or use a short length
of chain like a coil or tube as above...or connect the ends of the short chain
on the pin to regular cording
Be aware though that the cording will then
have a wider stance when viewed while hanging
than it would for a normal pendant hung from the top because it will be coming
from 2 ends of the tube (which are spaced apart) instead of from one connector
that's centered
...if that's a problem, the two cords exiting the tube
could be temporarily held together with a bead or tube (but would have to fit
through the clasps)
...... or a bit of wire or bendable metal or even thread/string,
etc, could be used to hold them together (wrapping, tying , etc.) and/or to make
the area where the cords divide closer to the top of the pin
could run the pin through a piece of fabric to which has been sewn or glued a jump ring or some kind of connector
for vertical pinbacks, most of the
ideas could still work if modified
... into a tube, perhaps put a wire with
large loop on each end (bottom loop to keep from slipping out of tube, and top
loop for attaching to cord or jump ring, etc.... or use a strip of fabric tied
at the bottom end
OR, tape or glue an eyepin or jump ring or tube to the back of the pin so that it's nearer the top of the pin, or even sticking up above it, then string the cording through that in the normal way
there are probably all kinds of approaches--even wild and wacky ones
OR ...make the connector permanent by drilling or red-hot-pin pricking a hole or just a small hole for embedding an eyepin... or by adding a bail, making a frame or backing then attaching to that, etc.
If you've made a hole to hang the item as a pendant, either use a jump ring to put it onto a cord or chain, or fold a cord in half, put the loop through the hole, the two ends of the cord through the loop and pull firm - then tie or otherwise fix the ends of the cord. This will make the pendant lie flat in wear.
That ornament
could easily be a pendant. It is star shaped and sort of thicher in the center
than the tips of the points.
.. The artist put the hole through the
star top to bottom, starting at the tip of the top point and coming out
of the "body" of the star at between the bottom points. ...A ribbon
goes through and is knotted at the bottom, leaving "shooting star"
tails
… If the design requires a visible hole, I'd build in a supportive
armature, maybe a piece of telephone wire inside the pendant, covered with
clay, but supporting the top of where the hole will go and of course going further
into the clay to distribute the stress)
For pendants or ornaments
or pins: wrapping wire, or twisted wire or wire wrapped with a
tiny wire around the rim of a clay shape or dimensional clay shape, possibly
adding beads, etc.. leaving a loop for handing, would work well too
(...for
all lessons and examples, see above in Framed Pendants)
Tania's
large long tube bead strung onto cording.. then large clay disk pendant
hangs from it via another cord wrapped multiple times around the center
of the tube bead and the dangled pendant
http://www.flickr.com/photos/1001artbeads/2080834785
Tanya F's bit of clay around the belly of a long bead strung on a cord (gone)
Brigitte's
wrapped and connected cane slices ...large
central and smaller side cane slices with holes in their
middles.... the end of one cord is slipped through the hole of the central
slice and pulled out (halfway), then both sides of that cord are joined
at the outside of the slice by tying or threading a small bead over both, before
being put through the center of the next slice (this is done with 2 separate cords,
heading in opposite directions from the middle of the large slice and results
in a 90 degree cording); for the remaining slices, the cords must be passed
through the top hole then down under the second half to the opposite side? (and
joined, 180 degree); repeat
http://creaplastic.free.fr/08_05.htm
Terry’s
extruded ropes of clay used around the joint
of two lentil beads (beads or bells inside)... which is looped at
two places along the way to create loops for connecting to a cord
http://www.polymerclayexpress.com/octo2001.html
making
tiny flowers (or other clay items) to attach to large snaps
for hair decorations (Sculpey may be too brittle after baking;
use a stronger clay like Premo or Fimo)
http://www.chamomiletimes.com/crafts/hairsnaps.htm
…or snap a series of them onto some beading thread and make a necklace
you can change with your mood! Sunni
Linda T’s faux turq and amber pieces with charm –interesting arched shape
components (website gone)
Linda G's pendants
with chain tassels on bottom (website gone)
Annie’s
many pendants with architecture, many framed (website
gone)
Matilda's curled wire
(with few beads strung on) protruding through a hole in each side of a plate-type
pendant necklace, ending up on the front side (gone)
Claude's
faux "bail"... a wire spiral-and-wavy wire
(spiral end glued? onto the pendant, and a loop formed at the other end for
hanging)
http://www.chez.com/creabijoux/interieur/GALLERIE/grandes%20photos/197.htm
(book)
by Ramona Solberg: Findings: The Jewelry of Ramona Solberg ..
http://www.amazon.com/exec/obidos/tg/detail/-/029598158X/102-2863220-5922551?v=glance
http://www.americanstyle.com/magazine/archive.html?Source=/Archive/2002/2/22-30422.html
(see also Jewelry, Vessels/Rock/amulets, Wire, Glues, )
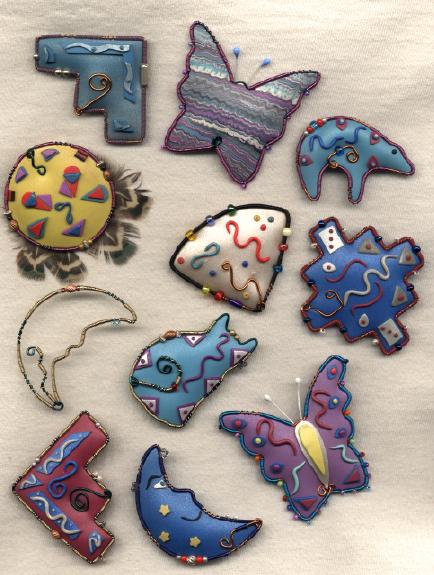